
Welcome to day 3 of the Ink to Paper October release countdown! How have you been enjoying the other 2 days! I hope you're liking all of the new products as much as I am! Today the festivities continue with some "frosty" products that are so much fun!

First up is the new Go-To Gift Card Holder: Snow Globe. I chose to use the smaller version on a card front rather than a gift card holder, but I'll be showing a gift card holder down below, so stay tuned. To begin this Winter Wonderland card, I dry embossed the On the Border: Splendid Snowflakes frame die using an embossing mat and my die cutting machine. I also die cut the snow globe pieces as well. the base is die cut 3 times and then glued together using liquid glue.

I used Faded Jeans and Tumbled Glass Distress Oxide ink to add some ink blending around the dry embossed panel as well as the snow glove. I added some white paint splatter on both pieces for that organic snowy look that I love so much.

The sentiment is stamped onto a piece that was die cut using the new stitched layers die collection and added to the top of the snow globe. I added some heat embossed snowflakes from the It's a Sign: Holiday sentiments stamp set. The centers each have a sparkling clear rhinestone for some sparkle and shine.

I almost stopped at that point, but decided to warm things up with some of the leftover bits from day 1. I added three different clusters of greenery and berries to add some extra detail!

The finishing touch is tinsel glitter sprinkled around the sentiment panel and all of the greenery and berries. It's perfect for this icy design!
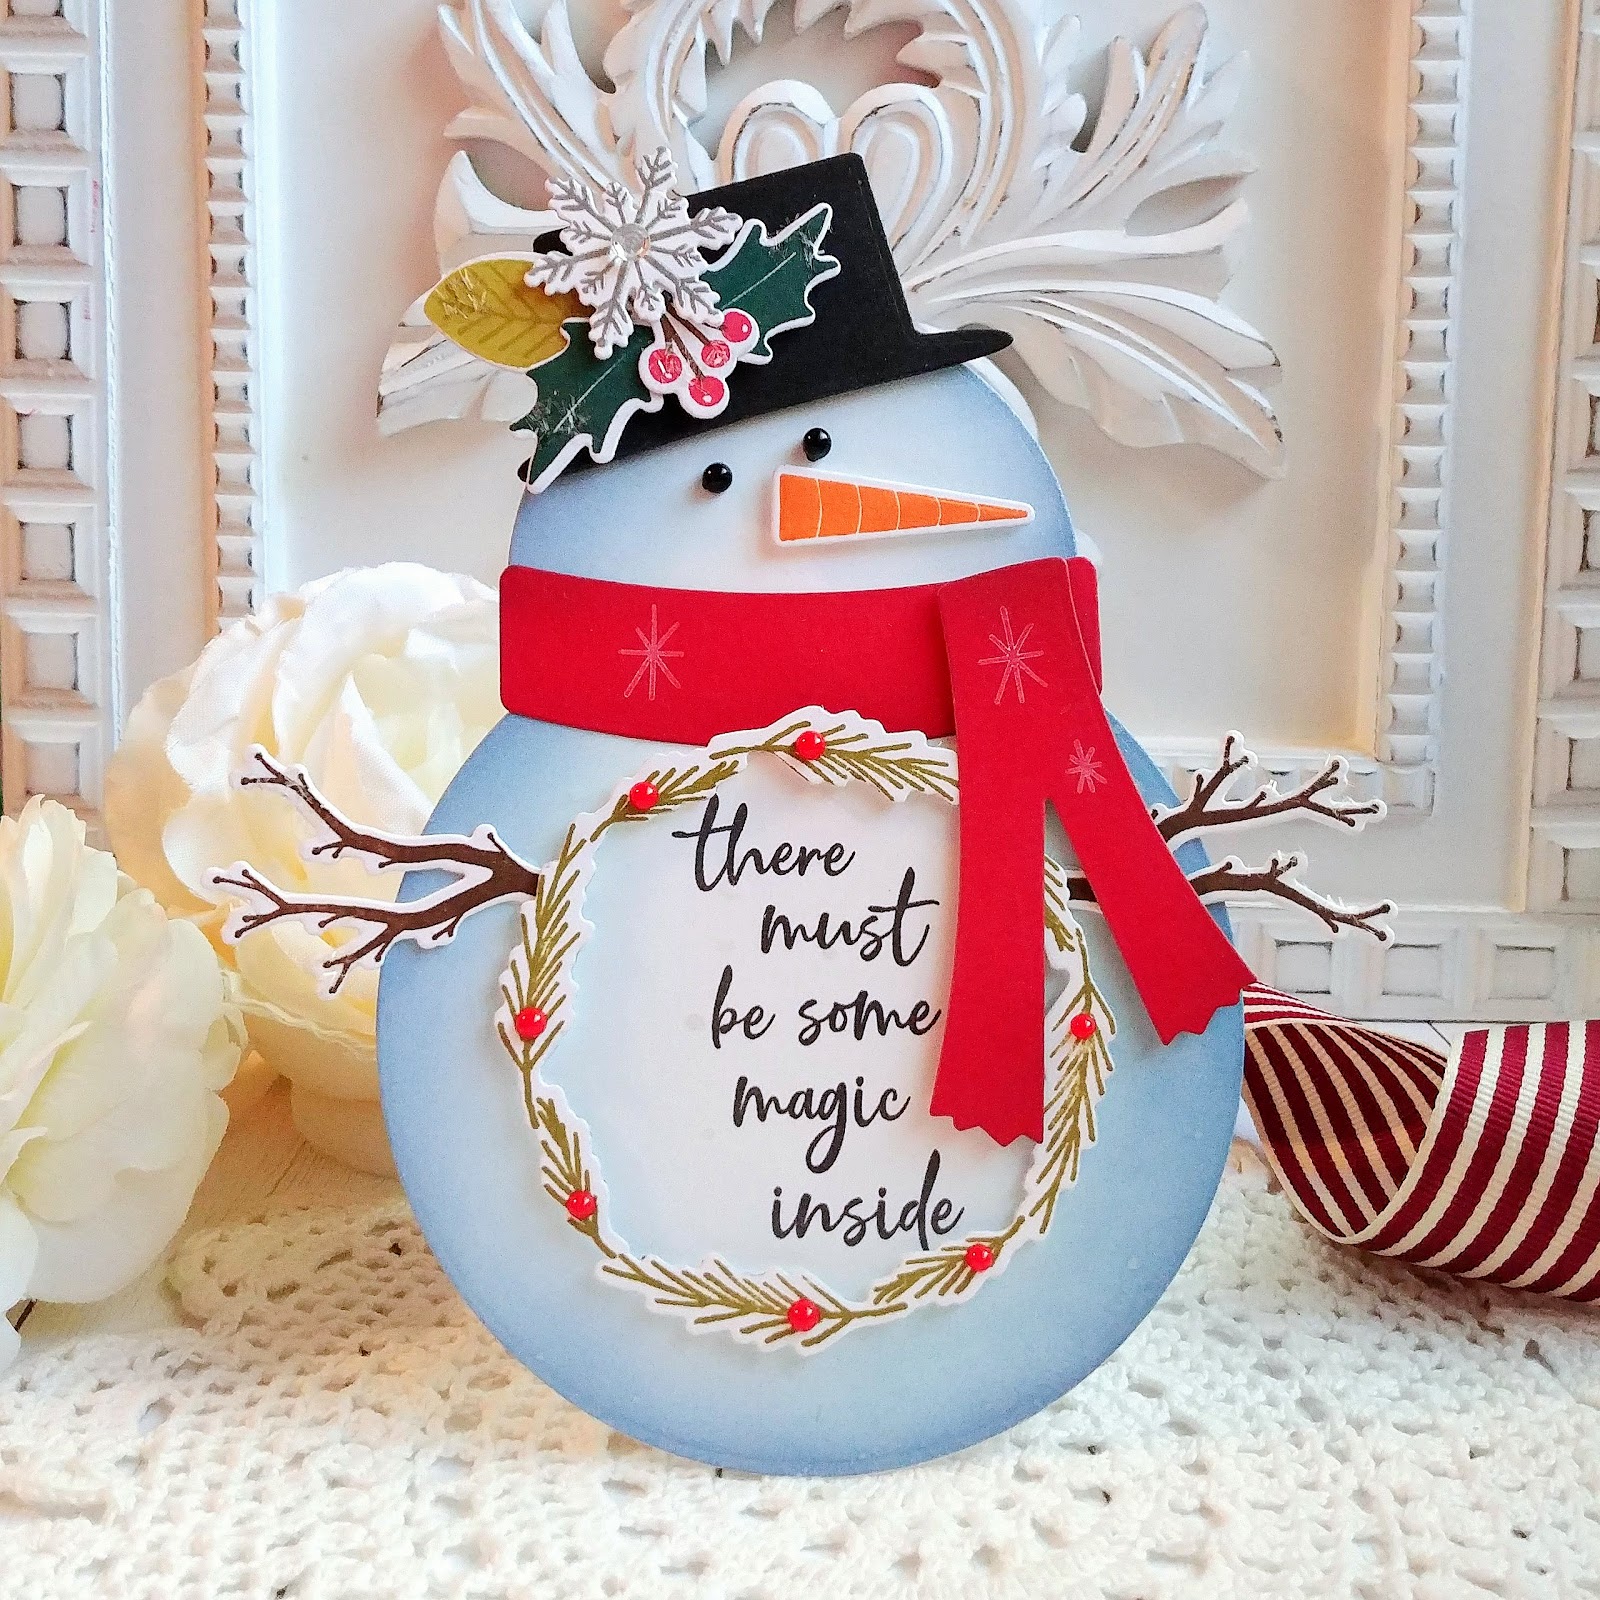
Next up are a few projects using the new Go-To Gift Card Holder: Snowman and the new Snowman Accessories stamp set. This looks like a card, but it really is a gift card holder. These are quite the ingenious little dies that will allow you to slide a gift card down the back. This uses the large snowman in the collection that you need for the gift card. It also has a smaller snowman for use on card fronts and such.

For these gift card holders, you will need to die cut two for each one. You can decorate the front as you like and then the back incorporates the "slit"and the gift card portion. I did some inkblending on the front using Faded Jeans and Tumbled Glass Distress Oxide ink.

You can see the gift card portion in this photo; it has the portion for you to easily slide a card into and tuck in the back. You will want to do the back part before you add the scarf because the scarf in front hides the thick top portion of the gift card holder.

Once the ink blending was done, I spritzed both snowmen with Frost Shimmer Spray. I also stamped the sentiment using black ink. The wreath is from the "Framing Florals: Christmas stamp set that was showcased yesterday. I had some bits and bobs left so I used them on these gift card holders.

I added some twig arms using the branch from the previously released Birdie stamp set and the coordinating Birdie Die Collection. I stamped the carrot nose and added it using foam squares. the eyes are Black Nuvo Drops, but the Snowman Accessories stamp set has two sizes of eyes and two smiles as well.

Next up is one of my favorite gifts to give during the winter months, especially for Christmas and this sentiment is a perfect companion to showcase this gift. I love making handmade handwarmers each year to give to friends and neighbors.

The Tent Style Packaging die is the perfect size to package up this set of handwarmers.

This is the smaller snowman and he fits perfectly on the front. I also added some snow using the In the Meadow Die Collection to give it some extra detail.

This little guy also got some twiggy arms but cut smaller since the snowman is smaller. I was actually able to get both the large and small snowman's twigs from two branches.

I had so much fun working on this fun little gift!

I've been listening to Christmas music while I have been doing all of my projects this week and "Frosty the Snowman" happened to come on a few times. I thought it would be fun to just focus on "that old silk hat"! This sentiment is perfect to add to a tag and top it off with the hat.

I die cut the Tag Creations: Modern Gift Die using the Candy Cane Prints pattern paper and then added the die cut "bows" that are included in the die collection.

The hats are embellished with the same die collection for easy detail! I added some tinsel glitter to the holly and berries for a festive touch.

I'm loving these new snowflakes so I thought it would be a fun touch to add to the side of the tags as well as a few sparkling clear sequins. I added some Pure Poppy Baker's Twine to the holes of the tags. I had so much fun working on everything for today! I am so well stocked for Christmas and it's not even Halloween! LOL! Thanks for fluttering by!
4 comments:
All of these are absolutely wonderful and adorable! You've created something "magic" yourself here! I love visiting your blog. The way you've used everything makes me want to get all you used! Have a fantastic day!!
Just gorgeous as always! I love the little hand warmers you make!
Such cute projects for today! Honestly, I just love everything you touch, Midas!
Cute projects! I love that snowman!
Post a Comment