Showing posts with label Simon Says Stamp. Show all posts

Thursday, August 21, 2025

Teacher....{Looking} Forward to a Wonderful Year!

Can't stop, won't stop! ha ha! Thanks for joining me today for yet ANOTHER school-themed card! This one is scratching an itch I've had since April or May. I can't remember which company or designer(s) made cards with apples wearing glasses, but I have REALLY been wanting to make my own version! Back-to-School is the perfect excuse, don't you think? But now, I'm thinking how much I NEED to make another card with an apple wearing glasses AND a graduation cap! Of course, that will wait until the spring, but a girl can dream, right?

I mentally rummaged through my endless supplies to think which stamps and dies could help me achieve my dream! To begin, I found the perfect apple; this is the largest apple included in the BotaniCuts Apple Die along with the stem and two leaves. I used a slender blender brush and added some yellow ink to the center of the apple and then added red ink around the perimeter. I also added some of the red ink splatter over the top to give it a more realistic look.  I agonized over what stamp set I could use for the mouth; I didn't trust myself to hand draw it for fear of ruining the entire thing. I landed upon the Baby Face Sentiments Stamp Set and I think it turned out great!

For the eyes, I remembered I had seen two perfectly sized circles in the Patriot Die when I was making the flag for the card I shared the other day. I die cut them from black cardstock and then added the white part using a white gel pen. For the glasses, I used the Framed In Success Die and cut them three times from black cardstock and glued them together. I added some Glossy Accents over the top for the glossy shine! Actually, I created the glasses first thing so they would dry while I was working on the rest of the elements. 

I adhered the glasses using a small strip of black foam squares and then added the eyes with liquid glue; I find that placement is really important to achieve a cute face. Sometimes if the eyes are spaced to far apart it can look a bit goofy so I played around with placement before I committed with glue. ha ha!

I also used the Framed In Success Die for the frame, stars, and books. I die cut the frame three times from Kraft cardstock and then glued them together. I stamped one of the sentiments included in the Teach and Inspire Stamp Set....my all-time favorite school-themed stamp set. The books are die cut from white cardstock and then colored with dye inks and blender brushes.

I used the same sentiment die as my last card which is the Teacher Wafer Die cut from gold cardstock with a vellum shadow. I added glue to the bottom portion of the gold letters and adhered it to the frame. 

I trimmed a piece of notebook paper from MFT....I don't know the name....I will look and edit the post when I get a chance. I used the Watercolor Wonderful Stencil Collection and Aqua Mist ink on the notebook paper. I rounded the corners with a punch to complement the corners of the frame. The frame is added using foam squares and then I layered the book and apple in the middle of the frame with additional foam squares.

I cut the three stars from gold cardstock and added them around the frame. I covered up the apple and sentiments with sticky notes and added some black ink splatter. 

The entire panel is added to a top-folding A2 Pure Poppy card base using foam squares. I also added a piece of white cardstock measuring 4 by 5 1/4 inches to the inside with another sentiment from Teach and Inspire. I gave it the lightest spritzing of shimmer spray and called it good! Thanks for fluttering by!


Wednesday, August 20, 2025

You're Amazing, Teacher!

I just can't stop with the back-to-school themed projects! You could definitely switch out the sentiment on this one and make it an any occasion card, really! The inspiration for this card was the flag, silly as that sounds! I passed a school and saw the flag waving in the wind and I thought, oh, I should do a schoolhouse inspired card! While it didn't end up like that, it was definitely the starting point! ha ha! I had so much fun creating the clock on my last card I thought it would be fun to make a clock for my school card with the flag, but as you can see, there is no clock in sight! The clock just didn't work so I had to pivot, but I'm so glad I did because I really like how this card turned out....soft and summery, with a hint of autumn!

I won't bore you with the details of how I switched gears a thousand times, so let's just dive into how I created it! To begin, I used the cute flag dies included in the Patriot Die to create Old Glory on the cute pole. I cut everything from white cardstock and then used blender brushes and dye ink to color the pieces. The pole is cut from silver cardstock and then I glued everything together with liquid glue. I set that aside to dry and got to work on the the flowers. I used the Into the Blooms: Coneflower Die. I didn't participate in the release when these were introduced, so this was the first time I used them and I am hooked! The bee was left over from another project so I added it to the flower using liquid glue.
I had the notebook and pencil leftover from the previous school-themed projects I've shared over the last week or so. When I was making the acorns for one of the cards, I also made this cluster of white flowers so it was fun to use it on this card.
Fort he sentiment, I die cut the main portion in gold using the Teacher Wafer Dies and then the shadow from vellum. I glued them together and let them dry. The "You're amazing" portion is heat embossed in gold on a strip of Kraft cardstock. I dug through my mini sentiment sets until I found something that would accent the teacher word nicely. This one is from the Just Sentiments: Everyday Mini Stamp Set. It's not one I use very often, but I really should because it has some of those sentiments that can be used for just about anything!

For the background, I used the Cascading Stars Hot Foil Plate with Spellbinders Champagne Foil. I love the champagne foil more than gold because it's not quite so yellow. I had fun adding the elements to the background. The sentiment is strategically attached with liquid glue applied ONLY to the areas where they touch something else.

I added some black ink splatter and then trimmed it down to fit inside the frame. I wanted the card to have additional dimension, so I added the entire framed background to a top-folding A2 card base using foam squares. I think I'm going to save this to be used for teacher appreciation next May, but I had so much fun creating it while getting in to the back-t0-school frame of mind! Thanks for fluttering by!


Wednesday, April 17, 2024

Simon Says Stamp Celebrate Release {Flower Power}

I'm thrilled to be helping with the Celebrate Release from Simon Says Stamp!  My card for today features the new Flower Power stamp set that features an assortment of daisies and flowers in all kinds of sizes and a few leaves and hearts.  It also features quite a few uplifting and encouraging sentiments so I was happy to be able to sneak two onto the card without it seeming odd or busy!

I had thought up the design for this card one night when I couldn't sleep, so once I had time to sit down and get busy, it came together quite easily. To begin, I cut a bunch of 1/4 inch strips of scrap cardstock in rainbow colors (omitting purple). I cut a panel of white cardstock measuring 3 3/4 inches by 5 and then glued the strips using liquid glue. I like using liquid glue on projects like this because it gives me a little "wiggle room" (literally) to get the strips placed neat and straight.

When it was all said and done, I only used two blue strips, so I decided to heat emboss the "hugs and happy thoughts" sentiment on the teal cardstock using white detail embossing powder.

I cut a slightly narrower panel and got to work building the flower pattern using the included images. Once I had what I wanted, I got to work coloring them with an assortment of alcohol markers. I don't do much coloring at all anymore so many of my Copic markers have dried up, so I had to use a few from my inexpensive set I got on Amazon. I added some black ink splatter for added interest and detail.

I attached the teal sentiment underneath the colored panel and then adhered it to the panel with the strips using foam squares. I mounted the entire thing onto a white card base using additional foam squares. I added some Tim Holtz Rock Candy glitter to the flower centers, leaves, and the smaller flowers. I added a trio of sparkling clear sequins to finish it off! Thanks for fluttering by!
 

Thursday, March 21, 2024

Simon Says Stamp {Be Bold Release}


Hello and welcome, friends! I've been busy behind the scenes working on some fun projects to share with you over the next few days, but for tonight, I'm excited to share two cards I made for the Simon Says Stamp Be Bold release! 

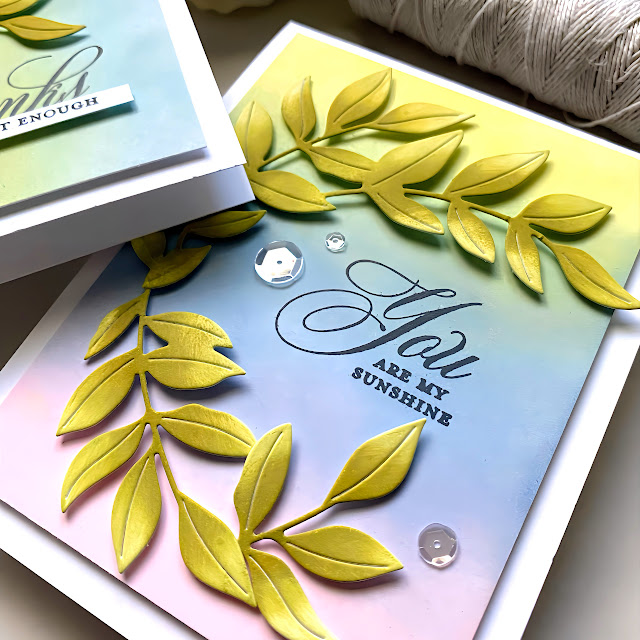
My two cards feature the new Lush Vines die set paired with a few sentiments from an older SSS stamp set that I got last year called Vintage Garden. I bought it specifically for the sentiments and the sympathy sentiment in particular. I was happy to use two of the ones I haven't used before for this pair of cards.

It's been a hot minute since I've done an ink blended background using Distress Oxide Inks. I chose two of Kristina Werner's color combos she did a year or so ago for spring. I just love the way these two backgrounds came out.

I die cut the Lush Vines from heavyweight cardstock and then added ink using finger daubers. The Lush Vines die set comes with two different vines; one small and one with the two stems.

This card uses both vines PLUS a little sprig os the smaller vine to add some extra fulness. I added the sentiments and a trio of sparkling clear sequins for some sparkle and shine. The release is now live! Thanks for fluttering by!


Saturday, January 29, 2022

Wintertime Welcome

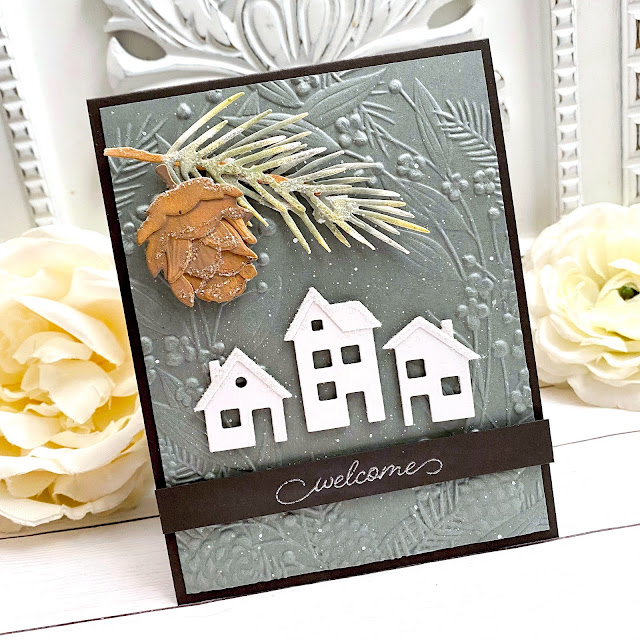
The cutest new couple moved into the neighborhood along with their super-precious twin baby girls! I couldn't wait to deliver a "welcome to the neighborhood" gift basket and card! I don't know if I've mentioned it or not, but I have a tendency of buying all of the stamps/dies/stencils/etc. that I fall in love with and they get sent to a specific "new product" basket that I have next to my desk. Unfortunately, this basket is bursting at the seams since I rarely get a chance to do "just for fun" creating! I decided to put a dent in the basket with today's card. I don't want to put the items away in their designated bins until I've actually USED them, otherwise they will be forgotten. Once I've created, photographed, and posted the project, the chances of me forgetting about a product are greatly reduced! Does this sound familiar to anyone? ha ha!

To begin, I used a beautiful embossing folder from Simon Says Stamp, which appears to be discontinued or out of stock. It was part of their holiday release; I snagged two others in addition to this one, so hopefully I'll get a chance to use those as well! ha ha! I used Stormy Sea cardstock which looks absolutely beautiful with this deep embossing! I added some white paint splatter for a snowy look.

I die cut the houses from Soft Stone cardstock using the My Neighborhood Dienamics. I glued the corresponding roofs to each house using liquid glue and then added them to the embossed panel using foam squares. I probably should have waited until I added the sentiment strip, because after I edited these photos, I noticed they were wonky! oh well! ha ha! I gave the rooftops some glittery snow for some added detail and sparkle.

Speaking of the sentiment, I heat embossed the "welcome" sentiment from the Right at Home  stamp set onto a strip of Smokey Shadow cardstock using silver powder. I adhered it to the embossed panel using foam squares.  I almost left the card just like that; clean and simple, but then I remembered that I had an extra pine bough and pinecone left over from THIS card, so I added it to the top!

I'm really glad I remembered it because it enhanced the images from the embossed background so nicely!

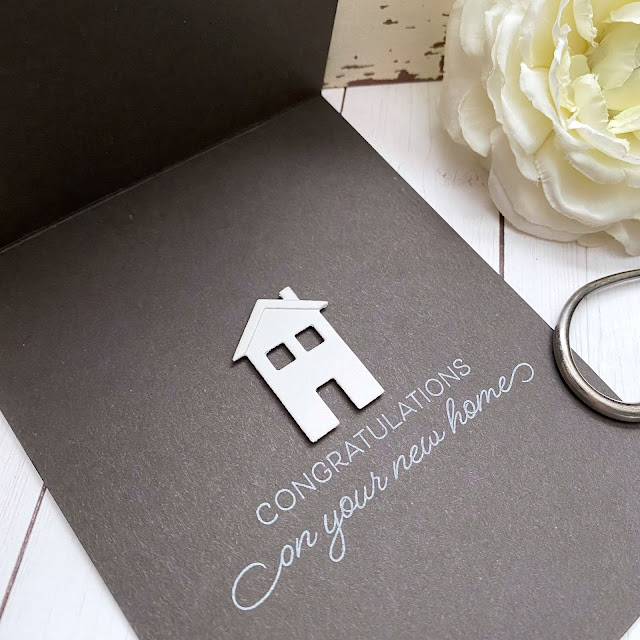
Since I had so many die cut houses left over, I decided to gussy up the inside by adding another sentiment and a cute little house! Thanks for fluttering by!


Saturday, September 19, 2020

Simon Says Stamp STAMPtember with Pinkfresh Studio


September is always such a fun month as we celebrate Simon Says Stamp's fun STAMPtember event! Today I'm sharing with you a card made using this year's collaborative set with Pinkfresh Studio! It is a beautiful set that allows you to create this floral arrangement in 4 easy to align images! I chose to use it as a frame in two different colorways; Peach and Coral!

This limited-edition, collaborative set will only be available in limited quantities and when they sell out, they're GONE! It does have a coordinating die, but I didn't use it on today's card. You can purchase this limited set at Simon Says Stamp under the STAMPtember category. 

I used my MISTI to align the stamps to create this colorful panel. Once I was done and saw how pretty it turned out, I wish I would have stamped a few more! This is a PERFECT stamp set to mass-produce cards...just swap out the sentiments and you could have an all-occasion set of cards made in no time!

The INK COLORS that I used on today's card are: Fresh Pear and Olive for the leaves, Apricot and Peach Fuzz for one set of flowers and Coral Reed and Passion Fruit for the other. The sentiment is stamped in black for some contrast and to let it pop! There are some really fun and unique sentiments in this set that you won't find anywhere else! A few Jewels in coordinating colors finish off this floral design! Thanks for fluttering by!


Monday, June 15, 2020

Serve and Protect {so grateful for you}

I was so thrilled when my package from Simon Says Stamp arrived with the new First Responders stamp set and coordinating dies! I wanted to make a few thank you cards for some deserving recipients. One is going to a friend of ours in the neighborhood who is a Police officer and the other  is going to the entire Police Department for our city. I've also made a coordinating tag that you can see at the bottom of today's post. We put together a package of treats to send over to them as part of a community event.

I used quite a mash-up of products from some of my favorite companies to bring these cards to life. To begin, I die cut 3 pockets and flaps using the new In Stitches Back Pocket Die out of Enchanted Evening cardstock. Once that was done, I added some Dark Indigo ink around the edges of each piece for some added definition and contrast.

I used my mini MISTI to align the "You are my Hero" sentiment and then stamped it in Versarmark ink and heat embossed it with Silver embossing powder from Imagine Crafts. I adhered the flap to the pocket portion using foam squares for dimension. I set those aside and got to work on the police badge pieces.

I heat embossed 5 in total and cut them out using the SSS First Responders dies. I just love how crisp the silver embossing looks against the blue cardstock! I also stamped the "thank you" portion using the same Dark Indigo Ink onto Spring Rain cardstock. There is also a die to cut this little piece out, which I love! I am a die loving girl through and through! 

I cut two pieces of Enchanted Evening cardstock measuring 4 by 5 1/4 inches and stamped the Pinkfresh Studio Diamond Tiles Cling Rubber Background stamp using Sapphire ink. I positioned the stamp so that it wouldn't stamp all the way to the bottom of the panel so that I would have some blank space for the heat embossed "for your selfless service" sentiment. 

The reason why I switched to Sapphire ink was that the other ink I was using needed to be refilled and I don't have the reinker! Ack! This ink is gorgeous and works nicely with this card. From there, I continued using it to add some ink blending around the edges of the stamped panel. Once this was done, I was ready to put all of the pieces in place to create this fun design! I used additional foam squares to add the pocket to the stamped panel. I adhered it to a top folding A2 Spring Rain card base using additional foam squares.

I knew that in addition to the treats we were dropping off, I wanted to add some gift cards to both of the cards. It might be a little cliche, but we decided on Krispy Kreme for the local Police Department! LOL! I think everyone pretty much loves donuts, cops or not! ha ha! I used the AMAZING Gift Card Pop Up die to create this fun addition to the inside of the card.

As you can see, this card has a pizza gift card; this one is going to our friend in the neighborhood. I used my mini MISTI to get the "so grateful for you" sentiment stamped and then heat embossed in silver as well. I like to use ScorTape to secure these to the inside of my cards for security. I used two 
 of the shield/badge pieces that I created earlier to decorate the inside as well.

Here is the gift tag that I made to add on to the package of treats. I used a wooden type basket to package up some Pepperidge Farms cookies, mixed nuts, Raisinets, and Beef Jerky. I placed it in a large cello bag and then tied it up with ribbon and this tag.

Easy, peasy! I just used all of the same elements as the card, but added the "so grateful for you" sentiment to the bottom of the popped up "thank you" sentiment. I used my Crop-a-dile to punch the large hole in the corner so that I could thread it through the ribbon. I used quite a thick ribbon so a large hole was necessary! I had so much fun creating these cards and tag! Thanks for fluttering by!

Sunday, September 22, 2019

SugarPea Designs STAMPtember {Merry Christmas...from our home to yours}

Hello and welcome! I'm thrilled be sharing yet ANOTHER amazing Simon Says Stamp collaboration for the STAMPtember event with SugarPea Designs! This new set is called "Nordic Village" and works so well with all of the NEW RELEASE products! I couldn't resist adding quite few! As always, these are limited edition sets and when they are sold out, they are GONE! This is one you definitely will NOT want to miss out on! This one will stretch far beyond Christmas and will pair perfectly with the Warm Welcome stamp set.


Of course I'm in full blown Christmas crafting so I was eager to use the Christmas sentiment paired with "From Our Home To Yours"! This card was a joy to make even if I did run into a few snags! LOL! I'll explain my design process and hopefully with some of my tips you can avoid any of my mishaps! ha ha!

As I mentioned earlier, the name of this set is called "Nordic Village". The new Geo Snowflake Stencil has a Nordic feeling to it, so I decided to use it for my background. If you recall, I used the same stencil and technique on THIS card, but kept it a little lighter for a more "daytime glow"! LOL! To begin the background, I prepared my work surface by putting down a large piece of grid paper and sprayed my stencil with Pixie Spray. I let that set while I got my panel ready to go. Once I had it measured and cut, I placed it on the grid paper and then carefully lined the stencil up where I wanted it. The Pixie Spray really grips the paper so that you can blend your ink and Glimmer Paste easily without any fear of it coming up. I used Tumbled Glass and Faded Jeans Distress Oxide ink to blend and then Moonstone Glimmer Paste over the top.
I set the panel aside to dry so I could clean my stencil and tool. I like doing this step first so that it can dry while I am working on the rest of the elements. After that was done, I got to work creating the snowdrifts that are at the bottom of the card. I did this by die cutting pieces of white cardstock using the Card Front Element Builder SugarCuts. At this point, you will want to stamp the "Merry Christmas" portion on the snowdrift. I decided when my card was COMPLETELY finished that I wanted it here and ended up ruining it. I carefully removed it and made a new panel, SOOOOO....do it at this point rather than later! ha ha!

After the snowdrifts were done, I set them aside and die cut the pieces for the Snow Globe. I die cut the outer circle portion three times as well as the base and the portion that has the white embossing on it. I stacked them together and adhered them using liquid glue. I also cut an additional snowdrift portion for the inside of the globe just like I did for the bottom of the card, but once it was cut, I used the circle portion of the snowglove to make sure it would fit nicely inside.

I stamped the images from the "Nordic Village" stamp set using black ink and then colored them with my Copic markers. I did minimal stamping to give them a light and bright look to keep the card cohesive. I used the coordinating die cuts, which you can purchase in the bundle on Simon Says Stamp's website. The Holly leaves and berries are from the new Christmas Characters SugarCuts. I added some tiny sparkling sequins to the center of each berry.

I also die cut the large green panel using the Card Front Element Builder SugarCuts. At this point, the stenciled panel was nice and dry and it was time to get the card put together! To begin, I added the snowdrifts to the bottom. The rounded portion is layered directly onto the stenciled panel using ScorTape. The glitter surface from the paste makes regular adhesive tricky, so make sure you use something strong. I added the other piece with the "Merry Christmas" sentiment using foam squares for dimension. Then I added the circle portion of the snowglobe at the top.I wanted to make sure I had enough room so I did that first. I was able to add the grey base easily after that. I added the extra snowdrift inside the globe, but I tucked it down a little bit so that you wouldn't see the harsh line where it was die cut at the bottom. The houses and trees were tucked here and there using glue and foam squares. A few sparkling clear sequins finish off this fun design! Thanks for fluttering by!