Showing posts with label summer cards. Show all posts

Friday, July 11, 2025

The Greetery {Happy Mail}


Hello and welcome, friends! I'm over on The Greetery Blog today (and here, of course) sharing some tropical inspiration; having said good-bye to June, things are heating up and tropical cards are always fun to make this time of year! I had so much fun cutting and coloring the hibiscus flowers, I decided to make two cards to share with you today! Let’s get started with the flowers.

To begin, I die cut all of the pieces for the flowers and foliage using the BotaniCuts Hibiscus Die from white cardstock and then used dye inks and blender brushes to color all of the pieces. I added a spritz or two of shimmer spray to all of the pieces and set them aside to dry. For the postal-themed card, I used the Airmail Border Stencil on an A2 sized panel of white cardstock. I chose the same pink and yellow inks that I used on the flowers for cohesiveness.

 I added some of the orange ink around the edges to give it a worn look. Once that was done, I used the Postcard Details Pierce Plate over the top. I have used this particular die positioned both vertically and horizontally and I just love the different look you can achieve just by changing it up! For today’s card I chose the horizontal placement since I knew the floral arrangement would take up quite a bit of space.

Before I attached the flowers and leaves, I added all of the extra postal stamping and die cuts; these were all created using the Postal Modern Stamp Set and coordinating Postal Modern Die. Once all of those details were in place, I attached the flowers and leaves using foam squares for dimension. Once I had finished the second card, I decided this card needed some gold accents, so I used the Deco Notecard Die to create the cute corners in the bottom left and upper right corners. Once that was done, I attached the entire panel to an A2 card base using liquid glue.

For the second card, I used the Herringbone Parquet Die on an A2 panel of pale pink cardstock. I added just hint of kitsch flamingo distress oxide ink using a blender brush for a bit of dimension. Next, I cut the Antique Gold cardstock using the Deco Frames Die. I also used the A2 Arches Die in the middle of the gold piece to cut the opening. I attached it to the pink background and then arranged the hibiscus flowers until I was satisfied with the arrangement.

The sentiment, which is from the Scripted Sentiments Stamp Set, was cut using the Scripted Sentiments Die and then stamped in black ink. I added it using foam squares near the bottom of the floral cluster. The panel is attached to a top-folding A2 card base using liquid glue. I love the tropical warmth these cards exude and I’m really happy with how they turned out!

You may have noticed that neither of these cards are “occasion” specific, which was intentional on my part; sometimes you just need a generic card and these two will suit just fine! How about you? What are you working on this week? I need to get started on a “golden birthday” card for my darling daughter and a few “welcome to the neighborhood” cards.

I mentioned this last month, but I finally took some time to sort out my card stash and organize it. Oftentimes I’m in such a rush, I just place them in the organizational bins I use and they are not sorted correctly. Once I had everything organized, I could really see the places where I was lacking and of course, the places that are OVERFLOWING! Ha ha! I hope you get some creative time this week to work on the projects you’ve been hoping to make! Thanks for fluttering by!

Tuesday, June 17, 2025

Project Inspiration {Hello Sweet Sunshine}

Hello friends! It's my turn for this week's Project Inspiration feature for Papertrey Ink. I'll be sharing step-by-step photos and instructions.

I usually make at least one strawberry-themed card during the spring/summer and this is the first one for 2025. 

To begin, I used the Watercolor Plaid Stencil Collection using Pure Poppy ink to create the background. I trimmed it to 3 by 5 1/4 inches, used a corner rounder punch and then mounted it to a top-folding A2 card base using foam squares. 

Next, I used the Simple Stitch Crochet-Small Stencil Collection using Mint Julep ink on Mint Julep cardstock. I cut it using the middle size included in the Love to Layer: Scalloped Ovals Die. I added it to the background using foam squares.

I die cut the circle from white cardstock using the Love to Layer: Scalloped Circles Die and added it to the center of the mint piece using foam squares.

 I used the Sweet Celebration Die to cut all of the leaves, berries, and flowers from white cardstock. I used blender brushes and ink to color all of the pieces. I added them to the card using both liquid glue and foam squares.

The sentiment, which is from the Just Sentiments: Summer Mini Stamp Set, is heat embossed in gold onto a strip of Berry Sorbet cardstock and then adhered using foam squares.

I did give the flowers and leaves a spritz of shimmer spray before I added them, but forgot to mention that earlier. I added a trio of sparkling clear sequins using liquid glue.

In just six easy steps, the card is complete!

Some additional tips and details about this card: I always like to use a foam mat and a stylus to give dimension to the flowers I add to my cards. 

The smallest flowers have pink pearls in the centers for some added detail and interest.

Well, that wraps things up for today! Thanks for fluttering by!


Saturday, May 24, 2025

Papertrey Ink May Release Countdown Day 2

Welcome back for day 2 of the Papertrey Ink May release countdown! As promised, I'm back with some additional western inspiration! This card features the adorable new In Stitches: Cowboy Boots Die and the new This is Big Sentiments: You're the Best.

Would you believe it if I told you that this entire card is made from white cardstock? The only exception is the base which is cut from Vintage Cream cardstock.

The boots are cut from white and t hen colored using assorted distress oxide inks. The flowers are from the new Into the Blooms: Wild Wood Die and are also colored with distress oxide inks.

I die cut the sentiment using the This is Big Sentiments: You're the Best and then stamped it using the coordinating stamp set.

There are a few different style options for the boots with included dies which make these boots so much fun.

I went with a traditional cowboy boot. The background was created using the Wood Plank Background Stamp and Bundled Sage distress oxide ink with some added brown around the edges. I layered everything up using foam squares and liquid glue.

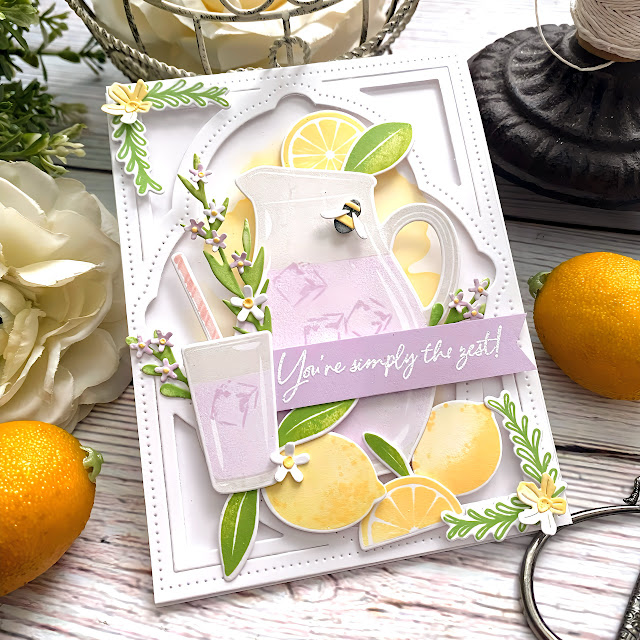
Switching gears here for something cool and refreshing; how about some lavender lemonade? I had so much fun creating this card using the precious new Main Squeeze Stamp/Die set.

To begin this card, I die cut all of the pieces using the Main Squeeze Die and then got to work stamping everything. I had a fear as I was beginning that all of the Design Team cards might end up looking the same so I quickly changed gears and created some lavender lemonade, rather than just regular lemonade.

In order to pull of the lavender feeling, I chose to use some additional die cut pieces from the Into the Blooms: Wild Wood Die; you've probably already guessed it's a favorite!!! ha ha!

For the background, I used the Watercolor Wonderful Stencil Collection on a panel of white cardstock. I also die cut the background frame portion from white using the Reflections: John 1 Die and then layered it over the top of the stenciled panel using foam squares.

From there I was able to build the scene using all of the stamped pieces.

I heat embossed the "You're simply the zest!" sentiment using white detail powder on a strip of Lilac Grace cardstock. I gave the two corners a little bit of extra detail by adding some foliage from the Corner Decor Stamp Set and a few blooms from the Wild Wood dies. I gave the entire thing a generous spritz of shimmer spray and attached it to a top-folding A2 white card base.
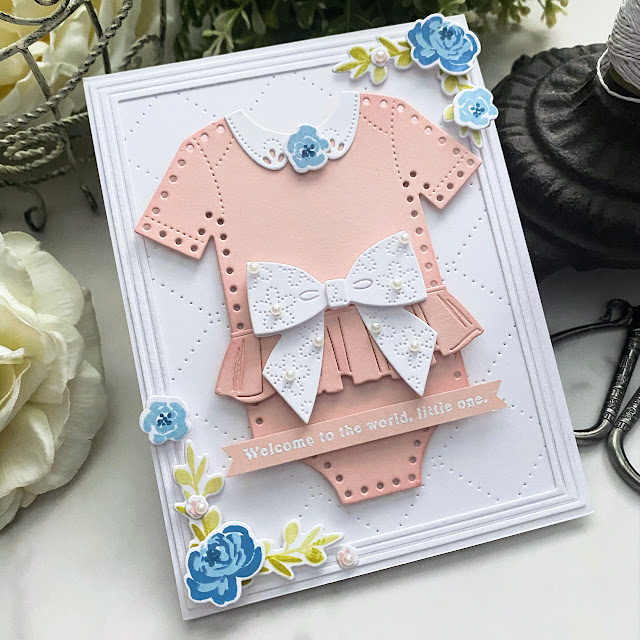
My final card for today features the new In Stitches: Onesie Die! This collection includes so many options to create all kinds of different styles of baby onesies.

I know I mentioned yesterday I was in need of baby boy cards, but I just couldn't resist making a baby girl onesie, so I'll just add this one to the stash! ha ha!

I die cut the basic onesie piece from Sweet Blush cardstock as well as the skirt/tutu portion. I added some Pale Peony ink around the edges to give it some dimension.

The collar and bow are die cut from white cardstock and attached using liquid glue and foam squares. I had some leftover flowers from my Cowboy Reverie cards that I shared yesterday. I thought the blue flowers looked so cute with the onesie, I decided to stamp a few more to add to the design.

The background was created by cutting an A2 panel of white cardstock using the Cover Plate: Quilted Die. I also created a frame using the Border Bling: Skinny Embossed Frame and glued it over the top of the background panel.

I used the Corner Decor Stamp Set to create the two embellishments for the two corners and then had fun adding the Wild Petals florals here and there. I attached the onesie to the background panel using foam squares. The sentiment, which is from the Just Sentiments: Welcome Mini Stamp Set, is heat embossed in white on a strip of Sweet Blush cardstock. I added the notched ends with a pair of sharp scissors and added it to the card using foam squares. The entire panel is added to a top-folding A2 card base using liquid glue. I hope you enjoyed today's post; join me again tomorrow for day 3 of the countdown! Thanks for fluttering by!


Sunday, June 23, 2024

Papertrey Ink June Release Countdown Day 3

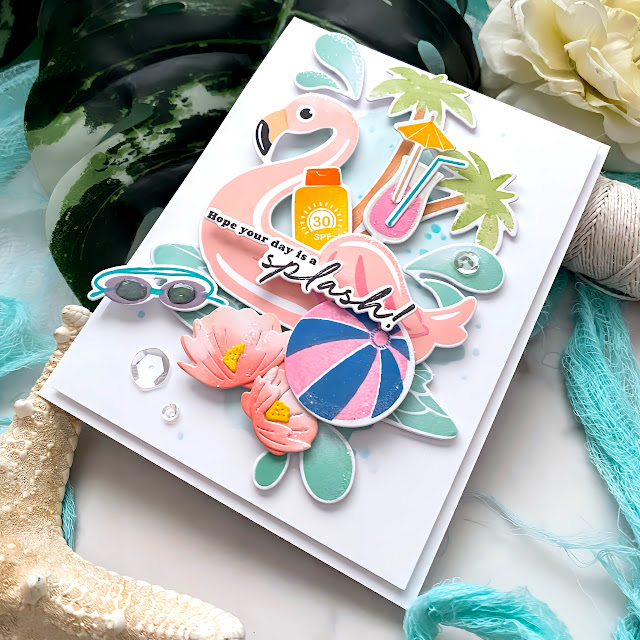
It's day 3 of the Papertrey Ink June release countdown! I'm sharing three projects using the new Soak Up the Fun stamp/die set and my last card features the new Baby Elephant stamp/die set.

This is such a fun summer set; it includes three sentiments and all of the images you need to create a fun summer scene!

I had a few flowers left over from yesterday's arch card so I added a few of those for some extra detail!

I used the Watercolor Wonderful Stencil Collection for the background to enhance the 'splash' theme! I used both a green and brown marker to give the palm trees the two-toned look; the stamp is just solid so I wanted something more realistic. I added some Nuvo Crystal Glaze to the swim goggles.

My second card for today is a shaker card; you can see the shaking bits better in the remainder of the photos, but I wanted to s how it how it looks just resting.

I used some Bitty Big: Pale Peony paper as the backdrop for the shaking sequins for added detail.

The new Fantastic Front: Scalloped Frame die is the perfect choice for a quick and easy shaker card! If you know me, you know I struggle with shaker cards, but this one was easy-peasy!

I used a few more of the leftover flowers from my wreath card for this card as well. 

I used another one of the sentiments; the die set comes with dies for the sentiments so I added it over the top of the acetate using foam squares.

My third card using the Soak Up the Fun set uses the previously released Through the Palms Hot Foil Plate. I created a quick blended panel using pinks/purple ink for a sunset type look.

It used the highest heat setting and let it heat for 25 seconds and I got a nearly perfect result!

I added the water portion and the floatie at the bottom of the scene and added  few more details.

You can really see the shine of the foiling in this photo!

I added some glitter and sequins for even more sparkle and shine!

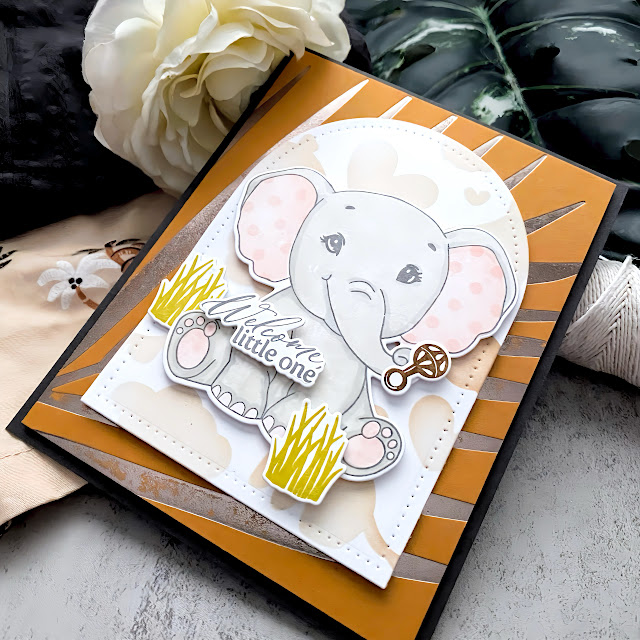
I have zero baby boy cards on hand and I have a baby gift to deliver! I took a picture with the outfits I bought in the background; this photo shows the shorts and shirt outfit which I tried to match the card to.

The outfits are jungle-themed so the new Baby Elephant set is perfect!

You can see the cute sleeper in the background of this picture. I chose to use Honey Nut cardstock with Platinum foil using the Tropical Frond Hot Foil Plate for the background. I stamped the elements from the Baby Elephant set and then mounted it on an arch that was die cut using the new Love to Layer: Arch dies with the new Baby Clouds stencil.

I did stamp pink on the ears because it just seemed like the right thing to do, but I hope it's not too girly! ha ha! Thanks for fltutering by!