Saturday, June 29, 2019

Ink To Paper Saturday Showcase {Smile...it looks good on you}

Well friends, June has come to a close and what a whirlwind of a month it has been! This is the last Ink To Paper Saturday Showcase for the month and today a few of us are using the set called Frame It Out: Wishes that was part of the debut release for Ink To Paper. Today I am sharing 2 cards made with this fun set because the sentiments are so fun and versatile!


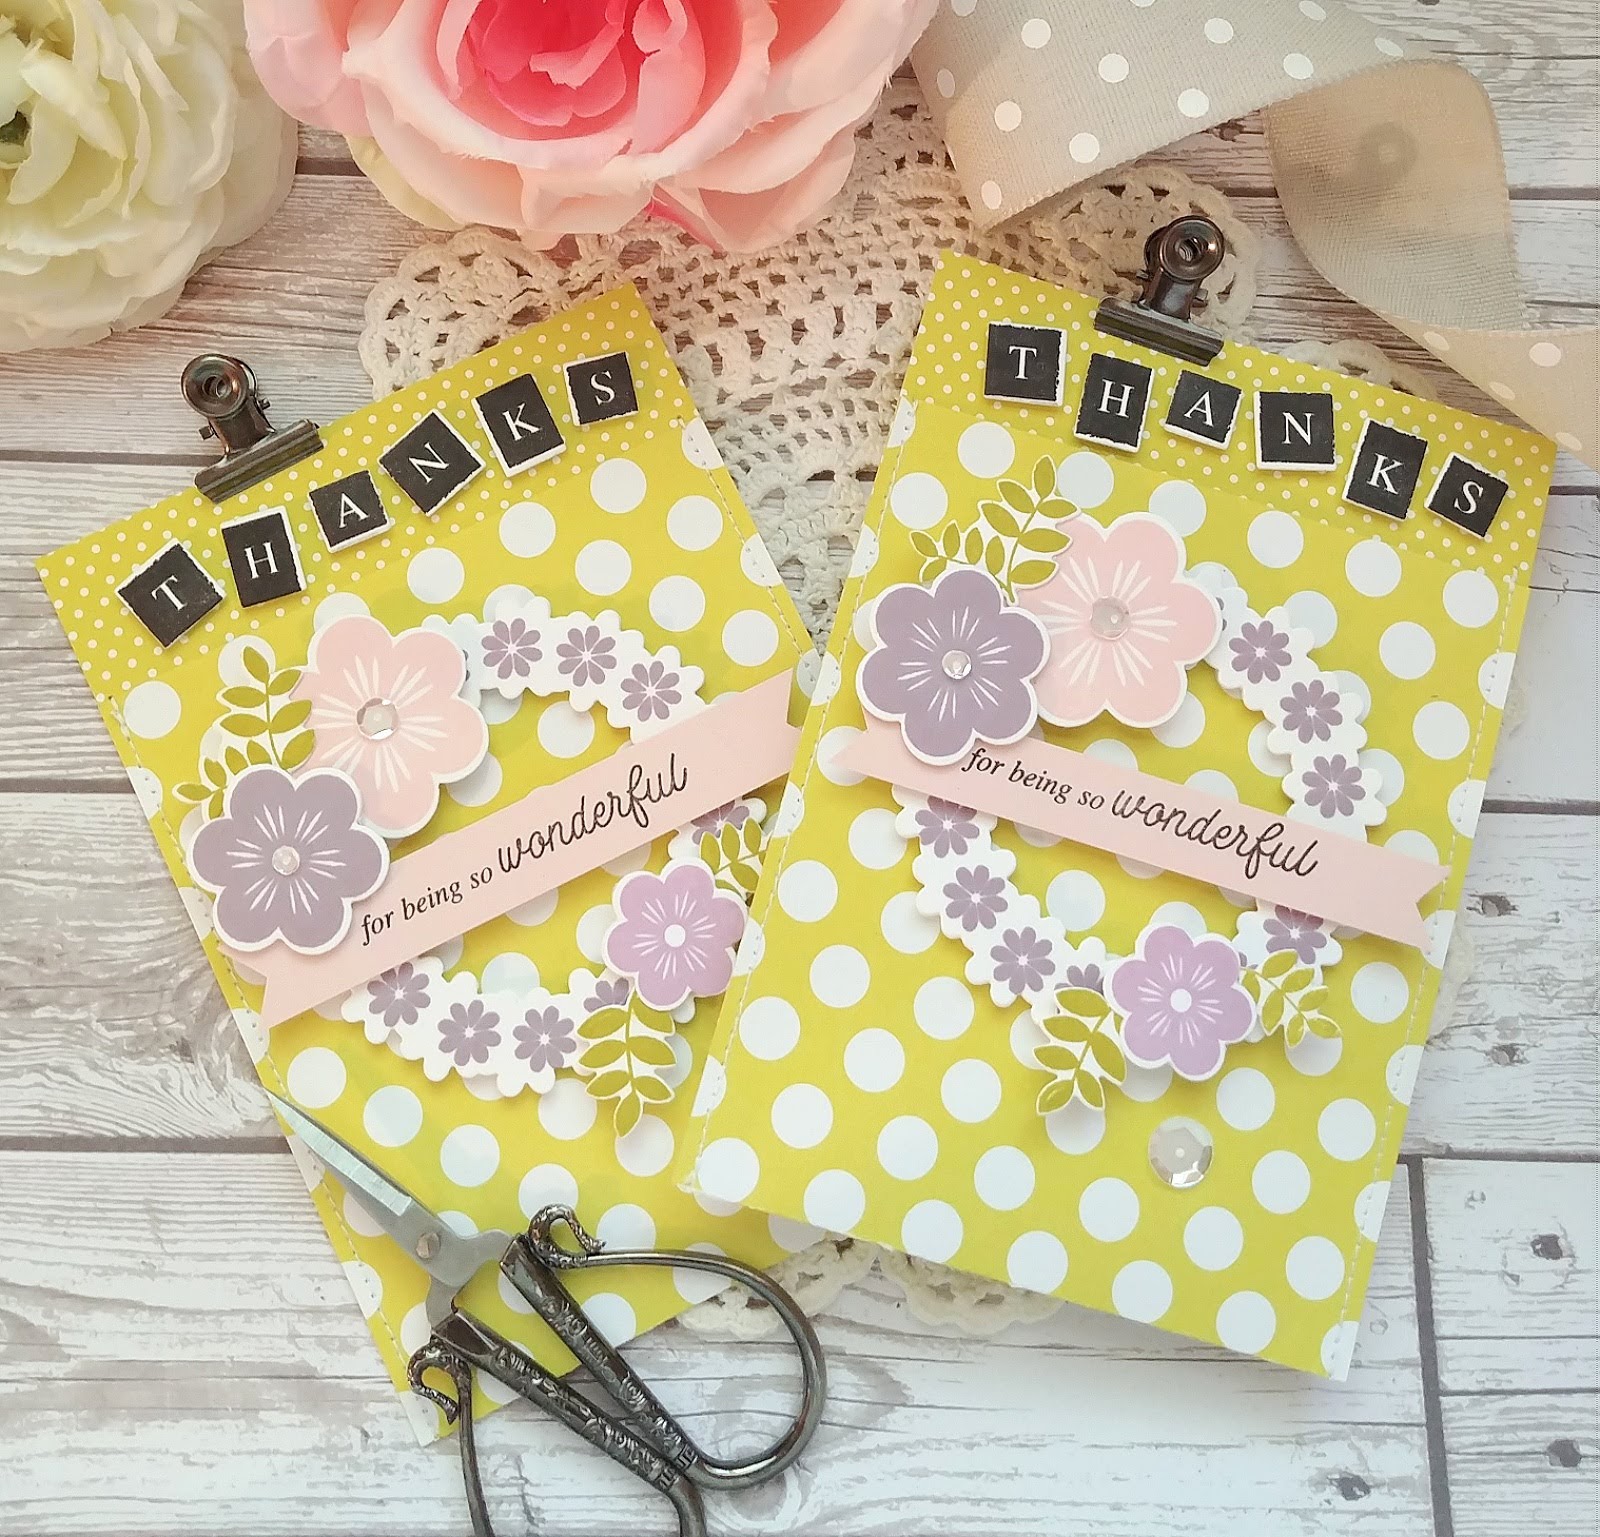
I've really been on a "make 2 cards at one time" kick lately, but it really is so easy to just make 2 while you have everything out. To begin these two cards, I first cut two 4 by 5 1/4 inch panels of Bitty Big: Harvest Gold pattern paper using the large striped side.  I also die cut two of the Geometrix: Hexagon Die and attached those to the striped panels using foam squares.

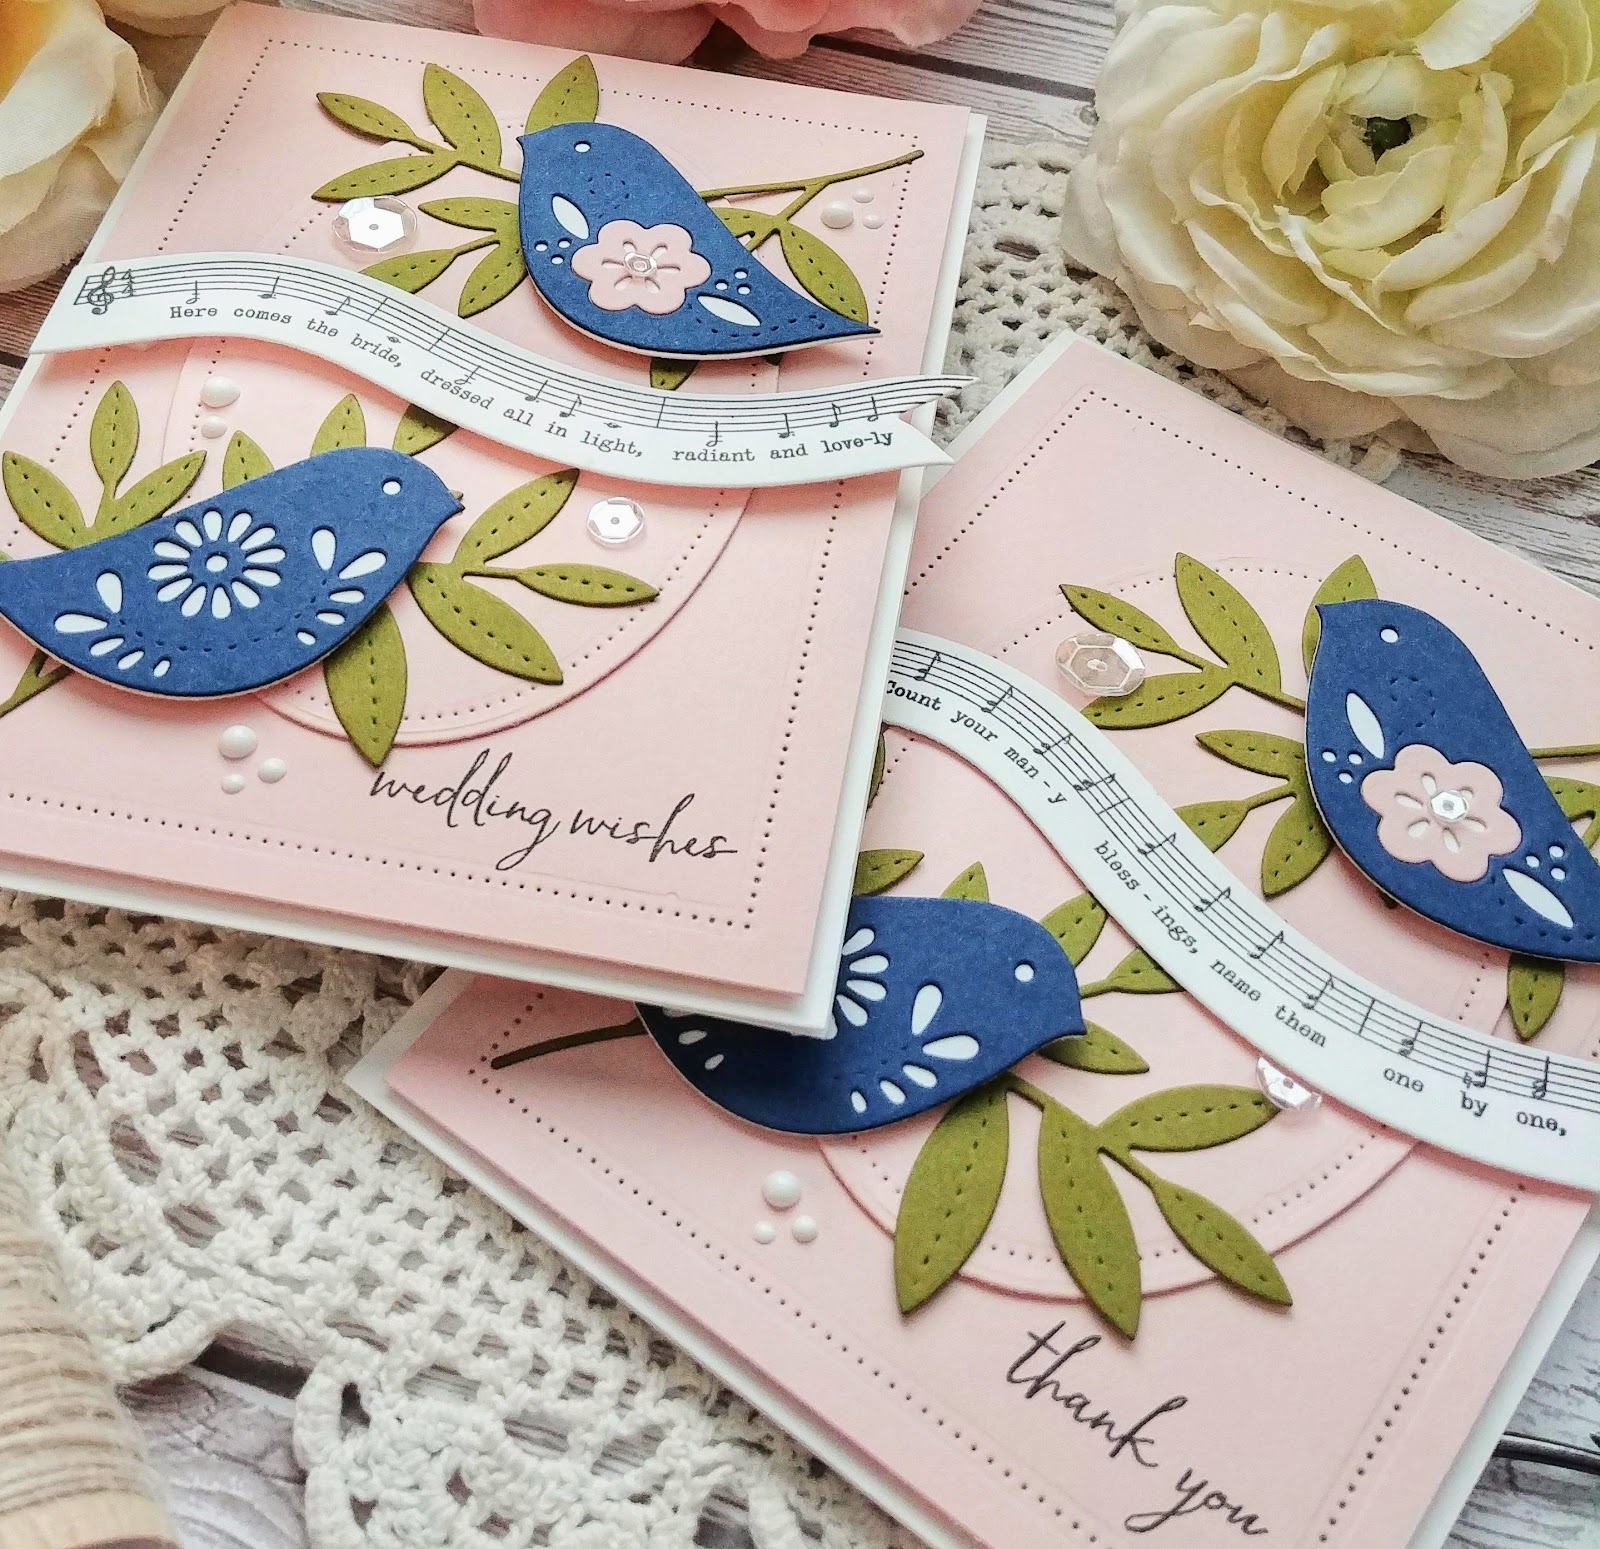
Once that was done, I stamped 4 of the large leaf images from the Frame It Out: Wishes stamp set in black and then colored them with an assortment of green alcohol markers. I used the coordinating Frame It Out: Wishes dies to die cut them and then added them to the top and bottom of the hexagon die cuts using mini foam squares.

There are a few different options for creating the large sentiments that are included in the stamp and die collection. For today's card, I chose to just stamp the "hello" and "smile" in black ink onto white cardstock and then use the large shadow die to cut it out. I heat embossed the "a note to say" and "it looks good on you" sentiments in white powder onto black sentiment strips. These are all added to the cards using foam squares as well.

I stamped a few additional flowers from the It's A Sign: Beautiful stamp set in Harvest Gold ink with some Summer Sunrise around the edges for contrast. I used the coordinating It's A Sign: Beautiful die collection to cut them out. I added them here and there with foam squares.

I also added some White Nuvo Drops here and there for some additional detail and this "hello" card also has  a few sparkling clear sequins for shine! I really had such a great time creating these two cards! Thanks for fluttering by!

Thursday, June 27, 2019

Papertrey Ink Throwback Thursday {Wedding Wishes}

Hello and welcome to this week's Papertrey Ink Throwback Thursday post! I always love this post because it gives me the opportunity to pull out some of my favorite older sets! Today I will be sharing two {almost} identical cards using the amazing Songbirds Stamp Set and the coordinating Songbirds Die Collection, which are now back in stock! Yay! I made THIS project a few months ago for my Keeping Christmas series and the dies were sold out, so I am happy to say they are available now!

Wedding season is in full swing and I am in need of a card using this beautiful Enchanted Evening color paired with Sweet Blush. I also created an identical thank you card because it's just as easy to make one as it is to make two! ha ha!
To begin this design, I cut two panels of Sweet Blush cardstock which measure 4 by 5 1/4 inches. I used the Nesting Basics: Pierced Rectangle dies, which are also back in stock, to give the edge that pierced detail that I love so much! I also created an oval in the same way using the Nesting Basics: Pierced Ovals and the Nesting Basics: Oval die

I die cut the music shape using the Songbirds die collection out of white cardstock as well as the base for each of the two larger birds. The leaf clusters are die cut out of Ripe Avocado cardstock and the birds are die cut from Enchanted Evening cardstock {linked above}. 

Before I began assembling the card, I stamped the "thank you" and "wedding wishes" sentiments at the bottom of the Sweet Blush panels using black ink. Once that was done, and I had stamped the music image, I was able to get to work assembling the rest of the cards.

The thing that I love about the Songbirds stamp and die collection is that you can use the die cuts by themselves for a different look, or use the coordinating stamped images in the more traditional way. I chose to do more die cutting for these two designs. I used liquid glue to adhere the leaves and the blue birds to the white bases. Once that was done, I used foam squares to adhere everything else. The base layer is popped up as well to give it some added dimension.

Once all of the die cut pieces were added, I used some White Nuvo drops here and there to look like berries coming off of the leaf sprigs. The sparkling clear sequins were added using liquid glue as well.

I added Shimmer Spray once the photos were taken since it can be distracting in the photos, but it gives a beautiful shine in real life! I had so much fun making these two cards! This Songbirds stamp set would be perfect to create a set of all-occasion note cards to give as a gift! Thanks for fluttering by!

Inspired By...Barbeque Party {Well Done! Grill Master}

It's Thursday and that means it's time for a brand-new Inspired By Challenge! This week's theme is "Barbeque Party" and it couldn't have come at a better time! I was the cook at my daughter's youth camp, which was a lot of hard work, but I had a couple of "grill masters" helping me out for two of the breakfasts, which totally saved my bacon {pun 100% intended}! I wanted to give them each a thank you note and gift, so I took the opportunity to get their cards done!

I was inspired by the traditional red gingham check napkins, the rustic blue wood and the bright, stark white of the cutlery I also really like the rope handles, but just decided  to add some jute button twine to my photos instead! LOL!

I made two identical cards, except for their pants and shirts because I grabbed the wrong markers! ha ha! To begin, I cut two 4 by 5 1/4 inch pieces of red houndstooth paper since I didn't have any gingham. I used my mini MISTI to stamp the two sentiments using black ink.  I used the Card Front Element Builder SugarCuts to create the white base for the stamped images. 

I was thrilled to find a scrap of the blue wood pattern paper to use at the top of the card. I layered the white piece over the top and then sewed it using a zig zag stitch. The images are from the new Grill Master stamp set and I stamped them in black and then colored them with Copic markers. Once that was done, I die cut them using the coordinating Grill Master SugarCuts and added them to the white panel using foam squares. 

The entire focal panel is added to the cardbase using foam squares. I wanted to add some Nuvo drops or sequins, but just couldn't do it since these are going to men. LOL! I hope they like their cards and they feel appreciated. I will try and find some masculine type gifts like beef jerky and such to give as a gift! I hope you get a chance to join us this week! I hope to see your "Barbecutie" card in the gallery! Thanks for fluttering by!

Wednesday, June 26, 2019

Taylored Expressions Blender Brush Launch Day 2 {Scream! It's your birthday!}

Welcome to day 2 of the Taylored Expressions Blender Brush Launch! I loved seeing so many fun samples on Instagram from so many talented designers using the Blender Brush set with stencils! Today, we're using the blender brushes in another fun way; Embossing Folders! I'm a sucker for embossing folders; I've loved them ever since I  got my Cuttlebug! Pairing them with ink blending is always a fun way to provide color and texture for your designs!


Don't forget about the special promotion going on until the end of the month, which you can read about in the graphic above. Also, there is free shipping for orders 50 dollars and over until the end of the month! If you order both the brushes and Storage Caddy, you will qualify for the free gift as well as free shipping!

I have two cards to share with you today! First up is this tone on tone ink blended dry embossed background card featuring the cute Little Monsters Stamp and Die combo. To begin, I embossed the teal panel using the adorable Streamers Embossing Folder in my Cuttlebug. Once that was done, I used the new Blender Brushes to enhance the raised embossed portion by gently rubbing the brush over the top. I also added some heavier blending around the edges to help define the perimeter. I added a light spritz or two of Shimmer Spray for some shine!

I kept the layout simple so that the embossed detail could shine! I stamped the images in black and then colored them with Copic markers.I added some white gel pen dots to the orange monster and some teal dots to the blue monster. Once they were colored, I die cut them using the included die cuts in the kit.

The sentiment is heat embossed using white powder onto a black strip of cardstock to really make it pop! I added a trio of sparkling clear sequins here and there for some shine!


For my second card, I created an ink blended background on a panel of white cardstock. I used some fun monsteresque colors that I felt would enhance these fun images! This layout is almost identical to the first card, but this time I stamped the sentiment on white using black ink.
I did the ink blending first and then used the Streamers Embossing Folder. I love how different each card looks depending on which technique is used! I made some similar cards back when these cute stamps were released, but by adding the ink blended embossed portion, it really helps make this simple design pop!


I added some Crystal Glaze to the monster's nose and the eyes on the other card. This one got a few sequins as well for some detail and shine! Tomorrow will be the last day of the launch, so make sure you stop by again tomorrow for one last way to use these amazing new brushes! Thanks for fluttering by!


Tuesday, June 25, 2019

Taylored Expressions Blender Brush Launch {I love you. That is all.}


Today has got me super duper excited and I'm pretty sure you can see why! I'm head-over-heels in love with the new Blender Brushes  and Blender Brushes Storage Caddy from Taylored Expressions! I will be sharing some different ways to use these over the next THREE days, so stay tuned! Today I'll be sharing a design using the Topsy Turvy Stencil and the new brushes, but before I dive into that, there are a few things about this release that I'd like to share with you.
Every order of the new Blender Brushes AND the Blender Brush Storage Caddy will recieve the  Blender Brush Cleaner Tool for FREE! It will automatically be added to all qualifying order; there is nothing you need to do! This tool is not currently available for purchase, so this is the only way to get it now! Also, there is FREE shipping on all $50+ purchases now through the end of June. It will return to the regular $75+ purchase beginning July 1st. Please note that the Blender Brushes will not ship until after July 1st. Whew! Now that we've got all of the business out of the way, let me get started on the card I made for today's launch!
First off, these blender brushes are WHITE, and there is one for each color of the rainbow so that you can dedicate one for each! I love that! Each brush is the same size,which is awesome! To begin today's design, I used the Topsy Turvy Stencil and taped it over a panel of white cardstock that measures slightly larger than 4 1/4 by 5 1/2. I blended in Festive Berries, Mustard Seed, Peacock Feathers, and Seedless Preserves Distress Oxide Ink using the new brushes. Once that was done, I removed the stencil and cut the panel down to 4 by 5 1/4 inches.

Once that was done, I cut some strips of white cardstock and blended in the same 4 colors of ink, plus Mowed Lawn. I kept the blending heavy in one area and faded it out to get some variation in tones. Once they were blended, I spritzed them with water and Shimmer Spray. I set those aside to dry and got to work on the sentiment. 

I heat embossed the "I LOVE YOU. THAT IS ALL." sentiment, which is from the Dadisms stamp set . I thought it paired so perfectly with this sweet little daisy-holding-monster from the Little Monsters Stamp and Die combo. Once all of the strips were done, I layered them diagonally on the stenciled panel using foam squares. 

I stamped the monster in black and then used Copic markers to color him/her. I also added some googly eyes using liquid glue to the eye portion. It provides just a touch of silliness that complements the monster so well.

Before attached the monster,I adhered some sparkling clear sequins here and there for some added detail and shine. I asked my daughter if she liked the card with or without the monster,and she said she liked it both ways. I just couldn't resist adding him/her.

Join me again tomorrow as I share another design using these amazing brushes! Thanks for fluttering by!


Keeping Christmas {Be Good}


It's the 25th and that means it is time for the monthly Keeping Christmas Blog Hop! I shared some sewn gift pockets last week that you can see HERE. After I got done making them,I realized how fun they would be to make to give at Christmastime! So...this is a Christmas version of that same concept! Before I share all of the details of today's project, don't forget to hop to the other designers' blogs to see what Christmas magic they have conjured up!
Kelly Lunceford (you are here)
Claire Broadwater (off this month)


These pockets are so easy to make; before you know it, you'll have whipped up a whole army of them to give to family and friends! I am planning on tucking a hot cocoa packet, a candy cane, a vintage foil wrapped Santa and maybe some other goodies or gift card, depending on the recipient. I made a total of 5 pockets, but I'm certain I'll be making more. My Christmas pattern paper selection is lacking, but I didn't realize it when I got started on these. You can really change the feeling by switching out the paper and stamps. I always love a vintage Christmas feel, so these are just up my alley!

I would recommend using 8 1/2 by 11 pattern paper; this paper measured 12 by 12, which is fine, but you'll need to cut it down to 11. I also would recommend using double sided pattern paper. I didn't use double sided for this project, but I did on the project that I linked above. It is much easier that way, but really, this isn't too much harder. I just simply added a strip of leftover paper to the top before I sewed up the sides!

The stamps that I used for this project are from Waltzing Mouse, which unfortunately is no longer in business. They are some of my favorites and I felt that they matched the feel of the paper, so I used them for today's project. I stamped all of the circular images using black ink on Kraft paper and then used my circle Nestabilities dies to cut them out. I also heat embossed the "merry and bright" sentiment, which is from the same set, in gold and attached it below the circle image. The "be good" images also sport a gold jingle bell on the end of Santa's hat. 


I gave each pocket a clip at the top of the front flap for extra detail as well as a sprig of plastic holly that I got at Hobby Lobby. These sprigs are glued to the paper using hot glue for stability. 

I have a feeling that these will be the perfect thing to have on hand this upcoming holiday season! I had so much fun putting these together! My kids and I actually had a "Toy Story" movie watching marathon of films 1-3 and then we're headed to see Toy Story 4 today! I sat and made these while the kids watched the show. Thanks for fluttering by!


Saturday, June 22, 2019

Ink To Paper Saturday Showcase {Thanks for being so Wonderful}

 Welcome to this week's Ink To Paper Saturday Showcase! I've been MIA the last few weeks because of vacation and travel, so it is good to be back sharing some fun new creations with you! This week a few of us are sharing some fun projects using the new Simply Sweet: Thanks stamp set that was just released last week! I had so much fun with it during the release when I made THIS {scroll down} card, but for today I wanted to use it in a more traditional way! 

For today's project, I created 2 sewn pockets that can be filled with a sweet treat, lip gloss, or small gift. In this photo, I have a lip gloss inside, but it is really hard to tell {which I guess is a good thing LOL!} . I cut a piece of Bitty Big: Limeade Ice pattern paper in half length wise and scored each one at 5 inches. I folded it at the score mark which leaves that small bit of the smaller polka dot panel at the top. I used my sewing machine to sew along the two edges.

Once the edges were sewn I got to work on the rest of the design details. I die cut the wreath portion 4 times, 2 for each sewn pocket using the Simply Sweet: Thanks die and stamped the flowers using Winter Wisteria ink. The 3 larger flowers are from the new It's A Sign: Beautiful stamp set as well as the leaves. The leaves are stamped in Simply Chartreuse ink, and the three flowers are stamped in Winter Wisteria, Lilac Grace, and Sweet Blush and they are all die cut using the It's A Sign: Beautiful die collection

 The "thanks" block letters are stamped in black and die cut using the coordinating dies {linked above}.I added them to the top flap of the pockets using foam squares. If you're worried about the size of your gift being to tall so that it might cover those letters, you could always add them to the bottom of the pocket as well.
The "for being so wonderful" sentiment is stamped in black onto a strip of Sweet Blush cardstock and then added to the middle of the wreath using foam squares. I notched the ends for some added detail.

I added a trio of sparkling clear sequins to the bottom right corner as well as the centers of the two flowers on the left hand side for some sparkle. I have been on a Nuvo drop kick lately so I was tempted to just squeeze those babies all over the place, but I resisted! LOL! I felt the sequins were a more appropriate option. As much as I wanted to add them, they compete with the larger polka dot of the pattern paper. I did add some clips to the top of the flap for some added detail. I also experimented with it on one of the sides at the bottom,which I like as well!

When I was making these, I couldn't help but think how cute these would be for Christmas gifties; hot cocoa, candy, gift cards, lotion, etc. My Keeping Christmas post is coming up on the 25th, so don't be surprised if you end up seeing more of these! Ha ha! Thanks for fluttering by!