Showing posts with label Pinkfresh Studio. Show all posts

Monday, April 7, 2025

Pinkfresh Studio {Celebrate}

Welcome, friends! I finally took some time over the weekend to use a few of those products that I just "had" to have when they were released! I have a basket with things I've purchased and never used and it is absolutely BURSTING at the seams so it's time to tackle it! ha ha! I decided to take ALL of the Christmas items out since I won't be using them for a few months at least and that made it seem not so overwhelming. 

To begin this card, I used the Garden Party Layering Stencils with the Garden Party Die and created all of the fun blooms. I love how easy it is to mix and match all of the different pieces to create one-of-a-kind flowers!


I had a few butterflies left over from a past project that were made using the Small Butterflies Hot Foil Plate with gold foil and the vellum. 

For the background, I used the Diagonal Stitched Plaid Die with Vintage Cream cardstock. I cut it to 4 by 5 1/4 inches and then used a corner rounder punch for the edges to give it some added interest.

I die cut the oval using the Essentials: Ornate Oval Die and then added it to the background using small strips of foam tape.

For the sentiment, I heat embossed the CELEBRATE sentiment in gold, which is included in the Here For You Stamp Set and then used the coordinating Here For You Die to cut it out.

I layered all of the flowers and leaves in the middle of the oval frame and tucked the leaves here and there until I was satisfied with the arrangement.

The sentiment is layered over the top using foam squares. I added the entire background panel to a top-folding A2 cream card base using additional foam squares. Thanks for fluttering by!


Tuesday, March 11, 2025

Hugs {Stronger Together}

One of the sweet gals that follows me on Instagram asked if I would be willing to make her sister, who is suffering with cancer, a card! Of course I said yes and got to work making a card for her and another to add to my stash! These two cards are actually similar to another pair I made a few years ago, but this time I chose cool tones to change things up.

To begin the pair, I first used the retired Modern Floral stamp/die from Pinkfresh Studio. I added some additional detail by using color pencils on the leaves and the larger blooms, and a white get pen on the small, darker flowers.

I heat embossed the background using white powder on a white panel and then added the ink around the edges. I die cut the panels out using the Essentials: Stitched Rectangles Die. I really like how nicely the finished edges look!

 I die cut the letters I would need for the YOU sentiment using the Jeff Alpha Die; this is one of my favorite alphabet dies! I die cut them from white cardstock and then added the purple ink using a blender brush. I layered the bouquet using foam squares, used a t-square ruler to place the letters properly.

Both cards feature a heat embossed sentiment; the previous sentiment is from the Simply Sentiments Hello and this one is included in the retired Modern Floral stamp set. I used gold to give both cards a touch of warmth.

I strategically added small dots of glue to the back of the embossing and then added it to the top of the letters.

I had a few bows that were sitting on my desk from a previous project, so I added one to each of the bouquets. A generous spritz or two of shimmer spray, a trio of sequins, and a white card base finishes off the pair of cards. Thanks for fluttering by!


Saturday, May 13, 2023

For Mom + more Gingham Inspiration!

Happy Saturday, friends! I'm popping in today to share the card I made for my Mom for Mother's Day and a few tags that I made using the new Gingham Gorgeous from Bath and Body Works as inspiration!
I happened to be sick during the release where we used Mother's Day products, so here I am at the last minute getting something put together! Please note: this card was HEAVILY inspired by a beautiful card that I saw HERE; I loved the gate-fold design, the MOM down the center and the washi touches!


I decided to take a more colorful approach to highlight the beautiful Hydrangea and Rose washi tape; my mom loves these citrus hues, so I hope she likes it!  I cut a piece of Green Parakeet cardstock measuring 11 by 4 1/2 and then scored it at 2 3/4 on each end and then folded the flaps to the middle.

I also die cut the Modern Blooms die (retired) out of the same Green Parakeet cardstock, cut it in half, and then glued it on either side of the opening lining up the blunt cut for precision.

I adhered the washi tape to a 4 1/4 by 11 piece of white cardstock and then die cut it using the coordinating Hydrangea and Rose die and set the pieces aside. I just HAD to buy the Jeff Alpha die; that is what originally caught my eye on the inspiration card! I die cut the shadow from white cardstock and then the detail portion out of Sweet Blush cardstock. I layered them together using foam squares and then added them to the left side of the opening at the half-way point.

Once that was done, I fiddled around with the placement of the washi tape pieces until I was satisfied with the arrangement. You can see in this photo that I actually layered two of the clusters together on the right side until I was happy with the way it looked! I heat embossed the sentiment using the Larger than Life Mom stamp set and then glued it under the "o" in  MOM.

I gussied up the inside with the same stamp set and another left-over flower cluster!

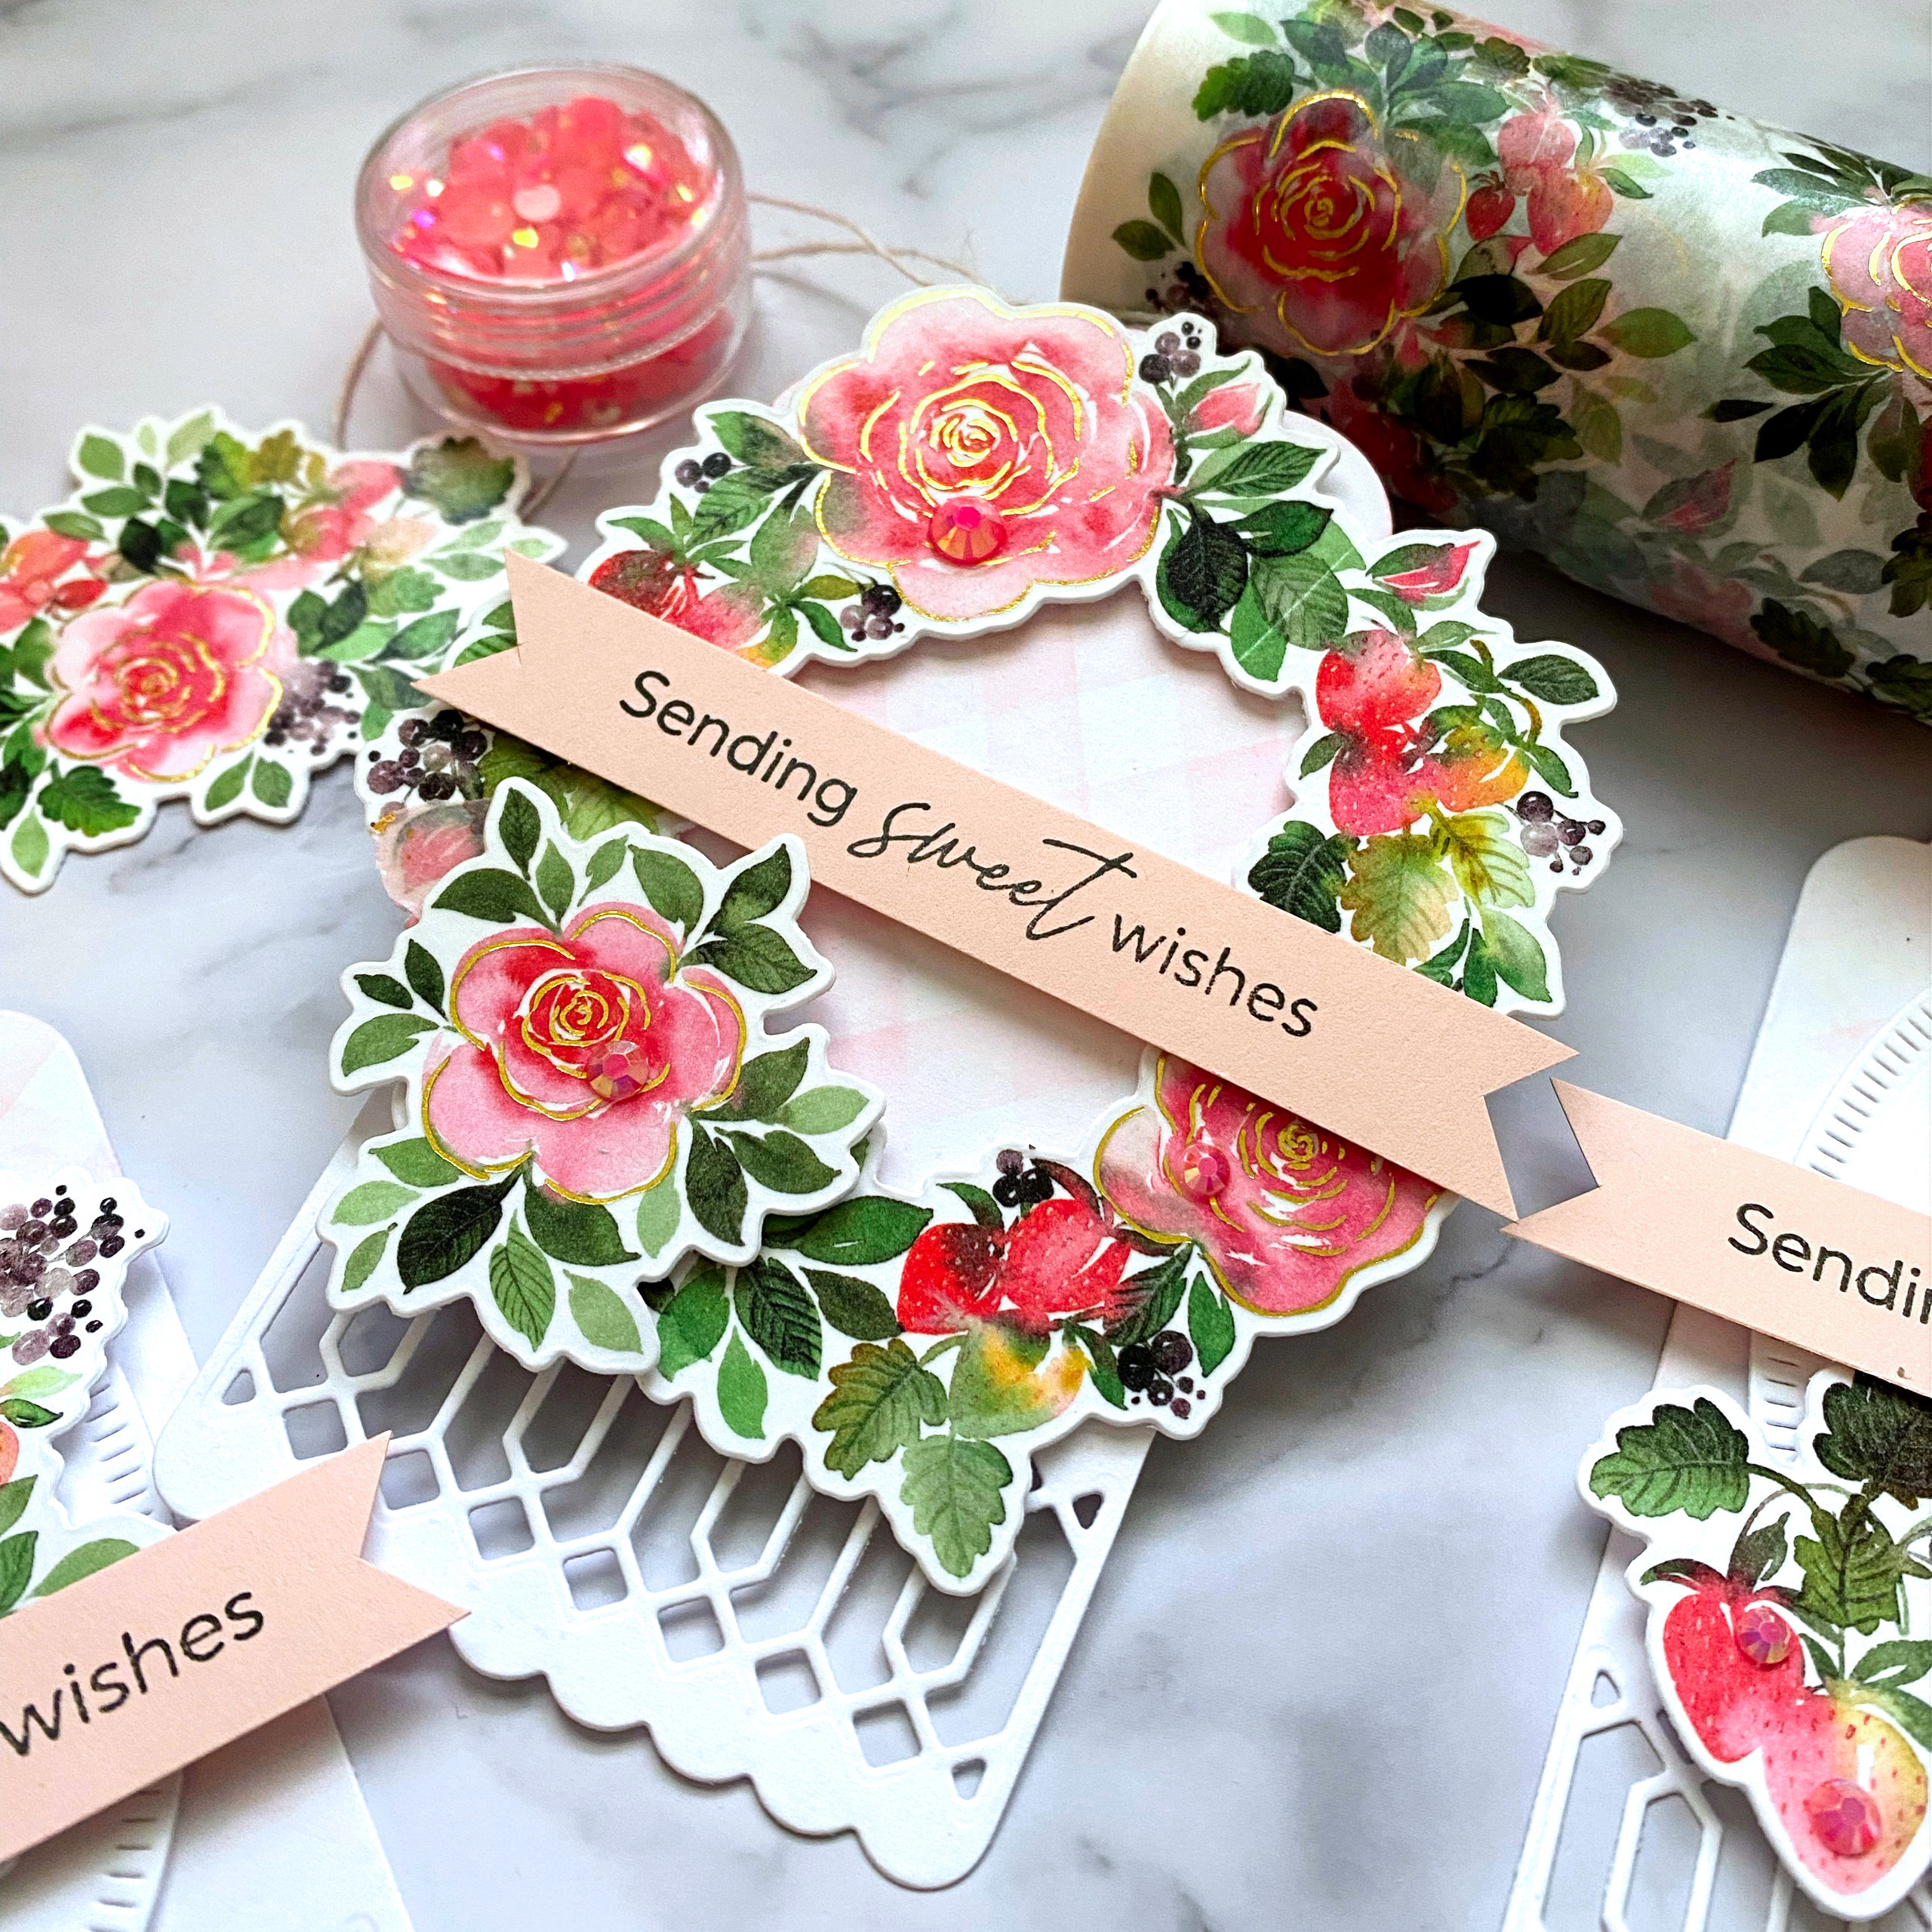
If you stopped by the other day, then you probably saw my birthday card I made using the new Gingham Fresh as inspiration; this time I used Gingham Gorgeous as inspiration! I'm giving a few ladies in the neighborhood a little Mother's Day gift, and I included some of the Gingham Gorgeous products! Lucky for me, the Blossoms and Berries washi tape is a match made in heaven!

I made 4 tags in total, but I'm only sharing three since the 4th is almost identical to one of these. I adhered and die cut the washi exactly as I did for the Mother's Day card. I set the pieces aside and then got to work on the tags.

I used my most favorite tags: the Essentials: Classic Tags with fillable elements! These are nice and big and you can customize them with all of the the different fillable elements; I chose this lattice-y look for today! I used a diagonal striped stencil to create the soft blush gingham on the background. It's hard to see, but it's there; soft and sweet like it looks on the lotion and soap packaging.

From there I was able to decorate them with the washi pieces; this one features the large wreath.

The sentiment is from the Blossoms and Berries stamp set and is perfect for these tags. Since these ladies aren't MY mom, but I want to celebrate them, I though this worked!

I'm also obsessed with this gingham ribbon I found at Hobby Lobby; the perfect finishing touch!

This is a "for me" photo. (wink)  I made these for the 7-11 year old boys' group at church to give to their moms for Mother's Day. I had them make little Shrinky Dink charms to attach to the ring; they turned out really cute! Anyway, I added them because I wanted to remember that I did this! ha ha! Thanks for fluttering by!


Friday, February 10, 2023

Beautiful New Baby

Hello and welcome! I was agonizing the other day that I couldn't get these pictures to load, but they seemed to do fine when I tried them by themselves! I made this card clear back in December, took the time to hurry and photograph it, but then I never did anything with it. Since things have been quiet around here, I decided to share it today. I also enjoy having things documented so I can remember different ideas I've tried when I'm in a creative slump!

This card uses a mash-up of products, but I just love how it turned out! To begin, I die cut the floral piece using the Floral Arches Die and then brought it to life using the coordinating Floral Arches Stamps + Stencil Combo. I chose colors that matched the baby outfits that I bought for the gift; I always love a coordinating ensemble! I also used the A2 Arches Die and the Arched Sentiments Stamp Set for a portion of the sentiment and then I finished it off with a retired sentiment from PTI. 

I ordered the cute Bundle of Joy-Honey Cuts quite a while ago and was thrilled to use them on this card. I absolutely love how you can customize the little clothes using different pattern paper. I die cut the hanger using metallic gold cardstock.

I actually die cut the romper twice; once from white cardstock and once from the green polka dot paper and then tore off the ruffles from the green portion (very easy to do) and then glued them together. I layered everything onto a Sweet Blush panel that was stamped using the Pinkfresh Sudio Diamond Tiles Background Stamp

I finished it off by adding another sentiment to the inside; I'm sad this particular sentiment and die set is retired, but I'm sure many of you have it in your stash! Thanks for fluttering by!


Wednesday, April 13, 2022

Pinkfresh Studio {Built on Dreams}

Hello friends! I'm popping in today to share 4 cards I made using the Built on Dreams suite of products! When I made THESE cards, I joked that I needed someone to move into the neighborhood before spring is over so that the springtime design would still be relevant. Well, that happened so here I am creating a few new designs to add to my stash! I actually made 2 "welcome" cards and then two "thank you" designs so I could use both of the bold sentiments included in the Built on Dreams stamp set.

I had so much fun stenciling each  panel using the Built on Dreams layering stencils. I used the same technique for these cards as I did on THESE; I simply switched up the last cluster of flowers to make each card unique, yet cohesive. My two favorites ended up being the blue one in the right corner and the purple one in the left corner.

I decided to make shaped cards because who doesn't love a cute little house shaped card, right? They're a sweet little size to tuck in with a welcome basket or housewarming gift! If you're not digging the shaped card idea, you can simply add the house shape to a standard A2 card base as well. Once I had the stenciling finished, I used the Built on Dreams die to cut each house.

To create the shaped card, I cut and scored 4 regular A2 cards and then placed the die over the top leaving the left edge of the die hanging off the fold line. Easy peasy! Just run it through your diecutting machine and you've got your shaped card base. I used liquid glue to adhere the stenciled/die cut houses.

Each card features the bold sentiment either reading "thank you" or "home" and then I heat embossed the smaller sentiment in white onto a strip of black cardstock. I also spritzed each card with Shimmer Spray. I normally do this AFTER I take photos, but I was too excited to see the sparkle! ha ha! The tiny flecks you can see on the black portions are the sparkles. They don't turn out looking that great in photos, so that's why I usually wait until after I photograph my projects!
I also added some Essentials: Jewels Mix (which are in stock-yay!) to each of the cards in assorted colors.
The stamp set also features this large sentiment that is perfect to add to the inside of the "Welcome to the Neighborhood" cards! 

Since I'm on an envelop kick, I decided to create some envelopes to coordinate with each card. I used a piece of typing paper to tuck underneath the flap of each of the envelopes and then stamped them using the Diamond Tiles background stamp. I think it really adds to the overall presentation of the card! Thanks for fluttering by!


Thursday, June 24, 2021

Pinkfresh Studio {Happy Birthday}


 Hello and welcome! I'm happy to be here today sharing a birthday design using a few of the new release items such as the new Small Butterflies hot foil plate and the beautiful new Hydrangea and Rose washi tape. I had stenciled a bunch of butterflies to use on a project for the release, but they ended up being WAY too bright for the project I planned. I was thrilled to find that by using the hot foil plate with vellum, it was the perfect overlay for these stenciled butterflies. It toned them down just enough for this soft birthday design!

To begin this card, I used the Layered Sunburst Stencil set to create the soft background using Sparkling Rose, Soft Lilac, and Raspberry Bliss inks. I used the Essentials: Stitched Rectangles to die cut the edges for a finished look. I set that aside and got to work on the other design elements. As I mentioned earlier, I had already stenciled the butterflies, so all I needed to do was add the hot foiled vellum overlays! I used clear liquid glue to secure them in the center.

I die cut the gold circles using specialty gold cardstock and the Essentials: Stitched Scalloped Circles and then added them to the stenciled background using mini foam squares. I added the beautiful flowers from the Hydrangea and Rose washi tape and then let the butterflies float here and there for an organic feeling!


I used the Perfect Sentiments hot foil plate for the sentiment. I used gold foil so that it would match both the hot foiling on the butterflies and the gold on the washi tape. I added a few gems here and there for additional detail and shine! Thanks for fluttering by!

Monday, June 21, 2021

Pinkfresh Studio June Washi, Stamp, Die, Stencil, and Hot Foil Release Blog Hop


Hello and welcome to the Pinkfresh Studio June release blog hop! I'm sharing two projects with you today using a few of the new products! Make sure to leave a comment here and on every stop of the hop to be eligible to win one of 10 $25 gift certificates AND leave a comment on the You Tube channel page and Facebook page to be eligible for a chance to win the ENTIRE June release! 

As I mentioned earlier, I'm sharing two cards with you today! Up first is this fun rainbow design which is similar to the last Pinkfresh project I shared, but I used a different rainbow and I added the darling new Small Butterflies Stamp Set as well as the Small Butterflies Layering Stencils and coordinating Small Butterflies Die.

To begin the butterflies, I used the stencils using shades of orange and yellow to create Monarch type butterflies. I thought they would accent the rainbow nicely without being too busy.

Once the stenciling was complete, I used the coordinating stamp to add the detail images. Once that was done, I used the dies to cut the butterflies out and set them aside.

I felt like this particular sentiment was absolutely perfect for this butterfly design and so I stamped it in black at the top of an A2 sized white card base. This sentiment is from the previously released Floral Bunch stamp set as well as the flowers.

I die cut all of the pieces of the Color Block Rainbow Die and then put them back together using foam squares for dimension. I layered the flowers hanging over the edge and then squared them up using my paper trimmer.

I added the butterflies here and there using additional foam squares. I'm thrilled about the fabulous new gold Metallic Pearls! They are so much fun and I added them to a few of the butterflies here and there!

My second project for today uses the new Floral Vase Layering Stencils which coordinate with the previously released Floral Vase Stamp set. I used to color this set with Copic markers, but now I can do it quickly and effortlessly with the new stencils.

I used the outline stamp on both images to give them the added detail over the stenciled designs.

I love the look of the vase, so I decided to add some watercoloring to the background using ink, a blender brush, and a few spritzes of water! Easy peasy!

I added a few jewels as well to add some sparkle and shine!

Don't forget to head to the other designers' blogs! Thanks for fluttering by!

You are invited to the Inlinkz link party!

Click here to enter