Monday, September 25, 2023

Papertrey Ink September Release Countdown Day 4

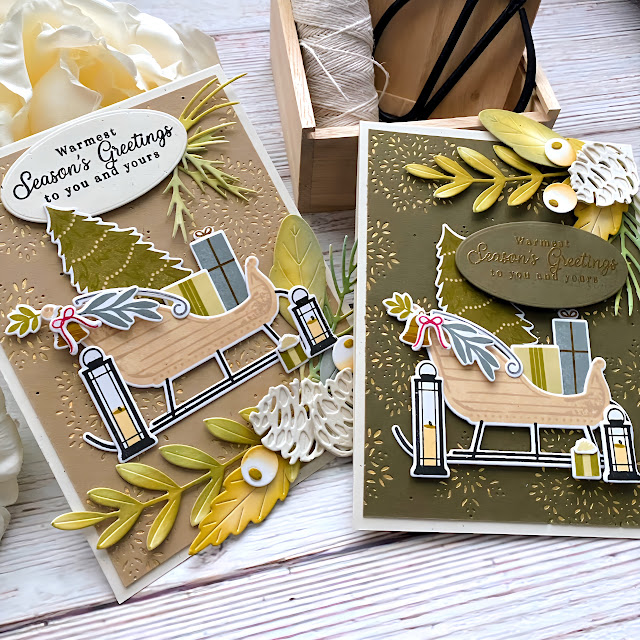
The Papertrey Ink September countdown has just flown by; I can't believe we're already at the 4th and final day! My first project for today is a pair of cards using the new Serene Sleigh stamp/die set! I used the colors from the stamping guide (again) because I thought they were just lovely!

I felt these colors lent themselves well to a natural, rustic, yet elegant look, so that is the direction I headed in.

I die cut all of the pieces twice so I could make two cards. I got to work stamping them using the stamping guide as a reference.

I used the Into the Blooms: Pine Die and the new Into the Blooms: Christmas Sprigs die for the foliage accents on both cards.

I used the same sentiment for both cards; one stamped in black and one heat embossed in gold. It is one of my favorites from the Winter Globes Sentiments mini stamp set.

Surprise! Surprise! I used the Fanciful Snowflakes Background Hot Foil Plate again! ha ha! I told you it's one of my absolute, all-time favorites! I used holographic foil on a panel of Kraft cardstock and on a panel of Olive Twist cardstock. I layered all of the stamped and die cut images using liquid glue and foam squares. I added them to top-folding A2 Rustic White card bases using liquid glue.

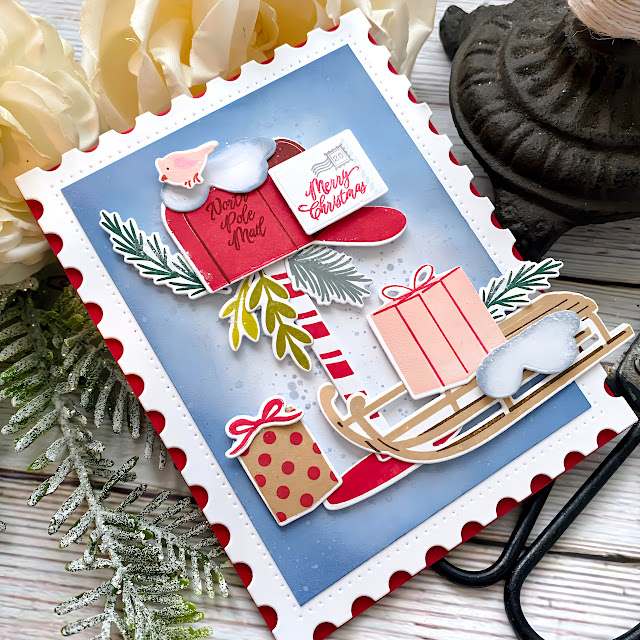
My final card for today, and for the release, uses the new Festive Mailbox stamps/dies. This is such a fun concept and it's no secret that I love a postage theme for Christmas!

This set features a few different present/parcels to jazz up the scene, a sweet little bird, a sled, sprigs, and more!

There are a few different sentiments that you can add to the "letter" in the mailbox for versatility.

I finished off the card with some glitter for some snowy, holiday effect! Thanks for fluttering by!
P.S. the entire collection will be available for purchase beginning tomorrow night at 10 pm ET.


Sunday, September 24, 2023

Papertrey Ink September Release Countdown Day 3

Well friends, we're officially halfway through the September Papertrey Ink release countdown! I had so much fun creating my project to share with you today and I hope you enjoy them as much as I enjoyed making them! My first card for today showcases the wonderful new Love to Layer: Ornament dies; I can tell I will be reaching for these time and time again. I am always drawn to products for their ease of use, but that also provide beautiful results; this collection definitely fits both checkmarks!

I chose to keep this card classic and elegant, but with the included dies, the sky is the limit when it comes to possibilities for these ornaments. To begin, I die cut the three ornament pieces from Pure Poppy cardstock and then added Scarlet Jewel ink around the edges. I stacked everything together using foam squares for maximum dimension to really give it a curved, ornament shape.

I offset the smallest poinsettia from the Into the Blooms: Poinsettia die collection and then added the "Peace on Earth" sentiment, which is from the Just Sentiments: Be Merry stamp set (I apologize for not linking these few items, but the website is down right now...boo!)

I die cut and colored the beautiful new Into the Blooms: Christmas Sprigs and then added them to the top of the ornament. But, let me back up, the background is created by using the Fanciful Snowflake Hot Foil Plate using holographic foil onto Stormy Sea cardstock. I cut the panel to 4 by 5 1/4 inches and then added it to a top folding A2 card base.

I layered the ornament onto the foiled background and then had fun arranging the sprigs here and there until I was happy with the look.

My second card for today also uses the Into the Blooms: Christmas Sprigs paired with the new Psalm Reflections: September stamp/die set. If you can't tell, I'm clearly obsessed with Stormy Sea cardstock for this release! ha ha!

While this scripture isn't Christmas-y, I decided to make it work for a Christmas card. To begin, I stamped the sentiment in black in the center of the Stormy Sea panel. I added some Fresh Snow ink around the edges and then some white paint splatter. I simply added a post-it note over the top of the sentiment before I added the splatter. I also added the FRAME over the top.

I used liquid glue to adhere the Psalm Reflections: September die cut around the sentiment. From there I had fun adding the Into the Blooms: Christmas Sprigs at the bottom using foam squares and liquid glue.

I stamped some stars from the The Greatest Gift stamp set using Fresh Snow ink. I die cut the star from glitter cardstock, which is included in the The Greatest Gift die collection and used a foam square to adhere it to the top of the card.

I added some glitter to the sprigs and felt happy with how this unexpected Christmas card came together! I didn't photograph the inside, but I stamped one of the large sentiments from The Greatest Gift stamp set to finish it off! Thanks for fluttering by!
P.S. Don't forget to join me again tomorrow for the 4th and final day of the countdown!


Saturday, September 23, 2023

Papertrey Ink September Release Countdown Day 2

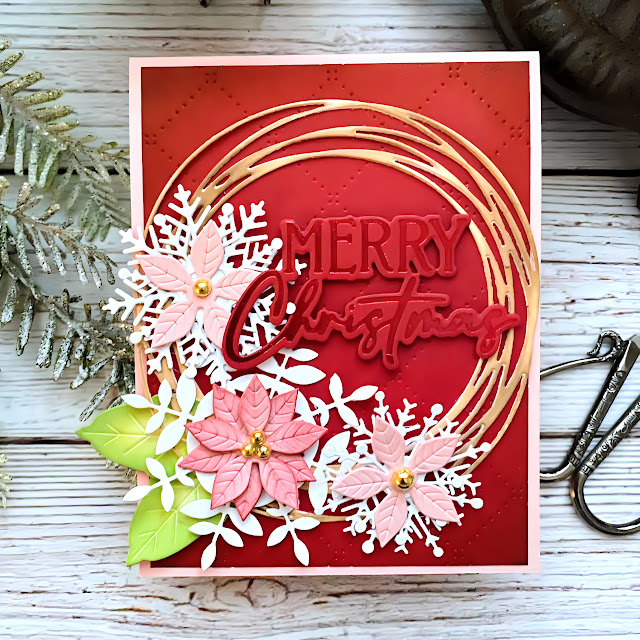
Welcome to day 2 of the Papertrey Ink September release countdown! I'm sharing two projects today using more products from this fabulous Christmas-themed release! My first card uses the new Forever Snowflake die collection. 

To begin, I die cut the wreath portion using white cardstock and then colored it using assorted colors of brown Distress Oxide ink. I die cut the snowflakes from white and left them as-is.

I added some Scarlet Jewel ink around the edges of a Pure Poppy panel of cardtsock. Once that was done, I used the Cover Plate: Quilted die to add the texture to the backround. I layered the wreath over the top using liquid glue and then glued on the snowflakes.

I die cut four of the smallest poinsettias included in the Into the Blooms: Poinsettia die set from Pale Peony cardstock and then added some Scarlet Jewel ink around the edges of two. I layered those two together and then added gold drip drops to the centers of all of the poinsettias. I added them to the centers of the snowflakes and a few leaves tucked on the side. the finishing touch is the tone-on-tone foiled Merry Christmas sentiment.

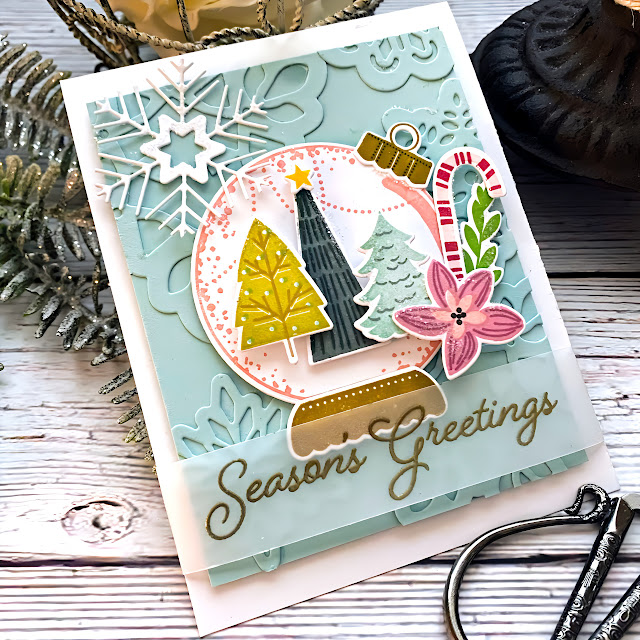
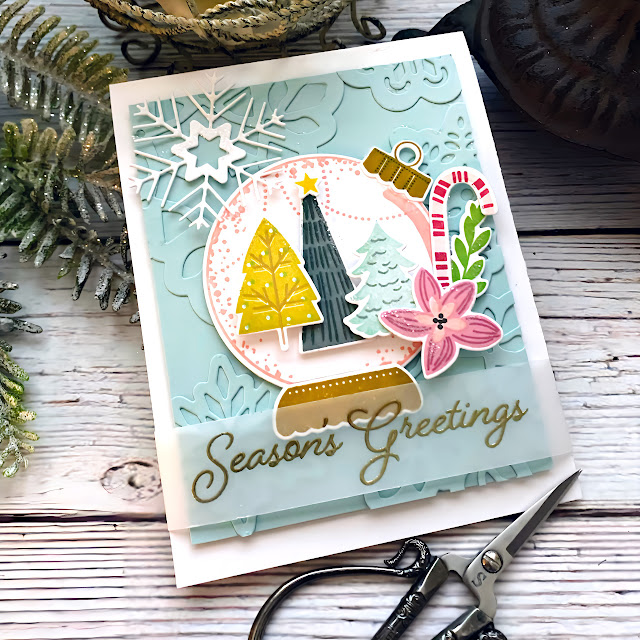
My second card uses the new Ornament Cloche stamp/die set! This is such a fun set to create cute little scenes inside the ornament. I chose colors and layout directly from the stamping guide; I absolutely loved the colors so I decided to keep things easy! (wink)

The background was created using the new Perfect Snowflakes die set; this is a LARGE die set with tons of different snowflakes. I chose to create a tone-on-tone background using many of the different styles of snowflakes.

I did add one of the leftover snowflakes from my first card in the upper left corner for contrast and interest.

I heat embossed the sentiment, also from the Peaceful Forest stamp set that I used yesterday, onto a strip of vellum and wrapped it around the card. I added glitter to the stamped elements for some sparkle and shine! Thanks for fluttering by! 
P.S. Join me tomorrow for day 3!


Friday, September 22, 2023

Papertrey Ink September Release Countdown Day 1

Hello and welcome to day 1 of the Papertrey Ink September release countdown! Autumn is a day away, but Christmas has made its way into the line-up! I'm sharing 4 projects with you today; three using the new Christmas Bouquet stamp set and one using a fun new set of dies!

I'm also sneaking a look at the new Merry Christmas Hot Foil Plate being showcased tomorrow, but I couldn't resist using it on this first card. 

To begin this card, I die cut and stamped all of the pieces from the Christmas Bouquet stamp set that I planned on using for this card. I used the new Elegant Edges: Christmas Bouquet die set on a panel of Stormy Sea cardstock. 

I layered the Stormy Sea panel onto a top-folding a2 card base using foam squares for dimension. I stamped the "you bring so much joy" sentiment using black ink at the bottom. I arranged the stamped images using foam squares and the foil sentiment below the bouquet. I added some white paint splatter for a snowy look.

My second card uses the same Christmas Bouquet stamp set, but this time I layered them on a custom background made using the Watercolor Plaid Stencil Collection. I used Berry Sorbet and Sweet Blush ink with Pure Poppy ink splatter.

I stamped the sentiment in black, which is from the new With Great Joy Sentiments stamp set, on the background. 

I added a frame around the background that was die cut using the Border Bling: Skinny Dotted Frame using liquid glue. 

I arranged the flowers and foliage using foam squares. I also added some gold drip drops to the center of the large poinsettia for added detail as well as a few sequins. I layered the entire panel onto a top-folding A2 Pure Poppy card base. This card got a touch of glitter for some holiday shine!

This is my personal favorite card of the day; it features a few older favorites paired with the new Christmas Bouqet stamp set. If you remember, I couldn't stop using the Fanciful Snowflakes Hot Foil Plate last year and I've been chomping at the bit to pull it out and today is the day!

I used gold foil on Pure Poppy cardstock; I trimmed the panel so I could offset it on a kraft base using foam squares. I tucked some foliage on the side and then created visual movement around the sentiment. I die cut the Larger Than Life: Peace word from gold glitter cardstock and layered it over the foiled portion using foam squares. I heat embossed the companion sentiment, which is from the Larger than Life: Peace mini stamp set, in gold and layered it above the PEACE word.

To continue with the gold theme, I added a few gold drip drops here and there for added detail.

This particular layout gives you some fun options for the floral arrangement.

This would also be really fun to try in blue hues for a cool, icy look!

My final card for today uses the new Holiday Car dies and is just simple and fun! 

I die cut all of the pieces for the entire card from white cardstock and then just used ink to color everything.

I made the car ahead of time so that the windows could set; they have two coats of Nuvo Crystal Glaze over the top. The first coat ended up cracking for some reason, so I gave it another coat so the window look quite realistic in real life! ha ha!

I colored the individual light bulbs with markers and gave them a quick dab of glaze as well. 

I prepared an A2 panel using Tumbled Glass, Stormy Sky, and Faded Jeans Distress Oxide ink and then added the On the Border: Splendid Snowflakes Frame using liquid glue.

I stamped the sentiment, which is an older favorite from the Peaceful Forest Stamp Set, in black inside the snowflakes. I added the car and tree using foam squares and called it done! Simple and fun! Thanks for fluttering by!


Friday, September 8, 2023

The Greetery {Autumn is in the Air}


Hello friends! I'm popping in today to share some autumn inspiration with you using some older favorites paired with some of the fabulous new products from the Harvest Fest Collection! I haven’t even attempted to start putting it away because the ideas keep flowing! I was so thrilled to use the cute sweater from the Hearts at Home: Sweater Die as the focal point for this card! I couldn’t wait to give it an autumn vibe by coloring it in shades of tan and brown for a cozy feeling!

To begin, I die cut all of the sweater pieces using Vintage Cream cardstock. I colored it using finger daubers and Distress Oxide ink. I also added some ink splatter to mimic the look of flecked yarn using watered down ink and a fine-tip paint brush. I glued the waist, neck, and wrist portions to the sweater using liquid glue. I set the sweater aside to dry and then got to work on the rest of the elements I planned to use on this card.


I die cut theRound About Fall Foliage die twice and then colored the leaves using the same technique as the sweater making certain to add in quite a few autumnal tones for variety and interest. I glued them together around the circle portion using liquid glue. My next step was to cut and color the cute pumpkins from the new Autumn Harvest die. These are perfect because they are the same scale as the sweater so they create a balanced look without overwhelming the design.

I used the Herringbone Parquet diefor the background and used teal cardstock with Ground Espresso ink around the edges. I layered all of the elements onto the background and even snuck a few leaves from the To Pie For Die to tuck here and there! Once I had everything arranged, I stamped the “is in the air” portion of the sentiment, which is from the older Fall Foliage stamp set, using Black Soot Distress Oxide ink. In hindsight, I would have stamped this first, but I hadn’t planned the sentiment! Ha ha!

I die cut the Let's Have a Word die from Smokey Shadow cardstock and then glued it over the top of the focal point using liquid glue. I also added some white paint splatter here and there for some contrast. The finishing touch is a sprinkling of glitter to the leaves and pumpkins! I had so much fun creating this card!


 I decided yesterday that it is much less painful to embrace autumn than it is to lament the passing of summer….so I am embracing autumn with all of my heart! It truly is one of my FAVORITE seasons and I plan on celebrating it to the fullest this year! Thanks for joining me today!