Saturday, April 27, 2019

Saturday Showcase {Everyone Needs a Friend Like You}


Happy Saturday, friends! I hope you've all had a nice week! I'm sharing two cards today for the Papertrey Ink Saturday Showcase using the Woodblock Prints stamp set. I paired these beautiful and intricate designs with the Some Like It Hot stamp set! I'm always looking for ways to add extra detail and dimension to my designs and these images are the perfect fit! If you've joined me from the Papertrey Ink Blog, then great, but if not, make sure you head over there to watch Ashley's video where she shares how she made her project!

 How many of you already own the Woodblocks Prints stamp set? I'd love to hear how you have used it in your designs! Leave me a comment if you have a minute! Before I dive into the details of these two tropical designs, I want to share with a few other ideas I had to use these particular stamps.  All of the images clustered together on the image sheet that comes with the set remind me of the classic bandana print! I can't wait to try using these images to create some fun 4th of July or western designs with a bandana as my inspiration. These images also remind me of beautiful Ginger Jars and you could easily recreate that look; especially beautiful paired with some of the floral stamps we all love to own!
Since I couldn't share ALL of those ideas today, I just decided to focus on some bright, fun tropical designs! I fell in love with the Some Like It Hot stamp set when it was first released and immediately added it to my collection! Honestly, I've never made any cards with it that I have been as happy with, as these two. I really love how the addition of the Woodblock Prints enhances the tropical vibe that I was trying to achieve!

To begin these cards, I used the Some Like It Hot die collection to die cut a large quantity of shapes. Once they were all cut, I got to work stamping them all using my mini MISTI. I actually have quite a few stamped images left over so I will be able to use them on a future project. Once that was done, I die cut two of the pinked shape using the Mix and Mat: Pinked Edge die out of white cardstock. I used my mini MISTI to stamp all of the Woodblock Prints images onto the panels. 


I had so much fun adding all of the die cut images using foam squares to create some extra dimension! Both of the sentiments are from the Keep It Simple: Friendship mini stamp set and are heat embossed in gold. The "you've got a friend in me" sentiment is die cut using the Skinny Mini Banners die and the other one is embossed on a strip of vellum and secured to the back of the Aqua Mist panel using clear tape. I also gave the Aqua Mist panel some extra detail by using the Nesting Basics: Pierced Rectangle dies

I added in some additional images from the Woodblock Prints on the pink panel of this card. It really gives the card some additional visual movement, but with the tone-on-tone stamping, it keeps things subtle to eliminate a cluttered design. I had so much fun putting these two cards together! Thanks for fluttering by!

Friday, April 26, 2019

SugarPea Designs April Release Day 5

Well, friends, it's the 5th and final day of the SugarPea Designs April release! I hope you've enjoyed seeing all of the fun new products that are available TODAY starting at 6 PM ET! Today the team is showcasing 2 new sets; Follow Your Dreams and For The Graduate. For The Graduate has a coordinating SugarCuts set as well as a coordinating stand-alone word die that says "Congrats"! I have 2 designs to share with you today, but first, you'll want to head to the other designers' blogs as well to see what they have come up with!

I had a lot of fun creating all of the brightly colored word strips for this fun design. I'm planning on using this as a graduation card for one of the girl graduates in the neighborhood. As I was editing my photos, I realized how cute the black circle would have looked with one of the graduation cap images from the For The Graduate hung at a jaunty angle! I think I will make the addition before I send it out! 
Image may contain: text

 I really like how all of these sentiments work so well together to create this colorful graduation design! To begin, I cut all of the different colored strips and then used my Mini MISTI to make sure that the "follow your dreams" sentiment was in the same place on each of the stamped strips. I didn't add the sentiment to the light green, yellow, and orange strips since they are covered up with the circle.  I heat embossed the "they know the way" in white onto a black strip to set it apart from the other strips.
I also heat embossed the "go and do amazing things" sentiment in white onto a circle that has been die cut using the new Card Front Element Builders II SugarCuts. The black card base has also been die cut using it as well.
Image may contain: text


 Each of the sentiment strips is popped up using mini foam squares and placed on the card with equal spacing. The black square is also popped up with foam squares to give it even more dimension. 
 My second set of cards uses the new "For The Graduate" stamp set and coordinating "For The Graduate" SugarCuts. I really like how professional these card turned out with the gold embossed details. I used the school colors to make the cards more personal and fitting for the two graduates. 
No photo description available.
This really is such an amazing set and I really love how it has so many details and sentiments; I really can't see myself needing another graduation set! To begin, I stamped and die cut the graduation caps and diploma rolls. I also die cut the smaller gold details using some gold specialty paper to give the card some extra depth and detail.
No photo description available.

As you can see, I used the Card Front Element Builders II to create this design. The "happy graduation" sentiment fits perfectly on the banner piece that is included in this die cut set. I used my Mini MISTI to do all of the stamping for the "class of 2019" portion to make sure I got it all lined up properly. 

There is also a coordinating "Congrats" stand-alone word die that goes with this set. I didn't use it on today's cards, but it will definitely come in handy in the future.
Image may contain: text

Well, that's all for today! I hope you've enjoyed the Sweet Peek Week! Don't forget to go shopping at 6 PM ET to make sure you get everything on your list! Thanks for fluttering by!


Thursday, April 25, 2019

SugarPea Designs April Release Day 4

 Hello and welcome to day 4 of the SugarPea Designs April release! Today I'm sharing two cards using the new Sprout, Bloom, Grow stamp set and coordinating SugarCuts.  I had so much fun building these spring time scenes, but before I get started on the details of these two designs, dont forget to head to the other designers' blogs to see what they have come up with.
I couldn't wait to get these adorable rain boots inky. To begin, I stamped the boot image 4 times onto a piece of yellow polka-dot paper. I also stamped the boot image onto white card stock and die cut them using the coordinating Sprout, Bloom, Grow SugarCuts. I fussy cut around the polka-dot boots and adhered them over the white piece using liquid glue. After the four boots were complete, I added a coat of Crystal Glaze and set them aside to dry.

No photo description available.
In the meantime, I got to work creating all of the pieces for the rest of the 2 designs. I stamped and colored each of the pieces I wanted to use. I really wanted the scene to be bursting with flowers, grass, and that sweet little bunny!

I normally don't center my sentiments but I thought it was so cute floating among the clouds! To give my design the scalloped edges, I used the Card Front Element Builder. I had so much fun creating these two cards! Thanks for fluttering by!

Wednesday, April 24, 2019

The Greetery Launch Week-Day 3

EEP! I'm so excited for today's post! Have you heard the news that the amazing and wonderful Betsy Veldman is launching her new stamp company called The Greetery? I was over the moon when I heard the news and even more excited when she asked it I would help  with her first launch! I've got a lot of cards and photos to share with you today using a few of the new products; BotaniCuts Succulents dies, Terrarium Dies, Sentiment Suite: Thinking of You + Basics Dies! Before I dive into the specifics of today's designs, let me first give you some important information; you can find The Greetery blog HERE and the STORE will be going live at 10 AM ET on Friday, April 26th. There's a few other designers participating in today's festivities so you'll definitely want to head to their blogs to see how they've used these incredible new products!

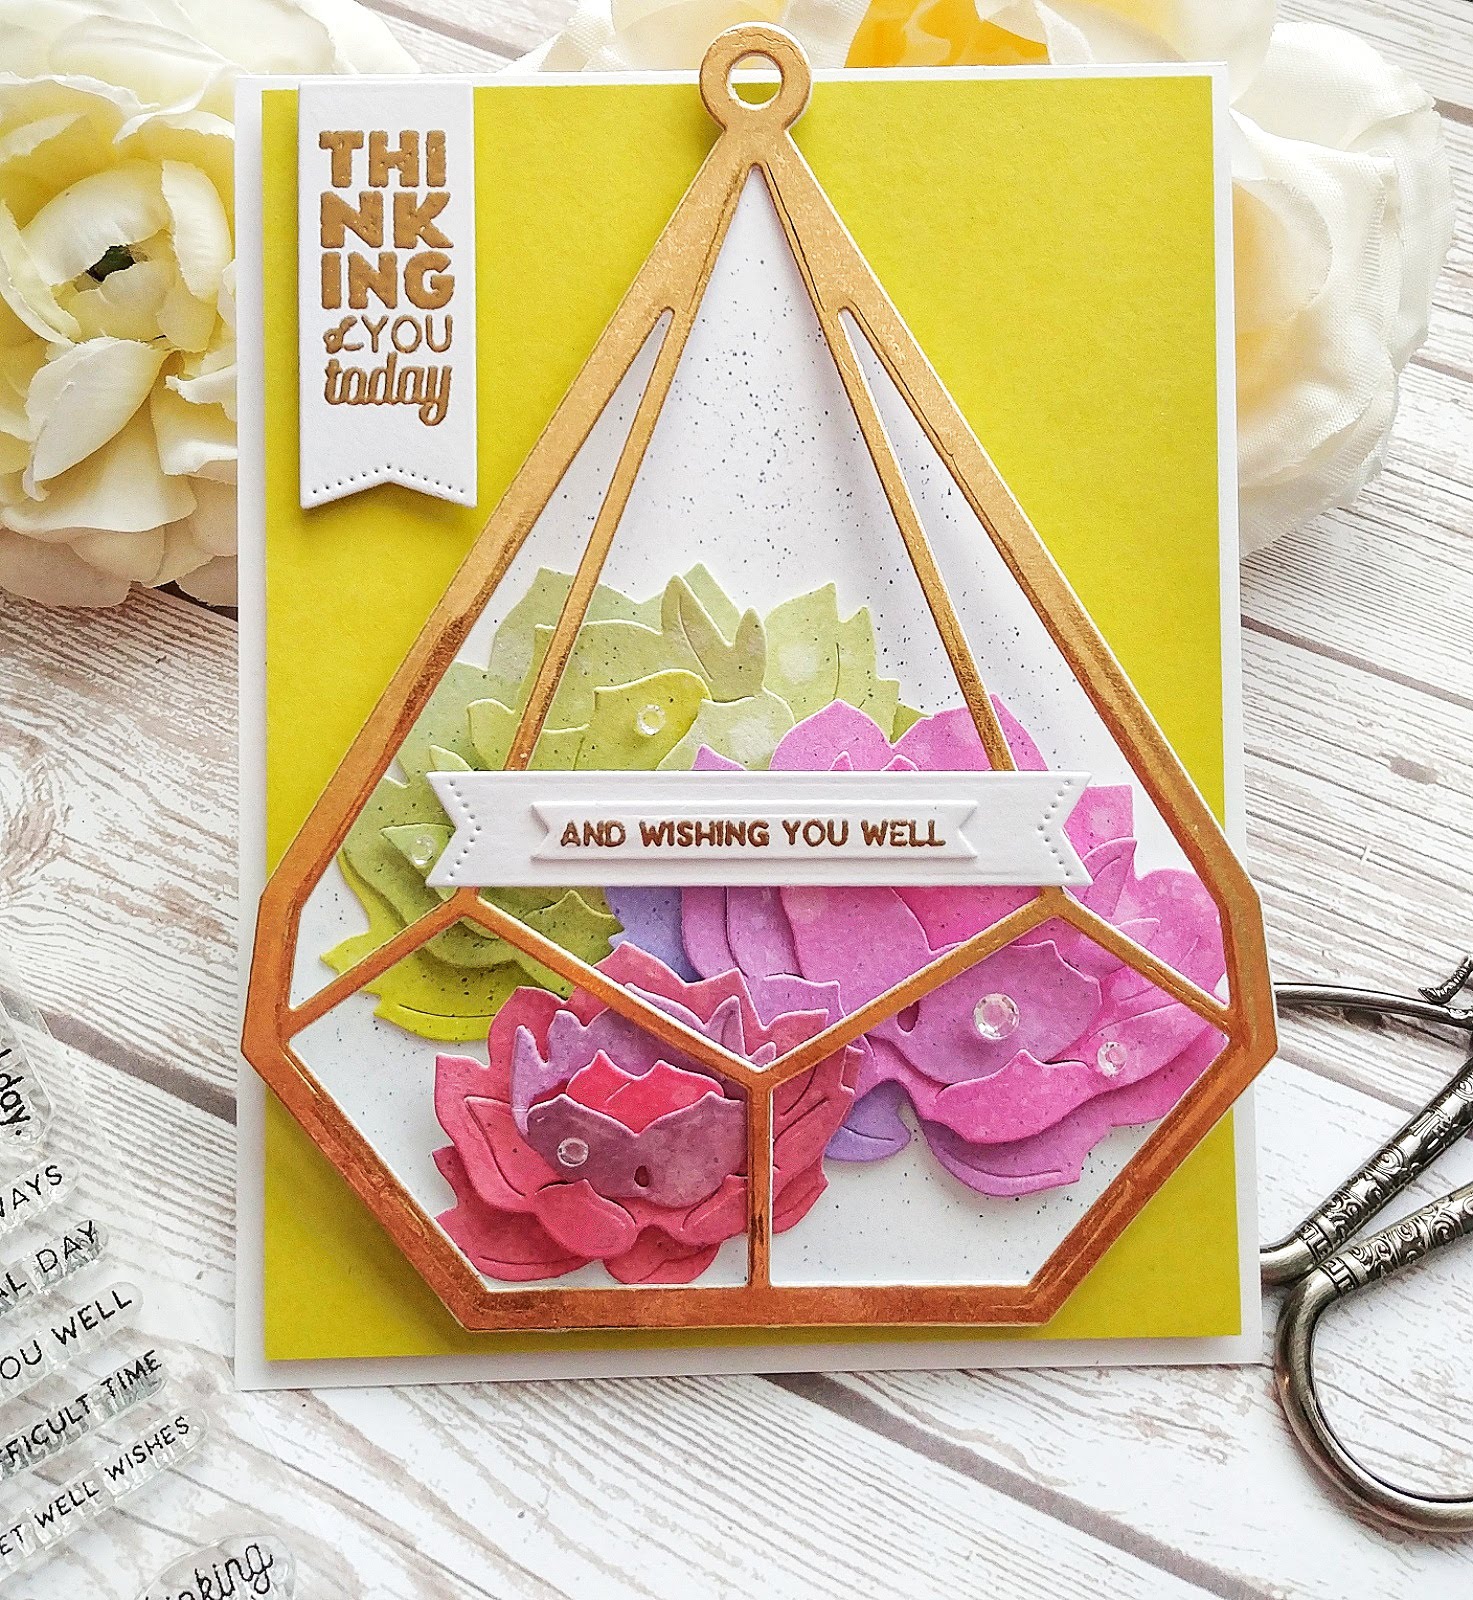
 I had so much fun working with all of these amazing new products; as I mentioned before  I have a lot of photos and a lot of samples because they are just THAT fun! This was actually the last design that I made in the series, but it was so easy and fun, but I love how it turned out. To begin, I created an ombre watercolor panel and then dry embossed it with an embossing folder that I felt would highlight the amazing new Terrarium Dies. This is the smaller of the two and fits so nicely on a card front. 

 I also die cut the BotaniCuts Succulents dies out of watercolor paper. I assembled them without any paint on them at all. There are two sizes included in the set, and each succulent consists of 4 pieces. Once you get each piece designated to its rightful spot, they come together so quickly, hence the reason why I have so many samples! LOL! Once they were all assembled, I spritzed them lightly with a spray bottle and simply added a wash of a few different colors of green paint. I also added some purple to the tips of the smaller one for a little bit of contrast.
 Once they were all painted, which took me just minutes, I added some black paint splatters to both the background panel and the succulents. While the paint was drying, I got to work on the sentiment and the terrarium.

In my other samples, I kept the succulents within the designated confines of the terrarium shape, but for this one, I decided to get a little crazy and just design it without realism as a factor. I die cut the smaller terrarium out of specialty gold paper as well as once from white cardstock. I glued them together using liquid glue and allowed them to dry.


The "thinking of you" sentiment is from the new Sentiment Suite: Thinking of You set and is stamped in black on one of the new Basic Dies. Once I had all of the elements created, it was just a matter of assembling it all together. I added the embossed background to a standard top folding A2 cardbase using foam squares. The succulents are arranged with foam squares as well. The terrarium is adhered to the card using 1/ 8 inch ScorTape on the bottom edge. I bent it over the top of the succulents and added some liquid glue to the perimeter of the hole at the top and held it in place with craft tweezers to dry. This gave it a very strong bond and keeping it's shape. the sentiment is added to the card as well. A trio of sparkling clear sequins finish off this first design.
This photo gives you a little peek into what I have left to share with you. As you can see, I kept everything quite cohesive in my designs. Sometimes I see myself creating a collection of cards like a fashion designer creates a collection for a fashion show; most likely too much Project Runway! ha ha!


This next design just showcases the BotaniCuts Succulents WITHOUT  the terrarium. I love that they are so powerful on there own; so many possibilities.  The layout for this design was actually inspired by the back of the packaging that the sentiments came in. I wanted to give a nod to Betsy and her vivid imagination when it comes to both designing product, but also her great Graphic Design skills! Can we just talk about The Greetery logo? I mean, c'mon! It is pure genius if you ask me!

 To begin this design, I actually just created a long blended panel using Distress Oxide inks in the colors that I wanted to showcase in this design. Once it was done, I simple die cut the pieces for both the large and small succulents. Once they were assembled, I spritzed them with water and Shimmer Spray for some added detail. I love all of the variation in colors that you can get from the blended panel.
I did some black ink splatter on a piece of 4 by 5 1/2 inch white cardstock and then layered the sentiments using foam squares. I love all of the different fonts, sizes, and layouts of these sentiments. There is nothing that won't work for your particular design idea.

 Once I had the sentiments in place, I simply added the succulents with foam squares. The entire panel is adhered to a standard A2 cardbase. I added some sparkling clear sequins onto this design as well.

This next design, uses some more blended succulents, but this time just the smaller of the two and completely encased in the small terrarium.
This particular design is very controlled and straight but the addition of the ink blended background gives it the whimsy that I love!

 I adhered the terrarium on this card exactly as I did in the first card as well as constructed it the same. Both of these sentiments are from the Sentiment Suite: Thinking of You. There are quite a few smaller straight sentiments that complement the larger phrases to make is very versatile. 
The sentiments are all heat embossed in gold to coordinate with the terrarium.
This is the final design in the collection and uses the large terrarium die which is so amazing. It really sets the stage to let all of the succulents shine. 

The BonaniCuts succulents dies are so well designed; there are slits where you simply nest each piece inside the other to create these amazing die cut pieces.

I created an ink blended panel to create these succulents as well, just with different colors. If you do a search for "succulents" your mind will be blown with all of the different colors that you can find. All of mine are based off of real succulents. Nature is amazing!


For this particular terrarium, I removed the prism portion from the basic outline shape so that I could create the solid white portion in the back to really make the colors pop! 


 I did some color spritzing to the white portion with a blue marker to give it some added detail.
The sentiments for this card are die cut using the Basic Dies and are heat embossed in gold as well. I added some sparkling clear rhinestones here and there on the succulents to mimic water droplets as well as add in some sparkle and shine! I had so much fun creating these designs and I hope you've enjoyed today's post! Once again, I am honored and thrilled to be taking part of this amazing launch! Thanks for fluttering by!