Showing posts with label slim line cards. Show all posts

Tuesday, December 19, 2023

The Greetery {Christmas Garland Slimline Card}


Hello friends! I’m happy to be here today sharing a slimline card that features some of my absolute favorites from the latest release from The Greetery! I had wanted to make a card featuring a wooden ball garland for the release, but just didn’t end up executing that particular idea. I couldn’t get it out of my mind, so I was happy to create this card to share with you today!

To begin, I die cut 4 wreaths using the Magnolia Wreath die from white cardstock.  I used twisted citron, mowed lawn, and rustic wilderness Distress Oxide inks and a finger dauber to bring them to life. I adhered two wreaths together using strategically places foam squares to give me two finished wreaths. I knew I would want additional greenery for my design, so I also die cut some BotaniCuts Juniper pieces to tuck here and there.  I set them aside and got to work on the bead garland.


I used the Ribbon Maker: Wood Bead Garland die and die cut the curvy design 4 times from Kraft cardstock. I glued two together for a nice, sturdy piece and then added some brown ink around the edges for contrast and depth. I glued them together after I had fussed and fidgeted with how I wanted the garland to hang for this design. I ended up cutting off the pieces at the top so it would hang just right; you can adjust things how you need if you’d like to try this idea!

Every Christmas, I add a beautiful icy garland over my fireplace, but have fun adding all kinds of “extras” like snowflake ornaments, icicle ornaments, etc. so of course I needed to give this garland some “extras” as well! I added both sizes of tassels using the Tassel Large Die and the Tassel Small Die.  I simply die cut them from Rustic White cardstock and adhered them together. I couldn’t actually thread them through the bead garland because of size, so I simply snipped a strategic slit in the loop and added them that way, securing them with foam squares. I also added a few gold glitter stars in two sizes; you will find these darling stars in the Rustic Star Small die collection and Rustic Star Large die collection.

I was having a hard time deciding on a sentiment, but I knew it would need to be one with a coordinating die, so I chose the gorgeous Comfort and Joy stamp setwith its coordinating die. I heat embossed it in white onto black cardstock and then die cut it. The black and white provided the perfect contrast against the red and greenery.


For the background, I die cut the largest panel included in the Nordic Slimline die collection out of Pure Poppy cardstock. I added that to a slimline-sized Kraft card base using foam squares. Once that was done, it was finally time to pull it all together….my favorite part! Once I had the wreaths, garland, and tassels in place, I added some white paint splatter. The stars are added using liquid glue and then everything got a generous sprinkling of glitter for that holiday sparkle I love so much! I also gussied up a Kraft slimline envelope using the Snowflake Prints Stencil and the Four Square Holiday Tags stamp set. I don’t often make slimline cards so this was a fun change-of-pace for me! I hope you’ll try your own garland card! Thanks for flluttering by!

Tuesday, March 9, 2021

The Greetery Spring Fever Release Day 2

Welcome to day 2 of the Spring Fever release from The Greetery! Thanks for ALL of your sweet comments on yesterday's post! I'm sharing two projects with you today using products that I know you're going to love! This first project uses a few things from yesterday paired with a fabulous new collection of products called Print Shop Floral Frame! If you fell in love with the Print Shop Floral background last year, you're going to love this framed option!

I couldn't resist adding in another bow from the "Put a Bow On It" stamp/die that was showcased yesterday! I know I will be using this one quite a bit, or at least as much as my design will allow! I really just want to put it on everything! LOL! The sentiment is from the Bunny Hop stamp set that was showcased yesterday as well!

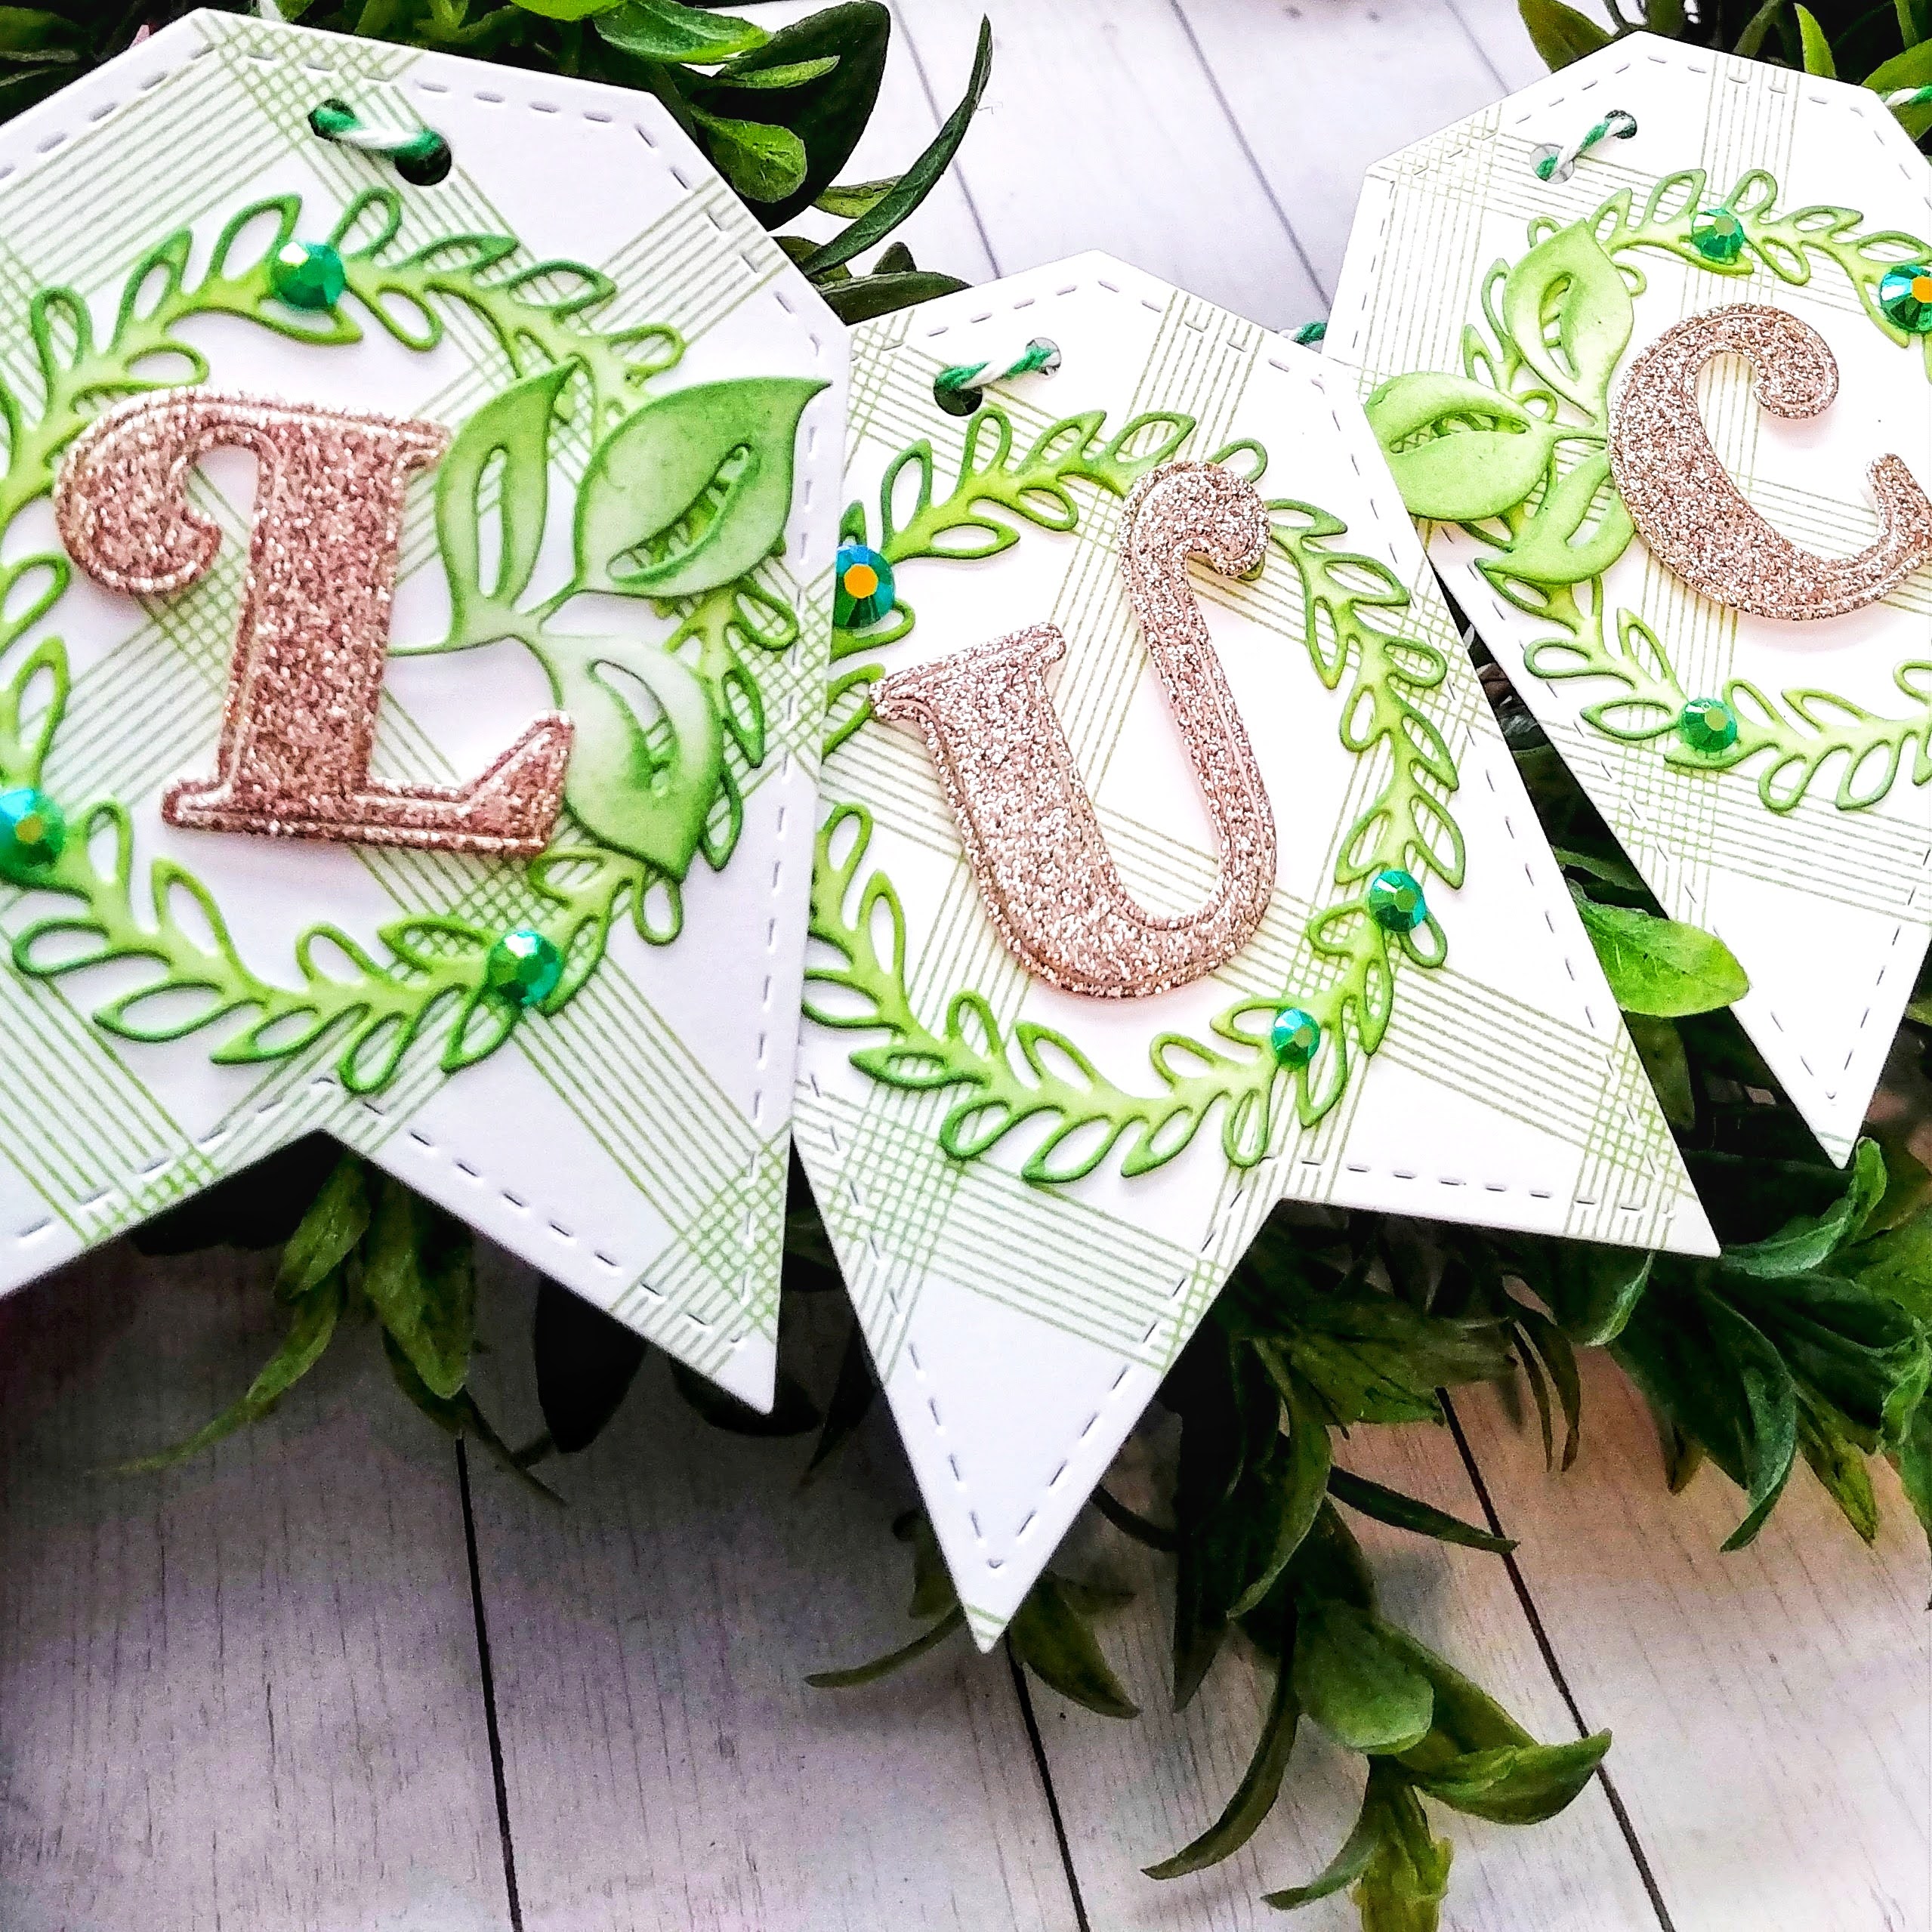
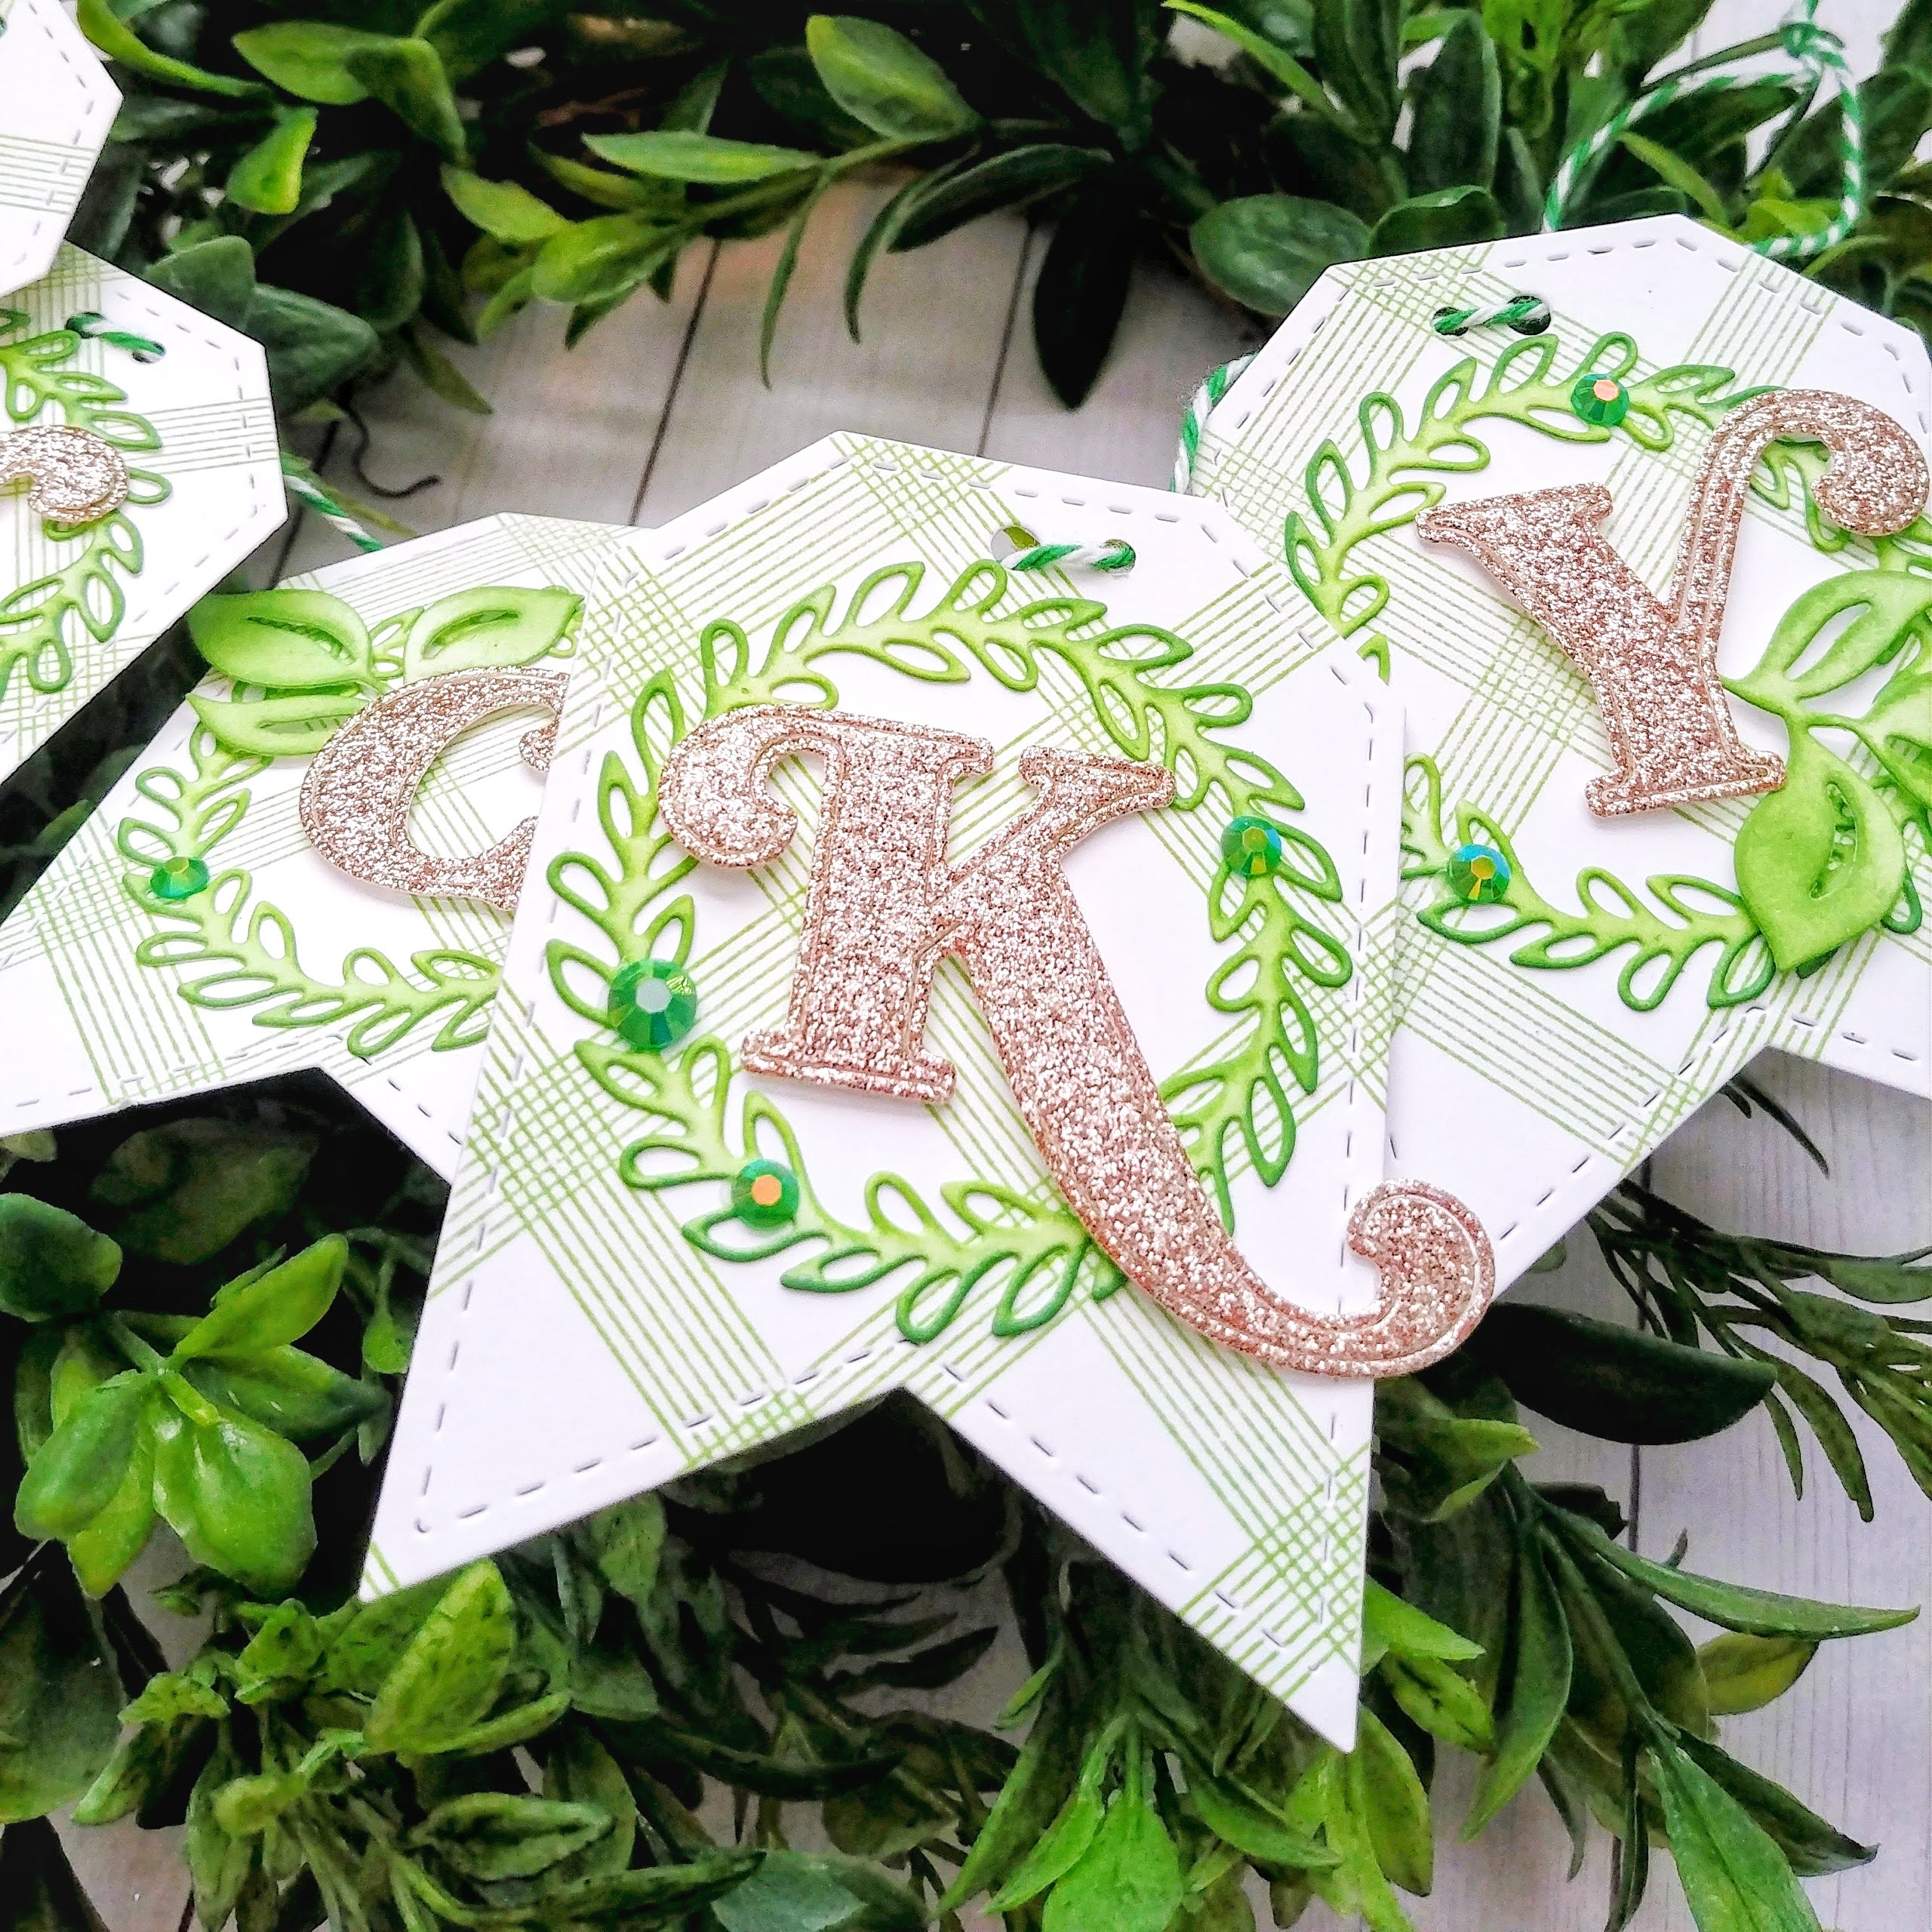
To begin, I used the Print Shop: Floral Frame stencil to get started. Next, you use the coordinating stamps to allow it to come to life! I chose bright, springtime colors again because I just love them1

I used the "guide" that comes with the frame die (for if you cut the frame apart) and used it as a stencil to mask so I could add the blue ink in the center of the frame along with some ink splatter.

I added a lot of glitter and sequins to give the frame and bow some sparkle and shine!

I layered the entire focal panel onto a top folding Hawaiian Shores A2 card base to make the colors pop!

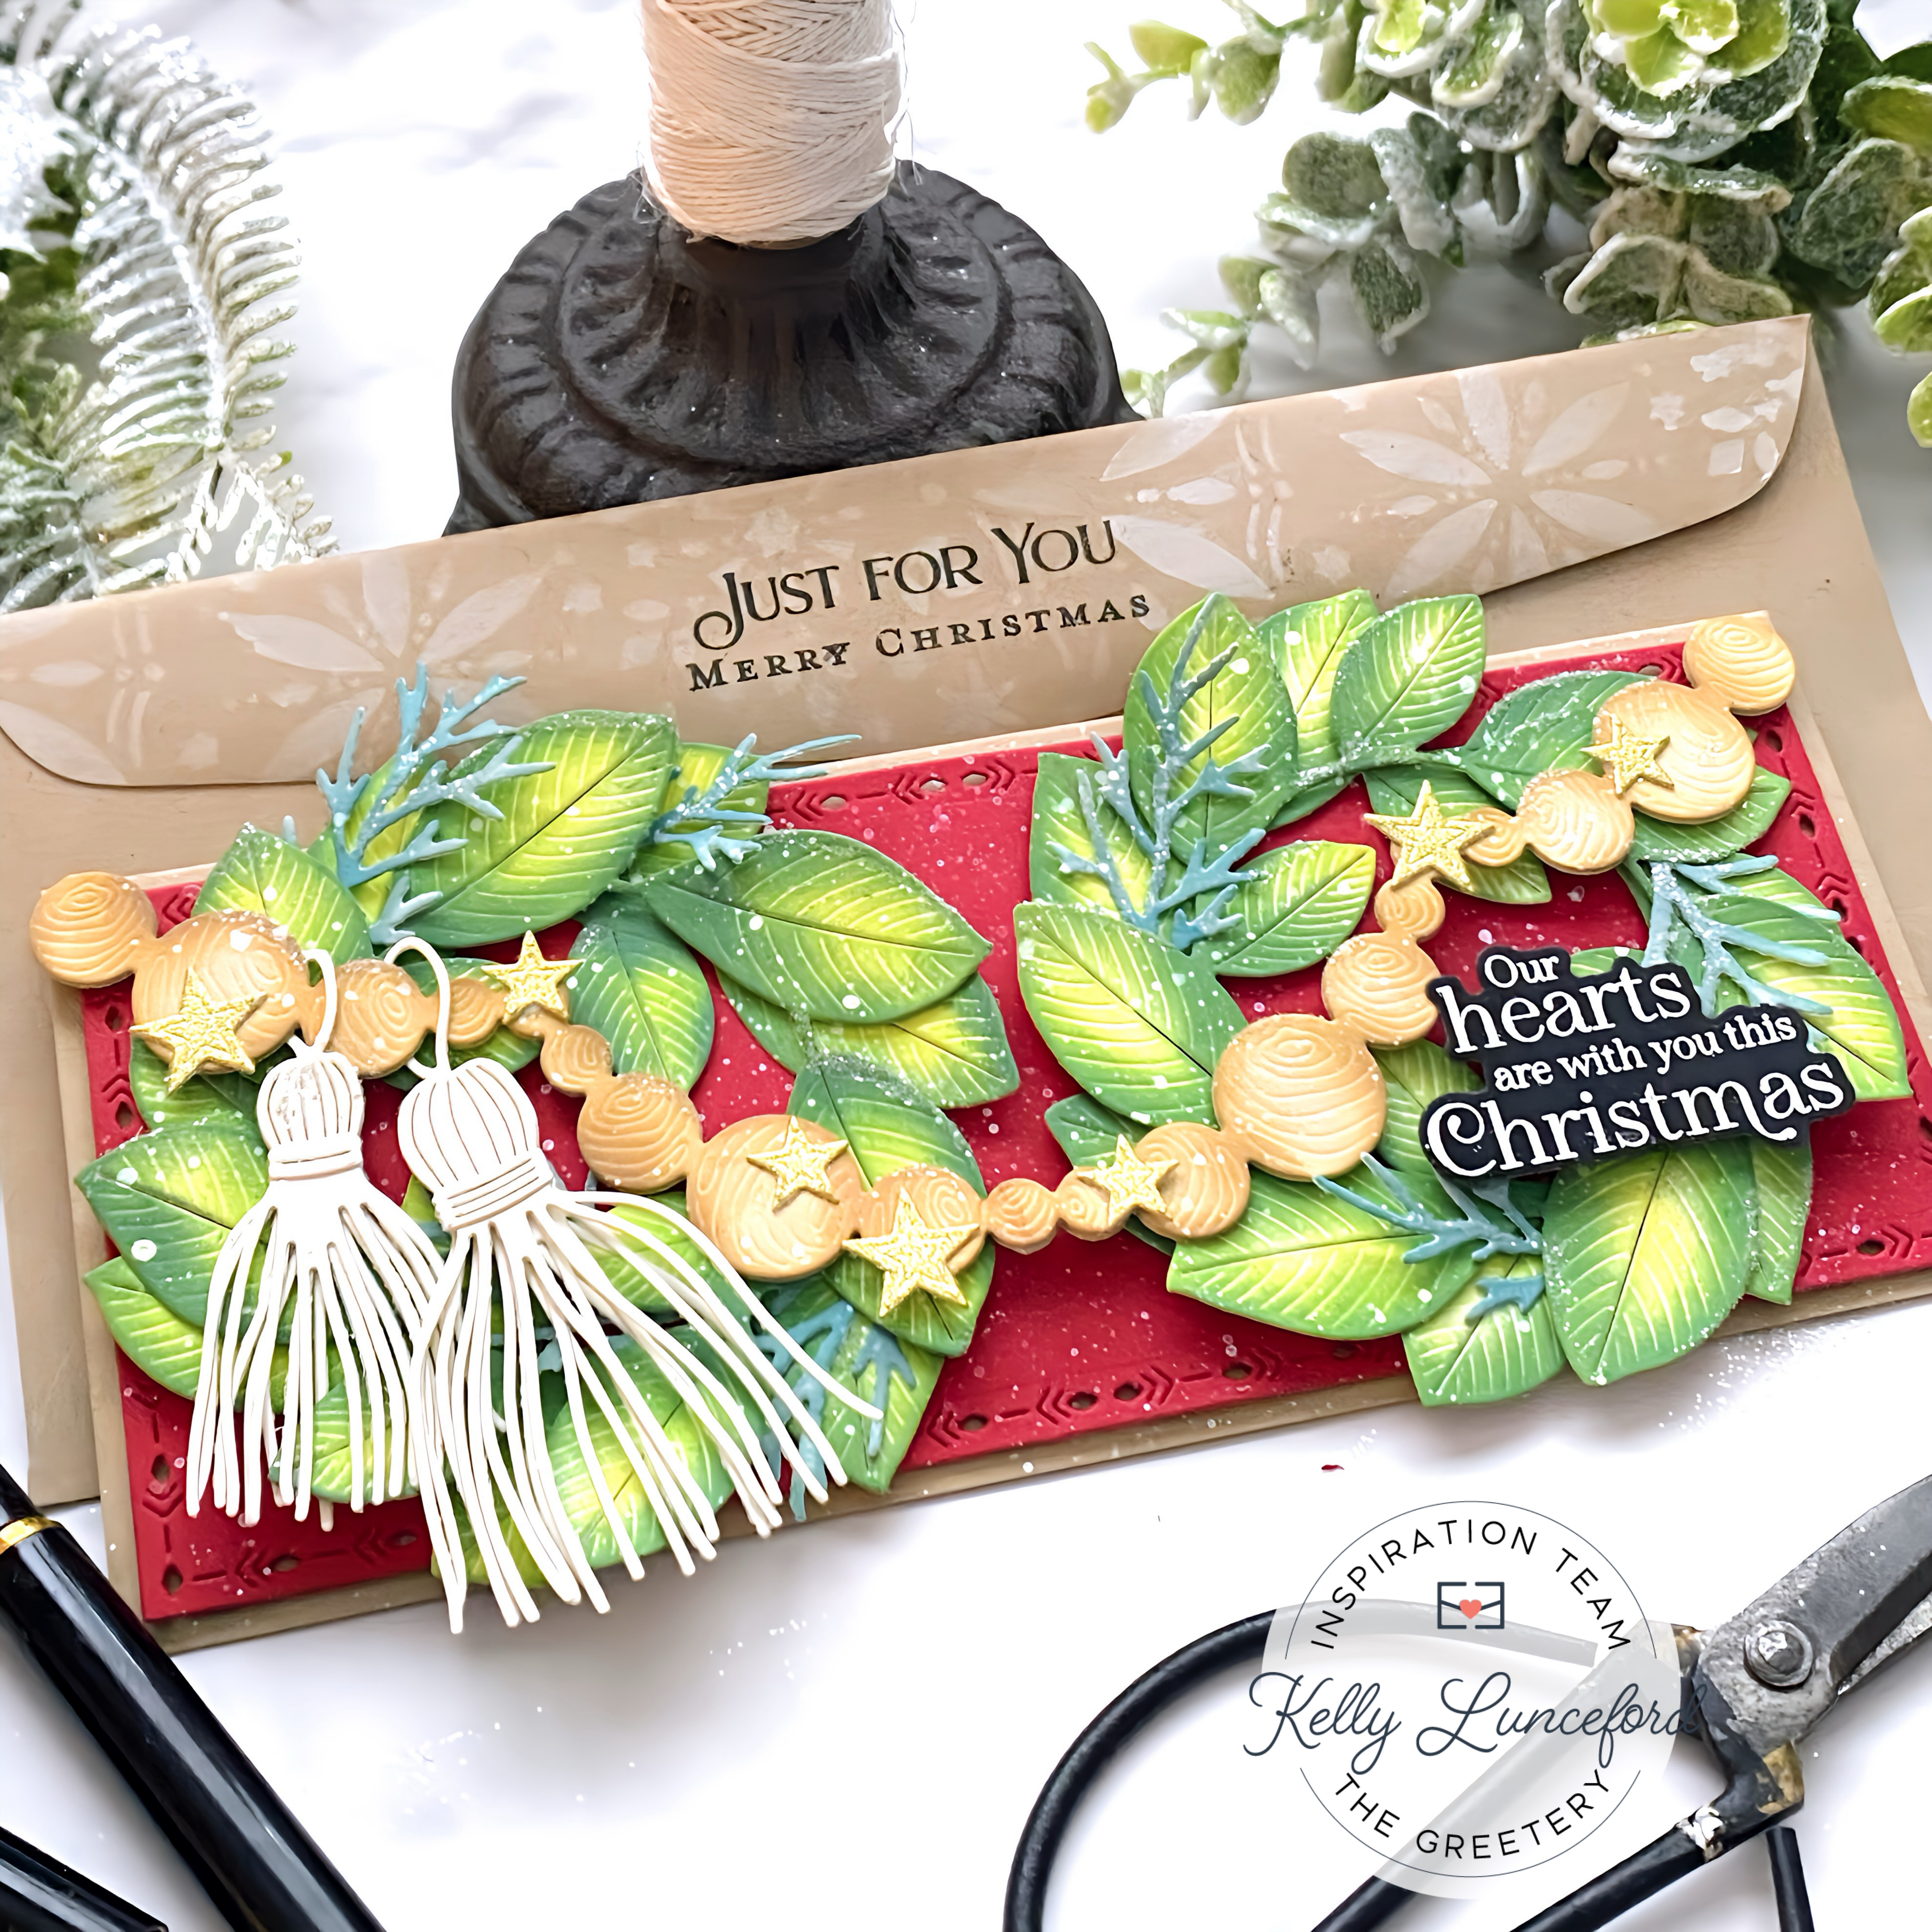
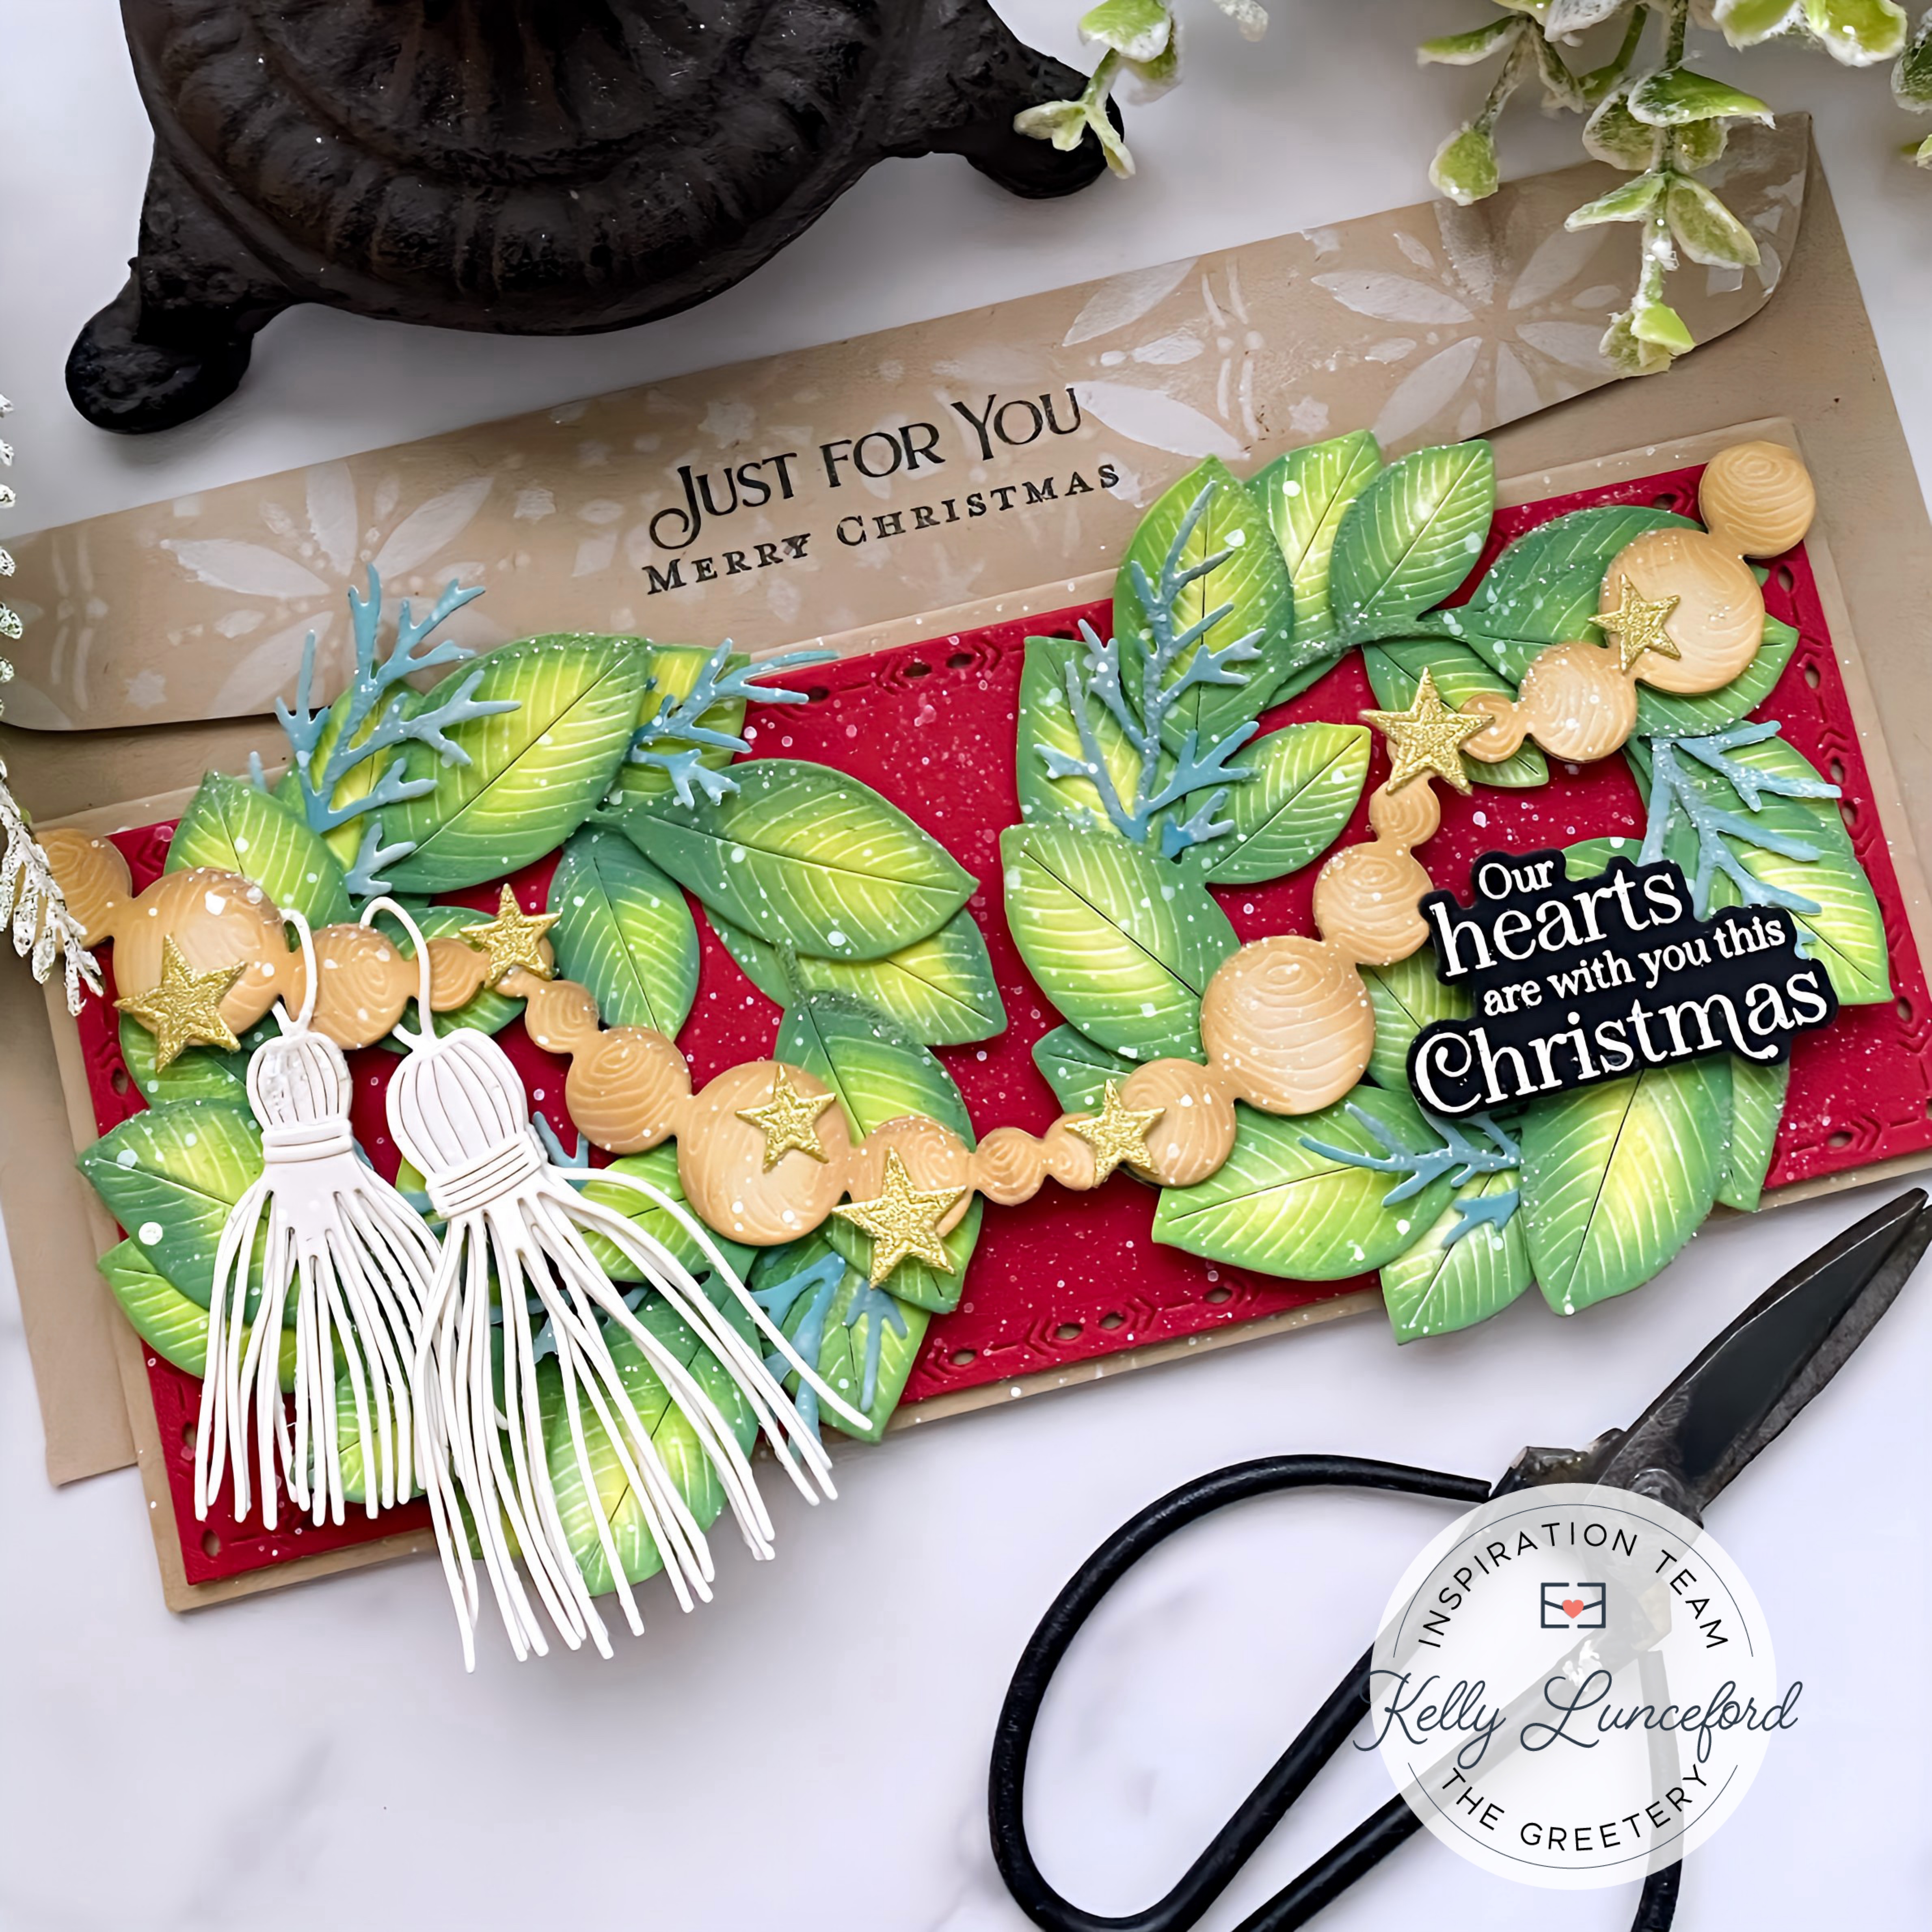
I'm super thrilled that there are some fabulous new slimline options for your card making! I paired it with the new "Full of Grace" stamp set and the different stand-alone images that are included in the Print Shop: Floral Frame stamp set.

I did some loose watercoloring in the background as a backdrop for the sentiment and the flowers.

The black sentiments really pop off the yellow background framed with the flowers! Everything will be available for purchase tomorrow! Don't forget to stop by the other designers' blogs to see how they've used these gorgeous new products! Thanks for fluttering by!


Monday, February 8, 2021

Pinkfresh Studio February 2021 Stamp, Stencil and Die Release Blog Hop

Hello and welcome! I'm thrilled to be here today for the Pinkfresh Studio February 2021 Stamp, Stencil and Die Release Blog Hop! I have three projects to share with you today using quite a few of the new products! This is such an amazing and beautiful new release; I hope you love it as much as I do!  Pinkfresh Studio will be giving the entire release away to a lucky winner on Instagram, You Tube, and Facebook, so be sure to enter to win there! As always, leave a comment here for a chance to win a $25 gift certificate.


My first project for today uses the fabulous new Slimline Layered Starburst Layering Stencil. You might recall that an A2 version came out for the last release, so I 'm excited that there is a slimline option as well! I haven't even used the A2 version (am I crazy, or what?) so it was super fun to use it on this floral design!

The next suite of products are absolutely AMAZING! I'm just going to apologize right now because you will be seeing A LOT from me with these flowers! ha ha! I used the Friendship Blooms Layering Stencils paired with the Friendship Blooms die set to create the beautiful flowers and leaves and the sentiment is from the coordinating Friendship Blooms Stamp Set.

The awesome thing about this bundle of products is that you can use the stencils by themselves, or with the dies, OR combined with the stamp set. You can also just use the outline stamp images by themselves to use with any coloring medium of your choice, whether it's watercolors, pencils, Copics, etc. If you don't feel as confident with your coloring skills OR you're short on time, the coordinating stencils make creating these beautiful blooms a cinch! 

I wanted my flowers to be soft and airy, so I opted for just the stencil/die combo, but can't wait to try heat embossing the line images over the top for a different look! Like I said, watch out!

The sentiment is also from the same set and I absolutely LOVE each and EVERY sentiment in this entire release! I want to make a card with every one! There are just so many to love!

I finished it off with some glitter and sparkles, of course!
My second card uses a few more new goodies; up first is the Folk Floral Print Layering Stencils all done up in bright, summer-y colors! This is seriously such a fun and beautiful stencil set and the color combinations are endless! It's amazing what color can do to create a different mood, don't you think?

I also used the new Leafy Circle Die as an anchor for the fabulous new Happy Birthday Sentiments! I am super excited for these because they are perfect for anyone and everyone and the mixing and matching possibilities are endless! I think this set really fills a need to help us create fabulous birthday cards!

Another thing that I really like about this sentiment set is that is has a coordinating Happy Birthday Sentiments Die for all of the main words in the set. You can see I die cut the "celebrate" word and then heat embossed the "Birthdays look good on you" portion of the sentiment onto a strip of vellum. I am obsessed with the way these particular sentiments look heat embossed! All the heart eyes!

My third and final project for today is a quick and easy home decor piece that I made using the new Leafy Circle Die and the new Curvy Leaves die set paired with some older favorites! I was looking for a few last-minute Valentine's Day decorations the other day only to find that the display had really been picked over. St. Patrick's Day decorations, however, were full and plentiful! I picked up a few new things and thought how fun it would be to make a coordinating banner using these new leaves and wreath!

I die cut 5 wreaths, one for each letter and added some Key Lime and Evergreen ink over the top using a blender brush. I set them aside and then die cut the LUCKY letters out of gold glitter cardstock using the Lea's Ornate Uppercase Alphabet dies. I have been making banners for quite a few years and I have previously been using chipboard letters. Some of my favorite letters that I've used over the years are from this same font! I love that I can make an endless supply of letters and never run out. Depending on the word I was using on my banners, I often had to buy two packages so I would have enough vowels! Can I buy a vowel? LOL!

I layered the letters onto the smallest banner piece from the Essentials: Shaker Tags dies, which is the perfect thing for this little banner! I stamped each of the pennants using the Diamond Tiles stamp and Key Lime ink. I added a few jewels for added sparkle. The banner pieces all have a hole at the top since they are actually tags, so I just simply added another hole using a Crop-a-dile so I could thread the green baker's twine through the holes. I'll have to take a picture of it in March with all of my other St. Paddy's decorations! Don't forget to head to the other designers' blogs to see their fabulous creations and to see even more of the new products! Thanks for fluttering by!

You are invited to the Inlinkz link party!

Click here to enter

Tuesday, December 1, 2020

Pinkfresh Studio {A Little Something to Brighten Your Day}

Hello and welcome friends! I've veered away from holiday crafting to share this bright and cheery card! I'm sharing it on the Pinkfresh Studio blog today and thought I'd share it here as well! I've had a nice, (not relaxing, but nice) Thanksgiving weekend! The "halls have been decked" and things are quite festive around here! ha ha! That being said, I'm ready to get back to crafting and sharing with you all!
This card was created using products from the the two latest releases using some of my new favorites! To begin, I die cut the GORGEOUS Essentials: Slim Stitches die and added some Marigold and Clementine ink around the edges. (side note...everything for this card was die cut from white cardstock and then colored with blender brushes and ink pads)

I've been dying to try doing the "stencil only" technique with the fabulous Floral Notes Stencils like I've seen a few of the other designers do. I love how soft and pretty it looks with these beautiful flowers. I used the Floral Notes die and then added color using the stencils. I stamped the sentiment, which is from the Floral Notes stamp set, directly over the stenciled piece.

Once that was done, I added everything to the stitched background panel, starting with the Essentials: Slim Stitched Scallop Rectangles that has Clementine ink around the edges. Next, I added the pure white Diagonal Stitched Circle over the top of that and the final piece is the stenciled flowers.

The entire focal panel is added to a slimline card base using ScorTape. I added some ink splatter and a few Essentials: Jewels to finish off this cheery design! I had so much fun putting this together (I actually made 2) ! Thanks for fluttering by!


Friday, November 20, 2020

Pinkfresh Studio November 2020 Essentials Die Release Blog Hop


Welcome to the Pinkfresh Studio November 2020 Essentials Die Release Blog Hop! There's so much to love about this new Essentials release for both A2 and Slimline cards alike! I'm showcasing two Slimline cards today, but you'll definitely want to hop along to the other designers' blogs {linked at the bottom of today's post} to see all of the fabulous inspiration they have for you as well! As always, Pinkfresh Studio will be giving the ENTIRE new release to one lucky winner on their Facebook page, IG account, AND You Tube channel so make sure you leave a comment there for a chance to win!
Leave a comment here for a chance to win a $25 dollar gift certificate to the Pinkfresh Studio shop. All winners will be announced on November 30th, 2020 on the GIVEAWAY PAGE


I used a combination of the new products paired with some of my favorite stamps and dies to bring these two cards to life. I chose to create two identical cards using different colorways and heat embossed sentiments. It's always so fun to see how color plays such a vital role in the emotion of a card!

My first card uses an apricot/blue color combination as the contrasting colors play off of each other to enhance their vibrancy!  To begin both cards, I die cut the large Slim Diagonal Stitched Plaid Die from white cardstock (actually, I ONLY used white cardstock for both cards) and then added some Peach Fuzz and Apricot ink around the edges, using the darker shade around the outside edge. I also die cut the beautiful Slim Stitched Scallop Rectangles, which I am IN LOVE with, and added the darker Apricot ink around the outside edge. This is layered up onto the Slim Diagonal Stitched Plaid panel using foam squares for dimension.

Next, I die cut the GORGEOUS Fancy Oval Frame and added the Apricot ink to it as well, using a heavier hand to really get the color saturated. This is added to the center of the panel using foam squares. I intentionally left the cut out portions intact so that I could add the foam squares and have them hidden.

I die cut the "HUGS" word using the AMAZING Heather Uppercase Die Set and left them plain white to really let them pop against the Flowers

The sentiments, which are also from the Modern Layered Floral Stamp Set, are heat embossed in gold onto a strip of vellum and then wrapped around the entire focal panel and secured in the back using adhesive.

Both cards got a few Essentials: Jewels and some sequins for some sparkle and shine! Don't forget to head to the other designers' blogs to see what fabulous inspiration they have to share! Thanks for fluttering by!


You are invited to the Inlinkz link party!

Click here to enter

Friday, October 16, 2020

Pinkfresh Studio October 2020 Slimline Stamp, Die, and Stencil Release Blog Hop


Welcome friends, to the Pinkfresh Studio October 2020 Slimline Stamp, Die, and Stencil release blog hop! Try saying that five times fast! ha ha! I'm sharing two projects with you today using a handful of the new products. I'll also be sharing the link with the other designers on the hop at the bottom of this post. You'll definitely want to hop along to see all of the fabulous inspiration that they have to share! 
Lots of business today, so bear with me....but it's FUN business! As always, Pinkfresh Studio will be giving away the ENTIRE release on their Instagram Page, Facebook page, and You Tube to one lucky commenter! Leave a comment on my blog for a chance to win a $25 gift certificate to the Pinkfresh Shop. Check the GIVEAWAY PAGE on Ocotber 23rd for a list of the winners. You MUST claim your prize within two weeks or it will be forfeit. Also, the Memory MISTI comes in handy when using these larger stamps, so My Sweet Petunia is offering the Memory MISTI at a 20 percent discount using the code PINK.


My first card for today uses the new You are My Favorite stamp set, You are My Favorite Die and the coordinating You are My Favorite Stencil set. I die cut the large floral image first and then lined up the stamp in my memory MISTI inside the negative space for perfect alignment.(because of the large size of these stamps they can become "floppy" and so it is helpful to line in up in the MISTI around the die cut negative). Once it was aligned correctly, I placed the die cut into the MISTI and stamped it in black ink.

Once you have the image stamped, the stencils come in to play. Please note, these stencils create a whimsical looking image, so they won't line up "perfectly" inside the black lines, so don't stress yourself out! LOL! You can use the colored reference sheet on the back of the stamp/stencil/die packaging to see how it is supposed to look when it is finished.
Once I had completed each of the steps with the stencils, I had some fun putting this card together. I really wanted to use this large sentiment and thought it would be fun to place almost in the middle and then frame it with the flower image. 

I decided to cut it and place it how I like around the sentiment. This really gives you some variety AND you could use it like this on a standard A2 card as well. The finishing touch of this card is the Diamond Plaid Layering Stencil inked up with Sweet Mustard ink. I only inked up the edges since you can't see the middle. I layered the focal point on top using foam squares for dimension. I added some glitter AND Jewels for maximum shine! I finished the design off with just a hint of pink ink splatter for added detail!


My next card uses the new Incredibly Grateful stamp setIncredibly Grateful die and Incredibly Grateful Stencils to create a Christmas design! I think it's always fun to explore different possibilities with our floral sets to stretch their use! I had so much fun putting this holiday design together using a few of the different background stencils and this rectangle floral wreath.

Once again, I die cut the outer portion FIRST, placed the stamp in to the negative space to get it lined up just right. THEN, I added the die cut in the MISTI and did the stamping and stenciling. Once that was all done, I die cut the inner portion to create the frame. This step is optional and you don't HAVE to die cut the center if you don't want to. 

I used TWO of the new stencils together to really bring some added pattern and detail to this card. I used the Diagonal Stripe Stencil on the outer Slim Ornate Banner Die and the new Diamond Motif Stencil on the middle panel. I love the hint of detail it adds beneath the die cut and ink blended letters. I added some glitter to the tops of the letters for some snowy detail and shine!

I always love adding a heat embossed sentiment over the top of the words I create on my cards. For this card, I used one of the sentiments from the fabulous new Our Home to Yours stamp set embossed in silver.

I used the AMAZING new Layered Snowflakes Dies stacked together in three groupings for some added detail. I just love how they look stacked together. To achieve this look It was important for me to keep some of the center portions in tact to reduce visual distraction. I used foam squares on the back to keep the larger center pieces in tact. Of course, the snowflakes got a sprinkling of glitter and jewels as well. The frame has a hint of glitter and a few jewels to finish this design off! Don't forget to hop along to the other designers' blogs to see what they have to share! Thanks for fluttering by!


You are invited to the Inlinkz link party!

Click here to enter