Wednesday, December 20, 2017

Mix it Up challenge #38-Merry and Bright!

Hello friends...the final countdown to Christmas is here. Today's card will most likely be the last Christmas design of the season and the year. I have had so much fun working on all of my holiday designs and this one is no exception. I'm over on the SugarPea Designs Blog today sharing this card for the current Mix it Up Challenge. This month it is all about stress-free and fun card making...because, ANYTHING GOES!!! It doesn't get easier than that, right?

Play-to-Win-Graphic---50
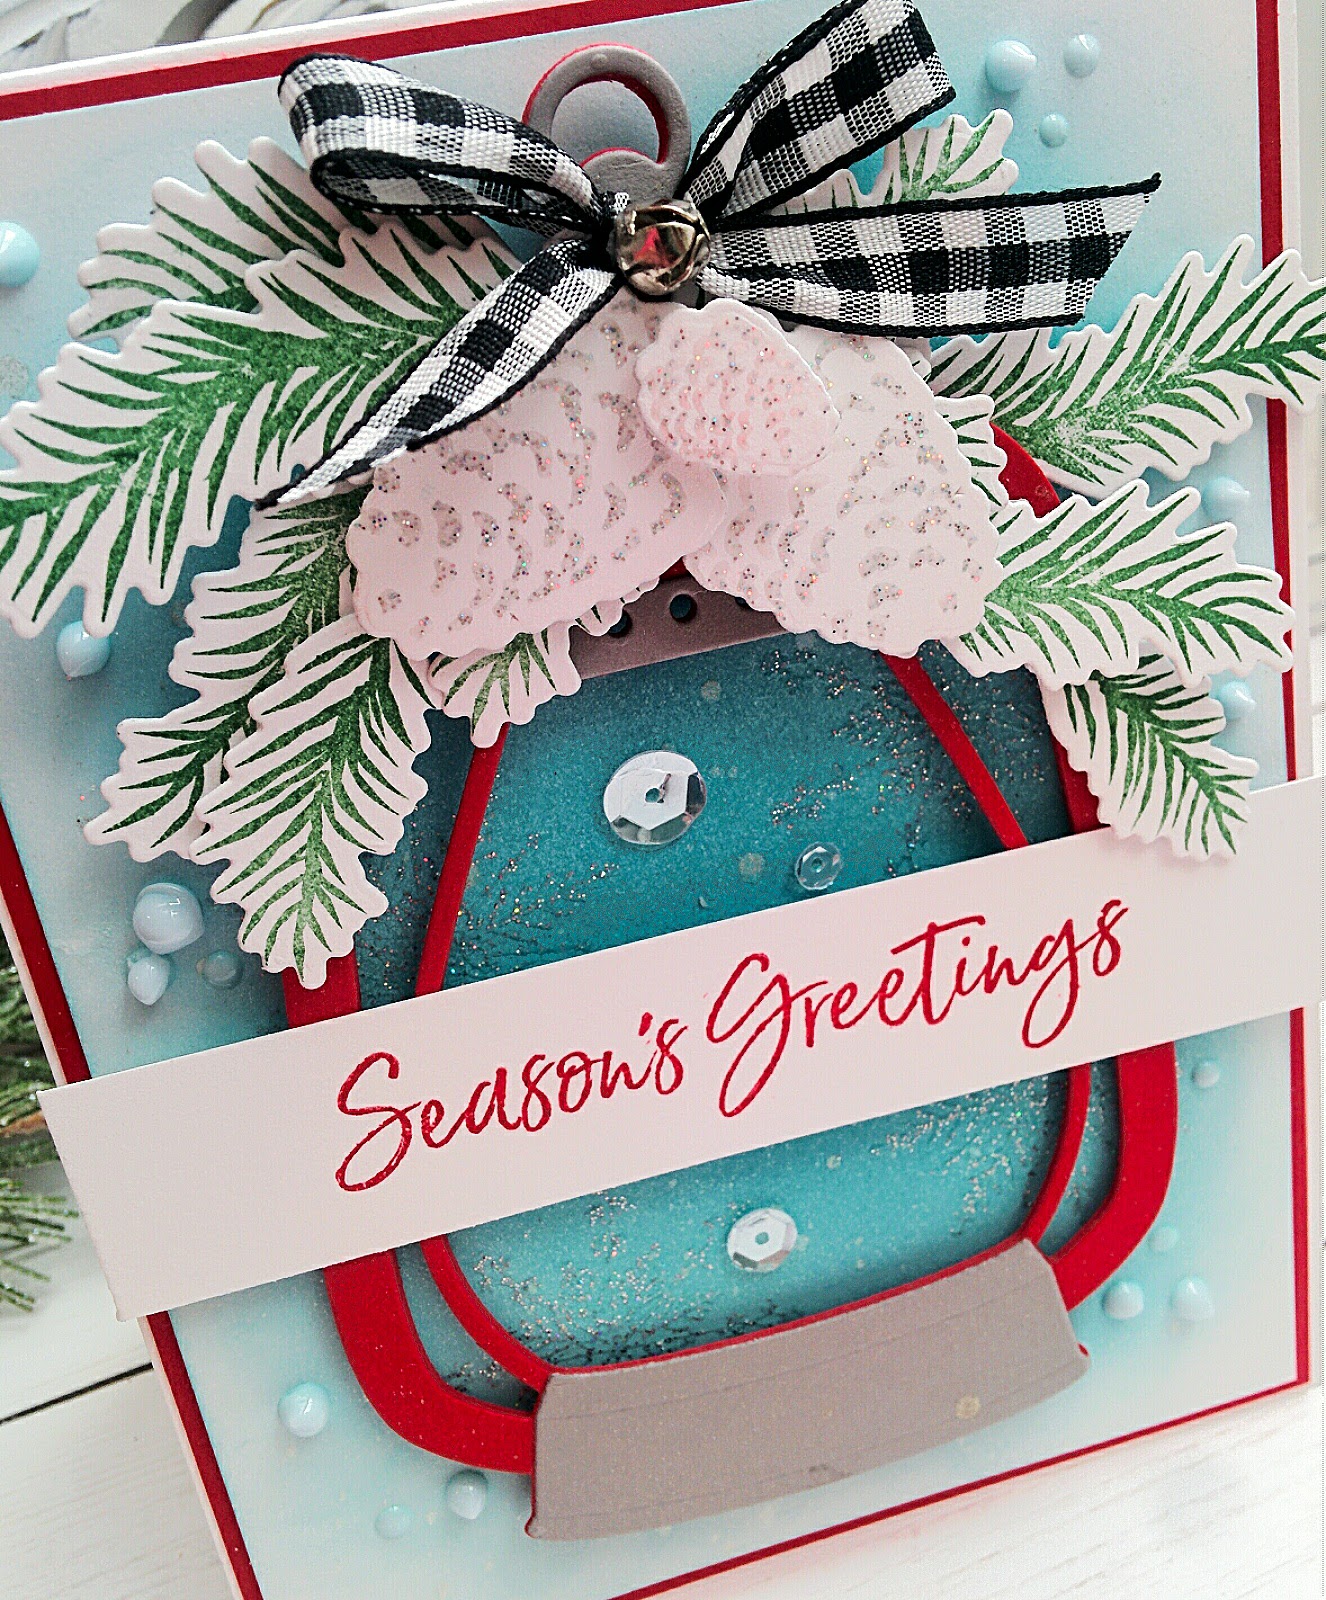
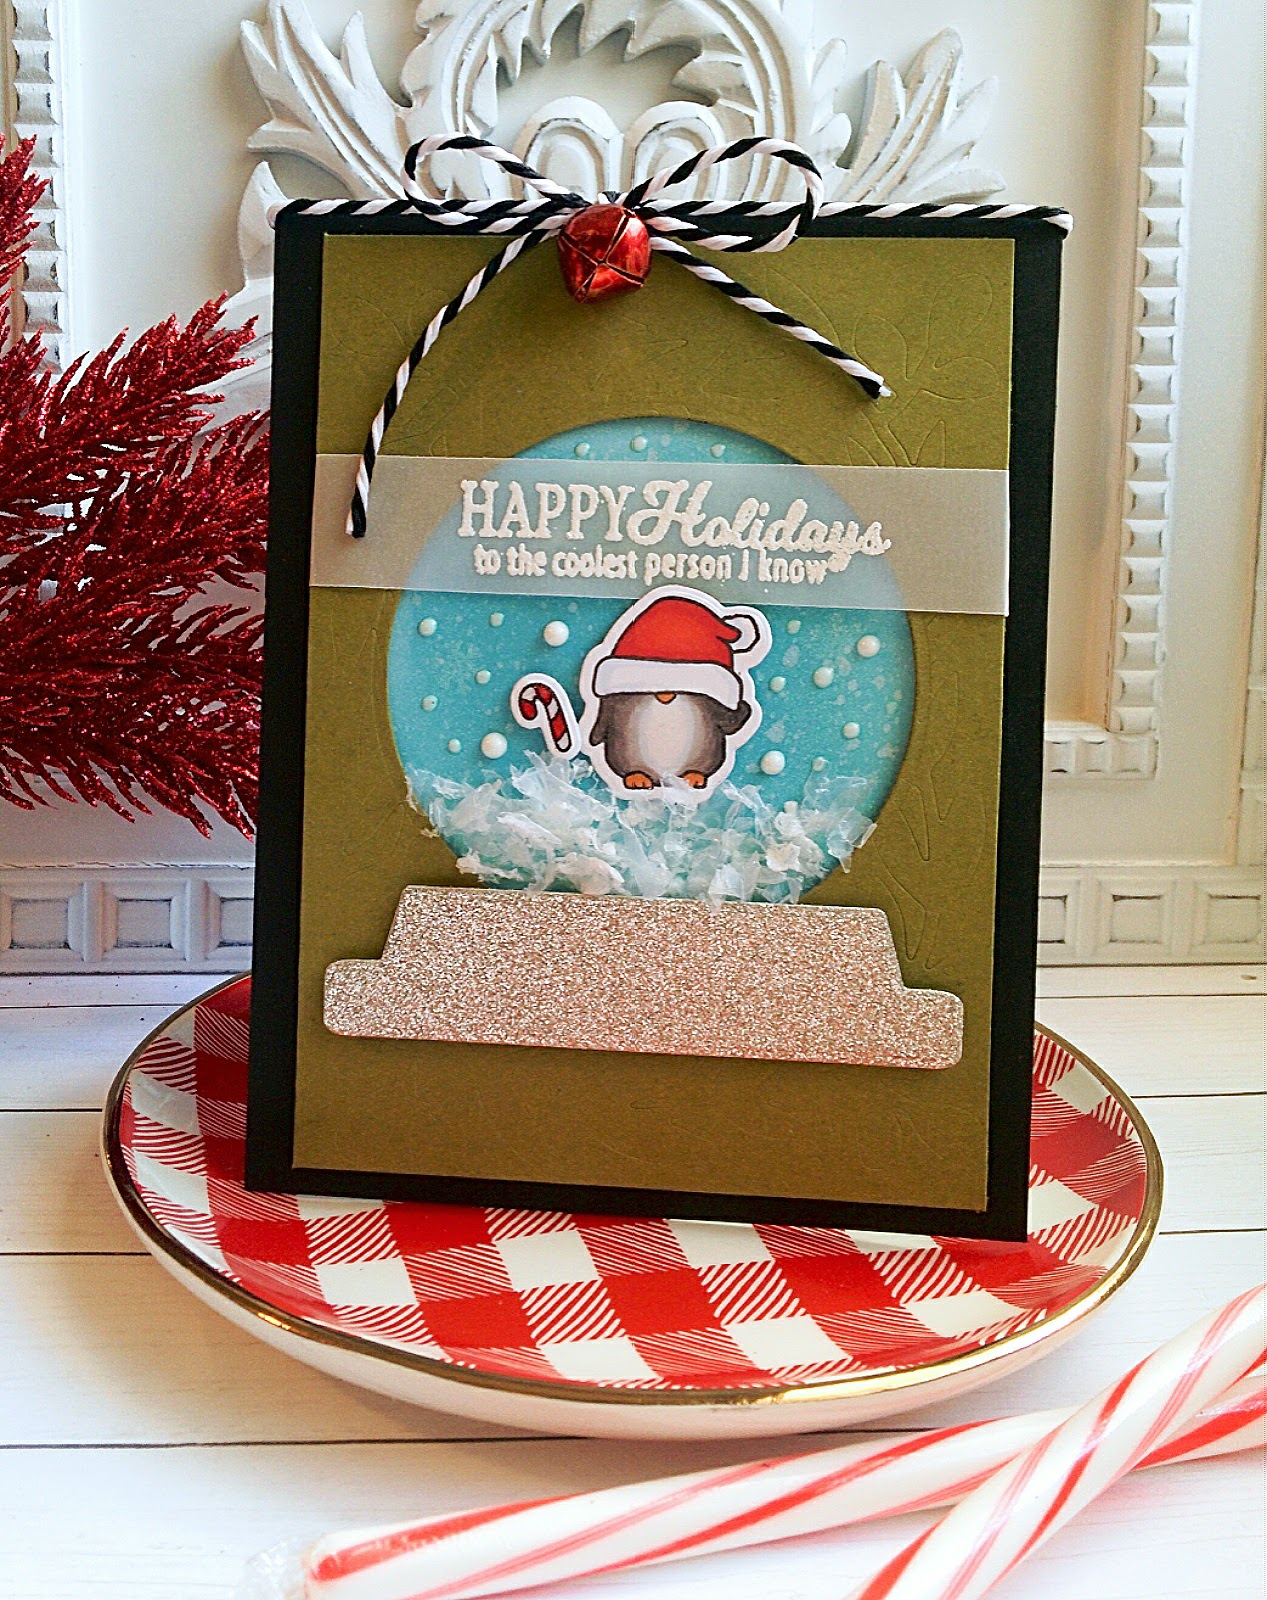
I had so much fun making THIS card so I decided to try something similar, but with a different layout. I just love the embossed pinecones hanging from the greenery. 

To begin, I sponged a 4 by 5 1/4 inch piece of Bristol paper using Salty Ocean Distress Oxide ink for a nice, smooth blend. I spritzed the entire piece using Shimmer Spray for some shimmer and shine. The SNOWFLAKES are heat embossed using some old SU! powder called Hologram Highlights, but I just love the effect that it gives the card. After that was done, I stamped quite a few evergreen boughs and sprigs using the PINECONE GREETINGS STAMP SET using two different ink pads on the same impression for some added dimension. Once they were all stamped, I DIECUT them and adhered them to the blended snowflake panel using foam squares.

The pinecones are heat embossed using gold powder onto Vellum cardstock and then die cut as well. I tied some silver cord into a bow and glued it to the top of the pinecones and stretched the remaining strand across the top of the card and secured it to the back of the panel using scotch tape.I also added some red Nuvo drops here and there to mimic winter berries.

The sentiment, which is from the Flurry of Warm Wishes stamp set, is also embossed in gold onto a strip of red cardstock. I added a few sequins to finish the design off. The entire focal panel is adhered to a red card base for some added color and dimension. I had so much fun putting this together. I hope you will get a chance to play along. There is a $50 dollar gift certificate up for grabs for the winner!!!! Thanks for fluttering by and Merry Christmas if you don't see me before the big day!

Monday, December 18, 2017

Merry Monday #270 {For a DEER friend}


Happy Monday, Friends! I'm so excited to be the host over at the Merry Monday Blog this week! This will be the last challenge before the new year so I hope you will join me for some fun!

Holiday parties are never complete without a few games, right? I've got a fun version of tic-tac-toe for you to play...card making tic-tac-toe, that is! I kinda wanted to do a "blackout" game, LOL! but decided to resist and just do the top row; stamping, pattern paper and embossing. What will you choose?

I ordered quite a few goodies from Simon Says Stamp a few weeks ago. When they arrived I was swamped with Holliday party preparations so I couldn't use them at all. Do you know how hard that is???? Torture...plain and simple! When I finally had some free time, I was so excited to get everything out. The background for my card is stamped in Versamark ink using the MFT Snowfall Background and heat embossed using White Puff embossing powder. I was 100 percent inspired by THIS card, right down to the paper and red accents! This Dashing Deer stamp set was the perfect companion for this snowy background.

I stamped the sweet little deer and colored him using Copic and Prismacolor markers. I also added some details to the scarf and his body using a white gel pen. Once he was all colored, I die cut him out. I also die cut a circle using a nestabilities die and then embossed it using the Wood Grain Impression Plate. So...I used two types of embossing; dry and heat. I also chose to do this so that I would have a circle to use as a guide to create the wreath. 

This particular stamp set includes three different types of "sprigs" or branches. I stamped each one quite a few times, colored them and die cut them. Once they were all cut, I added some Red Berry Nuvo Drops to the berries on two of the different branches. I left the other one white for some added interest and detail. I set those aside to dry and got to work on creating the "friend" portion of the card. I die cut it four times out of red cardstock and then glued them together using Tombow Mono Multi glue. After that was done, I applied a coating of Nuvo Crystal Glaze and sprinkled some chunky red glitter. I have used the same technique a few times lately on different cards that you can see HERE {I gave this one away on Sunday to the Santa that visited our Christmas party at church and I am having separation anxiety LOL!}, and HERE and another one HERE. It is such a fun effect to create! 


The sentiment above "friend" is heat embossed using Antique Gold powder. I had mentioned a few posts back that I had ordered a few and was eager to try them out. This is the first of the new gold powders that I tried out and I LOVE it! It DEFINITELY lives up to its "antique" name! After all of the elements were dry, it was time to assemble the card. I used a little strip of some old SU! pattern paper to anchor the friend die cut. I also needed that as one of my "tic-tac-toe" elements. Thanks for fluttering by!


Monday, December 11, 2017

Merry Monday #269 {Season's Greetings}


Is everyone ready for Christmas? This week's Merry Monday Challenge should get you one step closer to getting ready! It's such a fun challenge! I think I say that every week, but it REALLY is! LOL!


Debbie is asking us to create a Christmas card using three of the inspiration colors! I love all of the choices, so it was hard to narrow it down, but in the end, I decided on red, turquoise blue and the darker green. ANY combination with these colors would be so pretty! In fact, the team has put together lots of great inspiration that you can see HERE that should get the creative juices flowing! I hope you'll play along!

The hardest part for me was deciding on what images to use, but once I settled on this adorable Lantern Sugar Cut cut in red, I knew exactly where I was headed! The lantern is cut 4 times out of red cardstock and then glued together using Tombow Mono multi glue. The grey pieces are glued over the top {i hope that using a few neutrals is okay} While the lantern was drying, I got started on creating the beautiful background.


I cut a 4 by 5 1/4 inch piece of Bristol paper and sponged "Broken China" distress oxide ink in a circular fashion starting in the middle and working my way out. Once that was done, I spritzed it heavily with Shimmer Spray. The snowflakes are heat embossed in some old SU! powder that gives it a great shine! I used the Flurry of Warm Wishes stamp set for the snowflakes! 

I stamped and die cut a LOT of greenery and a few embossed pinecones from the Pinecone Greetings stamp set and then die cut them using the coordinating Sugar Cuts. I just love how all of these evergreen branches look arranged on top of the lantern! I tied a black gingham bow and a small jingle bell to the top for some added interest!

I added a few Robin's Egg Blue Nuvo drops around the lantern and the greenery for some snowy-looking details! The sentiment is stamped in red onto  a white paper strip and attached using foam squares.
A few sparkling clear sequins finish the design off! I wasn't really going for an old-fashioned country Christmas look, but in the end, that's totally what it reminds me of! Thanks for fluttering by! I hope you'll join us! There's just a few more weeks to play with all of your fun holiday products and then it will be all about the VALENTINES!

Thursday, December 7, 2017

Warm Holiday Wishes~You're as sweet as a cup of Hot Cocoa!


I'm excited to share a fun project I have been working on. I finished two weeks ago or so, but needed to go and buy the gift cards for the gift card holders, which turned out to be an adventure in and of itself! I'll share the story later in my post! This particular project was made because of the cute plastic insulated cups that I found at the Dollar Tree! I grabbed 6 of the cutest pattern and I was on my way! I knew that I could make a really cute Hot Chocolate inspired gift with these! 


 I don't think it's any secret that I am in LOVE with the Mugs and Kisses stamp set! I have used it quite a bit lately and I used it on THIS project! To me...it is one of those "perfect" sets; darling images, great fonts on the sentiments AND the sentiments SAY things that I want to use! For me, that is a "perfect" set! How about you? What is part of YOUR "perfect" set? 

To begin, I die cut 6 tags using the Snowflake Tag Sugar Cut and then used the coordinating stamp set called Christmas Tag Greetings for the stripes at the top. I used my paper crimper to create the red corrugated paper and attached that to the tag as well. The images are from the Mugs and Kisses stamp set and colored using copic markers. Once they were all colored, I die cut them using the coordinating Sugar Cuts. I added a dollop of Liquid Applique on the pom pom of the mallow's hat and heat it using my heat tool. I just this effect using these images! The sentiment is heat embossed using gold powder for some added shine. I also added some white Nuvo Drops for some added mallow-y detail!


I simply *had* to have this adorable Coffee Card Gift Holder from Honey Bee Stamps as soon as I saw THESE adorable creations from Dana Kirby! Thanks, Dana, for the fabulous enabling and for sharing! LOL! I knew that these would be the perfect companion gift to add with the dollar store insulated cups. The sentiment on the lid is stamped in red and then spritzed with some red ink using a color spritzing tool. As much as I wanted to corrugate the "slider" on the gift card holders, I HAD to resist because it would make them shrink in size and then it wouldn't fit around the cup. I used some inspiration from the actual insulated cup that I am using as the gift and added some Fair Isle stamping using the Fair Isle Motifs stamp set. I just love how it looks!


I love how the gift card just fits so perfectly inside and the "band" slides up so there isn't any glueing required! I mentioned earlier that I had an adventure getting the gift cards! I toyed around with the idea of getting Starbucks gift cards, but really wanted something to support a small business. There is a DARLING local shop called "Sips and Sweets" that I knew would be perfect for this gift. I headed there after I dropped my daughter off at dance because it is just down the street. I went through the drive-thru and ordered my gift cards. In the meantime, another patron that was INSIDE the shop bought the last of the gift cards, so I left empty handed! I called a few days later to find out if they had more, which they did. When I got there and the clerk handed me the gift cards, they said "Twisted Sugar". I was so befuddled! I thought it was called "Sips and Sweets"?!? I inquired with the clerk and he told me that another local shop a few cities away was going to sue them if they didn't change the name because it was too similar to theirs! Seriously???? So...my cute idea was thwarted! Oh well! Twisted Sugar it is! LOL!


Here is the gift all packaged up in a cello bag with the cute tag! I also added a green jingle bell to break up all of the red!

I also added a peppermint candy cane to add another festive touch. The insulated cups have a few packets of hot cocoa inside as well as a few Andes mints! Thanks for fluttering by!

Monday, December 4, 2017

Merry Monday #268 {The coolest person I know}


Welcome to this week's Merry Monday Christmas Challenge! It's a fun one, so I hope you get a chance to join us this week! It is always fun to see the gallery full of your fabulous creations! Deanne has challenged us to use a Santa hat on our cards this week!

I have a few Santa images and he is wearing a hat in all of them, but I decided that this cute little penguin from SugarPea Design's Eskimo Kisses would be the perfect fit for the challenge! I just love that he's got that big hat covering his face, which really does draw the focus to the hat.


Because this image is so small, I needed to enhance its presence. I toyed around with the idea of using multiple of the same image, but in the end, chose to put this little guy or gal into a snow globe. I did add a tiny candycane to his "hand" or flipper/fin/wing? LOL! What does a penguin even have??? LOL! I wanted a touch more red and the candy cane is the perfect accessory! I stamped, colored and die cut the candy cane and penguin using the coordinating Sugar Cut. I also added some Wink of Stella over the entire image and then some Nuvo Glaze over the top of the penguin's body, beak and feet as well as the candy cane. 

While those were drying, I got to work executing my snowglobe. I thought the lid die cut from the Coffee Card Gift card holder looked like it would make a great base for the globe and I was right! I just needed to find a good size circle Nestabilities Die. I die cut the base out of silver glitter cardstock. I really like using a detail like glitter paper, because it packs a punch without any extra work. Before I die cut the circle, I used a leafy frame die from Papertrey Ink to dry emboss some detail around the green panel. I am so sorry, but I cannot remember the name of the die. After that was done, I die cut the circle from the center of the green piece. I grabbed a scrap piece of white cardstock to quickly blend some Broken China distress ozide ink in a circle. Once that was done, I spritzed it with shimmer spray and stamped a few snowflakes from the Eskimo Kisses stamp set in white. I had originally planned to make this a shaker card, but in the end, I just wasn't up to the fuss. Because I felt like I was sacrificing a "wow" factor for the recipient, I decided to add some fake snow instead. I really like the effect it has and I will probably be using it again soon. 


The snow is glued down using Mono Multi Liquid Glue. I also added some white Nuvo Drops here and there to accentuate the snowglobe feel. The sentiment is heat embossed in white onto a vellum strip and then stretched across the top of the globe. The penguin is so small, I felt like the sentiment needed to help  fill up the space. I also wanted to give it a "glassy" feel without making it a shaker card. I adhered the green panel onto a black A2 cardbase using foam strips and then tied some black baker's twine in a bow and added a red jingle bell. I thought the trio of red looked nice. Thanks for fluttering by!


Sunday, December 3, 2017

Simply Sweet Blog Hop Giveaway winner AND Celebrate the magic of Christmas

Happy Sunday, Friends! December is finally here! I have spent the past week decorating and cleaning my house getting ready for the two parties I hosted yesterday! Both were fun, but I am exhausted and I have missed my papercrafing time. I thought today would be a good opportunity to share a card I made a few weeks ago for the "inspired by the little things" challenge, but never got it uploaded in time! But, before I tell you about the card, we have a WINNER for the Simply Sweet Christmas Inspiration Blog Hop! My cute daughter wanted to pick the winner and that is....JILL NORWOOD!! CONGRATULATIONS!!! Email me your address at kellyrory1@msn.com and I'll get your goodies to you ASAP!! I really enjoyed reading all of your comments and Christmas traditions! I appreciate ALL of the comments that you left for me! Thank you!!! You know how to make a girl feel loved!

As I mentioned earlier, this card was originally made for THIS challenge, but I didn't get it photographed or uploaded in time! Oh well! I didn't think I would even share it, but since I haven't been papercrafting this week, I thought I may as well share it!

I created a beautiful glittery background for the card and I have a photo tutorial of my process. I have made a similar background for THIS card back in the summer! I just love the result!
To begin, I taped my watercolor paper and the Marilyn Stencil to a matboard using washi tape. I cut my watercolor paper slightly larger than I wanted since I knew I would be trimming it down. 

I applied the Embossing Paste in an even coat, smoothing out the lines (which are still visible in this picure)
                                                                                                                                                                                                                                                                                                                             

Remove the stencil carefully and wash it immediately as well as your application tools.

Poor the embossing powder over the entire surface. Shake off the excess powder and then heat set.

The embossing paste will bubble as it is heated but the result is beautiful! I thought it made a perfect backdrop for my card!


The tree is die cut and embossed in the same powder and the ornaments are embossed in silver onto vellum cardstock for more stability, but a little bit of sheerness. The Christmas tree stand is embossed in silver as well onto a piece of gray cardstock. I used the Tree Trimming Trio stamp set.


A few sequins finish it off as well as a vellum sentiment strip! Thanks for fluttering by and thank you for all of your sweet comments!

Tuesday, November 28, 2017

Color Throwdown Challenge #471 Merry Christmas and Happy New Year!


I've had SO much fun being November's Guest Designer for the Color Throwdown Challenge! It has inspired me so much! Today's card is one that I probably would NEVER have made if it wasn't for this challenge! That's why I love it so much! It really stretches me as a designer and gets my mind working in all kinds of new ways! I'm sad to be saying goodbye!

Since I am in a Christmas card making mood, I decided to make something modern with lots of texture and shine! I had a lot of fun executing my design! This is what I had in mind as soon as I saw the colors, but decided to try something different. Well, that card is now in the bin and I decided to just stick with what my mind kept seeing! It really did turn out pretty much exactly how I had envisioned it, which is always nice!


To begin, I heat embossed the Woodgrain Background all over a 5 by 4 1/4 inch piece of Kraft cardstock using gold powder. I am almost completely out of gold powder, so I took the opportunity to order a bunch of new varieties. I can't wait to test them out when they arrive! I'm smitten with how this gold woodgrain looks! I'm pretty sure this isn't the last time this will make an appearance, so brace yourselves! LOL! 

After that was done, I die cut the Snowflake Medley snowflakes using black cardstock. I never imagined that I would be diecutting black snowflakes, but never say never! I heat embossed half in silver powder and half in gold powder. I really like how they look on the black paper! Unfortunately, the coordinating stamp set is retired, but Heather has come out with a beautiful new snowflake stamp set that would be perfect for this type of look as well!
After they were all stamped and embossed, I arranged them onto the woodgrain panel. I had some hang over, but I trimmed them off after I had them placed where I wanted them. After they were in position, I really wanted to add in some extra white so I got to work adding LOTS and LOTS of Nuvo Drops here and there where they looked good.


I added some silver and gold sequins here and there as well as a few in the centers of a couple of the snowflakes. I just love the added sparkle and shine it creates! The finishing touch is the silver embossed sentiment on a black strip of cardstock. I chose this particular sentiment because it included "Happy New Year" and this card has a "new year" type vibe to it! Thanks for fluttering by!


Monday, November 27, 2017

Merry Monday #267 {Happy Holidays}

It's now official... Christmastime is here! It's down to the wire so if you haven't played along with us yet, now is the time! Colleen has a fun challenge for us this week; create a Christmas card in green, blue, white/silver/vellum! I adore these colors so my card was so fun to make! You can check out the challenge HERE as well as see what the other designers have come up with! ETA: I have a Christmas giveaway I'm doing if you'd like a chance to win. It's on my post from the Simply Sweet Christmas Inspiration blog hop! Just leave a comment on that post telling me about your favorite Christmas tradition and be a follower of mine on Instagram @kellylunceford.
Isn't this inspiration photo dreamy? I hope it inspires you to pull out your Christmas stamps and get creating!

I'd already decided to use these cute stockings for my card, and took the opportunity to test the colors out when I made THESE tags {you'll need to scroll down to see the stocking tag} and so I knew they would look fabulous in Hawaiian Shores and for the green, I chose New Leaf! I love this particular combination, but I think I already mentioned that! LOL!

The stockings are die cut using the Stocking Prints Die. I really like this particular die because it cuts the larger and the smaller stocking at the same time. Unfortunately, it appears that the coordinating stamp set has been retired. I stamped the "hook" image onto a strip of Stamper's Select White Cardstock and then embossed it in silver. I added some silver brads to mimic the look of nails or knobs to hang the stockings. I just love special little details like that because they give the eye some added interest and make the scene a little more realistic.

The background is dry embossed using the "Knitted" background from Richard Garay. It is such a wonderful embossing folder. I have used it for many different styles of cards. You can see them HEREHERE and another one HERE. I have used it quite a bit, but those are just a few.

The white strip with the brads is adhered to the embossed panel using foam squares for dimension. The stockings are attached with foam squares as well and just tucked underneath the brads slightly to give the illusion that they are hanging. The entire focal panel is adhered to an A2 Hawaiian Shores card base for some added color. I decided on the blue since I only used two blue stockings. I felt like it gave the card some nice balance!

I placed the strip and stockings low enough because I planned on having the sentiment strip up above. Once it was done, I really liked the way the vellum strip looked stretched across the stockings so I added it there instead. That left quite a large space at the top that I wasn't anticipating, but I jumped at the chance to add a beautiful celery silk bow! I really like the contrast between the two greens! I also added a silver jingle bell and some silver cord. The jingle bell was just plain silver, so I added some white powder and some chunky glitter. I just rolled the tip of the jingle bell in Versamark ink and then dipped it into the white powder and heat set it! Warning: the jingle bell became EXTREMELY hot and was too hot to handle, so be careful it you try it! I would have normally just used tweezers to hold the end of the bell, but this particular bell had an interesting top so I couldn't do that. I had so much fun with this card. To be perfectly honest, it almost made it into the circular file, but I just kept at it and really ended up liking the result. Thanks for fluttering by!