Showing posts with label spellbinders. Show all posts

Thursday, July 31, 2025

Celebrating 22 Years {Happy Golden Birthday}

Hello and welcome, friends! My darling daughter celebrated her 22nd birthday this month! A friend of mine told me about 'golden' birthdays about 11 or so years ago and described it to me like this: the year you turn the same number as the date of your birthday. Some of my kids had already had their 'golden' birthday before I even knew it was a thing; my son born on the 2nd, my son born on the 10th, etc. So....this was the first one I was able to celebrate and of course a special card was in order! I bought a couple rolls of wrapping paper from various companies to create the vibe I was going for, so her card was inspired by the wrapping paper.
To begin, I got to work on the gold numbers; I used the Fancy Floral Numbers Die and cut the numbers from gold cardstock. They definitely look yellow in the photos, but it is a beautiful gold foil cardstock. I used the Fancy Floral Numbers Stamp Set to stamp the numbers. I used Versamark and then added the gold embossing powder, heat set and let it cool.

For the greenery, I used the Rosemary and Berry Die from The Greetery and then added different color wildflowers that were cut using the BotaniCuts Wildflower Mix Die. This combination is so fun because the little bulbs where the berries should go are the perfect place to add the wildflowers. I chose colors that matched the wrapping paper; you can see a photo at the end of this post.

I cut a panel of gingham pattern paper using the Love to Layer: Arches Die and then stamped the words with black ink. The numbers are added using foam squares for dimension. It looked a little bare, so I added another sentiment that is heat embossed over the top. It is one of my favorites from the Just Sentiments: Tagged Stamp Set and works so nicely for my daughter!

I picked a black background because that is what the main floral wrapping paper used. I embossed an A2 panel of black cardstock with the Spellbinders Mandala Blooms 3D embossing folder and then added a FRAME over the top. I layered everything up on the background using foam squares and liquid glue.  

Here you can see the wrapping paper that was the inspiration! Thanks for fluttering by!


Wednesday, February 12, 2025

All Things Valentines!!!

****edited to add: I created an updated tutorial for the key wristlets shown in this post. You can find it HERE ********  Valentine' Day is fast-approaching and  I have been having such a fun time making ALL  kinds of gifts and things for the big day! I have quite a bit to share, so get cozy and I'll dive right in!  This card was made a few days after I made the post boxes from my previous post. I had all kinds of goodies left over and my mind was racing with possibilities! I did add in a few doves for an added vintage touch and the sentiment is from the new Folk Heart Sentiments.

To begin this card, I die cut a panel of Pure Poppy cardstock using the Stitched Scallops Die and then stamped it with gold ink using the large frame included in the Bookish Holiday Frames Stamp Set. I die cut the largest heart and backer using the Nordic Hearts Die; the main heart from Pure Poppy cardstock and the backer from Pale Peony cardstock. I adhered them together using foam squares. I added it to the center of the background panel using additional foam squares.

You can read all about how I made the embellishments in THIS post. I had so much fun arranging them here and there until I was satisfied with the arrangement.

I added the Be Mine sentiment and gave it a generous spritz of shimmer spray. I layered the scalloped background onto a top-folding A2 card base.

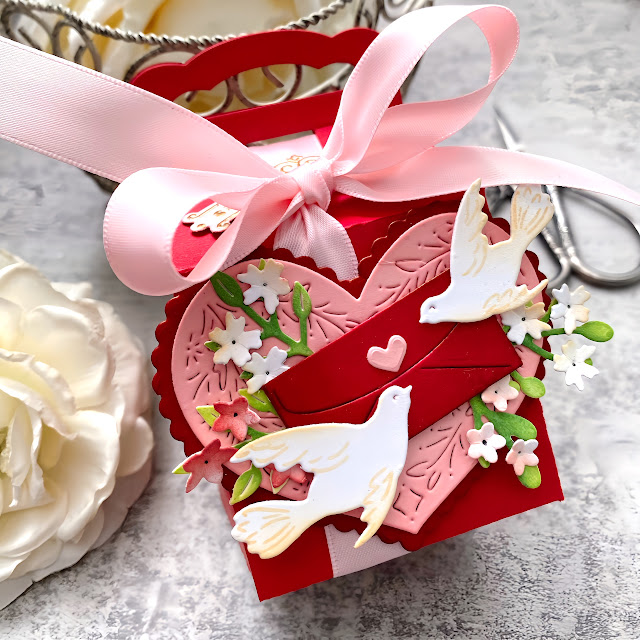
I still had quite a few embellishments left so I got to work on some treat boxes. I bought the Spellbinders Ribbon Box Die in November with plans to use it for Christmas, but we all know how things like that go! womp, womp! LOL! Anyway, it was the perfect thing for Valentine's Day treats!


I added the "feet" using the  Fancy Feet Die and I just love how it looks! They don't have to only be used on post boxes!
This one doesn't have the ribbon threaded through it yet, but I wanted to share it so you could see how it all works.

5/8 inch ribbon works perfectly to slide through the slot.


And now onto some sewn projects. I will most likely add these to my neglected sewing blog, but for now, I am going to post them here until I get some extra time to post over there. The fabric that I used for these projects is from Riley Blake, but I didn't note the collection.

I always love making these keychain wristlets to give as gifts and with the "P.S. I love you" labels, they're just perfect for Valentine's Day. I bought the labels years and years ago from the local quilt shop, so I don't have a source, unfortunately. 

I also love making tissue cozies as well. I ended up making 8 in total, but here is what they all look like.

I bought a bunch of the purse-pack tissue packages at Christmastime, but once again, womp! womp! I just didn't have enough time! Thank heavens for Valentine's Day to give us all a second-chance, right? ha ha!

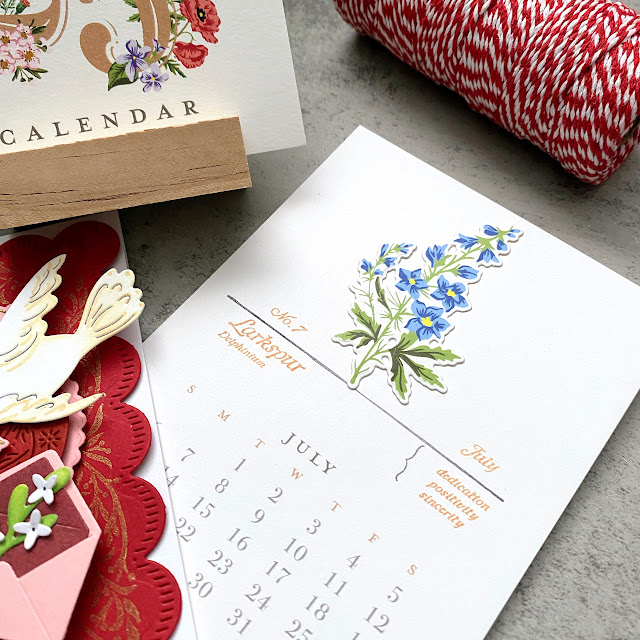
And to keep the theme going, I had planned to make these calendars for Christmas, too, but here they are for Valentine's Day gifts. I made 5 in total to give to a few friends and my son's teacher.

The 5 calendars didn't take long at all, especially when you're mass-producing! I'm so glad I got them finished because they look so cute with all of the other goodies! You can find everything I used in the These Are the Days Collection. Thanks for fluttering by!
P.S. Have a happy Valentine's Day! xoxoxoxoxoxoxo


Wednesday, November 30, 2022

Please Deliver To Santa {A collection of holiday greetings}

Hello, friends! I hope you all had a fabulous Thanksgiving weekend and that your new week is off to a great start! We got a fabulous snow storm bringing a delightful blanket of snow; just perfect to cover the leaves I neglected to rake! ha ha!  I spent the relaxing weekend working on a collection of Christmas cards that I'm excited to share with you today! 

I ordered a bunch of delightful things from Spellbinders Paper Arts and they've been waiting patiently for me to use them! I always love a postal theme, no matter the season, but add in vintage Santa.....I just can't resist! I have three additional cards I'm sharing below without Santa, but he just HAD to make his way onto one!

Each of the 4 cards feature the darling Parcel & Post Mailbox Etched Dies paired with the Christmas Mailbox Greetings Glimmer Hot Foil Plates. I also bought the All-Occasion Mailbox Greetings Glimmer Hot Foil Plates because one of my favorite "Santa" designs is included AND I want to use the mailbox for all-occasion cards as well.


To begin, I die cut the main mailbox, the side panel, and the door from Pure Poppy cardstock. I added some Scarlet Jewel ink blending around some of the edges to give the illusion of depth, without using different colors of cardstock. I also did all of the hot-foiling for the main sentiments on the mailboxes using the gold foil included in this 4 pack. I actually use all of the colors from this set year-round, so it's perfect to keep on hand!

The mailbox dies come with the rectangle so you can die cut the foiled sentiments and they fit perfectly on the front of the mailbox. I didn't use foam squares on this particular card, but for the rest of the cards, I foam mounted the sentiments for added dimension. I used foliage that's included with the mailbox AND a few sprigs from the Winter Welcome Sled dies (I'm sharing a trio of cards using that set later in today's post).

I ended up finding some beautiful pre-made poinsettia embellishments at Hobby Lobby a few weeks ago that made their way into my cart; they're absolutely perfect for these cards! All 4 of the backgrounds were dry embossed using the beautiful Ski Lodge Embossing Folder; I chose Aqua Mist, White, and Pinefeather.

The cute little envelope dies are also part of the mailbox die set and they are just the cutest thing ever! I made some white and some two-toned red; Scarlet Jewel and Pure Poppy. The sentiment strips at the bottom of each card feature the Mini Christmas Sentiments Hot Foil Plates. These little guys were giving me all sorts of fits until I did some adjusting; I raised the temperature to medium, put the sentiments in the middle of the platform, timed them for 18 seconds and added a cardstock shim! voila! perfect! The set also comes with a handy-dandy die to cut them out perfectly once they've been foiled!

My next series of cards uses the ADORABLE Winter Welcome Sled that I'm obsessed with! One of my favorite sets of ALL TIME is the Two Feet Deep Stamp Set, so it's natural that I would fall in love with this sled, too! I actually can't wait to combine the two because the sentiments in the Two Feet Deep set are so fabulous!

I chose to use some pretty pattern paper that I bought HERE; it's double-sided so the main panel is one side and then I used the opposite side for another card I'm sharing next. The striped paper is from a SU! pack I've had for quite a few years.

I fell in love with the sled cards that Yana made last year and she used the sentiment on one of the planks, so I used her cute idea! 

I used the same foliage for the sled cards as I did for the mailbox cards. Once again, the poinsettia embellishments are pre-made and easy peasy!

My final pair of cards are on the CAS side, but I love that look! I love making cards that look like they came from Papyrus or somewhere like that! The hot foil really elevates them so you don't have to do a lot, if you don't want to! As I mentioned earlier, this is double-sided paper and these are two designs from one sheet. I absolutely love both of them for these cards.

I had some extra sentiments left over from my mailbox cards so I chose to use them with the sleds. I was hoping they would still look like sleds with the large sentiment, but I love how they turned out. This sprig of holly is also from  Hobby Lobby; I'm addicted to their holiday crafting section!

Each of the bases for the sled were die cut using the beautiful Mirror Gold Cardstock; I also die cut many of the elements on the mailbox cards using this same cardstock. It cuts like a dream and is the perfect holiday touch!


I had so much fun creating all of these cards using these amazing products! I didn't want to stop! Thanks for fluttering by!


Wednesday, April 15, 2020

Spellbinders April Stamp of the Month {Beautiful}

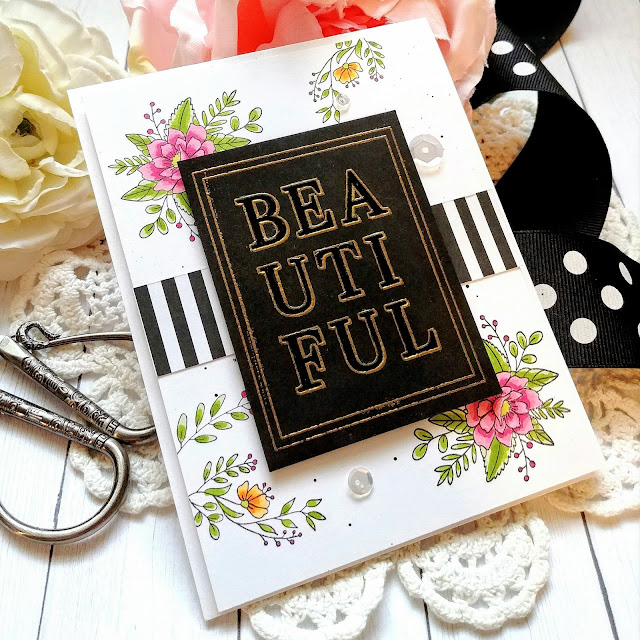
I hope you all had a wonderful Easter weekend! We did despite not being able to be with extended family! We made the most of it and tried to make it as special for the kids as possible! Today I'm sharing 3 cards using this month's Spellbinders Stamp of the Month! I had so much fun playing around with the different floral and leafy images that are included in the set, as well as the "Beautiful" sentiment!

This particular set comes with the rectangle outline that you can see on the card on the right. The "Beautiful" sentiment is separate so you can use it with the rectangle or separately like I did on the card on the left.

The sentiments are all embossed in gold and then I added some Crystal Glaze over the top of each letter to give it some added detail and shine.

To begin each card, I stamped the different floral and leaf images using my mini MISTI except with the card with the circle. I just did some free hand stamping to get the wreath look exactly how I wanted it!

I colored the images using an assortment of alcohol markers. This particular panel is trimmed down and then added on a top folding a2 card base with a strip of black and white striped paper adhered at the bottom. I used foam squares on the floral panel to give it extra dimension.

On this card, I added some black paint splatter to the floral panel and then adhered the striped paper in the center!

Each card also has a trio of sparkling clear sequins for some added shine and dimension!

I used the Nestabilities Standard Circles die collection for this card. I heat embossed the sentiment first and then die cut it to get it centered just right! These are my go-to circle dies and have been for years! As I mentioned earlier, I stamped the different images to create a wreath and then colored the images with alcohol markers! This card also has some paint splatter and a tiny strip of pattern paper at the bottom! These cards were so much fun to make and will get popped in the mail ASAP! Thanks for fluttering by!

Saturday, March 14, 2020

Spellbinders March Stamp of the Month

Hello and welcome! Today I'm sharing a set of 6 rainbow cards using the Spellbinders March Stamp of the Month! As we all know, the world has been turned upside down, especially in the U.S. these last few days. I know other parts of the world have already had things go crazy! Anyway, with this in mind, I sat down and made this card set to send out to those who might need a little bit of cheer and love!

That's what I love about this craft; it can bless people's lives no matter what, when, etc! We will not be able to go to church for who knows how long, and I have the responsibility of loving and caring for the children in our fold. I decided that since I won't be able to see them for a few weeks, I'd use all of these fun sentiments from this month's stamp of the month to create some colorful cards that let them know I'm thinking of them and missing them!

My cards look eerily similar to the cards on the Spellbinders website {ack} this was totally not intentional! I do love that it shows how easy it is to create a card with impact with just sentiments!

When I mass produce cards, I like to do everything assembly line style! First I cut and scored all of the white cardbases and stamped the heart that is included in the set on the back. I also chose 6 different rainbow pattern papers and cut them to 4 by 5 1/4 inches and adhered them to the card bases using Tombow adhesive.

I cut strips of coordinating colors of cardstock so that I could stamp the different sentiments. I only used black ink so it was all very easy!

Two cards say "Love is all you need" , two say "Oh, hey Hello" and two say "Miss seeing you" which are perfect for all of these sweet kiddos!

The strips are adhered to white panels that have been stenciled with a cloud image for some added whimsy. They were also spritzed with Shimmer Spray for added detail!

Without knowing how long we will be in social isolation, I will send a few out here soon, but keep the others on hand for future weeks! I hope that you all are safe and taking care of yourselves during this time of uncertainty. If you need help, please let me know and I have friends all over the world and a church that is able and willing to help those in need. Please don't hesitate to reach out if you need help. We are all in this together! All my love and hugs! Thanks for fluttering by!