Showing posts with label sewn projects. Show all posts

Saturday, June 28, 2025

All Things Red, White, and Blue

Independence Day is a little less than a week away so I decided I'd better get this post put together before the big day has come and gone! I've been having a ball creating all kinds of fun patriotic themed gifts and tags to give to a few ladies in the neighborhood! I made earrings, baskets, key wristlets, and tags! You can read more about the details of the sewn projects HERE

Up first are the tags that I created to add to the ribbon when I tie everything up! I'm putting the fabric baskets in larger cellophane bags and tying them up with ribbon, and a tag is always just the cherry on top!

I bought a bunch of things from Bath and Body Works included in their patriotic line this year and I just love the gingham, so that was the beginning point for these tags. The recipients will also be getting the cards I made for the Star Spangled Summer release from The Greetery. 


Here is another shot of my inspiration 

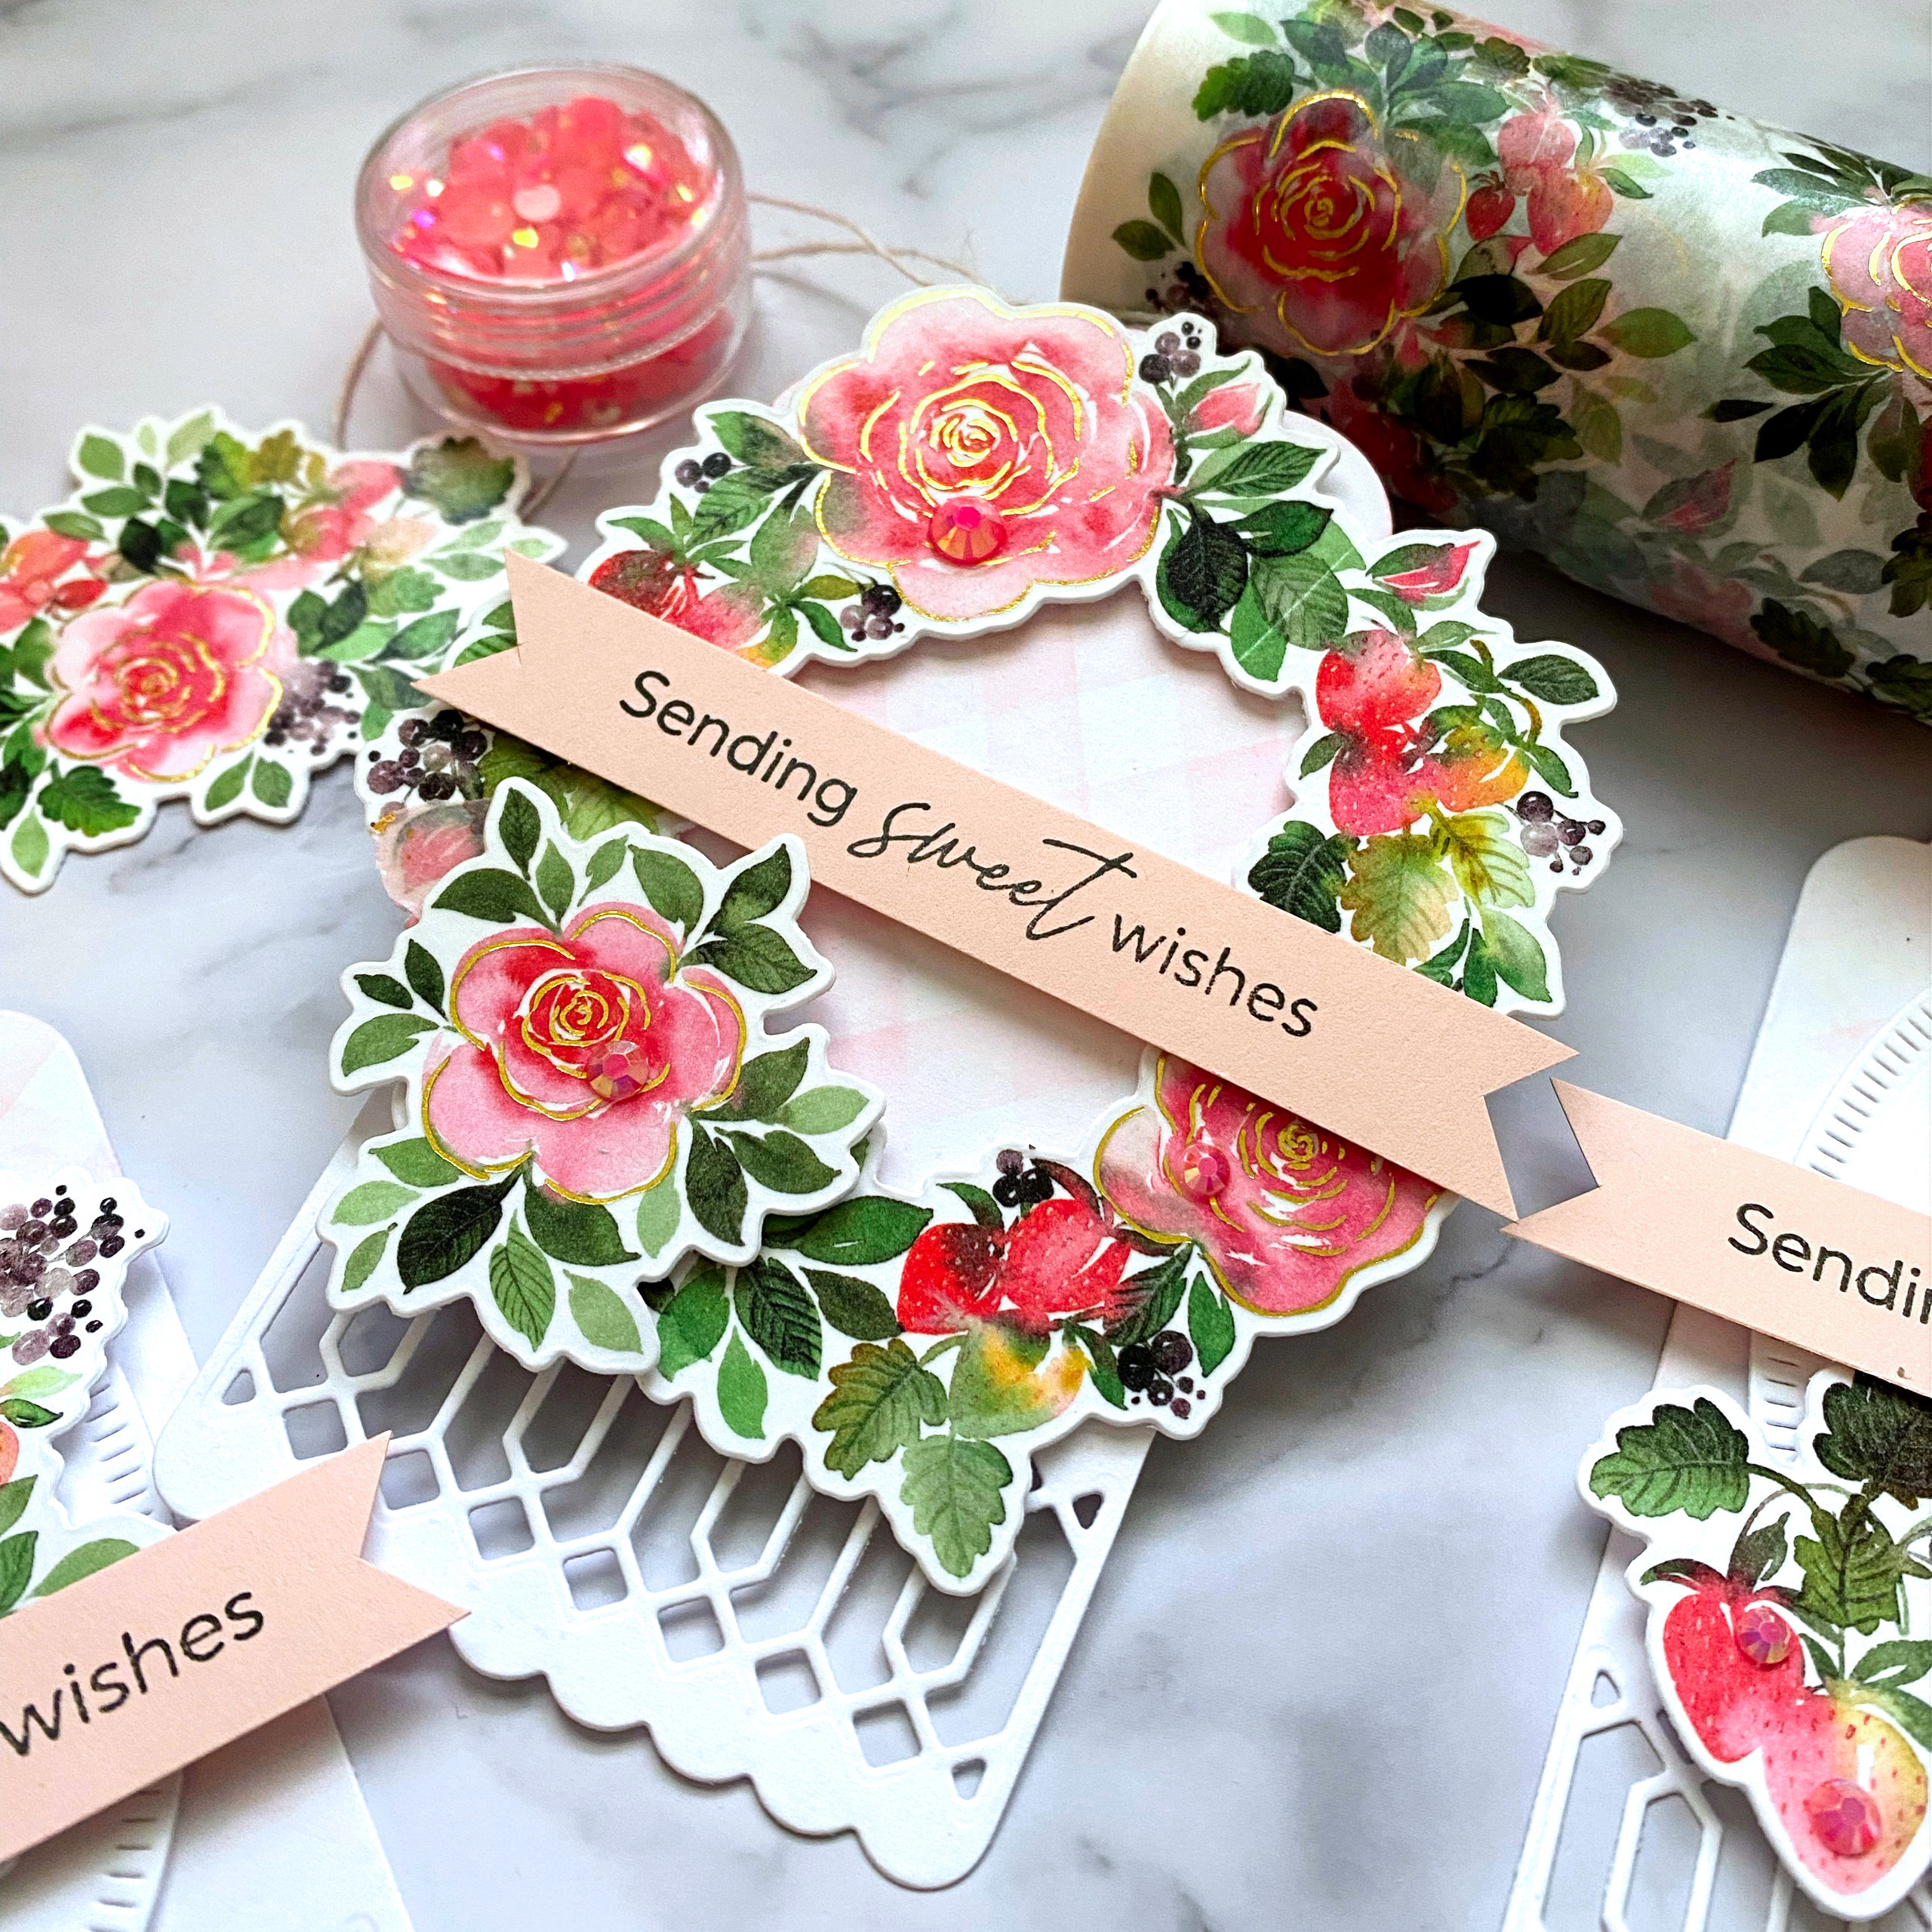
To begin these tags, I used the A2 Stitched Scallops Die and cut the smallest size from white cardstock. I added the gingham detailing by using the Scalloped Gingham Stencil; I love that it comes with stencils for all three sizes of the Die. Once that was done, I die cut the pieces I would need for the sentiment using the Land of Liberty Die from white cardstock. I did some gradient stamping with the Land of Liberty Stamp Set.

The flowers were made using the Bitty Botanicals Stamp + Stencil and then cut using the Bitty Botanicals Die. I added the dot to the flower centers using a journaling pen and then added details using colored pencils if applicable. This was the perfect floral addition to keep in theme with the cards. I just made a simple tag shape from Pure Poppy cardstock and then added the twine through the hole.

I had leftover fabric from the baskets, so I decided to make a few key wristlets using my updated tutorial.

I also got some new labels; as much as I love the P.S I Love You labels I have used in the past, they aren't always pertinent to the project. I loved them for Valentine's Day, but I wanted something a little bit different for these.

I made some patriotic earrings a few years ago and I wanted to make a few more to tuck in these baskets. I came here searching for the post with the old ones to remember the colors and faux leather I used, only to discover they were still on my camera roll from 2020! Woops! These are the new ones I made, but I will also be sharing the 2020 ones today, too! ha ha!

It looks like Taylored Expressions doesn't sell the Designer Dangles Dies anymore, but if you have them in your stash, that is what I used!


I bought all of my faux leather from an Etsy retailer called The Art of Fabric Folding. 

I bought the handmade labels forever ago at Hobby Lobby and I'm almost out; I'll have to see if they still make them.

These are the ones I made back in 2020.


I made 4 baskets in total, but only three key wristlets because one of my friends already got one from me and she also doesn't wear earrings. 

Here is a little peek at the basket all stuffed and ready to be wrapped along with THIS card that I just love! It is perfect for the baskets!

A quick shot of one of the baskets all tied up and ready to go! 


Here is what I put in each of the baskets, with the exception of the one I talked about earlier. 

I have a tutorial for these baskets that you can find HERE. I haven't made one in so long I actually need to follow my own tutorial! ha ha!

Well, that's all for today! I hope you all have a fun and safe Independence Day! Thanks for fluttering by!


Wednesday, February 12, 2025

All Things Valentines!!!

****edited to add: I created an updated tutorial for the key wristlets shown in this post. You can find it HERE ********  Valentine' Day is fast-approaching and  I have been having such a fun time making ALL  kinds of gifts and things for the big day! I have quite a bit to share, so get cozy and I'll dive right in!  This card was made a few days after I made the post boxes from my previous post. I had all kinds of goodies left over and my mind was racing with possibilities! I did add in a few doves for an added vintage touch and the sentiment is from the new Folk Heart Sentiments.

To begin this card, I die cut a panel of Pure Poppy cardstock using the Stitched Scallops Die and then stamped it with gold ink using the large frame included in the Bookish Holiday Frames Stamp Set. I die cut the largest heart and backer using the Nordic Hearts Die; the main heart from Pure Poppy cardstock and the backer from Pale Peony cardstock. I adhered them together using foam squares. I added it to the center of the background panel using additional foam squares.

You can read all about how I made the embellishments in THIS post. I had so much fun arranging them here and there until I was satisfied with the arrangement.

I added the Be Mine sentiment and gave it a generous spritz of shimmer spray. I layered the scalloped background onto a top-folding A2 card base.

I still had quite a few embellishments left so I got to work on some treat boxes. I bought the Spellbinders Ribbon Box Die in November with plans to use it for Christmas, but we all know how things like that go! womp, womp! LOL! Anyway, it was the perfect thing for Valentine's Day treats!


I added the "feet" using the  Fancy Feet Die and I just love how it looks! They don't have to only be used on post boxes!
This one doesn't have the ribbon threaded through it yet, but I wanted to share it so you could see how it all works.

5/8 inch ribbon works perfectly to slide through the slot.


And now onto some sewn projects. I will most likely add these to my neglected sewing blog, but for now, I am going to post them here until I get some extra time to post over there. The fabric that I used for these projects is from Riley Blake, but I didn't note the collection.

I always love making these keychain wristlets to give as gifts and with the "P.S. I love you" labels, they're just perfect for Valentine's Day. I bought the labels years and years ago from the local quilt shop, so I don't have a source, unfortunately. 

I also love making tissue cozies as well. I ended up making 8 in total, but here is what they all look like.

I bought a bunch of the purse-pack tissue packages at Christmastime, but once again, womp! womp! I just didn't have enough time! Thank heavens for Valentine's Day to give us all a second-chance, right? ha ha!

And to keep the theme going, I had planned to make these calendars for Christmas, too, but here they are for Valentine's Day gifts. I made 5 in total to give to a few friends and my son's teacher.

The 5 calendars didn't take long at all, especially when you're mass-producing! I'm so glad I got them finished because they look so cute with all of the other goodies! You can find everything I used in the These Are the Days Collection. Thanks for fluttering by!
P.S. Have a happy Valentine's Day! xoxoxoxoxoxoxo


Saturday, May 13, 2023

For Mom + more Gingham Inspiration!

Happy Saturday, friends! I'm popping in today to share the card I made for my Mom for Mother's Day and a few tags that I made using the new Gingham Gorgeous from Bath and Body Works as inspiration!
I happened to be sick during the release where we used Mother's Day products, so here I am at the last minute getting something put together! Please note: this card was HEAVILY inspired by a beautiful card that I saw HERE; I loved the gate-fold design, the MOM down the center and the washi touches!


I decided to take a more colorful approach to highlight the beautiful Hydrangea and Rose washi tape; my mom loves these citrus hues, so I hope she likes it!  I cut a piece of Green Parakeet cardstock measuring 11 by 4 1/2 and then scored it at 2 3/4 on each end and then folded the flaps to the middle.

I also die cut the Modern Blooms die (retired) out of the same Green Parakeet cardstock, cut it in half, and then glued it on either side of the opening lining up the blunt cut for precision.

I adhered the washi tape to a 4 1/4 by 11 piece of white cardstock and then die cut it using the coordinating Hydrangea and Rose die and set the pieces aside. I just HAD to buy the Jeff Alpha die; that is what originally caught my eye on the inspiration card! I die cut the shadow from white cardstock and then the detail portion out of Sweet Blush cardstock. I layered them together using foam squares and then added them to the left side of the opening at the half-way point.

Once that was done, I fiddled around with the placement of the washi tape pieces until I was satisfied with the arrangement. You can see in this photo that I actually layered two of the clusters together on the right side until I was happy with the way it looked! I heat embossed the sentiment using the Larger than Life Mom stamp set and then glued it under the "o" in  MOM.

I gussied up the inside with the same stamp set and another left-over flower cluster!

If you stopped by the other day, then you probably saw my birthday card I made using the new Gingham Fresh as inspiration; this time I used Gingham Gorgeous as inspiration! I'm giving a few ladies in the neighborhood a little Mother's Day gift, and I included some of the Gingham Gorgeous products! Lucky for me, the Blossoms and Berries washi tape is a match made in heaven!

I made 4 tags in total, but I'm only sharing three since the 4th is almost identical to one of these. I adhered and die cut the washi exactly as I did for the Mother's Day card. I set the pieces aside and then got to work on the tags.

I used my most favorite tags: the Essentials: Classic Tags with fillable elements! These are nice and big and you can customize them with all of the the different fillable elements; I chose this lattice-y look for today! I used a diagonal striped stencil to create the soft blush gingham on the background. It's hard to see, but it's there; soft and sweet like it looks on the lotion and soap packaging.

From there I was able to decorate them with the washi pieces; this one features the large wreath.

The sentiment is from the Blossoms and Berries stamp set and is perfect for these tags. Since these ladies aren't MY mom, but I want to celebrate them, I though this worked!

I'm also obsessed with this gingham ribbon I found at Hobby Lobby; the perfect finishing touch!

This is a "for me" photo. (wink)  I made these for the 7-11 year old boys' group at church to give to their moms for Mother's Day. I had them make little Shrinky Dink charms to attach to the ring; they turned out really cute! Anyway, I added them because I wanted to remember that I did this! ha ha! Thanks for fluttering by!