Showing posts with label offset gatefold cards. Show all posts

Wednesday, March 6, 2019

Countdown to Confetti Day 2


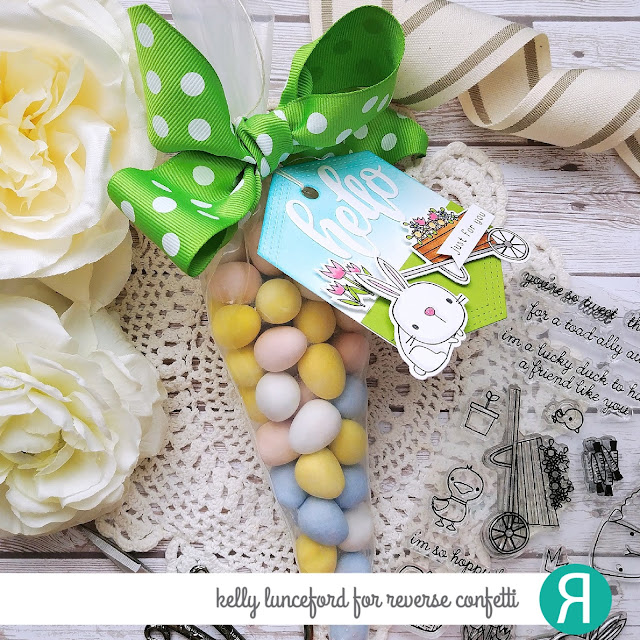
Hello and welcome to Day 2 of the Countdown to Confetti! What was your favorite thing that was showcased yesterday? Today you'll probably be adding a few more favorites to your list as we start things off with a fun new set called "Spring Pals"! It is so cute! One of the reasons why I like it so much is that is has all the fun and charm of an Easter set, but the sentiments are for many other occasions when you want to send a springtime card. I chose to make a thank you card and tag for my "carrot". Also, this is a LONG post, but we are showcasing two new sets today, so scroll all the way down to see the second set. Also, don't forget to stop by the other designer's blogs to see how they have used today's new products. And..I totally forgot to mention the prizes up for grabs yesterday! Reverse Confetti will be giving away a $15 dollar gift certificate to one blog commenter and to one Facebook commenter, so let's give the designers some love and be entered to win!

Isn't this sheep adorable? I'm just loving how easy he is to color, too! wink wink! I couldn't wait to get him inky and pair it with this punny sentiment! To begin, I die cut the Stitched Hex Tag twice; once out of green paper, but just enough to make grass, and once out of white. I did some ink blending at the top to mimic sky. I also added some flecks of ink mixed with water to give it some extra detail. I used bot the "thanks" and "hello" from the hello and thanks word duo Confetti Cuts for this project. They are so much fun and I love the fonts!


The frame is cut using the new Stitched Note and Frames Confetti Cut. I layered it over the top of some of the new Darling Dots pattern paper. I just love polka dots for spring and these ones are just so cute!


The images are die cut using the coordinating "Spring Pals" Confetti Cuts. It was so much fun to create this little scene against the hex tag. I tied it up with some twine for added texture.

I love using icing piping bags to make carrot treats for spring. I filled it with Cadbury mini eggs because they are delicious and the colors are fabulous as well! I tied it up with a big green bow to mimic the top of a carrot.

I used the same steps for this tag as I did for the card, but didn't add ink splatters.

The "just for you" sentiment is from the Word Up set that was showcased yesterday.


For my final project of the day, I am using a few fun new products! First up is another one of the word duos; Mom and Dad. I die cut the dad piece twice and glued it together using liquid glue. I also heat embossed the "I just can't say it enough" sentiment in white onto a strip of matching cardstock. This is also from the "Word Up" set that I can't seem to get enough of.


The idea behind this card is one that is very common,but fun for Father's Day or for a Dad's birthday. I'm sure you've seen the cards where the outside is a shirt and then the inside is the superhero outfit. That is the idea I was going for, so hopefully that translates here. I used a piece of pattern paper from the Paper Bliss 6 by 6 paper pad to create the shirt. I felt like it looked like a fun shirt print. This is an offset gatefold card where the right hand portion is larger than the left. I sewed along a strip of the pattern paper on both sides so that I could add the buttons and have it look realistic. The pocket is die cut using the Tie-rific Confetti Cut and added to the card using foam squares.

This view gives you a little peek inside the shirt to the superhero portion. The inside uses a super cute new set called So Super. 


When you open it up it says "You're my Hero" which continues along with the sentiment from the front. 


The images are colored using copic markers and then attached to the tag using foam squares. The skyline is die cut as well and the sentiment strip is attached. A few sparkling clear sequins finish off this fun design! Thanks for fluttering by!

Friday, February 8, 2019

Papertrey Ink Design Team Tips {Offset Gatefold Cards}

Hello, Friends! I'm so happy to be here today sharing this week's Papertrey Ink Design Team Tips! Do you ever feel like you get stuck in a design rut? I know I do! For today's Design Team Tips, I'm sharing an easy way to create visual movement on your cards using an offset gate fold card! Not only does it create visual interest, but with its unique fold, it gives the recipient a bit of the unexpected as well! 

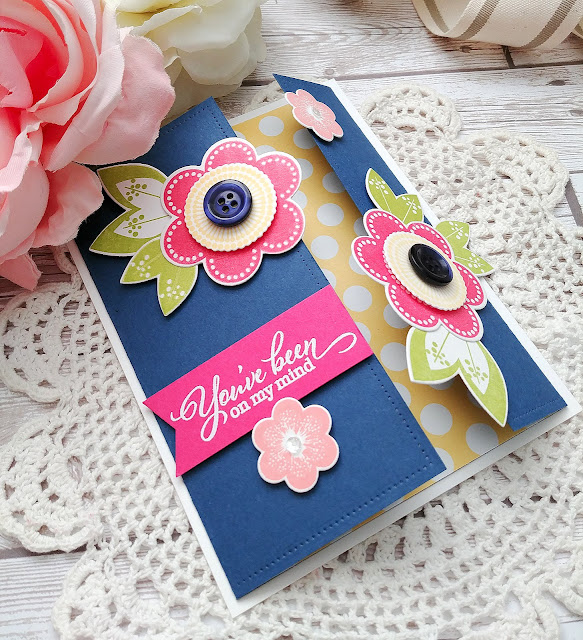
 I will be sharing all of the measurements that  I used for today's cards as well as instructions on  how I put them together.  They are so easy to assemble, you'll be whipping out a whole set in no time! To begin, I chose a bright and springy color combination that I thought would help us remember that no matter how cold it is TODAY, Spring really will come! LOL! I chose Enchanted Evening and Green Parakeet for the two card bases. The base of the offset gate fold card measures 8 by 5 1/2 inches. The small flap on the right side measures 1 1/4 inches and the large flap on the left side measures 2 1/2 inches. This will leave a small gap between the two flaps.
This gives you a nice visual of how the card looks underneath. I used a 4 by 5 1/2 inch piece of Bitty Big: Harvest Gold pattern paper to place inside the card. This gives just a little peek-a-boo from the front and gives the card some extra visual detail. If you don't like that aspect, you could always just do some stamping along this portion, or leave it blank depending on the theme and feel you want your card to have. I was going for a playful and fun spring-like card, so polka dots were the perfect choice. 
I chose to use one of my favorite stamp sets; Friendly Flowers for this pair of cards. I used the Friendly Flowers die cut and the Friendly Flower Extras dies to die cut  all of the pieces I needed and then got to work stamping them. I used my mini MISTI to make it go quicker.  The ink colors that I used are: Hibiscus Burst, Harvest Gold, Pale Peony, Green Parakeet, and New Leaf. 


 I just love the subtle detail that the Nesting Basics Pierced Rectangles dies add to my designs. You can see how I added it to the edges of the card flaps. I don't use buttons nearly as much as I used to, or nearly as much as I OUGHT to, but they just seemed fitting for today's designs. I attached some Enchanted Evening Buttons using mini glue dots to the centers of the large flowers. I also added some sparkling clear sequins to the centers of the small flowers for some shine.
The sentiments, which are both from the Friendly Flowers set, are heat embossed in white onto strips of cardstock. I used the end of one of the XO Skinny Mini tag dies to give it the notched look. Normally I just use my scissors, but I really wanted them to have nice finished edges. I arranged the flowers and leaves in a zig zag pattern to create the movement I wanted using foam squares.
I decided that I wanted the card to have a white background, so I added the entire gate fold card to a white base. This is not folded or anything, just a backer to give the card a little bit of contrast. You will want to be careful, if you add this, to make sure that your card can still open and that the white portion won't impede any movement from the overhanging embellishments. The leaves on the right side of my card simply fold behind it when it is opened, but I didn't make the pink portion quite long enough, so it catches a little bit. Also, you will have plenty of room to stamp or write your greeting inside, but be sure you don't stamp or write in the gap. I hope you've enjoyed today's Design Team Tips. As always, if you have ANY questions, please leave me a comment and I will get back to you! Thanks for fluttering by!