
***If you're here for the Reverse Confetti Blog Hop, please scroll down ***
I'm so excited to be sharing my second Traveler's Journal post for Papertrey Ink ! This month, we are focusing on creating booklets using mixed paper. You can see more inspiration over on the Papertrey Ink Blog. I chose to focus on creating colorful pages filled with different patterns to showcase a few school pictures of my boys. I can't wait to keep adding to them as the years go by. My youngest will be starting Pre-school in the fall, so I will be able to start his from the beginning and keep them up to date on a regular basis. The Traveler's Journals are the perfect size to create these sentimental keepsakes.

The newly released School Days stamp set was the perfect starting point paired with the fabulous Bitty Big pattern papers. To be honest, I didn't know that they were double sided, with a small pattern on one side and the larger print on the other. I should have known based on the name; Bitty Big! LOL! Regardless, they are fabulous for so many projects. I used them for actual pages along with the Page Blanks. It was easy to just add the holes to the pattern paper to create my own custom pages. The thickness is perfect as well...not too bulky, but sturdy enough to hold the weight of the embellishments.

To begin, I die cut the Big Apple Die using Pure Poppy cardstock. I stamped the handwriting lined paper image using Fresh Snow Ink. The "R" is die cut using the smaller print from the Simply Chartreuse Bitty Big pattern paper . I used the Book,Print Upper Alphabet Die and cut it again using True Black cardstock for a shadow. I glued them together and added some Crystal Glaze over the top. The sentiments are heat embossed using gold powder as well as the number 1 image that is included in the School Days set.

I created the actual pages for this layout using Harvest Gold Bitty Big pattern paper. I also stamped some more lined paper and continued with the same elements that I used on the other page. I was so excited to stamp the "school, grade, and teacher" sentiments on each pencil to use as headers for that information. I will go ahead and write those details in using a pen or smaller alphabet stamps later.

I love the little details included for the pencil; my personal favorite is to gold emboss the part that connects the eraser to the pencil. It just adds that little extra realistic detail.

This layout showcases my son's school picture for this year. I always buy this gigantic package of pictures and this is the first...the VERY first time I have ever done a single thing with them, besides giving them to the grandparents. I'm excited to get to work putting more of these together to get those pictures out of the envelopes and into these booklets.
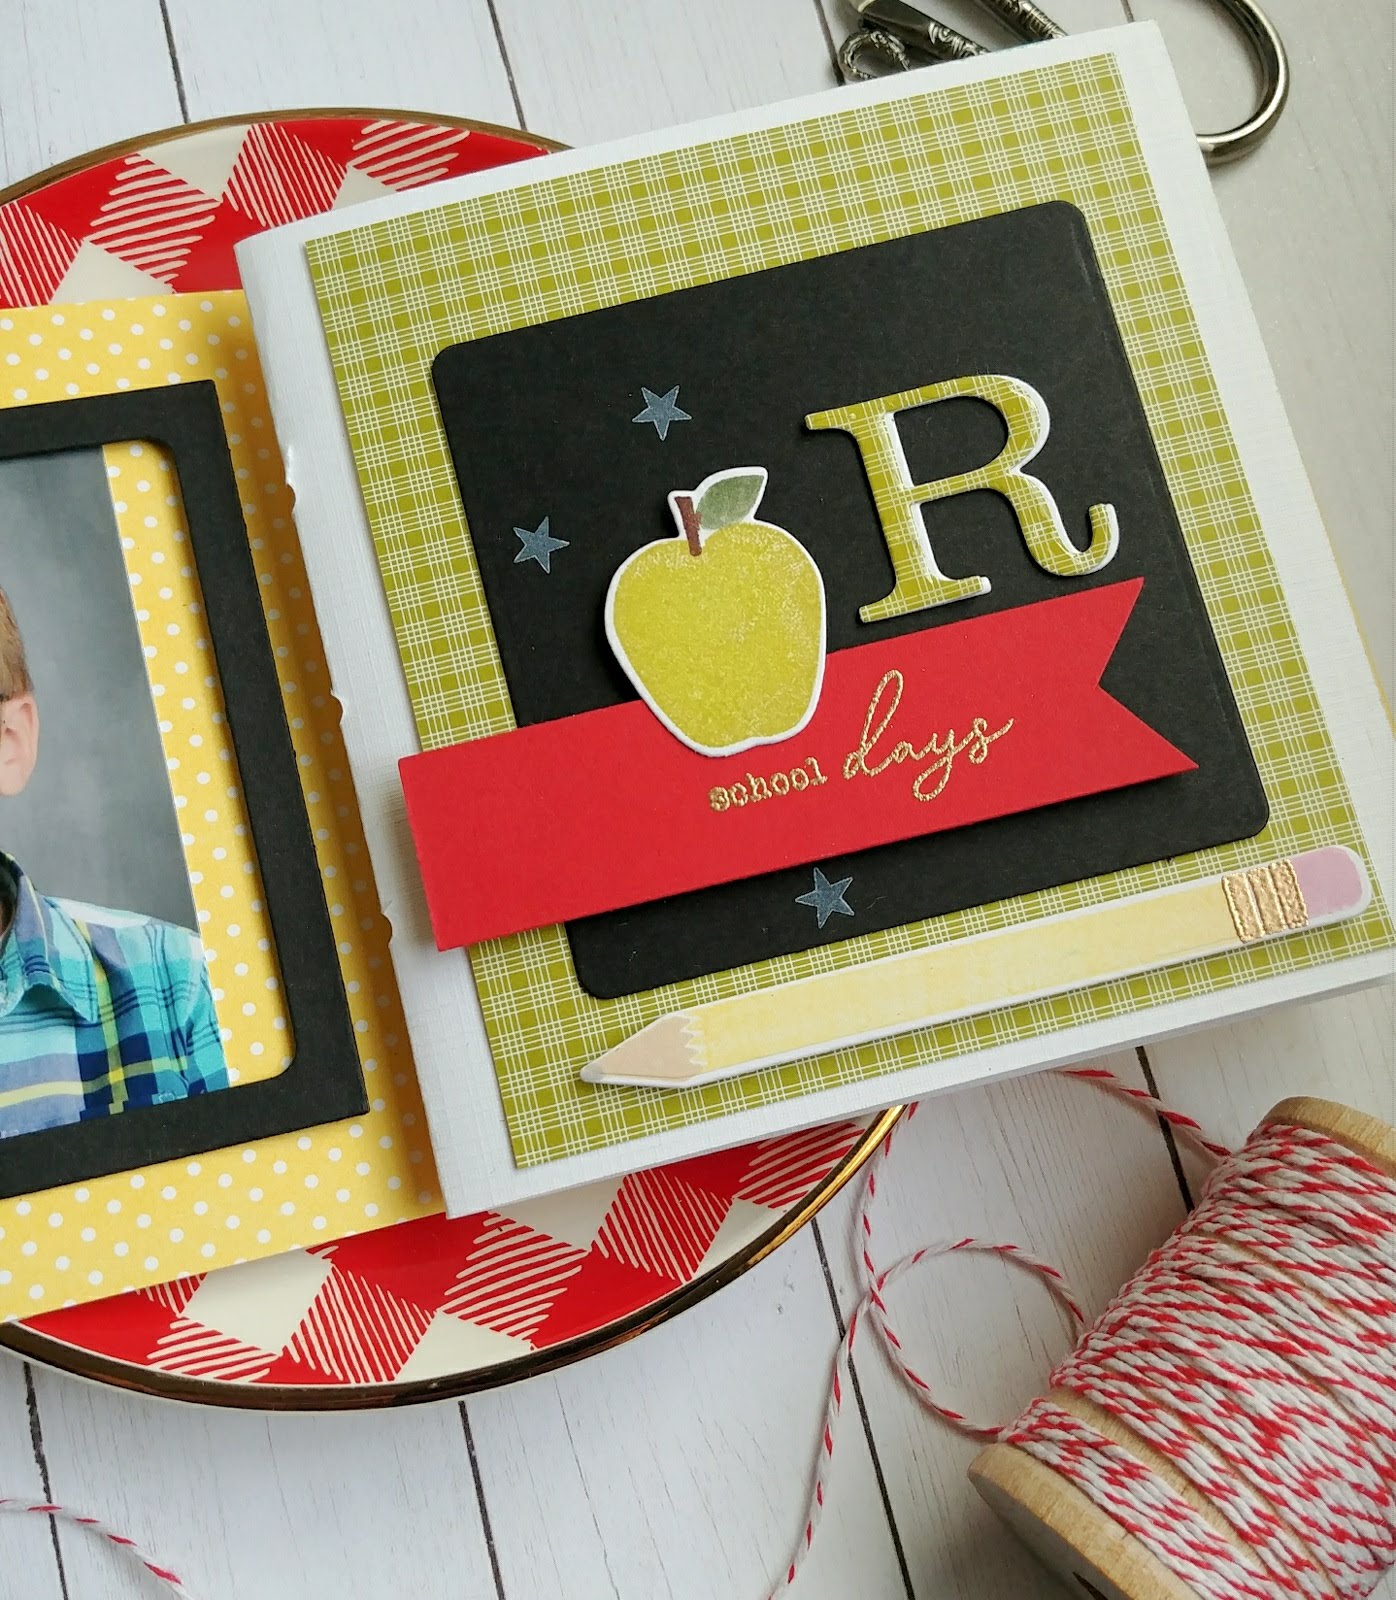
You can see that I used the smaller print on this layout as well. The black frame around the photo as well as the black square used on the other side is from the Traveler's Journal Outercover die set.

I'm going to be using this layout to add a picture from the last day of school. I always like comparing first and last days to see how much they've grown. School won't be out until June, so I can't add it until then, but this is where it will go.

I used the Bookprint lowercase Alphabet dies to create my son's entire name. It is pronounced "Reese" for those of you who may be wondering. LOL! I die cut it out of True Black cardstock and then added crystal glaze over the top.

I added the letters over the top of an envelope made using the Traveler's Journal Envelope Die. These are so easy to create and make great mats or focal points in your journals if you don't want to put anything inside. I will be sharing lots of ideas with these envelopes in the months to come, so stay tuned! I couldn't resist showing last year's Kindergarten picture of Rhys because they are just so darn cute! This year's pictures were full of "character" and I almost sent both of my little boys back for retakes. In the end, I thought they were kindof fun so I just kept them. I had so much fun putting these together and I hope I have given you some ideas on how to create your own mixed paper journals. Thanks for fluttering by!
4 comments:
Love the paper Kelly, cute designs!
Although I don't journal, I still love seeing your creations, always fun and colorful.
Thank you, Debbie! I appreciate your kind words and for stopping by!
Thank you! You're always so sweet!❤❤❤
Post a Comment