
Hello Friends, new and old! Welcome! It's so good to have you stop by! I'm so happy to be here today sharing some designs using some of the fabulous NEW products for the June Papertrey Ink release! It has been so fun putting my thinking cap on and trying to show you some versatile ways to use the new products that I will be sharing today! Remember, you can read about and see all of the details about each product on the Papertrey Ink Blog. The best way to find this is to find today's post on their blog, find the wording in blue that says "click here for further product details". I will provide links to any products that I have used today that are not part of the new release that I have included in my designs. They will all be highlighted in red. Also, all new release products will be available for purchase starting June 15 @ 10 pm EST.

I wanted to save this card for last because it's one of my favorites, but then I just couldn't resist showing it first because it is so bright and cheery! This is one of those designs that I had rolling around in my head and I couldn't wait to set it free on paper! That being said, this was attempt number 2 because sometimes my mind's eye doesn't take every little detail into consideration! LOL! I will share those little foibles here and there as I share my design process with you! To begin, I knew that I wanted to try splitting the new Bold Borders: Waves die cut into two pieces on a diagonal like this. I was lucky to find that I did indeed only need ONE frame. However, I did layer it 3 times for a nice sturdy piece. I did a lot of ink blending and I wanted to make sure it would withstand all of that motion and I also just love how it looks stacked up!

The inspiration for this card came two fold; I love how the "waves" on this border also look like rainbows. I also love the "sending you sunshine" sentiment that is included in the new Sentiment Staples: Sending You. I knew that these two ideas could create something fun and colorful. I used a sponge to blend in all of the colors; Pure Poppy, Orange Zest, Harvest Gold, Green Parakeet, Hawaiian Shores and whatever was left on my blue sponge! LOL! There is a darker shade of a Navy of some kind! Ha Ha! Once all of the blending was done, I spritzed it with some water and some shimmer spray.

Next, I got to work laying out the card elements. My MISTI was a must-have tool for this design! The first step was to decide which angle to place the blue/purple portion of the frame. Once I had it at the angle that I liked, I put it into my MISTI so that I could get the sun stamped in just the right place. This particular sun is from one of my ALL-TIME favorite kits; Make It Market: Shakers and Sprinkles. This is one of those kits that I hit refresh about a bajillion times so I could get it! LOL~! I haven't used it nearly enough, but the sun was the absolute perfect image in every way shape and form for this card! Once it was placed in the MISTI, I stamped it multiple times to get a nicely saturated image. When you're on your second attempt, you can afford to make any mistakes! LOL!

At this point, I glued down the frame using liquid glue. I like using liquid glue for projects like this because I have a little "wiggle" room, so to speak! (pun intended) If the angle isn't just right, you can adjust it before it dries! At this point, I was able to center the "sending you" portion of the sentiment onto the card. Once again, I used my MISTI for proper alignment and a crisp image. This is where I went wrong on my first attempt. I just stamped the sentiment without realizing where the 2nd frame would be going and then it just looked really off. The second portion of the frame was askew and I just needed to start over. I made sure to leave enough room to add the black sentiment strip with the word 'sunshine" embossed in gold.

I repeated the same process for the second portion of the frame, making sure to line it up exactly with the first one. Yay! It worked! I repeated the same steps for the second part as I did with the first. If I made this card for a third time (LOL!) I might take into consideration the placement of the colors. I did them in rainbow order starting at the bottom and working my way up, not realizing how it would turn out when it was cut. I REALLY like how it turned out, so I'm not sure it would enhance or detract!

Once everything was in place, I added a little bit of sparkle with some rainbow gems scattered here and there.

For my second design using the Bold Borders: Waves, I wanted something soft and feminine and that also included the word "celebrate" that is also included in the Border set of dies. I wanted to use it in a more special way, which I will share with you later on in the post. I also paired it with the Botanical Bounty II set that was featured on the BLOG yesterday. You can see the card that I made for yesterday's post HERE.

To get started, I die cut a few of the borders and glued them together (surprise, surprise) and then adhered them to an A2 Stamper's Select White Cardstock base.

Once that was done, I got to work stamping all of the blooms and leaves. My color palette for today is Harvest Gold, Hibiscus Burst, Raspberry Fizz and Pale Peony. The leaves are stamped in Ripe Avacodo and LImeade Ice.

I also did some gold embossing for a few of the centers of the flowers for some extra texture and shine! I always have so much fun arranging flowers on my cards!

For the word "celebrate", I die cut it 3 times and then glued it together with liquid glue. Once that was dry, I pressed it into a Versamark inkpad and sprinkled it with gold powder and heat set it. I repeated this process a few times til it was smooth and melted with some nice dimension. It was easy to add it to the card by attaching it to the leaves with liquid glue. It didn't require any foam squares! Yay! I really like how adding the gold embossing powder to the die cut makes it feel a little more special and elegant! I added some black flecks here and there with my color spritzing tool for some added detail and interest. A trio of sequins finish off this design.

For my last design, I'm showcasing some of the amazing new die cuts that were featured on Day 2 of the June Release. I shared THIS card using them as well. The new Reef Builder Dies are a natural fit for this new Bold Borders: Wave die! You also probably saw a little sneak of this project on the sneak peek video and Instagram post! It was SO MUCH FUN to make!
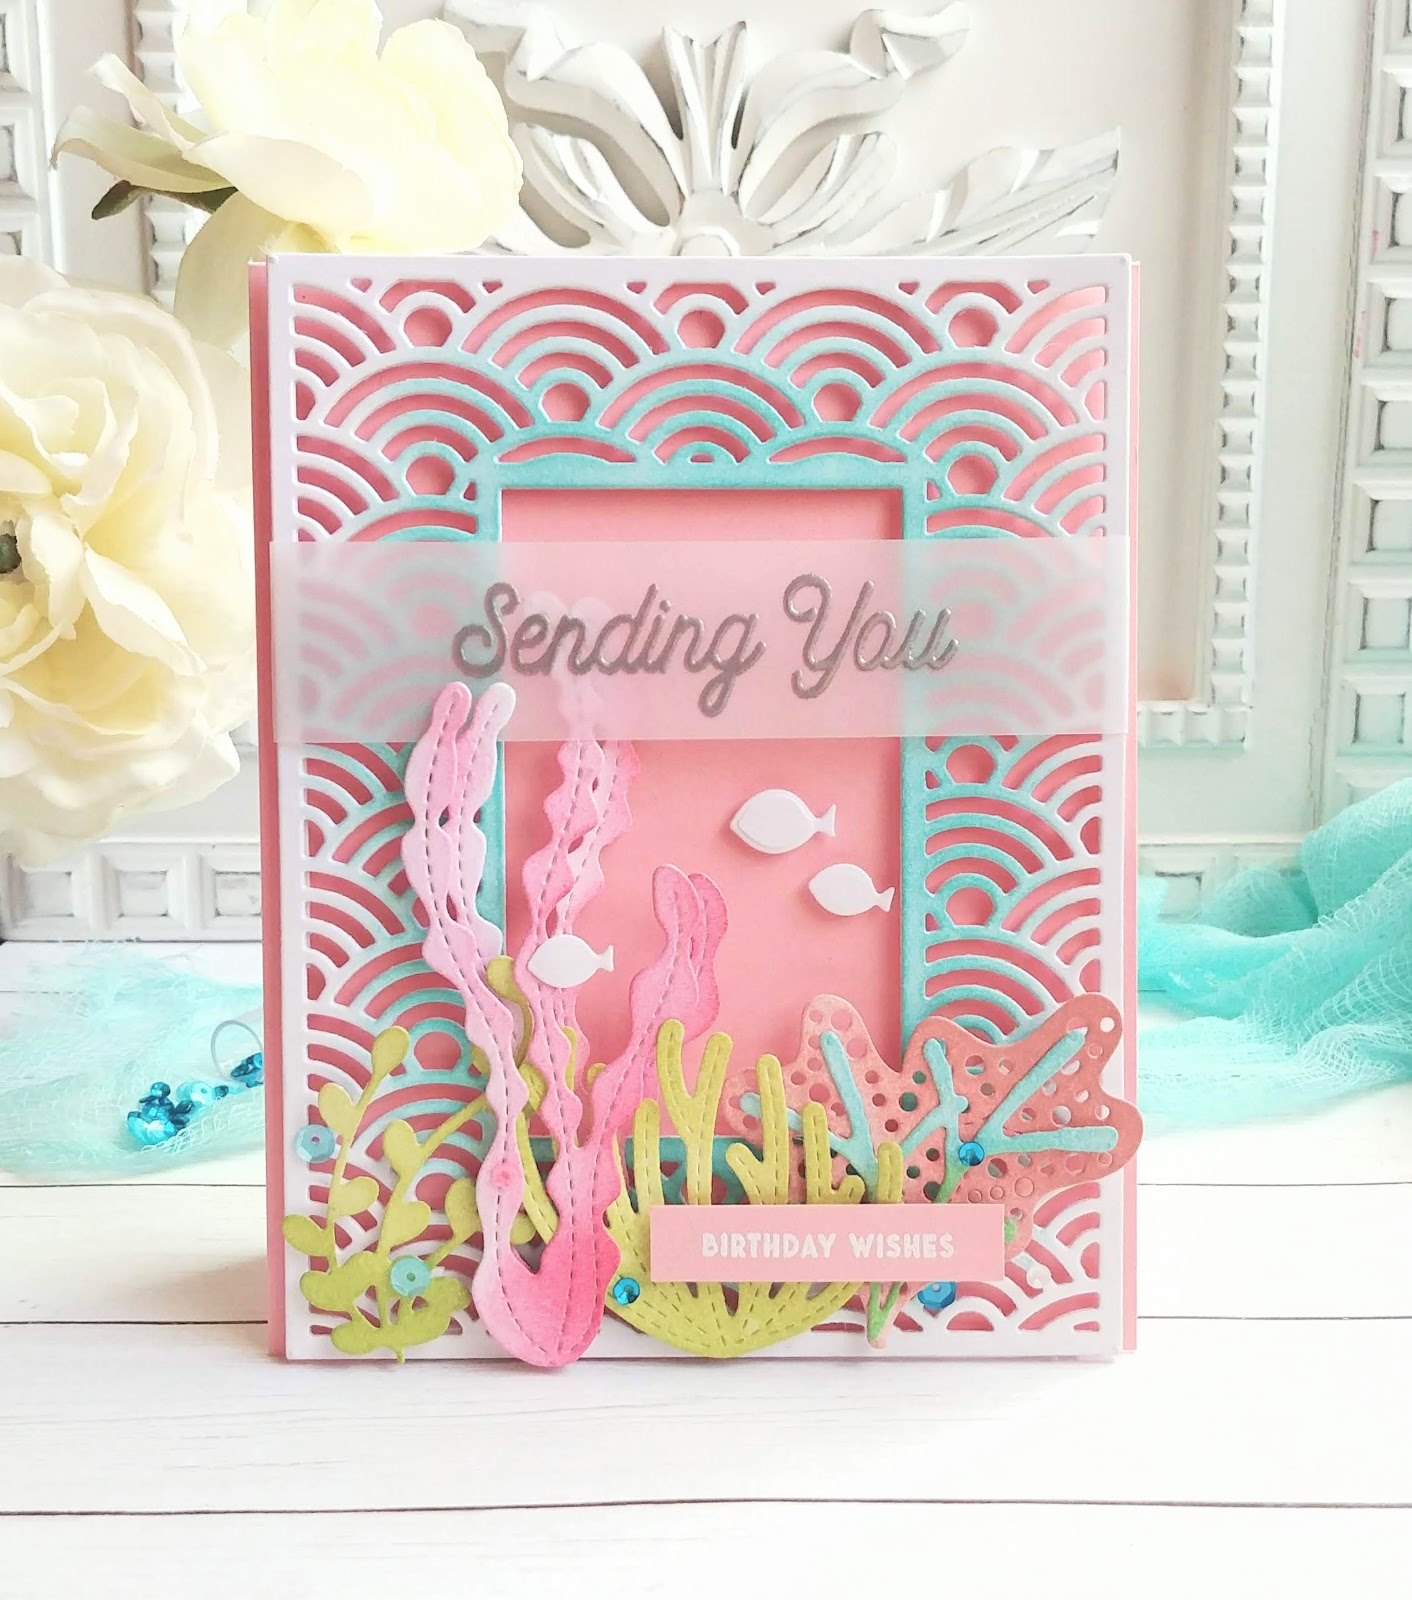
To begin, I did some ink blending around the center of the frame using Hawaiian Shores ink. I also die cut all of the pieces from the Reef Builder Dies and got to work sponging some ink onto them. I just love how easy it is to customize all of the pieces by adding ink in various shades!

Surprisingly enough, I kept the trio of fish white. I really like how stark they look against all of the colorful Flora! I toyed around with different colors, but in the end, white won out! Who woulda thunk? I also heat embossed the "Birthday wishes" sentiment in white onto a piece of Sweet Blush cardstock.

I had so much fun arranging the seaweed and coral here and there. I also added a few different sprinkles from the Make It Market: Shakers and Sprinkles kit . It just gives that extra bit of ocean charm. It probably didn't help that my 3 youngest boys keep watching a you tube video of the crab from Moana singing "I'm so SHINY!" LOL!

I heat embossed the "sending you" sentiment onto a strip of vellum and attached it around the back of the border. This is also from the Sentiment Staples: Sending You". I can tell this one will get a lot of use! Once that was done, I was able to attach the frame using thin strips of foam tape to an A2 Sweet Blush card base!
That concludes today's post, but I hope you'll stop by after the release where I will be sharing lots of inspiration using even more of the new goodies! Thanks for fluttering by!
10 comments:
sigh.
Love everything, especially your nautical design!
WOW -- these are all stunning! I thought that second one was spectacular and then I scrolled to the third and my jaw dropped. So lovely! Thank you for all the inspiration this release!
Wow, these are all beautiful Kelly. Love the different styles and techniques on each card, especially the way you divided the frame on the first card. Love that frame. Thanks for all the inspiration.
Very cute and love the florals. Love all the different looks.
You've shared fab cards today, and shown how versatile the waves border is by achieving 3 different results on your cards.
Stunning, Kelly! Not only love your beautiful creations but also your detailed blog posts!
Oh what a bright and happy post! Love each and every cheery creation today! Beautiful designs!
Very pretty cards, Kelly! Love your innovative designs!
Hi Kelly! I waited until this morning to come by and with a cup of coffee, enjoy your post. (My son has been here on vacation so my days have been super busy.) Kelly, you're a gem! I love reading your blog for many reasons- your detailed information, your humor and realism. I'm seriously going to try your multiple embossing because Celebrate turned out GORGEOUS! Actually, every single card is too! Thank you for your beautiful inspiration!!!
This is a fantastic bundle of cards !!
[margessw(at)icloud(dot)com]
Post a Comment