Monday, March 8, 2021

The Greetery Spring Fever Release Day 1

Happy Monday friends! I hope you're having a fabulous day! Things are down-right festive over here for day 1 of the Spring Fever Release at The Greetery! There are so many adorable new products to create projects for Spring and Easter! Of course there are so many that will work all year long as well! You can see all of the products up close and in detail on The Greetery Blog! Up first are these darling carrots in the BotaniCuts family! I am seriously in love, but I think I say that every time a new set of BotaniCuts is released! ha ha!

The flowers are also from a new collection of BotaniCuts; Wildflower Mix! I've used them on EVERY project today so I think that tells you just how much I love them! And....the bow...can we talk about the bow? OBSESSED! This is from the new "Put a Bow On It" stamp/die set! It has so many different sentiments from birthday to Christmas, Easter to Just for You! The possibilities are endless!

I couldn't resist using the Happy Easter sentiment to accent these spring carrots and flowers! I die cut everything out of white cardstock and then used ink and blender brushes to color all of the BotaniCuts and then used ink pads, of course, for the bow!

I am especially obsessed with gingham prints for Spring so each of my cards today uses the Square Dance Stencil set to create the backgrounds.

I added some ink splatter and dew drops for added interest to this simple Easter card!

As you can see I switched the background to pink on this one and then added more of the pretty BotaniCuts Wildflowers. I added them around the perimeter using foam squares and liquid glue. The "Wishing you a lovely" portion of the sentiment is from the new PreText stamp/die set. I used two of the different dies to creat a banner to highlight the sentiment.

The "Spring" word is from the new "Let's Have a Word: Spring" die. I die cut it three times from white cardstock and glued them together using liquid glue. I added some ink to the top using a blender brush.

I added some extra details to the foliage and flowers using colored pencils. I added white Nuvo drops to the centers of some of the flowers for some added detail.

The fun thing about the new BotaniCuts Wildflower Mix is that you can mix and match them in all kinds of different combinations to make your projects truly unique. I had fun putting the different stems together with their blooms.

I had so much fun with the flowers and I can't wait to use them in all kinds of different ways!

Next up is a fun suite of products called "Bunny Hop"! There is a stencil set, stamps, and dies! I used the stencils and dies for this card, but I used the stamps/dies on my last card for today!

I added some flowers to the blue bunnies ears for a fun touch.

You add the nose and eye details with a black pen. I used a fine point sharpie! The "With Love At" portion of the sentiment is from the PreText stamp set and is stamped directly to the gingham background using black ink. I used the "Let's Have a Word" Easter" die and created the same way I did the Spring word on the 2nd previous card.

I added a few sequins for some sparkle and shine!

My last card for today was 100 percent inspired by THIS home decor piece! I used the fabulous Boho Banner Die to create the banner. The sentiment is from the Bunny Hop stamp set as well as the stamped and die cut bunny!
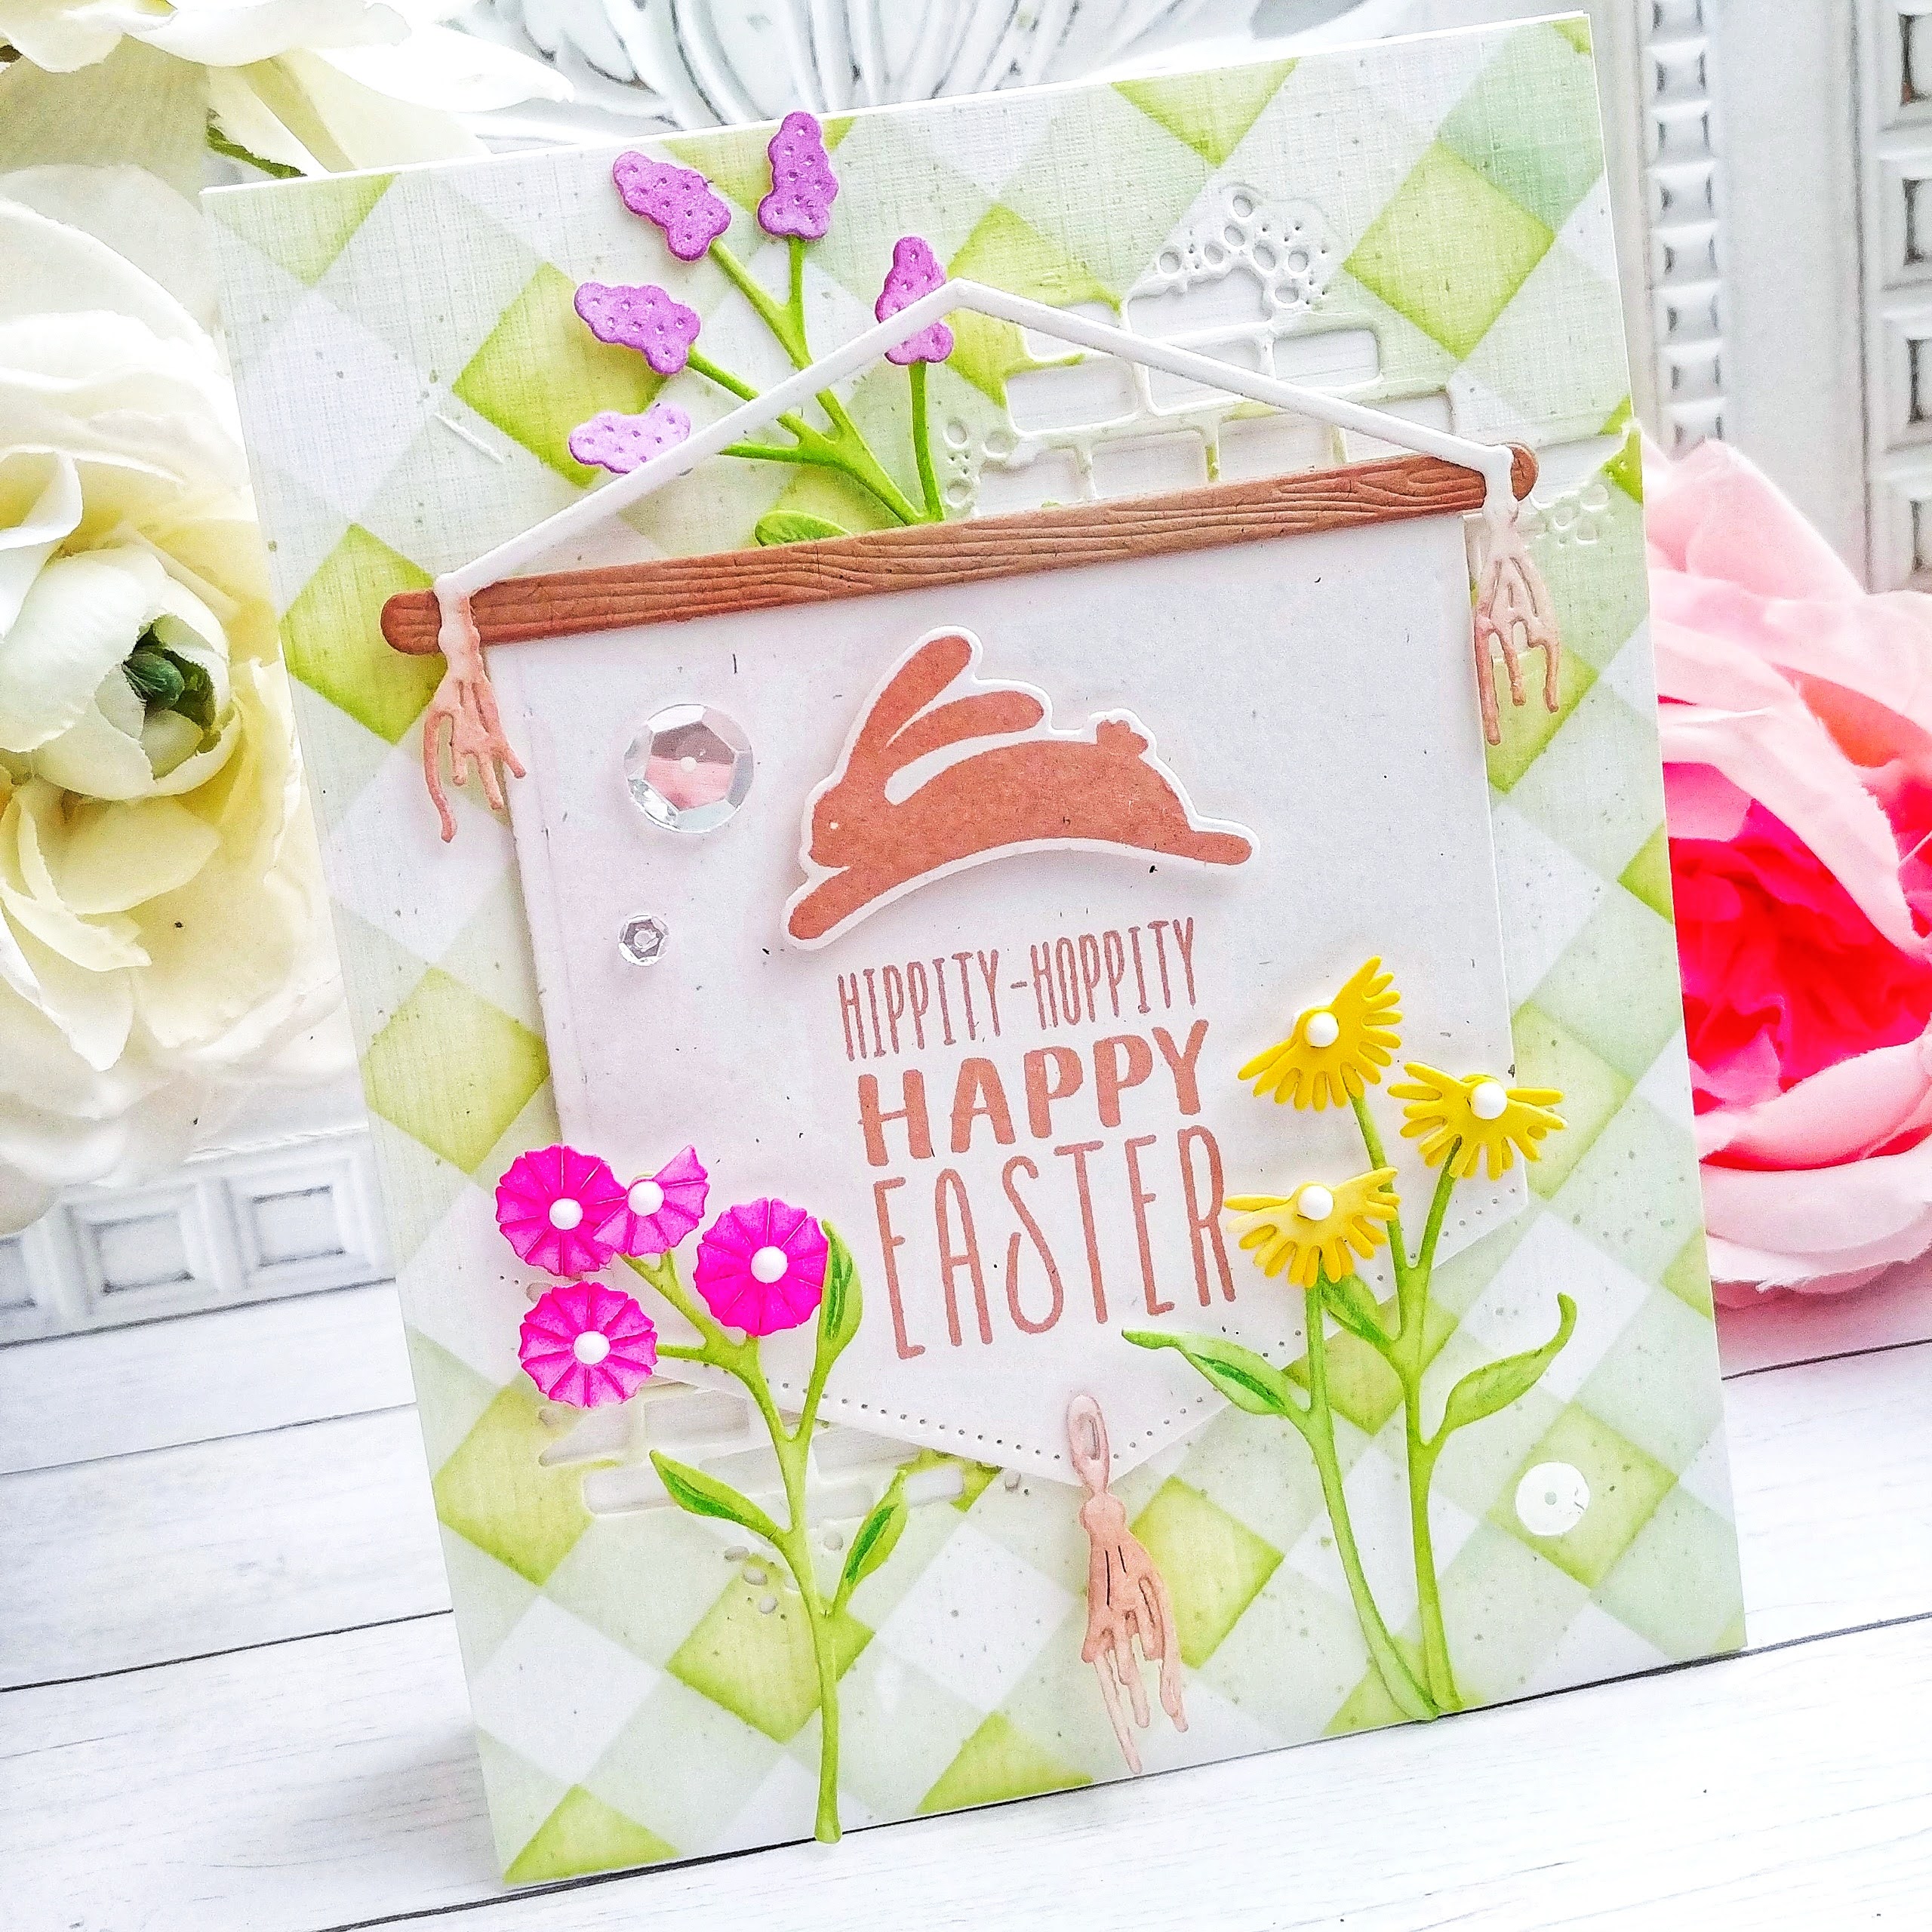
I created the gingham background (of course) and then used the Brick Layer Die to add the subtle brick look in the background.

Of course I had to embellish the card with more flowers! I had a ball using all of these fun new products! Don't forget to stop by the other designers' blogs to see what visual delights they have to share! Thanks for fluttering by!


Pinkfresh Studio March 2021 Stamp, Die, and Washi Release Blog Hop


Hello friends! Welcome to the Pinkfresh Studio March 2021 Stamp, Die, and Washi release blog hop! I'm head over heels in love with this release and I know you will be, too! I have two projects to share with you today, but first I wanted to take care of some fun business! Pinkfresh studio will be giving away the entire release to one luck winner on both the Pinkfresh Blog and You Tube Channel. One of my lucky blog commenters will receive a $25.oo gift certificate to the Pinkfresh Shop, so make sure to comment on today's post! Winners will be announced on the Giveaway Page on March 15th and you will need to claim your prize within two weeks of the announcement. And now, on to the projects!

Both projects use the GORGEOUS new Painted Peony Mix Washi Tape which you can see in the photo below. I cut a piece of cardstock in half and adhered the Washi tape straight and even onto the cardstock. This Washi tape is very forgiving, so if you make a crease or something, it can easily be smoothed out or lifted to readjust. The Painted Peony Mix Die lays over the entire panel to die cut it ALL in one pass! I'm seriously obsessed! What you're left with is perfectly die cut embellishments for you to add to your project!

My first card uses some older favorites mixed with the new Washi tape to create this slimline design. To begin, I used the Diagonal Striped Stencil on a long panel using Regal Bliss ink. I die cut the Slim Braided Circles panel out of white cardstock and then adhered it over the top of the stenciled panel using foam squares. I stamped the "Believe in Yourself' sentiment, which is from the new Joyful Bouquet stamp set, directly in the center of the bottom circle using black ink. From there I added all of the die cut washi tape embellishments using foam squares.


I die cut the word "YOU" using the Heather Uppercase Dies from both a gold specialty paper and white cardstock and glued them together for stability. This particular paper is a cross between paper and gold leaf, so it is incredibly delicate, but so pretty! I heat embossed the "There is purpose in the season you are in" sentiment, which is also from the Joyful Bouquet Stamp Set, onto strip of vellum and wrapped it around the card. I finished off this design with a few purple jewels!

My second card for today uses a few more of the die cut embellishments. I love how many pieces you get from one panel! I can't wait to make some tags using some of the other Washi Tape designs! Actually, I can't wait to make all the things with the other designs! ha ha! There are 5 in total with coordinating stamp sets and dies!

As you can see, I went with the same feel for this card with the Fancy Diagonal Stripes die . I did some ink blending around the Pretty Frame and on the panel underneath the strips for a splash of color.

This particular sentiment is from the coordinating Painted Peony Mix stamp set and is heat embossed in gold to coordinate with the gold foil accents on the washi tape. No matter which Washi Tape you choose, you won't be disappointed....they are ALL gorgeous! Make sure you head to the other designers' blogs to see some of the other collections! Thanks for fluttering by!


You are invited to the Inlinkz link party!

Click here to enter

Reverse Confetti March Release Blog Hop

Hello and welcome friends! It's going to be a busy day here on the blog! I'm thrilled to be participating in the  Reverse Confetti March release Blog Hop! Easter is on it's way and so are some fun products to help you create fun and unique projects for your friends and family!


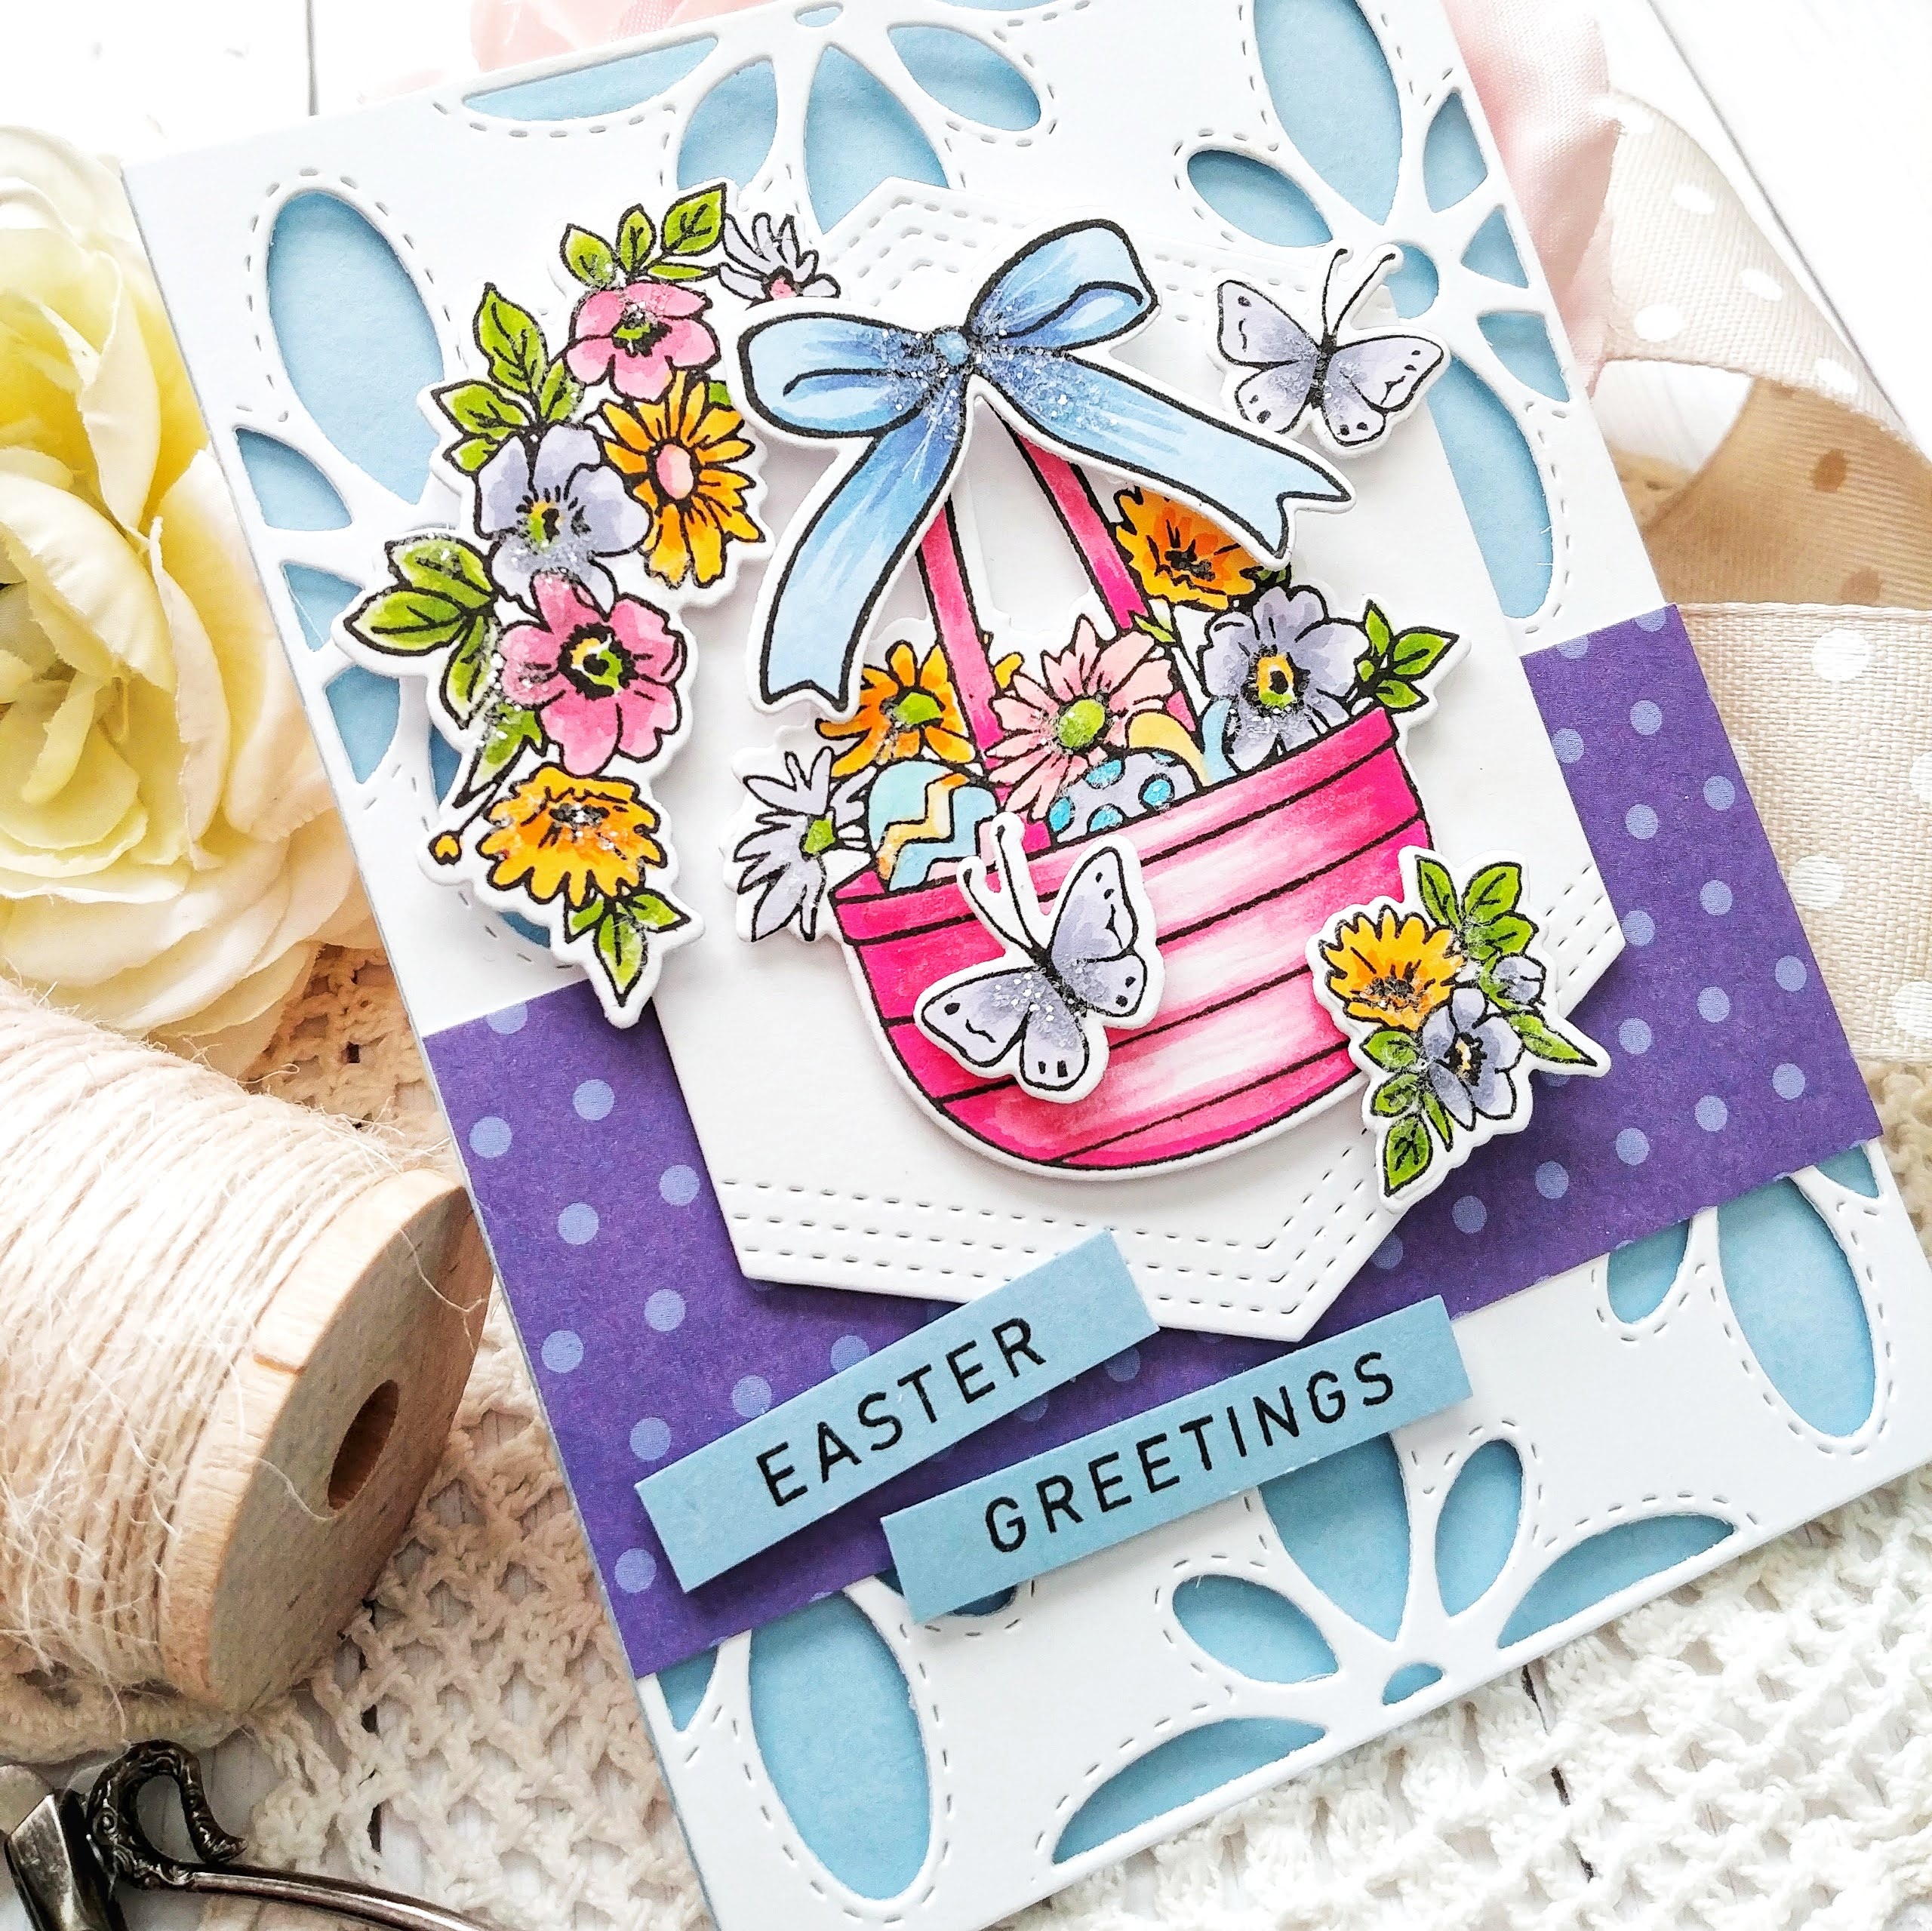
My first project uses the darling new Big Flower Coverpanel paired with the super sweet new Adorned Egg Stamp Set. To begin, I stamped the images in black ink and then colored them with Copic markers in springtime colors! I used the coordinating Adorned Egg Confetti Cuts to cut everything out.

I layered the flower Coverplate over the top of light blue cardstock using foam squares for dimension. I added a strip of Darling Dots Pattern Paper near the bottom using a tape runner. I added the basket to the Stitched Hex Tag using foam squares as well as a few flowers, the bow and butterflies!

The sentiment, which is from the same set, is stamped onto the same light blue cardstock using black ink and then cut into strips. I added them to the card at a slant for a playful look!

A bit of glitter finishes off this first design! 


My next card features the new Orange Blossoms Stamp Set which I just love! I'm especially fond of oranges and it's always fun to use them in my crafty projects To begin, I stamped the images and colored them with Copic markers. I used the coordinating Orange Blossoms Confetti Cuts to cut everything out.


I die cut the Hope word using the HOPE Confetti Cuts and added some ink over the top of the smaller word and the sun portion using a blender brush. I also added some ink splatter for additional detail.


I cut a panel of white cardstock measuring 4 1/4 inches by 5 1/2 and added the same ink around the edges. I die cut the Big Flower Cover Panel out of white cardstock as well and added ink to that as well. I adhered it to the other panel using foam squares.

I framed a piece of Darling Dots Pattern Paper with the Stitched Note Frame and added it to the background using additional foam squares. I would recommend stamping the sentiment, which is from the Hope Coordinates stamp set, before placing it onto the background. I didn't do this but it worked out okay! ha ha!

Once the sentiment was stamped I added the HOPE piece. I embellished it with the orange images placing them here and there. I added sequins and glitter for some added detail. Make sure you head to the other designers' blogs on the hop! Thanks for fluttering by!


Amy Kolling

Tricia Barber

Kelly Lunceford

Lisa Henke

Deanne Kuntz

Jenny Colacicco

Kathy Schweinfurth

Cheiron Brandon

Dana Joy

Amy Rohl

Jeanne Jachna

Julee Tilman

Audrey Tokach

Susan Wymer

Tina Smith

Becky Roberts

Heather Ruwe

Olga Matyushevskaya

Amy Tsuruta

Olga Moss

Dana Joy

Dilay Nacar

Candice Fisher


Friday, March 5, 2021

The Greetery T.G.I.F. {Just a Note to Say Hello}


Hello friends! It’s my turn for this week’s TGIF project! I’ve been having a lot of fun sprucing up the house with spring and St. Patrick’s Day touches so I thought it would be fun to create an Irish inspired card! I love when I can use products from my stash that aren’t necessarily for a specific season and re-work them to fit my needs! In this case, I was thrilled to be able to use the smallest of the Heart Leaf Posy Pocket Dies to create a shamrock! 


I die cut three posy pockets out of white cardstock and then added two different shades of green to each one and then secured them shut using foam squares. I set those aside and got to work creating the small yellow bouquets. I used the BotaniCuts Forget-Me-Nots Dies  and die cut everything out of white cardstock and then used yellow and green ink to add the color using blender brushes. I also added some darker yellow details using a colored pencil. Once they were all colored, I used liquid glue to assemble them together and add them to the stems. I was thrilled that one of the stems in the set worked perfectly as the stem for the shamrock as well!

I like to use mini foam squares to attach the flowers to the stems for a bit more realism and dimension.  Once the bouquets were finished, I was able to get started on assembling the card. I cut a piece of Linen cardstock and added some light blue ink with a blender brush to the center of the card working my way toward the edges. I also added some ink splatter with an ink that is a few shades darker than the background.

I stamped the “a note to say” portion of the sentiment, which is from the Opposites Attract Stamp Set directly onto the panel using my mini MISTI for exact alignment. I die cut the “hello” portion three times out of white cardstock using the Opposites Attract Dies . I stamped it in black and then stacked the other two die cuts to create a chipboard weight piece. I added it directly underneath the scripted sentiment using foam squares.

I placed the stem where I wanted it and then added the three posy pockets to the panel using foam squares. From there I was able to tuck the two bouquets here and there for added detail and embellishment. I added some glitter to the flowers and the shamrock using a 2-Way glue pen. Once that was done, I added some White Nuvo Drops to the centers of the flowers and a few gold drops for a touch of St. Paddy’s gold! You could also use some of the letters from the Alphabuds collection if you wanted something more on the St. Patrick’s Day side, like “Lucky” or “Pinch Me”. I love using alphabets to customize my cards! I had a lot of fun putting this card together! Thanks for fluttering by!

Thursday, March 4, 2021

Hope Your Day is Dino-mite!

I'm sharing a couple of simple dinosaur birthday cards that I created a few weeks ago; one for a Zoom birthday party (dino themed, of course) and the other for my daughter's friend's birthday! My dinosaur stamp collection is small so I ordered the Rawr Stamp Set which is super cute! I worried that it wouldn't arrive in time for the birthday party, but with Ellen's crazy fast shipping, it arrived in the nick of time...hence super simple cards! ha ha!

I hesitated whether or not I should even post them, but I think we all need some quick and easy card ideas from time to time! I also like having a record of things that I make, kind of like a creative journal, which is what my blog really is! ha ha! To begin, I used my mini MISTI to stamp two of each of the images I planned on using.

I colored the images using an assortment of Copic markers and then used the Rawr Elle-ments dies to cut them out. I heat embossed the "Hope your day is dino-mite" sentiment in white onto black strips of cardstock; one for each card.
The "Happy Birthday" sentiment is from the Happy Birthday Combo and it totally helped fill the card front for this blue design. I was thrilled that I had one stamped and cut already to go!

I used on of my super old Cuttlebug Embossing Folders to give the background the scaly texture. I like using this particular one for sports cards and dinosaur cards! ha ha!

I did the same textured background on this card, but in green for a true dino feel!

This is the card that I made for my daughter's friend. She bought her a stuffed dinosaur that looks EXACTLY like the green one on the card! I'm not quite sure WHY she gave her a dinosaur, but from what I understand, the friend really wanted it! 

Of course I added some celebratory glitter to the dinosaurs and the party hats! I was really wishing I had a little bit more time to add some prehistoric foliage, but CAS was the way it needed to be! ha ha! Maybe next time, right? Thanks for fluttering by!


Tuesday, March 2, 2021

With Heartfelt Sympathy

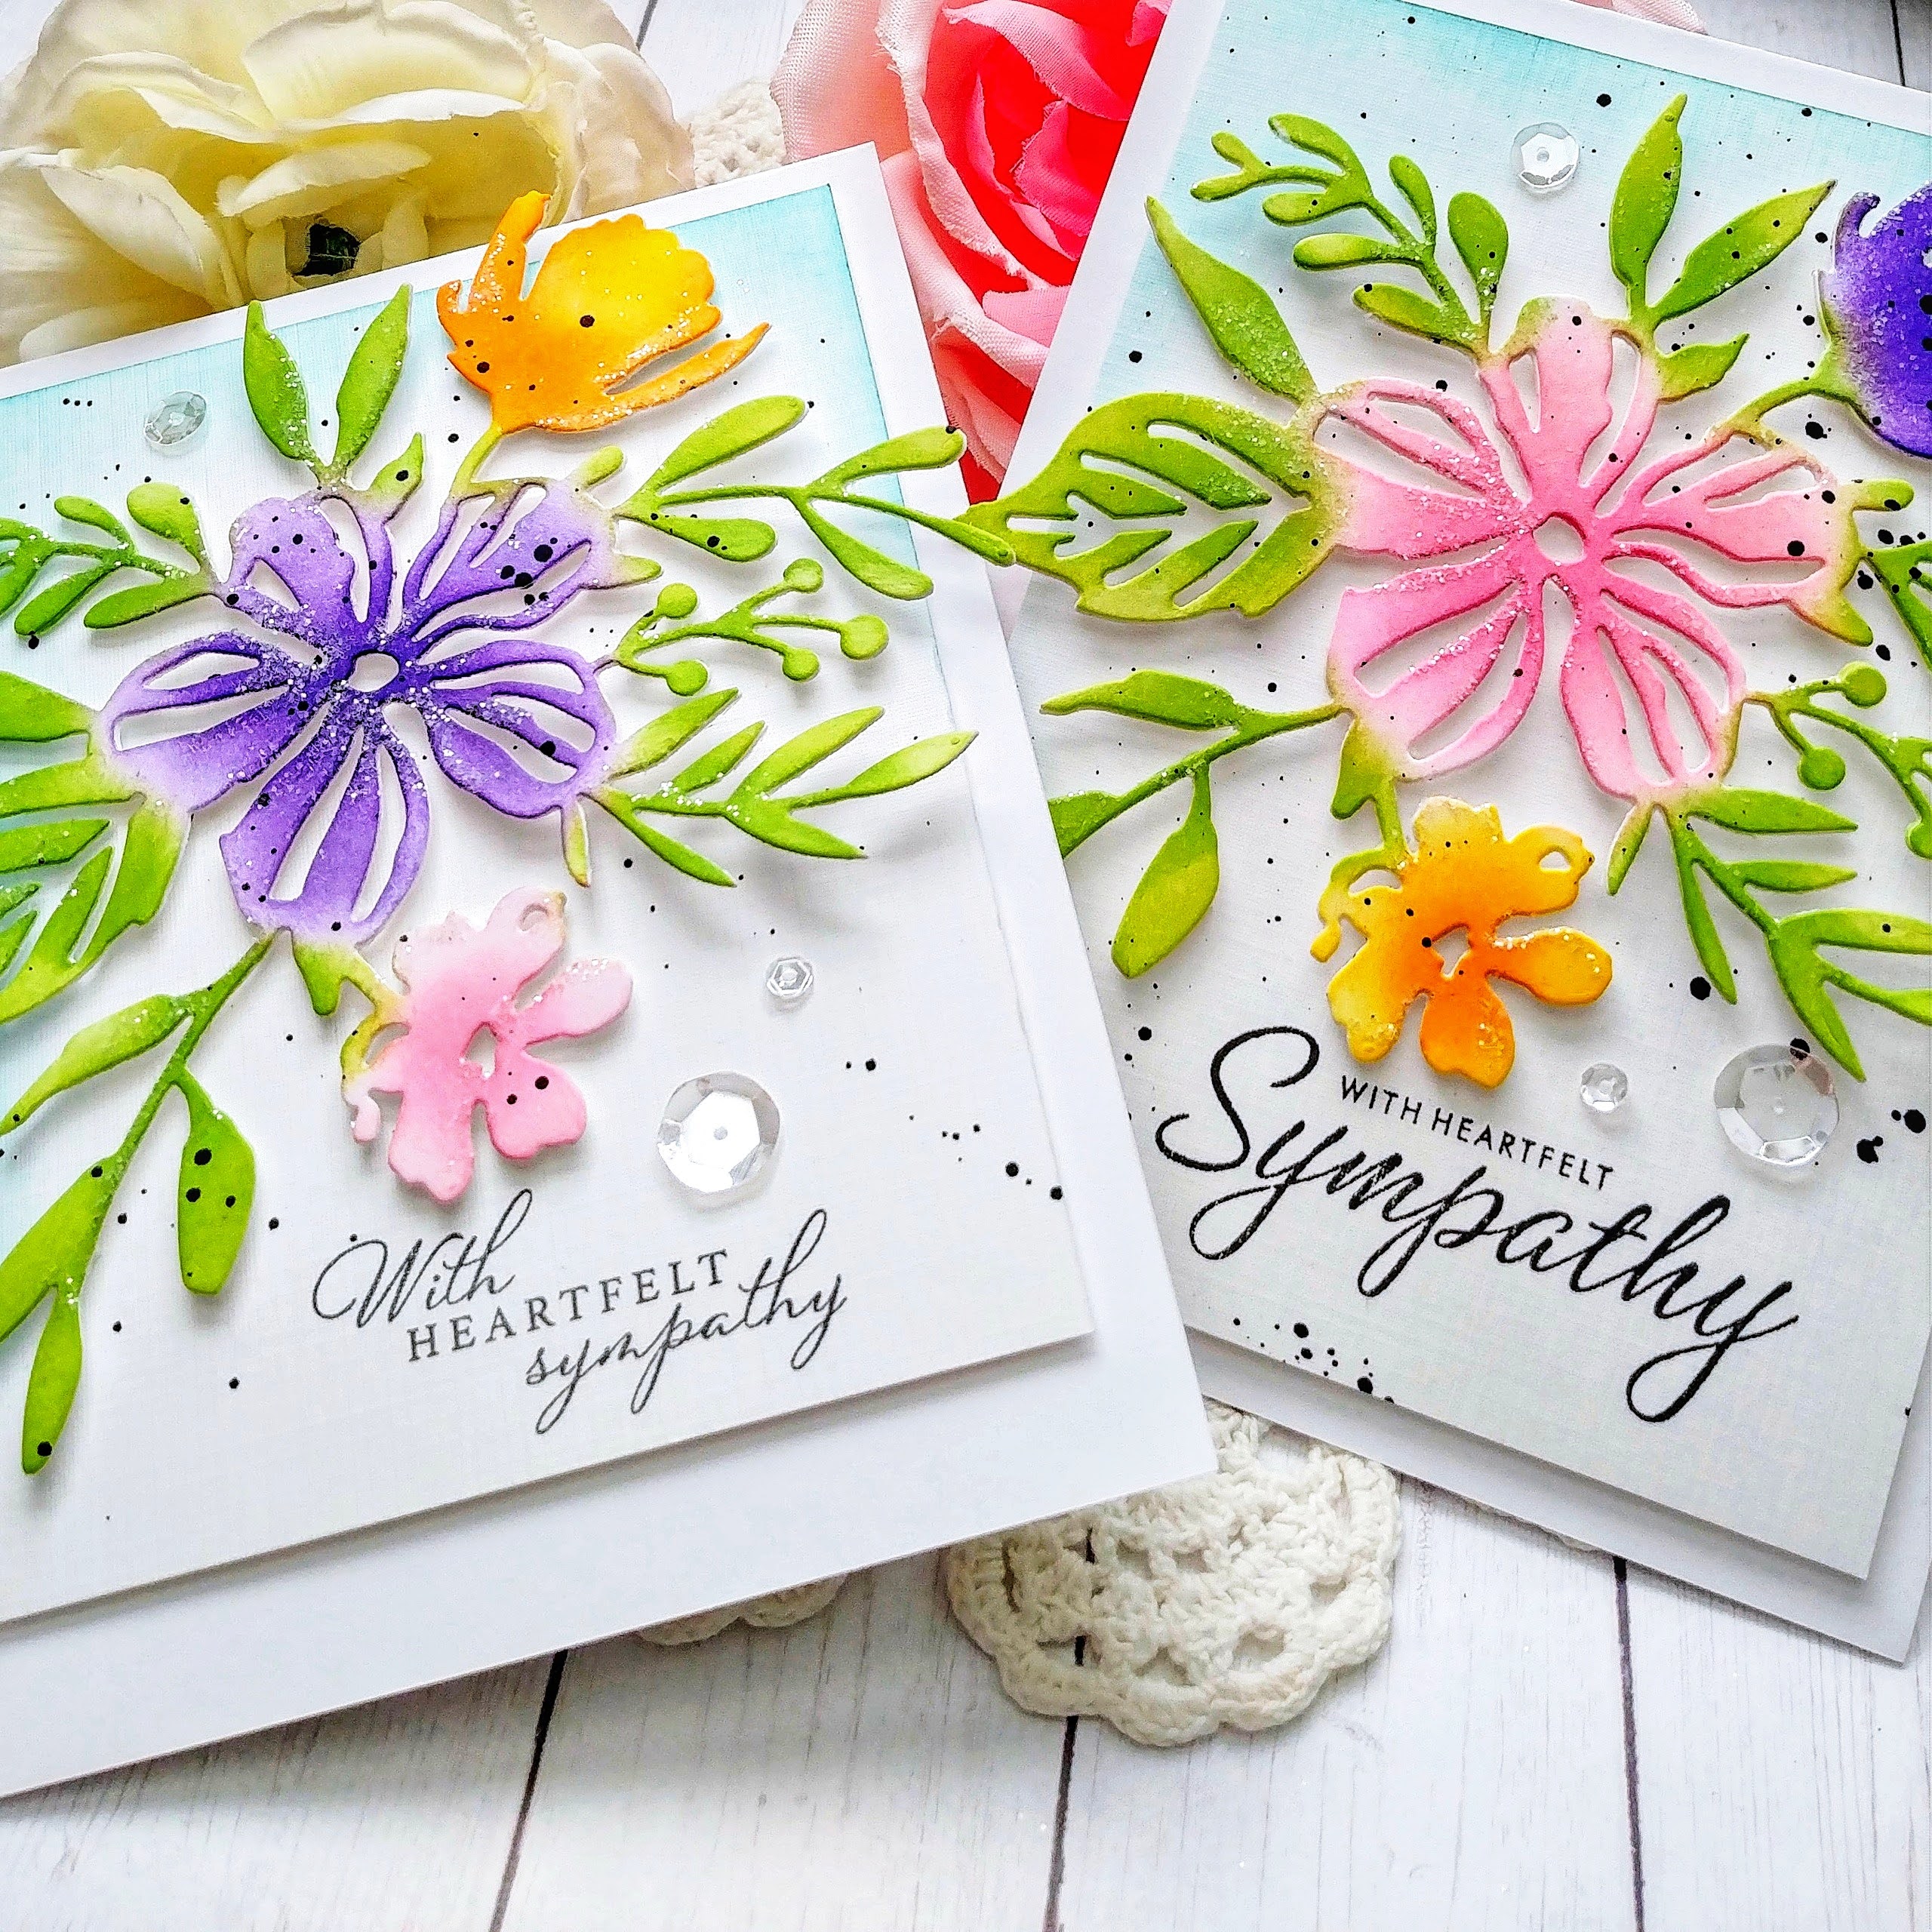
Hello friends! You might be thinking you're experiencing Deja Vu because of the cards I'm sharing today! These are a CAS version of THESE cards that I made a few weeks ago. I really had so much fun creating them so before I put all of my supplies away, I quickly made these two sympathy cards.

I kept the coloring of the flowers and foliage (the Bouquet Backdrop Die) the same as before because I really like how it turned out. Rather than adding the frames around the panels, I chose to keep them plain but adding a hint of Hawaiian Shores ink around the edges for contrast and added depth.

This card uses one of my favorite sentiments from the Feathered Friends 4 stamp set and stamped directly onto the panel using a mini MISTI and black ink.

This particular sentiments is and oldie, but goodie, from Stampin' Up! This is one of those sets that I will never part with and I use it often! 

I added just a touch of black paint splatter for some added detail as well as some glitter and sequins. The entire focal panel is added to a top folding white A2 cards base using foam squares. I've already sent one of these out and the other one is headed out today! Boo! Maybe I need to make another set, but this time for something happy, like a birthday! Ha ha! Thanks for fluttering by!


Monday, March 1, 2021

Papertrey Ink/Ink to Paper Flash Sale {Easter Joy}

Happy Monday and happy March! Spring weather is on the forecast this week! yay! I'm sharing two cards with you today using products that are part of this week's Papertrey Ink/Ink to Paper Flash Sale! If you've stopped by Instagram this morning then you already got a peek at these and maybe read that my blog post disappeared! Ugh! I had it all ready to go and the next thing I knew it was gone! I was so upset and decided to just not worry about it and get it posted today! So....here I am! It's a little late, but honestly, the sale hasn't even started (it starts when the Papertrey Ink newsletter hits your inbox) so I don't think it's a big deal! ha ha!
The sale will run until Wednesday at 6 PM ET and this is what will be included in the sale!


INK: Spring Moss, Simply Chartreuse, Pale Peony, Sweet Blush, Berry Sorbet, Lilac Grace, Winter Wisteria, Plum Pudding, Lemon Tart, Harvest Gold, Hawaiian Shores, Versamark

Paper: Pale Peony, Bitty Big: Pale Peony, Lilac Grace


I started both cards by die cutting and stamping a bunch of the flowers and leaves. I know I keep using the same colors, but they are just perfect for spring cards, don't you think? This particular set comes with different sizes of blooms, but for these two Easter designs, I chose to use just the buds and smaller blossoms to reinforce the Spring feeling!

I die cut the He is Risen sentiment three times and then glued them together using liquid glue.  I added the Hawaiian Shores ink around the edges using a blender brush and then added some additional ink splatter for interest. The "Wishing you a blessed Easter" sentiment is heat embossed in gold onto a strip of vellum. 

I cute two panels measuring 4 by 5 1/4 inches and added the pierced detail around the edges using the Nesting Basics Pierced Rectangles. I also die cut two ovals out of white cardstock and two oval centers using the two different Bitty Big papers; Pale Peony and Lilac Grace. I added all of this to a top folding A2 Pale Peony card base using foam squares.

On this particular card I heat embossed the Easter Joy sentiment directly to the plaid oval and then wrapped the He is Risen sentiment around the focal panel and secured it in the back with tape.

This particular sentiment set is one of my favorites from last year and I ended up using it on quite a few projects so I was happy to use it again on these floral Easter designs!


I added some glitter and sequins for some sparkle and shine! These were a lot of fun to put together and add to my growing Easter stash! Easter is on the 4th this year so it might sneak up on us if we're not careful! ha ha! Thanks for fluttering by!