Showing posts with label Mother's Day. Show all posts

Friday, May 1, 2026

The Greetery {Happy Mother's Day}


Hello friends! I'm over on The Greetery blog sharing a fun project for Mother’s Day! When the Silly Goose suite of products was introduced in March, I was telling my mom how much fun I was having with the geese and reminiscing about my childhood! I thought it would be fun to make a goose card just for her to give to her on Mother’s Day this year!

To begin, I created the gate because I wanted to make sure I chose the correct size frame/embossing folders, etc. to house the dimensions of the gate. I cut it twice using the Garden Gateway Die from Kraft Gray cardstock. I glued the two pieces together for a nice, sturdy piece and then added a bit of walnut stain distress oxide ink shading for added dimension and depth. The hinges and handle are cut from black cardstock and attached to the gate using liquid glue.

The next step was to get the stenciling done on the background panel. I cut a piece of white cardstock using the Shortbread Shapes: Scalloped Hearts Die and while I had everything at my fingertips, I created the card base using the same die. I like to use my MISTI for stencils so I can butt them up against the straight sides for a perfect matchup with each of the steps. Once the stenciling was done, I got to work on the goose.

I cut her from white cardstock using the Silly Goose Die and then added yellow/orange ink to the feet and beak. I glued them on using liquid glue and attached the wing using a foam square. The hat was colored with shades of blue and coral flowers attached to the ribbon. I fiddled with the hat until I was satisfied with the arrangement and then added a piece of clear tape to the back to secure it in place.

Once that was done, I got to work on the frame. I cut it from white woodgrain cardstock using the same Shortbread Shapes: Scalloped Hearts Die making sure to cut the middle part as well. Once that was done, I used the coordinating Shortbread Shapes: Scalloped Hearts 3D Embossing Folder to add the details. I added some old paper and walnut stain distress oxide ink around the edges and on the inside of the scalloped opening. I layered it onto the stenciled panel using foam squares for dimension. The gate was also attached with foam squares along with Mrs. Goose!

I wanted some additional flower and foliage so I used the Bigger Botanicals: Oregano and Bigger Botanicals: Hawthorn Die to enhance the design. I pulled them apart and used them in the way that looked best with the gate rather than keeping each cluster together. The finishing touch is a sentiment that is cut using the Silly Goose Sentiments Die and then stamped in black using the Silly Goose Sentiments Stamp Set. This was such a fun card to create and I hope my mom likes it! Thanks for fluttering by!

Saturday, May 10, 2025

For Mom

Hello and welcome, friends! I hope you've all had a great week! It's been busy around here, but I wanted to pop in for some last minute Mother's Day inspiration! I used some products from the latest Papertrey Ink release along with some older favorites for this Mother's Day card.

To begin, I die cut all of the pieces for the flowers and leaves using the Into the Blooms: Anemones Die. Everything is cut from white cardstock with the exception of the flower centers (those are cut from gold). I used Harvest Gold ink for the flowers and Ripe Avocado, Stormy Sea, and Spring Moss ink for the leaves.

I gave all of the flowers and foliage a spritz of Shimmer Spray and set them aside to dry. For the background, I used the Fall Harvest Hot Foil Plate with gold foil on Lilac Grace cardstock. I used a corner rounder punch on the corners for a professional look.

I heat embossed the sentiments, which are from the Larger Than Life: Mom mini stamp set, using gold powder on a strip of velum. I let that cool while I worked on the next steps.

I used the Reflections: Numbers 6 Die for the anchor point for the flowers and foliage. I added it to the background using foam squares and then arranged everything until I was satisfied with the arrangement.

I wrapped the vellum strip around the card front and secured it to the back of the background panel using Scotch tape.


The entire panel is glued to a top-folding A2 card base using liquid glue. I used pearls for the berry sprig and a few on the left side for balance. I also added the gems to the flower centers. This design would work well for quite a few different occasions: wedding, birthday, thinking of you, etc.
 I hope you have a wonderful weekend! Thanks for fluttering by!


Monday, April 21, 2025

Papertrey Ink April Release Countdown Day 4

Well, it's the 4th and final day of the Papertrey Ink April release countdown! We're switching gears completely and "cooking" up some fun Mother's Day inspiration using the new Mom's Kitchen Stamp/Die set!

This particular set isn't JUST for Mother's Day, so I'll also be sharing some other ways to use this cute new set! I know Mother's Day can be hard for those of you who have lost your mom or maybe didn't have the best childhood for whatever reason.....my heart is with you!

I'll be sharing three cards in total with this set today, but for this first card, I really wanted to give it a vintage, shabby vibe. To begin, I die cut ALL of the pieces I would need for all three cards from white cardstock and then stamped everything. I had fun using all of my favorite ink colors for a fun, vintage feel!

One of my favorite elements of this particular die set is the cupboards/counter detail with the cute handles. There are three different handle styles so you can customize your drawers to your liking.

There are a ton of options for the sign, too! I chose to tailor this one for Mom, but you can use the other's for different occasions. 


I added the corner details from the Corner Decor Stamp Set to give it some added charm!

I'm jumping ahead to show you the cutest new In Stitches: Adorable Apron Die for this second card! There are two styles of aprons included in the set with lots of different styling options.

Once again, I went with a fun vintage feeling for this card. I die cut the apron from some old My Mind's Eye pattern paper (the same paper I used for the "wallpaper" on the first card).

To begin, I die cut the apron and the scalloped detail and glued it together. I had originally put the scallops on top rather than the bottom so to remedy my mistake, I just cut another apron and glued it over the top which also helped with stability.

For the background, I cut a piece of Bitty Big: Aqua Mist pattern paper measuring 4 by 5 1/4 inches. I glued three layers of Ric Rac together and glued it to the background panel. I stamped the sentiment in black, which is from the new Seasoned with Love Sentiments stamp set.

I popped the apron up using foam squares and then added the apron and all of the cooking tools and utensils. They are all just so cute!

The cherries were cut using the Sweet as Pie Die but the leaves are from the new Into the Blooms: Anemones Die from this new release! I added some glitter for some sugary sweetness!

Here is another card using the Mom's Kitchen Stamp/Die, but not Mother's Day themed. I thought this would be a sweet card to send with a homecooked meal when the time comes! 

The background for this card was created using the Weathered Tile Stencil Collection with Spring Moss and Simply Chartreuse Ink.

You can see the other handle option on this set of drawers.

I love the little jam jar, crockery utensil holder, chicken, etc. So many cute details!

There are also two shelf options: one without the hooks and then this one with the hooks for different design options!

My final card for today, and for the release, features the Mom's Kitchen Stamp/Die set paired with the new Seasoned With Love Sentiments Stamp Set and the This is Big Sentiments: Love Stamp/Die set. I thought they all worked together nicely to show another non-mom card!

For this card, I stenciled a panel of white cardstock using the Watercolor Wonderful Stencil  Collection with Aqua Mist and Hawaiian Shores ink. I stamped the sentiments in black, with the exception of the LOVE sentiment.  That was die cut using the This is Big Sentiments: Love Die and then stamped with an ombre look.

I used the Border Bling: Skinny Hearts Frame Die to cut the frame and then I added some ink around the edges. I glued it to the stenciled/sentiment panel using liquid glue.

I had fun arranging all of the different elements to frame the sentiment using foam squares and liquid glue.

I gave it a spritz or two of shimmer spray, added some glitter and sequins and adhered it to a top-folding A2 card base. This concludes my projects for this fun release! Everything will be available for purchase tomorrow at 10 am ET! Thanks for fluttering by!


Friday, March 15, 2024

The Greetery {Chocolates and Flowers for Mom}


Hello and welcome, friends!  I'm happy to be here today with a fun Mother’s Day project using the new To Mom with Love stamp/die set as the focal point and then traditional Mother’s Day accents: flowers and chocolate!  Mother’s Day is just a few short months away and I find that it’s always good to ensure that YOUR mom or mother-in-law is taken care of long before the actual day so you don’t have to endure stress on YOUR special day (if you’re a mom). Mother’s Day can be tricky for some and for those of you who struggle on that day, please know you’re in my mind and in my heart.  That being said, this card design transcends beyond Mother’s Day; simply switch out the large focal sentiment for a birthday or thinking of you sentiment, whatever your needs may be.

To begin, I die cut quite a few flowers and greenery using the Winter Medley Die and then colored them with distress oxide inks. I used a foam mat and the smaller end of my stylus to give the flowers shape and then glued them to the greenery. I added a black dot to the center of each flower using a fine-tip Sharpie marker. I gave them a spritz of Shimmer Spray and set them aside to work on the chocolates.

I used the Curio Confections Die and cut out all of the pieces and then just had fun coloring them. I die cut the paper liners from vellum and then added the chocolates using foam squares for dimension. I added some Strawberry Bits and some Flower Bits to the chocolates for added detail. I simply glued them to the top of the chocolates using liquid glue. I find that a gem picker comes in handy to add embellishments like this.

Once the flowers and chocolates were finished, I got to work on the background. I used the Curio Divider & Details II die for both the outer frame and the liners die cut from pattern paper. This particular pattern paper is from a 12 by 12 pad from Recollections called Floral Fantasy. I didn’t notice when I chose it that the tiny detail of the pattern is a crown, just perfect for Mom! I die cut the divider portion three times from Kraft cardstock and then glued it together using liquid glue. I added some brown shades of distress oxide ink near the joint of each section. I layered it onto an A2 panel of white cardstock using additional liquid glue and then secured each of the liners using a tape runner.

Once that was done, I just had fun adding all of the chocolates! I heat embossed the sentiment in gold onto white cardstock and then using the To Mom With Love Die to cut it out. I layered it over the chocolates using foam squares. Once that was done, I added the different clusters of flowers here and there until I was satisfied with the arrangement. I gave the chocolates and flowers a generous sprinkling of glitter and then mounted the entire panel onto a top-folding A2 white card base using liquid glue! This card was a joy to create and I’m so glad that my Mom’s card is taken care of this early! No procrastination for this girl! Ha ha! Thanks for fluttering by!

Saturday, May 13, 2023

For Mom + more Gingham Inspiration!

Happy Saturday, friends! I'm popping in today to share the card I made for my Mom for Mother's Day and a few tags that I made using the new Gingham Gorgeous from Bath and Body Works as inspiration!
I happened to be sick during the release where we used Mother's Day products, so here I am at the last minute getting something put together! Please note: this card was HEAVILY inspired by a beautiful card that I saw HERE; I loved the gate-fold design, the MOM down the center and the washi touches!


I decided to take a more colorful approach to highlight the beautiful Hydrangea and Rose washi tape; my mom loves these citrus hues, so I hope she likes it!  I cut a piece of Green Parakeet cardstock measuring 11 by 4 1/2 and then scored it at 2 3/4 on each end and then folded the flaps to the middle.

I also die cut the Modern Blooms die (retired) out of the same Green Parakeet cardstock, cut it in half, and then glued it on either side of the opening lining up the blunt cut for precision.

I adhered the washi tape to a 4 1/4 by 11 piece of white cardstock and then die cut it using the coordinating Hydrangea and Rose die and set the pieces aside. I just HAD to buy the Jeff Alpha die; that is what originally caught my eye on the inspiration card! I die cut the shadow from white cardstock and then the detail portion out of Sweet Blush cardstock. I layered them together using foam squares and then added them to the left side of the opening at the half-way point.

Once that was done, I fiddled around with the placement of the washi tape pieces until I was satisfied with the arrangement. You can see in this photo that I actually layered two of the clusters together on the right side until I was happy with the way it looked! I heat embossed the sentiment using the Larger than Life Mom stamp set and then glued it under the "o" in  MOM.

I gussied up the inside with the same stamp set and another left-over flower cluster!

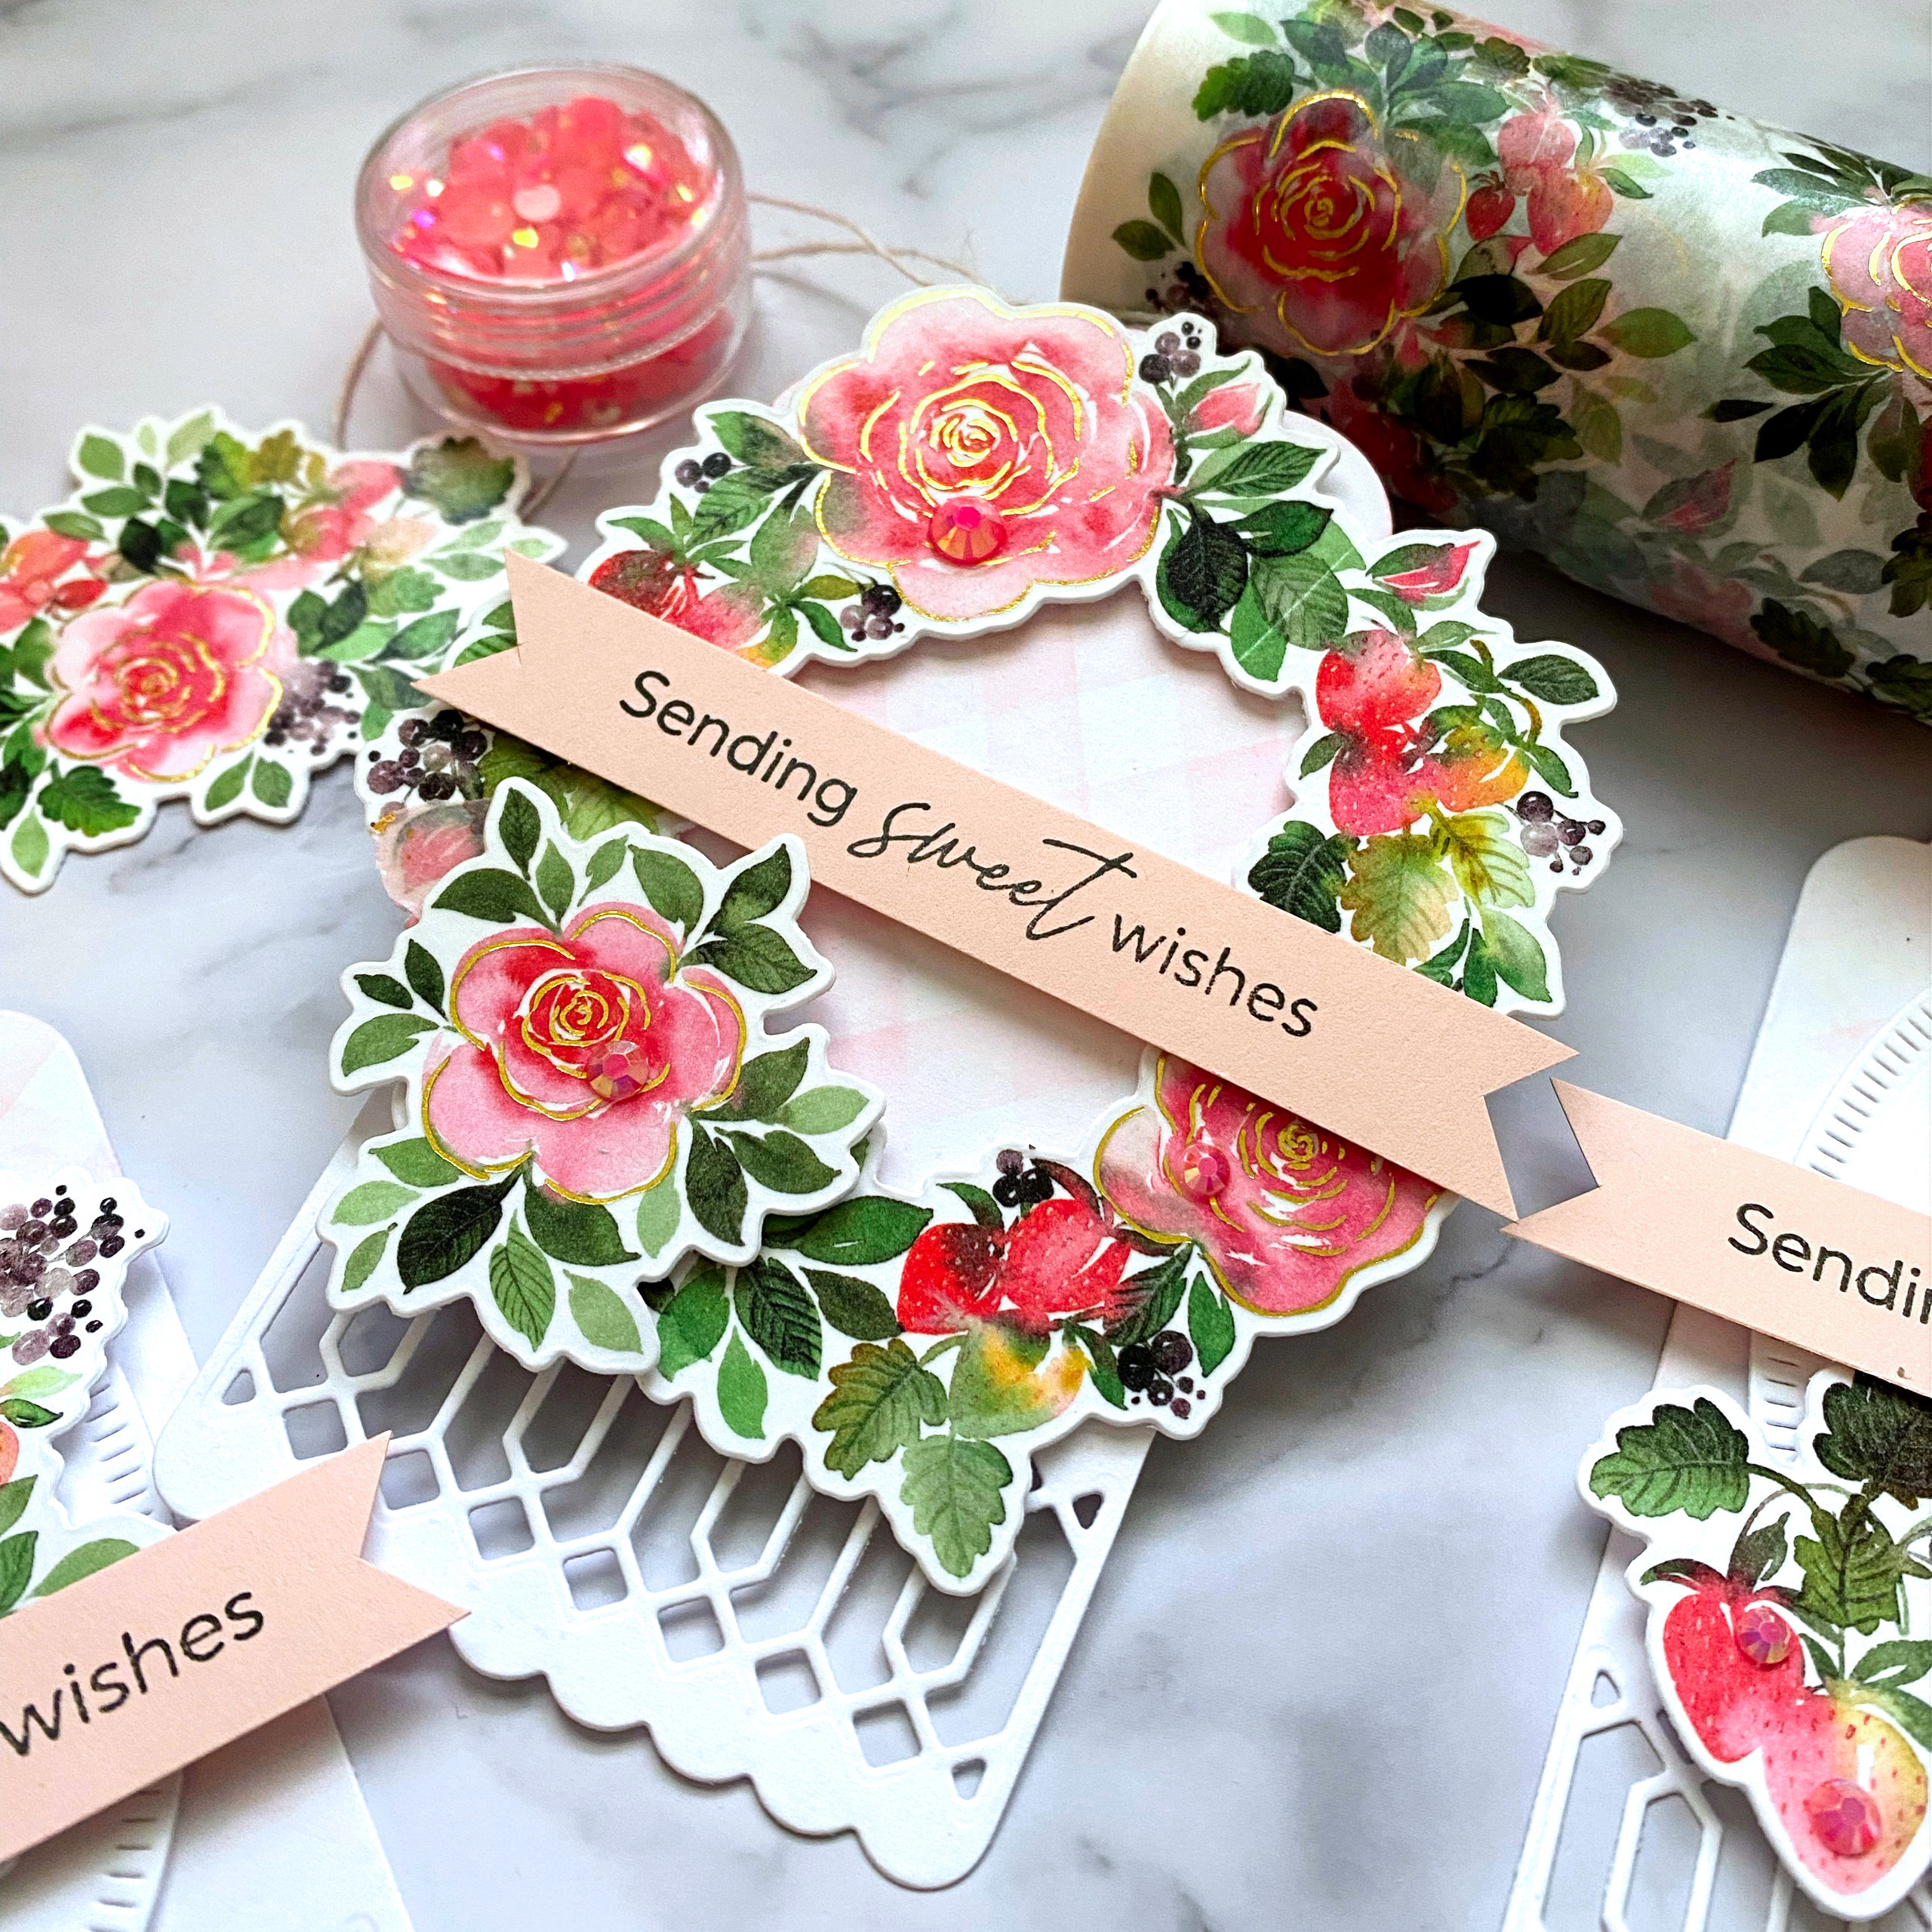
If you stopped by the other day, then you probably saw my birthday card I made using the new Gingham Fresh as inspiration; this time I used Gingham Gorgeous as inspiration! I'm giving a few ladies in the neighborhood a little Mother's Day gift, and I included some of the Gingham Gorgeous products! Lucky for me, the Blossoms and Berries washi tape is a match made in heaven!

I made 4 tags in total, but I'm only sharing three since the 4th is almost identical to one of these. I adhered and die cut the washi exactly as I did for the Mother's Day card. I set the pieces aside and then got to work on the tags.

I used my most favorite tags: the Essentials: Classic Tags with fillable elements! These are nice and big and you can customize them with all of the the different fillable elements; I chose this lattice-y look for today! I used a diagonal striped stencil to create the soft blush gingham on the background. It's hard to see, but it's there; soft and sweet like it looks on the lotion and soap packaging.

From there I was able to decorate them with the washi pieces; this one features the large wreath.

The sentiment is from the Blossoms and Berries stamp set and is perfect for these tags. Since these ladies aren't MY mom, but I want to celebrate them, I though this worked!

I'm also obsessed with this gingham ribbon I found at Hobby Lobby; the perfect finishing touch!

This is a "for me" photo. (wink)  I made these for the 7-11 year old boys' group at church to give to their moms for Mother's Day. I had them make little Shrinky Dink charms to attach to the ring; they turned out really cute! Anyway, I added them because I wanted to remember that I did this! ha ha! Thanks for fluttering by!