Tuesday, December 19, 2023

The Greetery {Christmas Garland Slimline Card}


Hello friends! I’m happy to be here today sharing a slimline card that features some of my absolute favorites from the latest release from The Greetery! I had wanted to make a card featuring a wooden ball garland for the release, but just didn’t end up executing that particular idea. I couldn’t get it out of my mind, so I was happy to create this card to share with you today!

To begin, I die cut 4 wreaths using the Magnolia Wreath die from white cardstock.  I used twisted citron, mowed lawn, and rustic wilderness Distress Oxide inks and a finger dauber to bring them to life. I adhered two wreaths together using strategically places foam squares to give me two finished wreaths. I knew I would want additional greenery for my design, so I also die cut some BotaniCuts Juniper pieces to tuck here and there.  I set them aside and got to work on the bead garland.


I used the Ribbon Maker: Wood Bead Garland die and die cut the curvy design 4 times from Kraft cardstock. I glued two together for a nice, sturdy piece and then added some brown ink around the edges for contrast and depth. I glued them together after I had fussed and fidgeted with how I wanted the garland to hang for this design. I ended up cutting off the pieces at the top so it would hang just right; you can adjust things how you need if you’d like to try this idea!

Every Christmas, I add a beautiful icy garland over my fireplace, but have fun adding all kinds of “extras” like snowflake ornaments, icicle ornaments, etc. so of course I needed to give this garland some “extras” as well! I added both sizes of tassels using the Tassel Large Die and the Tassel Small Die.  I simply die cut them from Rustic White cardstock and adhered them together. I couldn’t actually thread them through the bead garland because of size, so I simply snipped a strategic slit in the loop and added them that way, securing them with foam squares. I also added a few gold glitter stars in two sizes; you will find these darling stars in the Rustic Star Small die collection and Rustic Star Large die collection.

I was having a hard time deciding on a sentiment, but I knew it would need to be one with a coordinating die, so I chose the gorgeous Comfort and Joy stamp setwith its coordinating die. I heat embossed it in white onto black cardstock and then die cut it. The black and white provided the perfect contrast against the red and greenery.


For the background, I die cut the largest panel included in the Nordic Slimline die collection out of Pure Poppy cardstock. I added that to a slimline-sized Kraft card base using foam squares. Once that was done, it was finally time to pull it all together….my favorite part! Once I had the wreaths, garland, and tassels in place, I added some white paint splatter. The stars are added using liquid glue and then everything got a generous sprinkling of glitter for that holiday sparkle I love so much! I also gussied up a Kraft slimline envelope using the Snowflake Prints Stencil and the Four Square Holiday Tags stamp set. I don’t often make slimline cards so this was a fun change-of-pace for me! I hope you’ll try your own garland card! Thanks for flluttering by!

Tuesday, December 5, 2023

Sent With Love

It's my turn for the Papertrey Ink Flash Sale and since it's December, that means it will be a Valentine's Day theme! My card for today features the adorable All You Need Is Love stamp set! I took December off last year so this is actually the first time I have ever used this set and I absolutely LOVE it! This tiny envelope image would also be so cute for Christmas tags and cards! I think I might just leave it out and make some cute tags with it or something!

For this card I knew I wanted an overall postal theme so I chose to use the Border Bling: Postage Frames Die for the background and then layered up all kinds of fun things to pull this card together!

To begin, I die cut all of the pieces and then stamped them using reds, pinks, and corals! I die cut everything twice so I have enough left over to make another card! Yay! 

The base of the envelope and the flap are two separate dies and images so it makes tucking everything in a breeze! I layered the two pieces onto the largest heart in the Love to Layer: Hearts die collection, cut from Pure Poppy cardstock, and then added that to the largest rectangle in the Love to Layer: Rectangles die collection.

I added all of the stamped pieces here and there. I would recommend stamping the cute little flourishes coming out of the heart BEFORE you add the envelope. I did it after, but it was a little tricky, so do that before if you can.

I arranged the three pink hearts around the envelop for added detail. I added the postage frame on a top-folding A2 cardbase using foam squares and then layered everything on top of that. I added a touch of glitter for some sparkle and shine! Thanks for fluttering by!
P.S. I mentioned at the beginning of today's post that I took last December off and I am doing the same this year. I have SO many stamp/die sets that I have purchased for my personal use that are just sitting there (like YEARS worth) and I am planning on taking some "me" crafty time and pull them out and do some Christmas crafting! I will be sure to share everything here! But first.... finish decorating for Christmas! ha ha!


Saturday, December 2, 2023

Season's Greetings Shaker Card

Welcome! I shared this card on Instagram a few weeks ago for the Papertrey Ink Flash Sale, but I didn't share it here. It seemed to be quite popular so I thought I'd share it here and give a few details on how I made it!

One of my favorite die sets from last year is the Christmas Shaker Dies; I love shaker cards, but I seriously struggle with them and these dies make creating shaker cards a dream! For this card, I wanted each portion of the tree to be it's own "compartment" so I chose to die cut the tree shape about 5 or six times and then glued them together using liquid glue. I used the "backer" die, which is also used for the acetate portion and glued the acetate layer underneath the top tree piece. I turned it over and added the tiny star embellishments in each compartment and then glued the pattern paper backer to the back using additional liquid glue. 

I have gotten quite a few questions about the pattern paper that I used for this card; it really does set the tone of the card, doesn't it? It is called Holiday Spice from the Recollections brand. I did a quick google search and it looks like there is a pack available on Ebay and I saw one on Etsy I believe, but it is a 6 by 6 pad. Anyway, it DOES look like you could get your hands on some.

I carried out the star theme and die cut the included star from the shaker set from silver glitter cardstock and glued it to the top of the tree. I tucked some greenery behind the tree for added detail. The sentiment is from the Winter Globes Sentiment Set and is just perfect for this card!

The light panel is die cut using the Love to Layer: Rectangles Die and I just love the pierced detail! It lends itself nicely to the piercing on the tree to keep things cohesive. I chose the big plaid for the background to warm it up even more and glued it to a top-folding Kraft card base. Thanks for fluttering by!


Thursday, November 30, 2023

In the Spotlight: Season's Greetings + Bonus Tag

Hello friends! I'm sharing a holiday card that is featured in today's Papertrey Ink newsletter and I thought I'd share it here as well with a few more details about the process AND I had a few sprigs and berries left so I am sharing a bonus tag that I made with the leftovers!

This is the finished card, but in the next series of photos, I will share step-by-step instructions on how I created this Christmas design.

To begin, I die cut and colored all of the pieces I used for my wreath. I used the Into the Blooms: Holly DiesInto the Blooms: Christmas Sprigs dies, the berry branches included in the Christmas Bouquet stamp set, and finally, the wreath from the Forever Snowflake Frame Die. I used an assortment of Distress Oxide Ink Pads for the die cuts and then stamped the berry branches using Pure Poppy, Scarlet Jewel, and Cocoa Bean ink.

Next, I hot foiled a 4 by 5 1/4 inch piece of Soft Stone cardstock with silver foil. Use the coolest setting on your machine for 15 seconds; this Fanciful Snowflake Hot Foil Plate always provides amazing results without a lot of fussing and guessing which setting!

Glue the wreath to the foiled panel and attached the panel to a white A2 top-folding card base with foam squares.

Arrange Holly, berries, and pine sprigs around the wreath frame using liquid glue and foam squares. Add the stamped./die cut sentiment from the Christmas Your Way stamp set and then heat emboss the accent sentiment using silver powder on a black strip of cardstock.

Finally, add the finishing touches like white puff embossing powder and glitter! I also added black detail to the berries using a fine-tip Sharpie marker. 

Here's the finished card! I forgot to mention that I added some ribbon "tails" to the bottom of the wreath using the Bows Galore die set. I did rip it in half at the top so I could arrange them the way I wanted.

I chose to stamp the Season's Greetings sentiment on the same Soft Stone cardstock as the background to keep the wreath's openness. I used the black sentiment strip to add contrast.

I don't normally mix stamped images and Into the Blooms die cut pieces, but I really felt that the berry sprigs worked nicely with this design.

I like starting off with white cardstock for die cuts like this because it allows me to create built-in "shine" and realism by keeping portions white, like I did on the berries and leaves. 
Since I had some die cut pieces left over AND a few sentiments from the November release, I decided to have some fun and make a bonus tag.

The Happy Holidays sentiment is from the Vintage Holiday Flair stamp set and is one of my favorites from the new release.

I also added one of the postal images from the Deliver by December 25th stamp set and is part of this week's Flash Sale.

For the tag, I used Wow! White Sparkle embossing powder and I absolutely LOVE the result! As you can see in this photo, I went one step further on the berries and added some details with a white gel pen to give them a bit more realism. I gave the entire tag a couple flicks of white paint splatter and called it done! Thanks for fluttering by!


Tuesday, November 21, 2023

The Greetery {All That Glitters Collection} plus Thankful For You Sale


Welcome! Today is the day....everything from the All That Glitters Collection from The Greetery is available TODAY at 10 am ET, PLUS it's time for the annual THANKFUL FOR YOU SALE! Plus, there is an ADDITIONAL 15 % off select holiday products that can be found HERE


  • No code needed - it's applied automatically at checkout
  • Can NOT be combined with rewards (if you enter a rewards code it will override the 15% off)
  • Sale starts 10am EST on 11/21 and ends at 11:59pm EST on Saturday, 11/25
  • In stock items only
  • Does not apply to previous purchases
  • New items ARE included in the storewide 15% off


Thank you so much for all of your support! I hope you enjoy the new collection as much as I do!

I wish all of my U.S. friends a happy Thanksgiving! I am thankful for you!


Thanks for fluttering by!


Monday, November 20, 2023

The Greetery {All That Glitters Collection}

It's the MOST wonderful time of the year! I'm so happy you're here today as we showcase the beautiful All That Glitters collection from The Greetery! I always love this time of year when Betsy thinks up the best products for us to get our holiday packaging on point! Make sure you head to The Greetery Blog for the official "meet and greet"! Also, you'll want to leave a comment here, and on each of the other designers' blogs, for a chance to win one of two $50 gift certificates to the shop!

My first project for today features the fabulous new "Four Square Holiday Tags" suite of products! Wow...talk about fast and fun! I had so much fun creating this set of tags to coordinate with some of my favorite wrapping paper that I bought last year. I only bought one roll, but ended up LOVING it and the way the gifts looked glistening under the tree in my family room. I went back to get another (or maybe 5) rolls, but it was GONE; I was devastated! Now, I'll be using it for the most special gifts. I made my husband run out and buy an actual gift so that I wouldn't waste it on a "fake" present to showcase my tags! Ha ha! 

This particular suite of products features a stamp/die set and a stamping guide and coordinating die for that so you can achieve the embossed detail at the top of each tag. I think Betsy has a video showing how this suite of products work, so make sure you watch it! It's so much fun!

The Four Square Tags stamp set comes with the most beautiful sentiments, to/from sentiments, and accent images! I decided to make all of my tags so they could be opened like a card and inside is a to/from sentiment.

On this photo you can see that there are coordinating dies for the sentiments and then a beautiful image of foliage to frame your tags!

I had so many wooden beads left over from last year's tags that I decided to add them to the top of each one of these tags as well for an added element of dimension and texture.

These are three of my favorites....I especially love that cute snowflake image in the circle, the Just For You sentiment, and the other smaller accent sentiments!

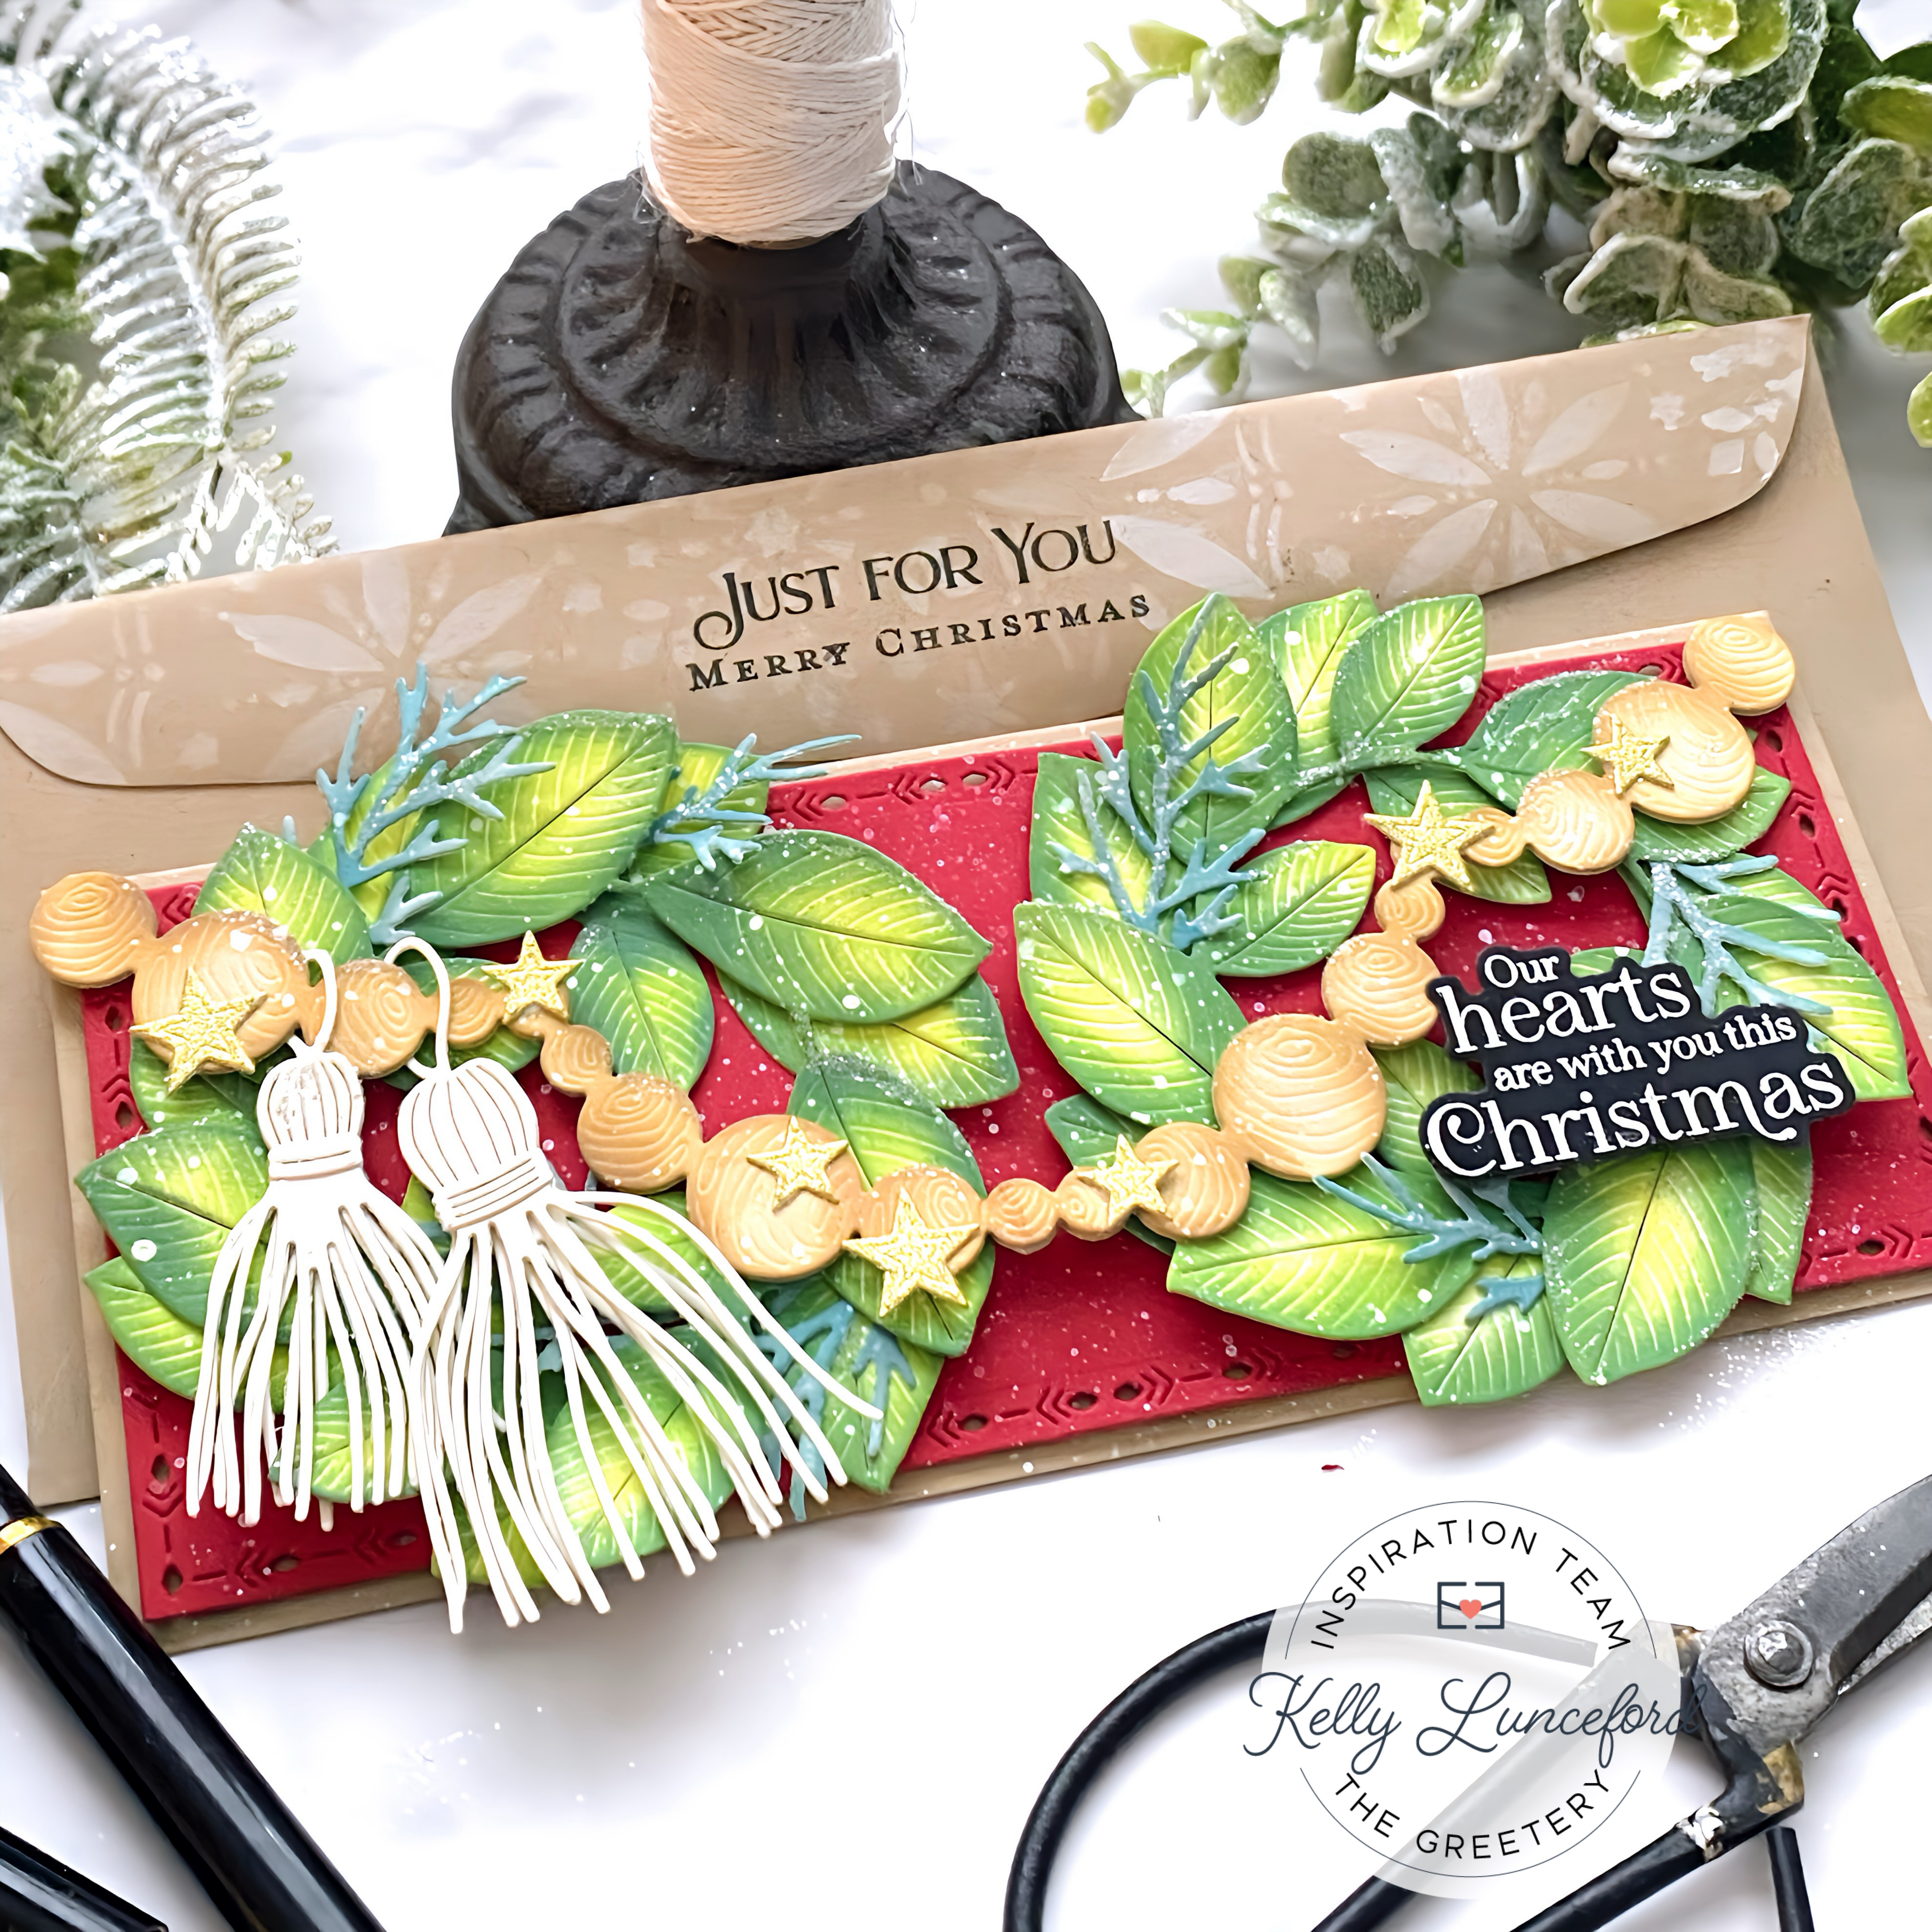
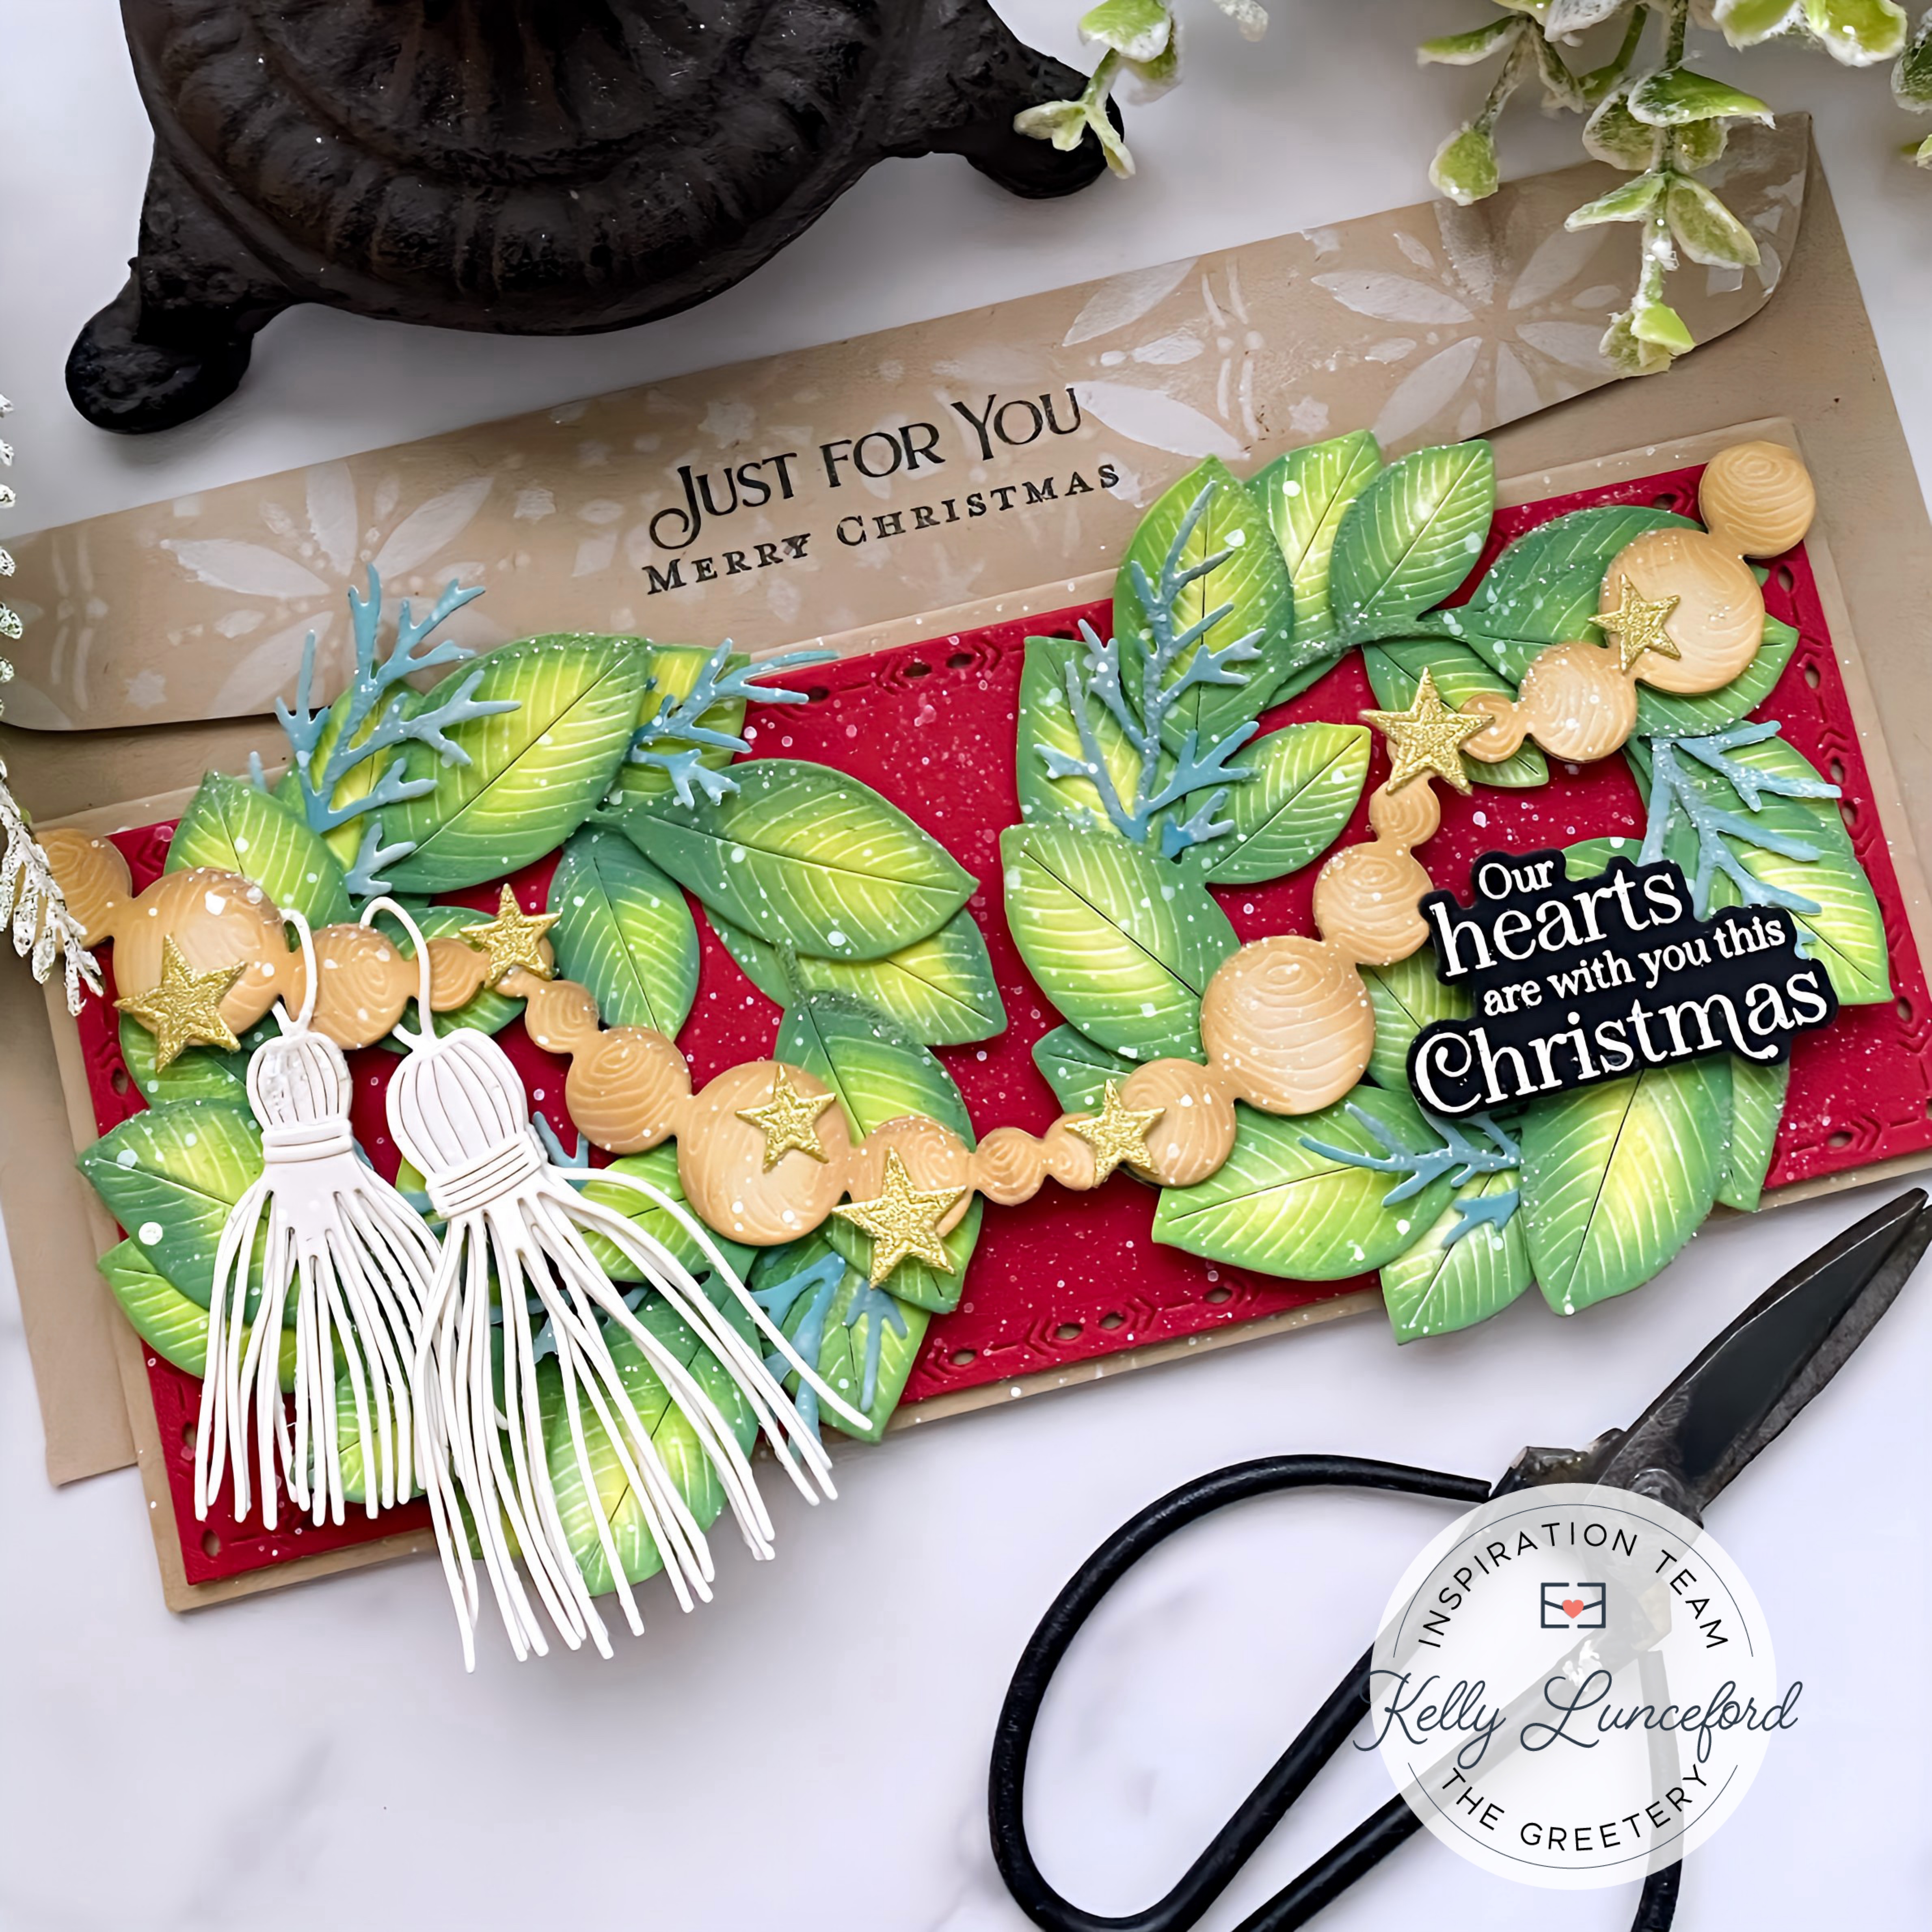
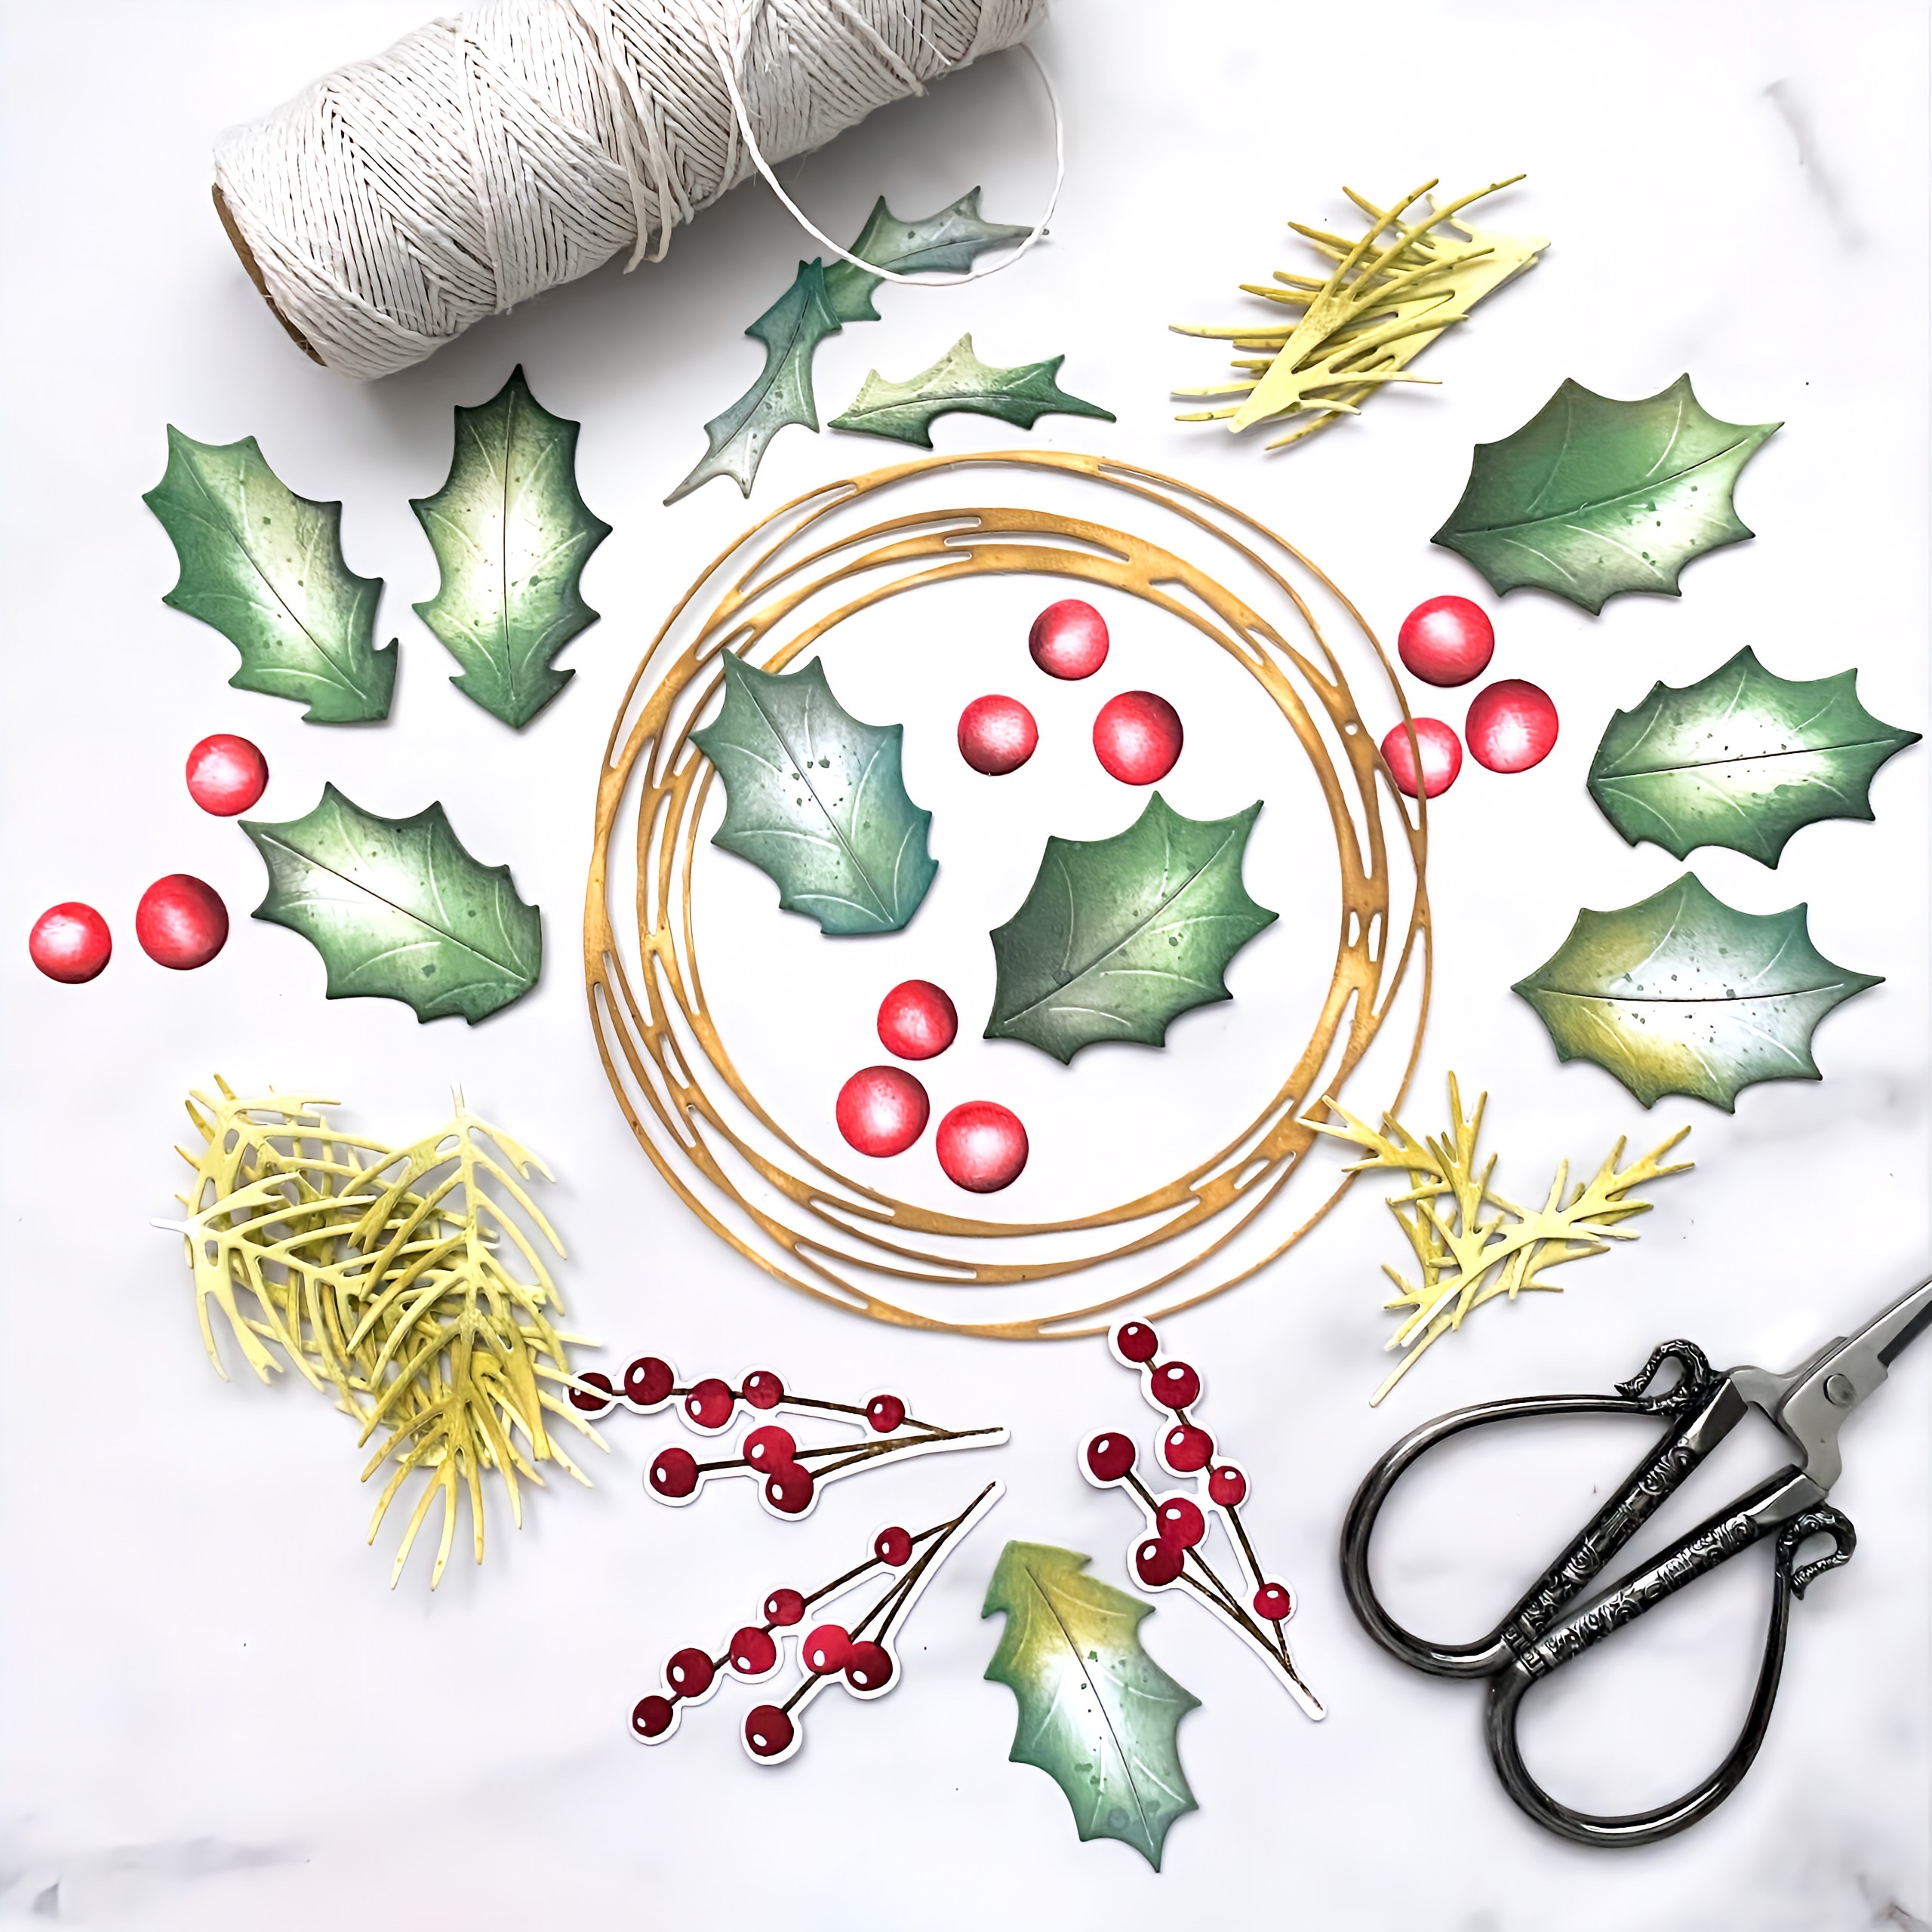
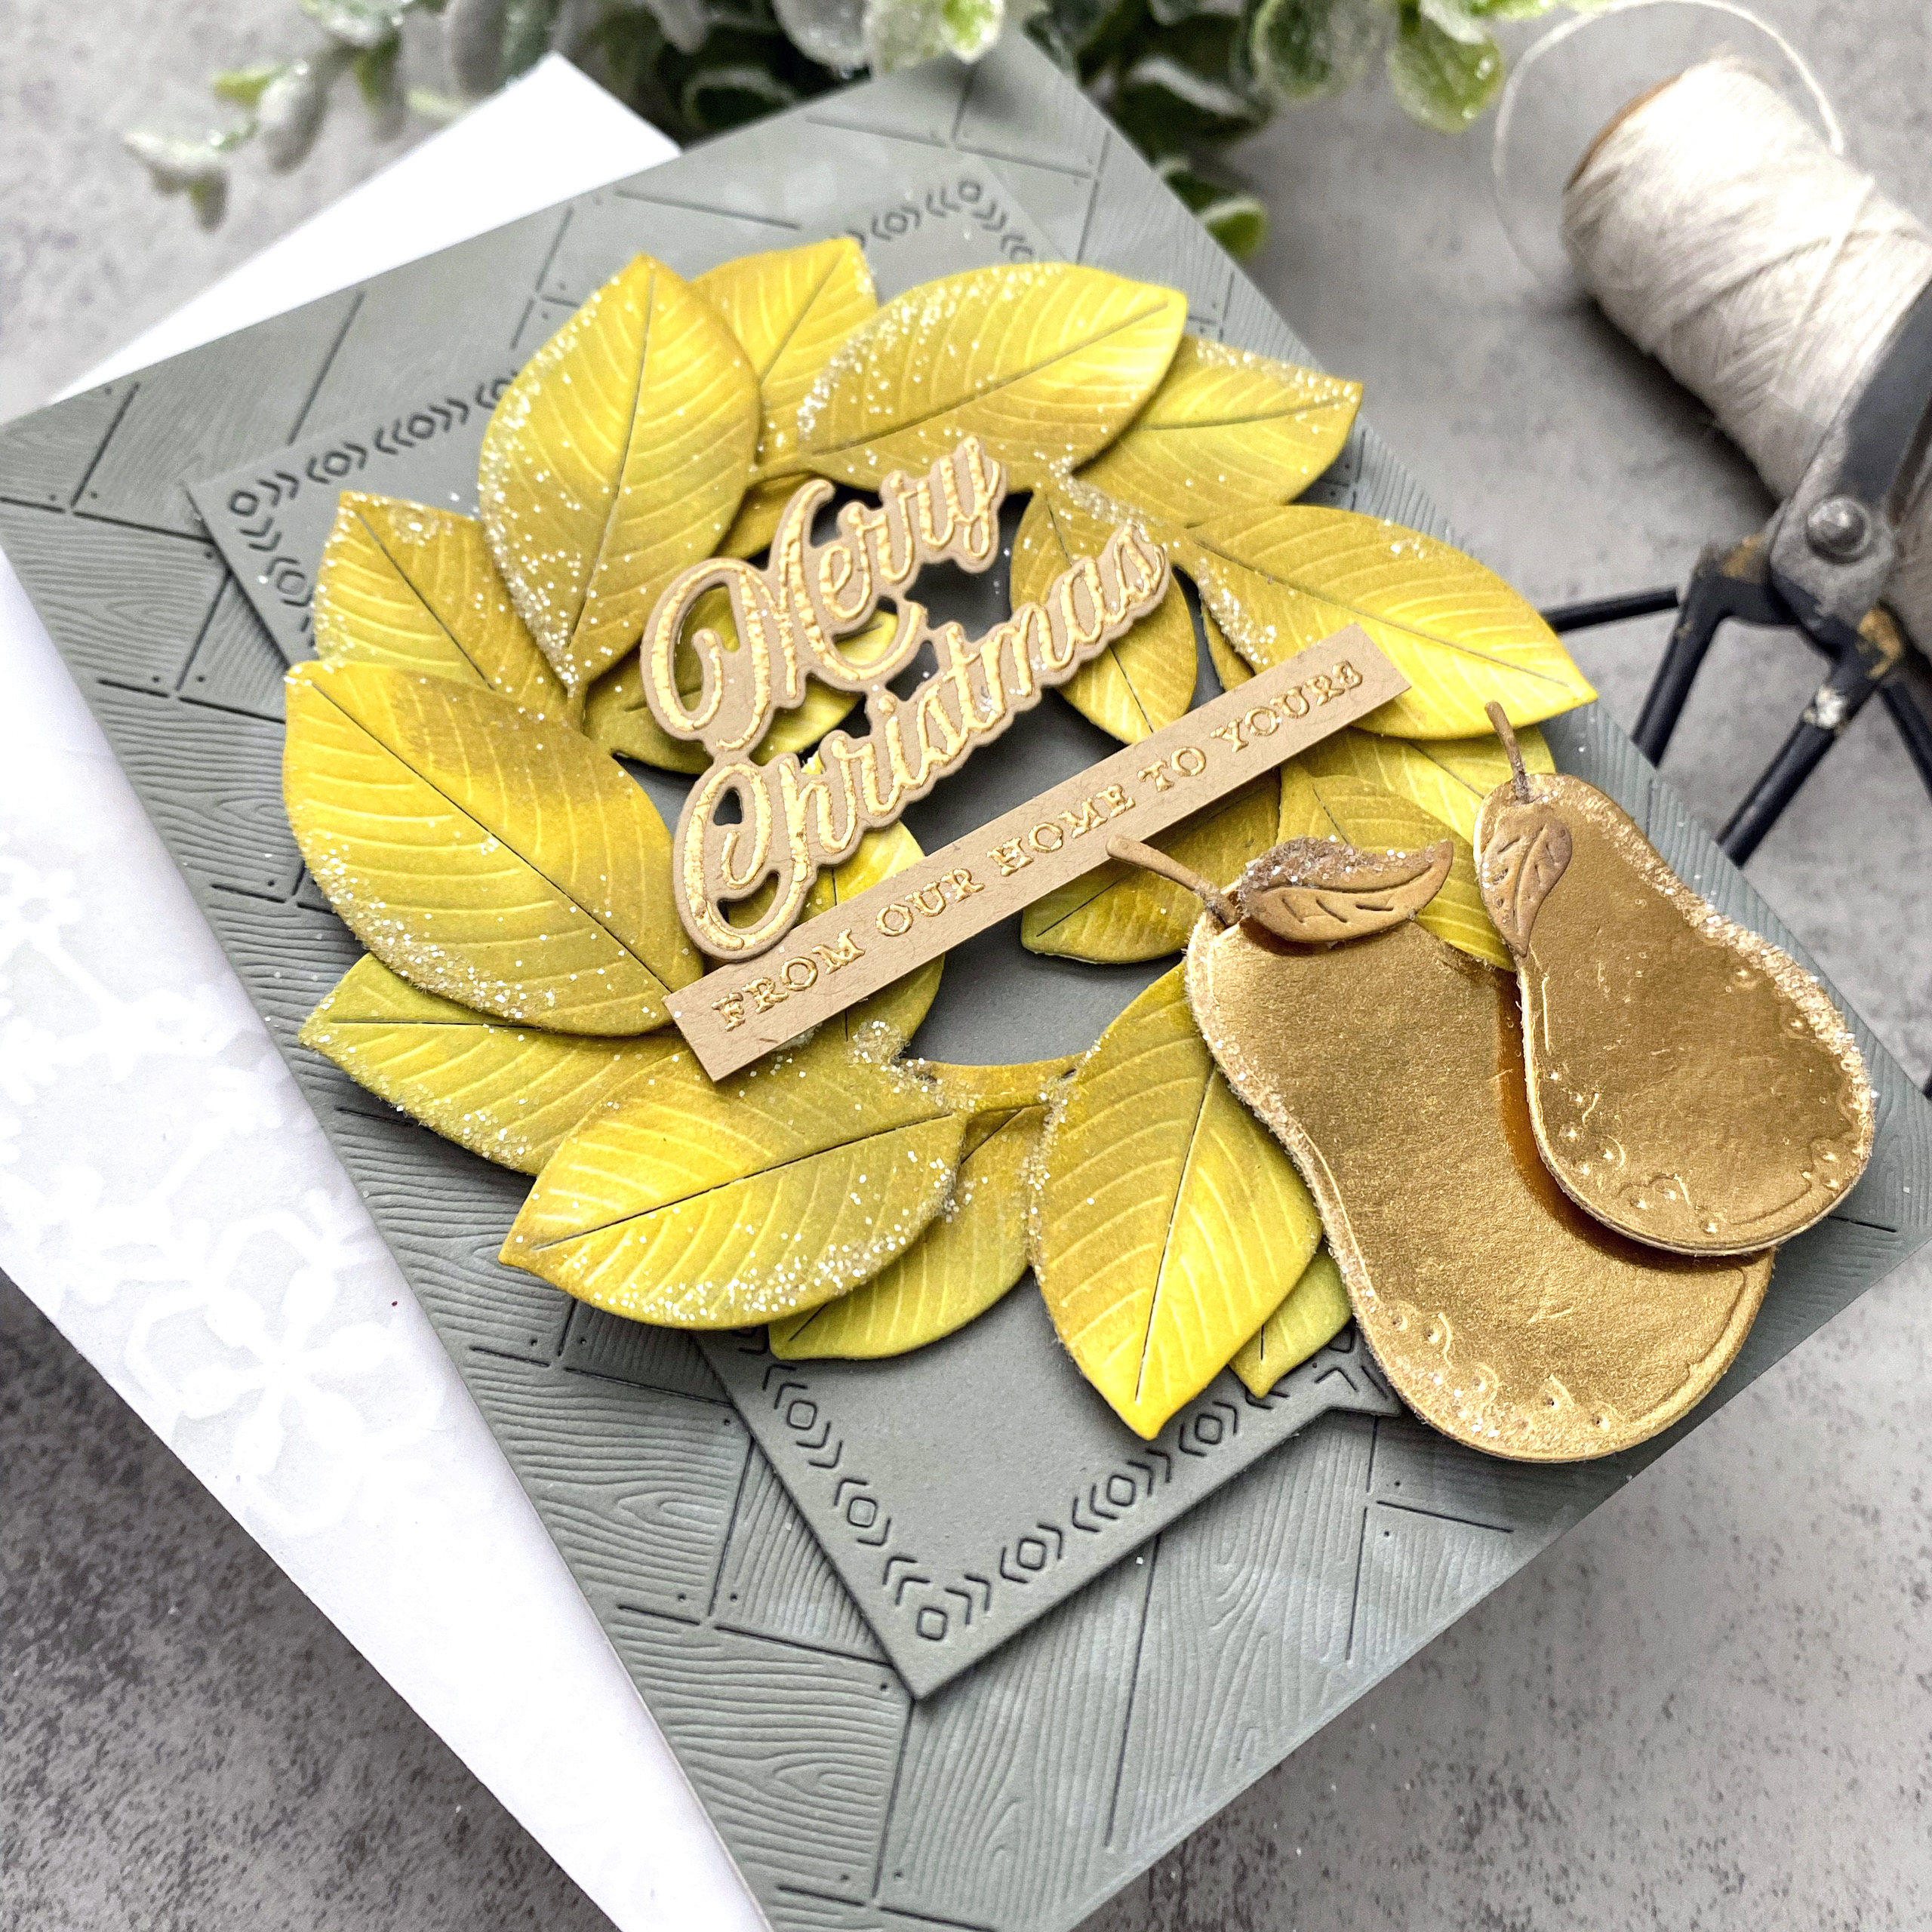
My next project is a card...we all love to make cards so I wanted to show how easily these new products work for cards as well. This card features the new Magnolia Wreath die and the new BotaniCuts Pear die. 


My card features two wreaths together stacked up for a fuller look. I inked them up using Distress Oxide inks and then glued them together with foam squares for a bit of dimension.

The pears are die cut from gold cardstock; the stems and leaves are die cut from Kraft and then inked with a bit of brown ink. I also die cut the pears from white cardstock and then glued them together for a sturdier piece....the gold cardstock is a little thin and then has a tendency of "curling" when it goes through the die cut machine because of the pressure. I found that by gluing two together it helped smooth it out.

I chose to use some of the gorgeous sentiments from the Four Square Holiday Tags stamp/die set embossed in gold to accent the pears.

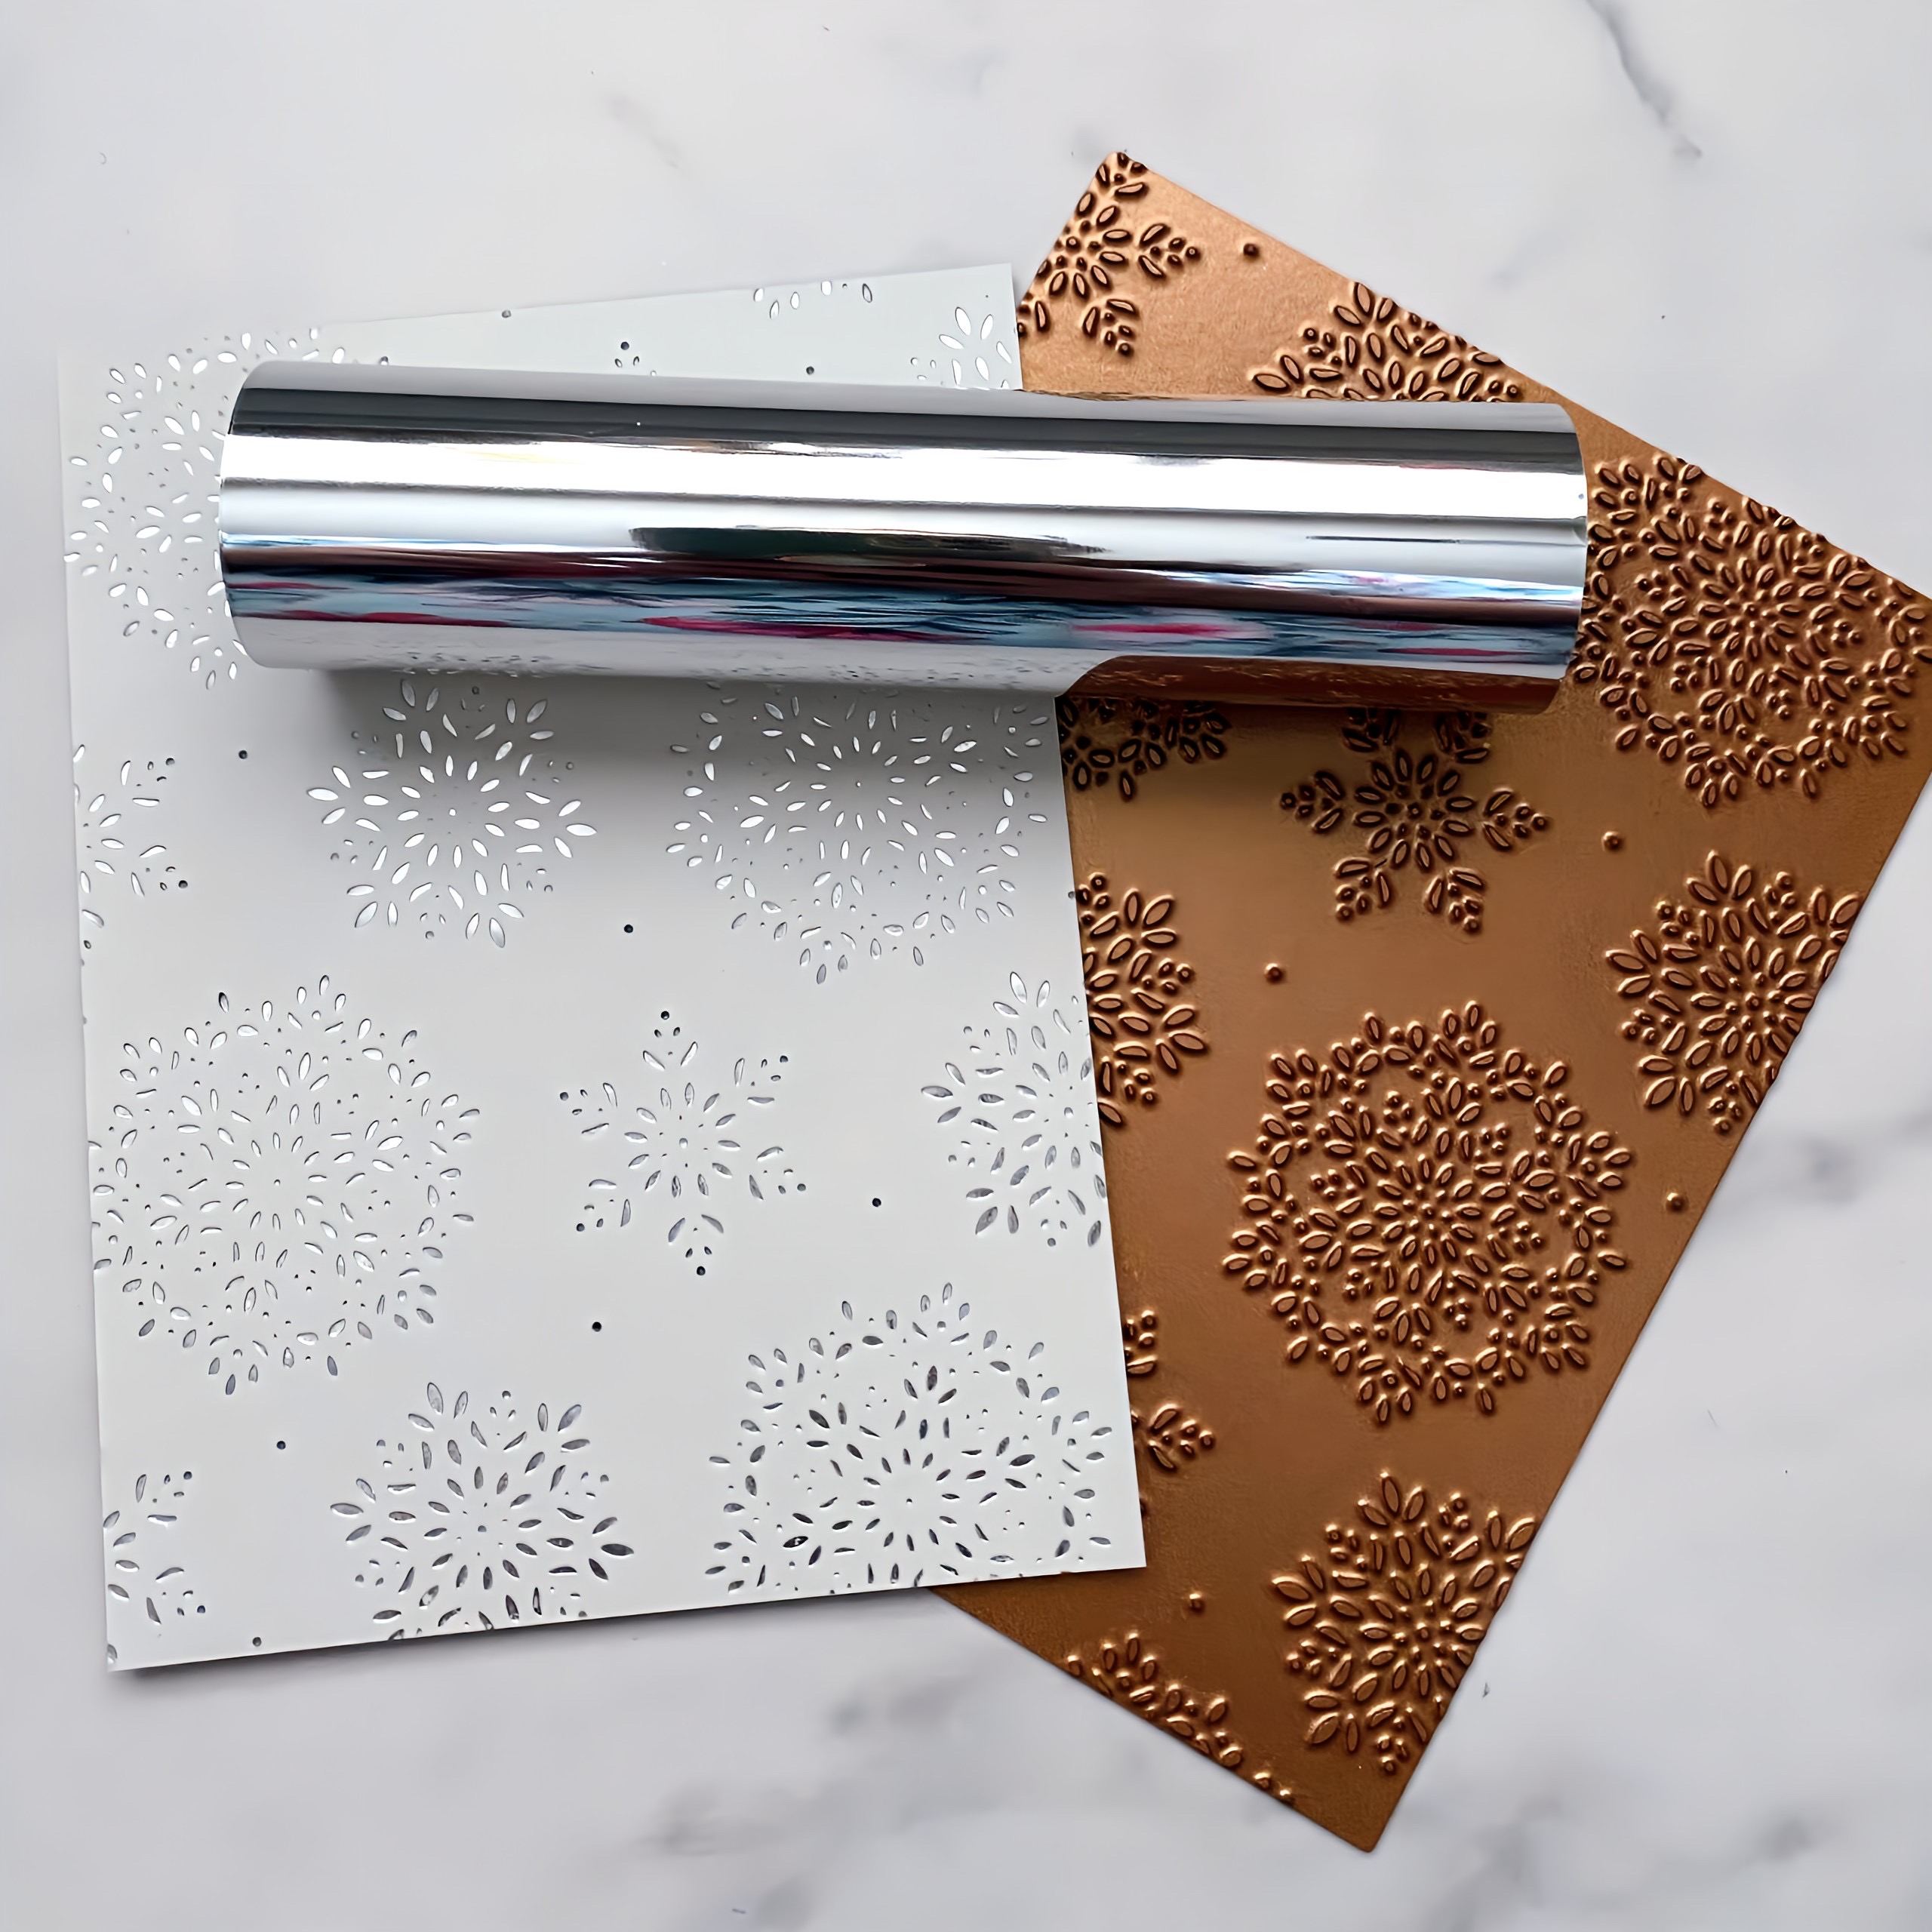
For the background, I stenciled the new Snowflake Prints stencil using Fresh Snow pigment ink onto grey cardstock and then ran it through the die cut machine using the Herringbone Parquet die for that gorgeous texture.

For my third project, you can see the stencil better...I chose to make a pair of gift boxes for small gifts or treats! They both feature the gorgeous new Snipped Snowflakes dies, more Four Square Holiday Tags sentiments (I told you I LOVE them ;)) The tag on the top of the left box uses the new Wintry Mix die....this set of dies cuts these beautiful snowflake shapes and then I used the tag dies again and then layered it onto Kraft cardstock so the snowflake would show through.

The box on the right uses the new Tear Strips Coverup die....this coordinates with previously released items in the "Tear Strip" family. I absolutely adore the pierced details with the die cut patterns! In this photo, you can also spy a few of the new BotaniCuts pinecones....they didn't actually make it onto a projectr, but this gives you an idea of what they look like and their size!

This box uses the Snipped Snowflakes 3 die with a gold embossed sentiment.

I used "gilver" glitter cardstock, white cardstock, and vellum and layered them together for visual interest.

This box features the Snipped Snowflakes 2 and I just layered the two different sizes together with both glitter cardstock and white.

You can see the gold embossed sentiment better here and the die cut tag.

I love making 3D projects, but they are a pain to photograph sometimes, so hopefully this last photos gives you a better idea of their height and side dimensions.


My final project for today is ALSO a 3D project which proved to be difficult as well! ha ha! This is a clear cube gift box all gussied up with even more new products!

This is a bird's eye view from the top looking down. This box features the new Wooden Stars dies, the small and large Tassel dies, the new Ribbon Maker Wood Beads, Large Leaves: Magnolia die....and then a few other favorites already showcased earlier in my post!

I also used the Ribbon Maker: Large Scallops Die as a wider base to showcase the Ribbon Maker: Wooden Beads.

You can see the wooden beads poking up on top of the star.

Well friends, this concludes my post to showcase the new collection! Everything will be available for purchase tomorrow morning at 10 am ET. Don't forget to stop by the other designers' blogs to see what magic they have conjured up with this beautiful collection! Thanks for fluttering by!


Kelly (you are here)