Monday, September 30, 2019

Pinkfresh Studios Holiday Stamp & Die Release

It's the most wonderful time of the year! Welcome to the Pinkfresh Studio Holiday Stamp and Die Release! I'm so excited to share all of the amazing new products with you and a few projects that I created using a few of the new stamps and dies! There's a huge blog hop to celebrate the occasion, so make sure you head to the designers' blogs to see their amazing projects!
As always, there's fabulous prizes up for grabs. Leave a comment here to win a 25 dollar gift card and head to the Pinkfresh Blog (linked above) to find out how you can win the entire release! And now, on to the projects and products!
I put some holiday music on and had so much fun using the new Season's Greetings stamp set! This is the perfect quintessential Christmas set; I have lots more ideas to share with you during the holiday season so stay tuned! To begin, I stamped the wreath in black and then colored it using an assortment of alcohol markers. Once that was done, I used the coordinating Season's Greetings die collection to die cut both the outer portion and the inner portion. I knew that I would be using this sentiment and wanted it to be peeking out from the center of the wreath. I do really like that it has the option to leave the center, or die cut it. It really makes the set that much more versatile.

I added few of the gorgeous Essentials Crystals around the wreath using liquid glue. I have been DYING to use these red ones and this was the perfect opportunity! I also stamped, colored, and die cut the bow and added it to the top of the wreath.

I heat embossed the sentiment in white onto a tag that was die cut using the Essentials Braided Tag die. I  love the shape and the instant detail and interest it adds to my design with minimal effort! You could actually stop at this point and use it just as a tag if you wanted! 

I'm in love with the Essentials Pretty Frames die cut and knew that it would be the perfect border to frame the tag. I love this Grinchy green paired with the classic red! All of these elements are layered onto a white card base using foam squares for added dimension!
For my second design, I wanted to keep the same feel as the first card but switch it up by using the new Layered Wreath Die. In the end, this card is one of those designs that could be mass produced easily and sent out in quantities!

Can you see what is hiding behind the card in the upper right corner? Yep...you guessed it! Pinkfresh is releasing their own ink pads and they are AMAZING!! There will be an official release soon, but in the mean time, we are sneaking them into our holiday designs as you will see as you hop along! I did some inkblending over the top of this dry embossed panel that I created using the Modern Bloom die using the new ink!

I added the layered wreath using foam squares for dimension. The die includes some berry shapes, but if I can get away with using Nuvo drops, I'm going to do it! LOL! They are so addicting and I was able to add quite a few! Ha ha!

I used the new Classic Holiday Words to create the sentiment that says "Be Merry". I added that over the wreath using foam squares.

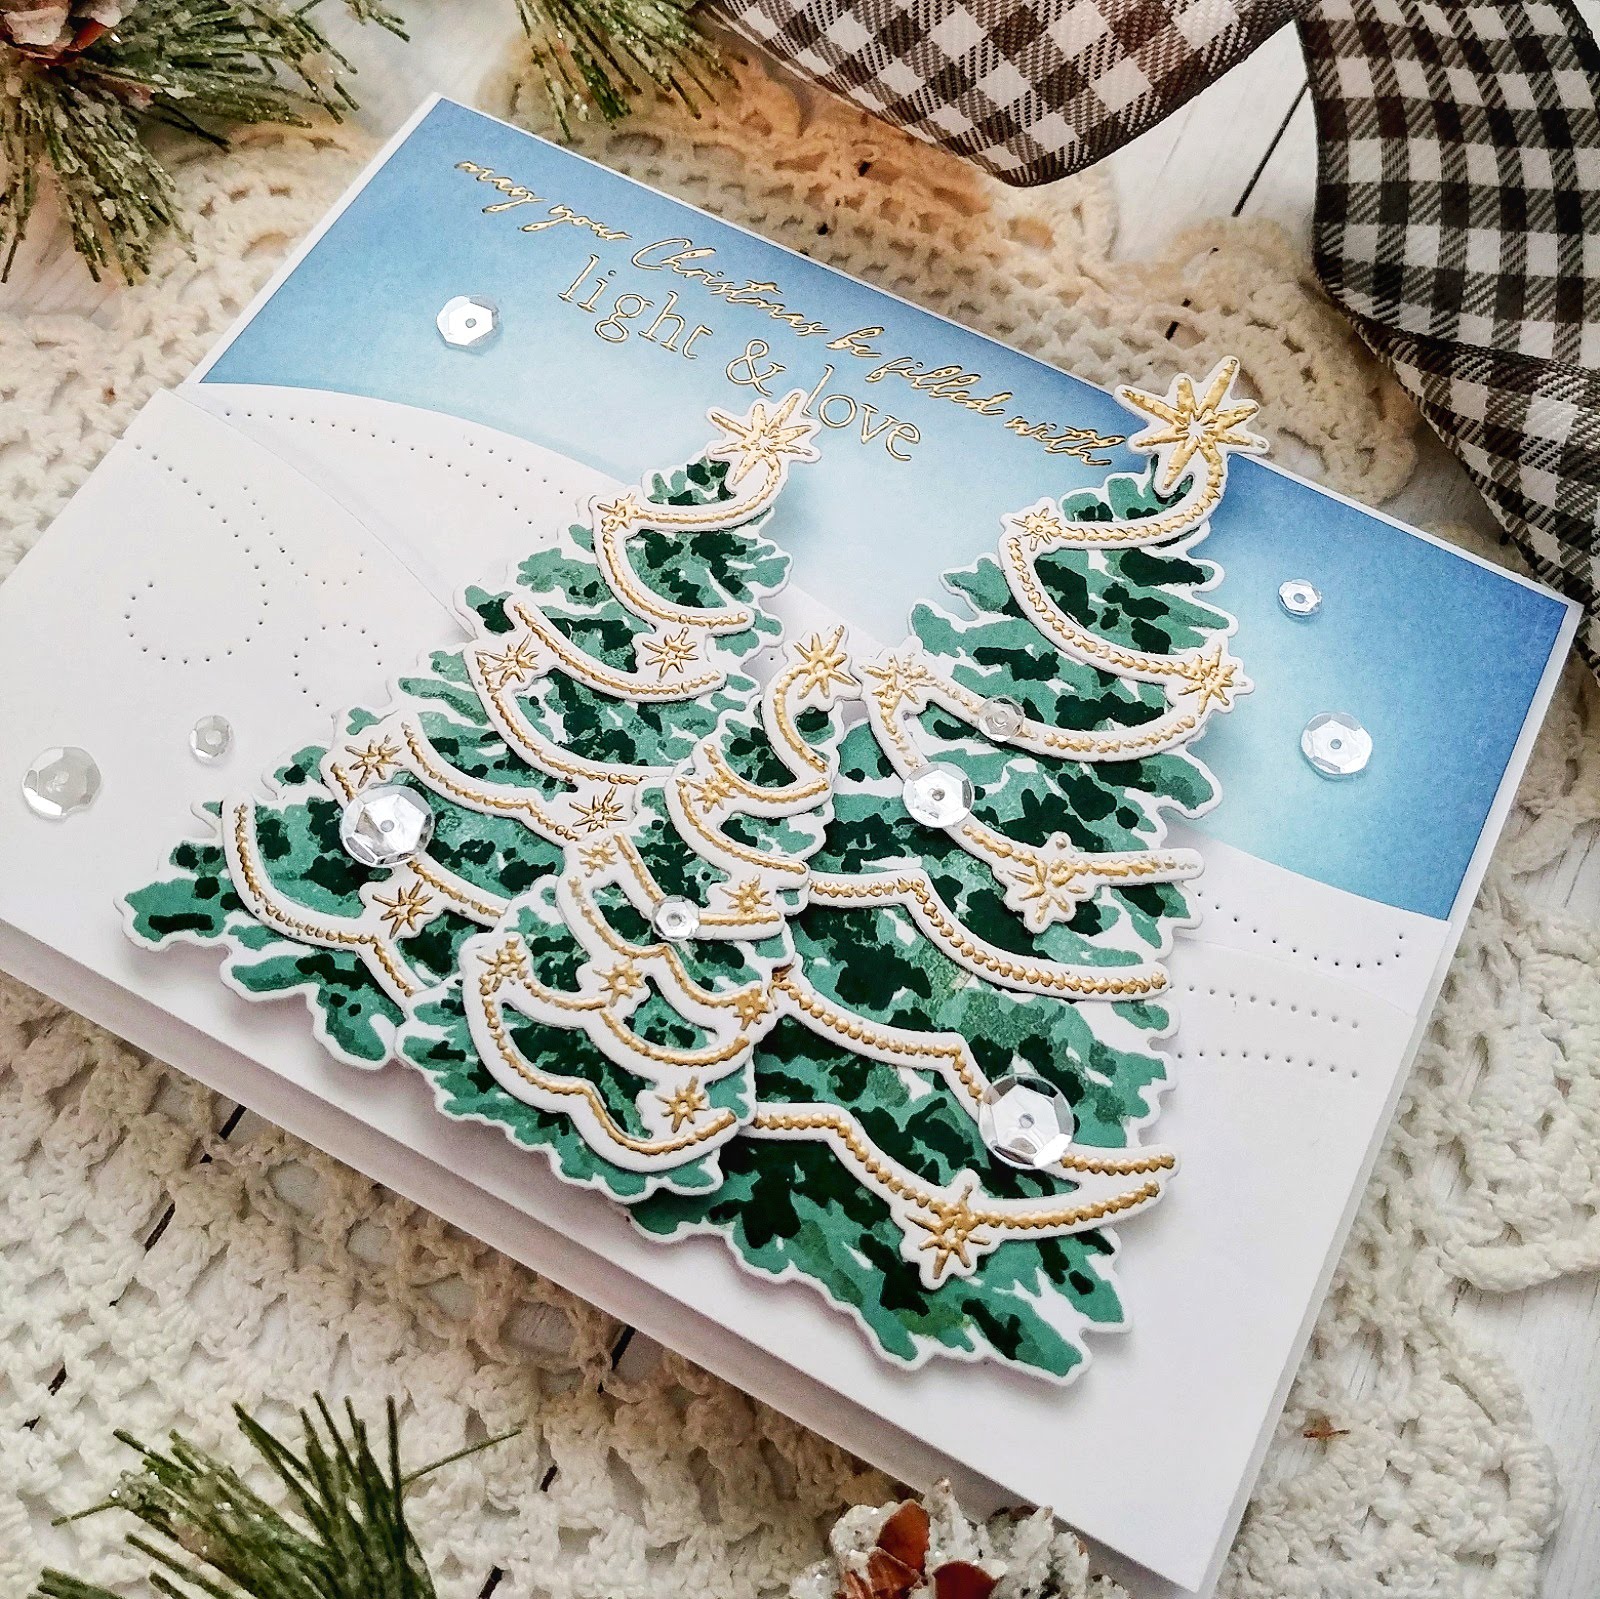
I heat embossed the "Christmas Greetings" sentiment, which is from the  new Skiing By stamp set in gold and added it under the "Be Merry" sentiment.

A few Essentials Crystal Mix finish off this fun and festive holiday design!

This is the third and final design for today's hop! I've used the fun and charming new set called Skiing By stamp set. I used another one of the sentiments on the previous card. As you can see, I used more ink pads; this time to do some inkblending to create this wintery sky! I also added some on the ski slopes so that they would have some added dimension.

Once I had the ink blending done, I used the Skiing By die collection to die cut all of the pieces and assembled the scene! I kept a very simple color combination for this graphic card. I added some snowflake embellishments using liquid glue to enhance the "take time to chase the snowflakes" sentiment!

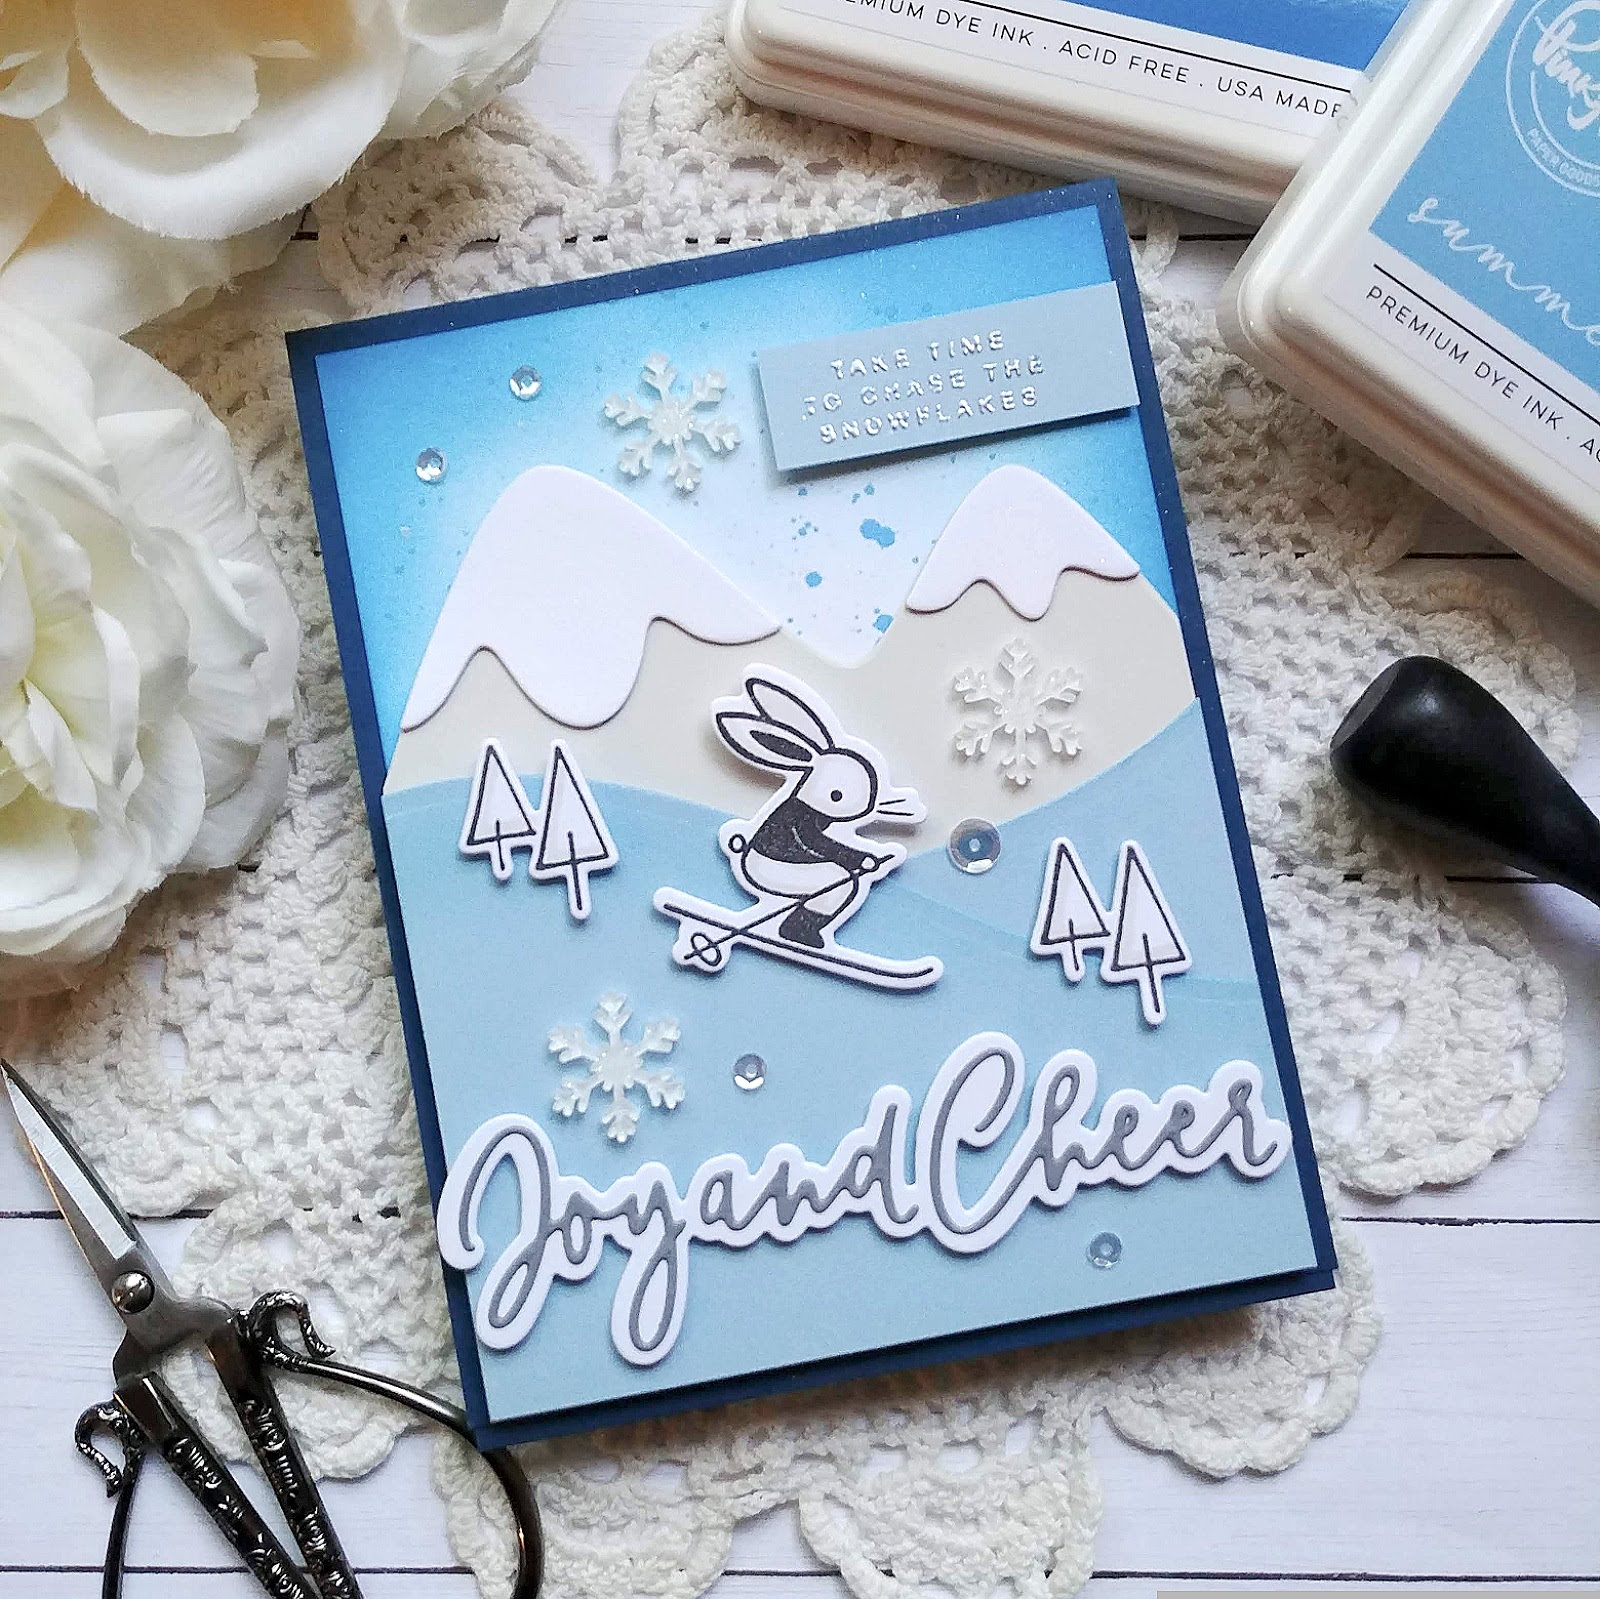
Of course, I couldn't resist adding another sentiment from the Classic Holiday words to the bottom. I added a few sparkling clear sequins for some added shine and a quick spritz of Shimmer Spray!
I had so much fun creating these designs! Thanks for fluttering by!


The Greetery {Let's Make Memories} Holiday Collection Day 1

Well friends, the time has FINALLY come! Are you as excited about this release as I am? Welcome to Day 1 of The Greetery Holiday Collection Countdown! This amazing collection of products is fittingly named "Let's Make Memories" and I couldn't love it more! I'm so excited to share with you all of the projects I have created for day 1! Before I dive in, here are the links to the other designers' blogs!

I'm head-over-heels in love with EVERYTHING being showcased today! First up is the FABULOUS new set called Christmas Eve! Isn't that perfect name for this sweet set? I also paired it with the new Foliage No.2 stamps and dies AND a new set called Tree Trimmings! 

To begin, I stamped a grundle or maybe a forest, of trees! LOL! I didn't know how much I would love them, but in the end I am so glad I did because I ended up using them on pretty much EVERYTHING! LOL! These pink ones might just be my favorites!

Once I'd decided on pink trees for this sweet, serene scene, I created the dreamy sky by doing some ink blending using Tumbled Glass and Spun Sugar Distress Oxide ink. I also added the snow image from the Christmas Eve stamp set using the same Tumbled Glass ink. I just love the subtle effect it adds to the background.

I also stamped a bunch of church images. Can I just say that stamping these is like magic? I absolutely love when these multi step images come to life layer after layer! Betsy is a genius on so many fronts!

Once the church was stamped, I added a thin line of 2 way glue to the edges and added some Martha Stewart coarse clear glitter for some snowy, sparkly details. 

I decorated one of the trees using the new Tree Trimmings stamps and dies. I embossed it in gold for a nice holiday touch!


I spritzed the background using some Sparkle Shimmer Spray before I assembled the rest of the details for some added shine! The snowdrifts were created using the new Drifting Die. You will be able to see how much I am in love with this as well since I have used it on just about everything!

The sentiment is from the new Tree Trimmings set as well and is stamped in black directly onto the ink blended panel. The two people are die cut and stamped as well and added to the bottom using foam squares. The set also includes a boy and a girl so you can create all kinds of fun scenes! 

My second card uses a lot of the same elements, but in different colors. You can see just how easy it is to change the mood by switching out the colors!

This church is actually stamped in the same color combination that you will find on your stamping guide. Isn't is pretty? I just love this color combination! I added the snow in the same way as I did on the other card.

Did you read about what inspired this church and stamp set? If not, you'll have to read all about if from Betsy! I love that it has a sentimental beginning!

Isn't this car just the cutest? There are 2 cars included in the set as well as street lights, banners, and more!
The "Merry Christmas" sentiment is from the Christmas Eve stamp set and there are quite a few to pick from, which I always like!

My third and final card for today showcases the Tree Trimmings stamp and die set as well as the Foliage No. 2.

I decked out all three of the trees in gold embossed details. The sentiment is also heat embossed as well onto an inkblended panel.


This card reminds me of a scene that you might find in a Rankin and Bass Christmas movie! LOL! Maybe Burl Ives playing the snowman in Rudolph the Red-Nosed Reindeer might come swishing by! ha ha!

Well friends, this wraps it up for day 1! I hope you'll stop back by tomorrow for day 2! I promise you won't be disappointed! Thanks for fluttering by!


Saturday, September 28, 2019

Saturday Showcase {Halloween Frights-Boo!}

Welcome to this week's Ink to Paper Saturday Showcase! Today a few of us are getting in the Halloween spirit with some fun Monster inspired ideas! How many of you remember Disney's Snow White? The spooky forest was the inspiration for my projects today! 

To begin my treat holders, I die cut the trees using the Peaceful Forest die collection using the die with the cluster of trees for ease. I knew that with this die and my mini MISTI, making these treat holders would be a breeze! Once they were all cut, I stamped the trees all in black using the Peaceful Forest stamp set. I had to laugh that I used the "peaceful" forest set to create my spooky forest! LOL! Oh well...I sure love stretching my supplies.

I used the Tent Style Packaging Die to die cut 6 panels to create the 3 treat holders. Each one uses two panels glued together at the bottom. I used ScorTape to adhere the bottom flaps for security!

Once that was done, I was able to attach the trees using foam squares for some added dimension. I also die cut the BOO! using the To Die For Sentiments: Halloween out of Canyon Clay cardstock. I added that over the top of the trees using additional foam squares. 

I used the Monster Dies to die cut the eyes and popped those even higher in the Os, to really give them some dimension. 

The sentiment, which is from the Halloween Fillings stamp set, is heat embossed in white to really make it pop! The finishing touch is the clothespin added to each of the treat holders. I added a strip of True Black pattern paper from the Bitty Big Pattern paper collection. I love combining spots and stripes for Halloween! I also couldn't resist adding a few white Nuvo drops here and there to give the feeling of even more eyes peering out from the forest! Thanks for fluttering by!

Thursday, September 26, 2019

PTI Throwback Thursday {Once Upon a Time}

Hello and welcome to this week's Papertrey Ink Throwback Thursday! It's one of my favorite features and I always love when it's my turn to share with you! While the Book Cover Dies and coordinating Book Cover Details stamp set are definitely "throwback" worthy, they are new to me, so I was particularly excited to use them for this Bridal Shower card I was in need of!

I know I will be using these again and again; especially for all of the book lovers in my life as well as my Book Club! Believe me, it has been on my Wish List for YEARS, and I finally brought them home! To begin, I die cut the Book Cover portion using the Book Cover Card Die using Aqua Mist cardstock. I added some Aqua Mist ink around the edges using a blender brush. Once that was done, I added the die cut "pages" portion that I die cut from Rustic Cream cardstock. This particular cardstock gave the book pages the look I was going for. 

I quickly stamped the filigree detail on the book spine using my mini MISTI and black ink. The large rectangle on the front is also die cut using the Rustic Cream cardstock and the die is included in the Book Cover Card die collection {linked above}. I die cut the "Once" piece twice using Simply Chartreuse cardstock and glued together with liquid glue. 

I also die cut the "happily" and "for you" portions using the same cardstock and layered the same way. I also made a fake gift card for the pocket so you could see how I intended to use it. It will really have an Amazon gift card inside, but I may use this green piece to hide the orange and black of the card! LOL!

I wanted to add some florals, so I pulled out another "throwback" set; Bitty Bouquets. This is another one of my favorite sets and I have used it quite a bit. I used them last year on THESE cards, which turned out to be some of my favorites.
I die cut the shapes first using the Bitty Bouquets die collection. These are solid dies so you need to die cut and then stamp. I used my Mini MISTI to do all of the stamping since I was stamping multiples and I wanted to get them done quickly, accurately and nicely saturated. 

I did all of the extra stamping, like the "and they lived" and "every after" and " upon a time" using my mini MISTI as well so that I got everything lined up properly.


A few sparkling clear sequins finish up this fun and whimsical design! I think the Bride-to-be will think it's fun! Thanks for fluttering by!

Inspired By...Tailgate Party {Happy Harvest}

It's Thursday and that means it's time for a brand-new Inspired By Challenge! I decided to create a set of three quick cards to mail out this week! Now that fall is officially here, I can get some of these autumn cards flying out the door! 

I was inspired by the leaves at the top of the photo; there just beyond the tailgate, the plaid of the thermoses, the picnic basket, the twine wrapped around the thermoses and the colors.

To begin these quick cards, I die cut the Bold Borders: Foliage Die out of Olive Twist cardstock. Normally I would stack them about 2 or three times, but for these quick designs, they just got a single layer, which looks great because of the pierced detail! I layered them onto panels of Fall Prints & Patterns pattern paper, using prints that looked like the leaves in the inspiration photo.

I used the Vintage Picnic dies to die cut the picnic baskets and then used the (retired) Vintage Picnic stamp set to stamp them. I did some simple Copic coloring to get some of the fun plaids from the photo incorporated into the design.

After the baskets were cut, stamped and colored, I stamped the pumpkins directly onto the panels of Rustic Cream cardstock as well as the "Happy Harvest" sentiments. I used Copic markers to color the pumpkins and added some highlights using a white gel pen.

I used foam squares to pop up the baskets and the panels using foam squares. I also added a quick bow of Jute Button Twine. Once that was done, I added the entire panels onto top folding A2 card bases using ScorTape. These were a lot of fun to make and I always love pulling this old set out! Thanks for fluttering by!