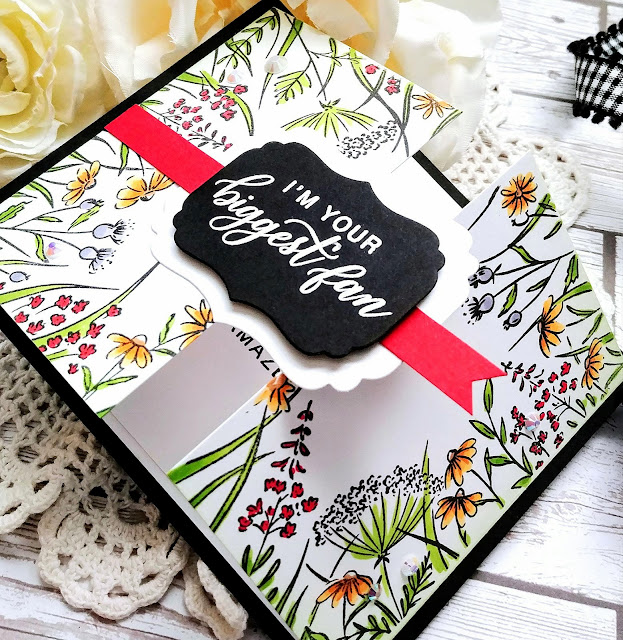
I'm beyond thrilled and honored to be participating in this AMAZING blog hop! It's all about celebrating 45 years of HERO ARTS and CELEBRATING OUR INDUSTRY! Hero Arts and Pinkfresh Studios have come together to create a beautiful stamp set for this collaboration! You will see how versatile this stamp set is and all of the beautiful sentiments as you hop along to the other {Amazing} designers' blogs!
Before I share those links, you can see the beautiful set called You make a Difference! It is available for purchase at Pinkfresh Studio HERE-You make a difference. Also, there will be an amazing giveaway as well! There will be 3 prizes, drawn from comments left across the blog hop:
- One winner will receive the stamp set!
- One winner will receive a $25 shopping spree at Pinkfresh Studio
- One winner will receive a $25 shopping spree at Hero Arts
Hoppers have until Sunday, August 18 to leave their comments, and the winner will be announced on the Hero Arts blog the following week.
Before I dive into the details of my card, don't forget to hop along to the rest of the designers' blogs (isn't that a spectacular line up?)
Kelly Lunceford {you are here}
Whew! Now that the business is out of the way, let me share the details about this gate-fold design. To begin this card, I took a piece of 4 1/4 by 11 white cardstock and scored it a 2 3/4 on one end and then 2 3/4 again on the other end to create a gate-fold card. I used my bone folder to get the folds nice and crisp. Once that was done, I put it into my mini MISTI and stamped the image a few times to get a saturated and crisp image.
I used two of the sentiments paired together for the greeting on the inside. This was done by cutting a piece of cardstock 4 by 5 1/4 inches and then stamping it in my MISTI. I layered that on the inside of the gate-fold card using adhesive.
The outside of the card is colored using Copic markers in wildflower tones; red, yellow, purple, and white! I really love this selection of images and how fun they are to color! I also blended a little bit of green ink around the perimeter of the card using a blending brush. I just used whatever was left on the brush! LOL!
The sentiment on the front is heat embossed using white powder and then die cut using the AMAZING and VERSATILE Essentials: Fancy Label Frames die collection. I actually die cut two of them so that I could layer them together for stability AND weight since I wanted this detail to help weigh down the folded flaps.
I die cut the next larger in the label frames collection out of white cardstock. At this point, I took a long strip of red cardstock and sandwiched it between the two, making sure to measure it at the correct length beforehand. I used foam squares between the black and white portion.
In this photo you can see that I only adhered the label and red strip to the left hand side of the card. I wanted it to give the impression of a belly band (of sorts) but not actually have one! As much as I LOVE a belly band, I think they can confuse the recipient! Once that was all done, I matted the entire white card onto a piece of black cardstock that measures 5 3/4 inches by 4 1/2. In the end, it comes out to be larger than a standard A2 sized card, but the envelopes that I purchase can handle the extra dimensions. The finishing touch is a few of the clear jewels from the Essentials Jewel Mix.
I hope you've enjoyed today's hop! Don't forget to leave comments along the way for your chance to win the prize! Thanks for fluttering by!


