Wednesday, July 14, 2021

The Greetery {Capturing Summer} Release Day


Hello, friends! It's release day for the fabulous new Capturing Summer Collection from The Greetery! The release will be available for purchase beginning at 10 am ET! I'm popping in to share another bit of inspiration using the fabulous new Geranium BotaniCuts, Side Of Greens, and the Summer Findings Dies! I mentioned in yesterday's post that I'd created some red geraniums, but they just didn't work for the card I made, so I knew I needed to let them shine on their own card!

Red geraniums are some of my favorite flowers and I have quite a few planted this year! I just love the pop of color they add to my yard and porch, and right now they look especially cute with American flags tucked into their blooms! In Utah, we also celebrate on the 24th of July, so I keep the Americana look all month long!

To begin, I die cut ALL of the pieces for this card out of white cardstock and inked them up using Distress Oxide inks, blender brushes, and finger daubers. The butterflies got a bit of added detail with a white gel pen, but I also added white paint splatter to the entire card front to give it even more detail!

The background was created by adding some Tumbled Glass and Broken China Distress Oxide ink around the edges of a Linen cardstock panel. I then glued the Side of Greens piece using liquid glue. This is a VERY delicate die cut piece, so I was very careful in handling it and gluing it! I had a little plank leftover from my Shiplap porch from yesterday's card, so I added that as a place to "ground" the pot of flowers. From there I added the pot and flowers using foam squares for maximum dimension.

The butterflies were created to look like a monarch butterfly with the stark black and striking orange! I thought they would accent the warmth of the flowers paired with the cool background! Of course I just couldn't resist adding quite a bit of glitter to let this card sparkle and shine!  I hope you've enjoyed today's post! Have fun shopping and thanks for fluttering by!


Tuesday, July 13, 2021

Taylored Expressions {Knock on Wood}Designer Dangles


Hello and welcome, friends! It's always a good day when I'm sharing something I LOVE and getting to work with one of my favorite companies! I've shared quite a few of the Taylored Expressions Designer Dangles over the years, but this new release is so fresh and fun! I've given countless sets of earrings as gifts to my friends, my kids' teachers at school and church, as giveaways, etc.! They are just so much fun!

Our Knock on Wood earring composition bases come in a variety of shapes to complement our Designer Dangles dies. With drilled holes that work with our Designer Dangles Earring Wires and Jump Rings (sold separately), these laser-cut walnut wood shapes will surely inspire you to make more jewelry! Please note: the laser-cutting process leaves a thin layer of film on each base that makes it look "dirty" on one side. Peel off the film to reveal the true walnut color that can be left plain, painted, or bedazzled with glitter!

***I didn't know about this peel off film, so I didn't do that, so please note that some of my samples still have the film!***woops!

It's no secret that I'm a HUGE fan of printed faux leather and I use them A LOT with my earrings! The knew collection also includes these fabulous printed leathers that you will see throughout today's post!

The wood pieces are nice, sturdy, and THICK so you will want to make certain that you order the jump rings as well. Most of the earrings I am sharing in today's post use the jump rings, with the exception of 2.

This particular set does not require jump rings. These earrings use the new Designer Dangles "Wrap Around" dies paired with the nesting circle wood pieces (not sure on the exact name). These are by far my favorite of the release and I ended up making another pair using the extra circles that I'll share in a bit!


These are so easy and simple to create and I think they're so cute!

This particular pair is one that I didn't remove the film, so the look of the wood on these is WITH the film on. I actually really like it, so you can decide if you want to keep it on like I did! ha ha! On this particular pair, I used the half-circle wood pieces to insert into the leather for a different look.

These are the same earrings with the half-circle removed! I made these for a cute new dress I got from Amazon that ended up not fitting! LOL! I will definitely still be wearing these because I love how they turned out!

This next pair uses the new On Point dies paired with these diamond shape wood pieces. As you can see, you need two jump rings to make these earrings!


This pair uses the beautiful green and gold flecked cork that I ABSOLUTELY adore!

This next pair is fun because you can use just the dies to create the earrings or just use the wood portion at the top with the leather at the bottom, like I have shown today!


This next pair is one of the easiest of the bunch because all you are doing is adding the leather piece to the bottom with glue! The leather is cut using the In the Round dies. You can also just cut the circle piece from leather as well, so this one is versatile, too!
Well, this concludes today's earring post, but rest assured, I will be making more of these super cute designs! Thanks for fluttering by!


The Greetery {Capturing Summer} Day 2

Hello and welcome to day 2 of full reveals for the Capturing Summer release from The Greetery! Thank you so much for ALL of your sweet comments on yesterday's post! The rest of the collection is being showcased today and it will all be available for purchase tomorrow at 10 AM ET! As always, you'll want to head over to The Greetery Blog for all of the details on each of the new products being showcased today! Make certain to leave a comment here, and on each of the designers' blogs for a chance to win one of 2 $50 gift certificates to The Greetery shop!

My first card for today is my favorite and all of the new products available in the "Curio Collection" are totally up my alley! Betsy has done it once again and created these fabulous dies to create a curio cabinet to display specimens of the winged and plant variety! That being said, I totally want to create little scenes in each of the sections using the tiny images from the Destination Collection to stretch these fabulous dies! These would also be perfect to showcase the beautiful flowers from the BotaniCuts Wildflower Mix Dies! Wow....too many fun ideas flowing through my brain! ha ha!

To begin this fun card, I die cut all of the pieces for both the curio display and the specimens from white cardstock, with the exception being the silver pieces for the hinges and closure! I used an assortment of Distress Oxide inks to ink up all of the pieces and then had fun putting them all together! The wood border and closures/clasps are from the Curio Cover Die. The tiny labels, paper clip, and divider are from the Curio Divider and Details die. The flora and fauna pieces are from the new Curio: Summer Findings Die. 

There is also a companion stamp set called Curio Labels and it is full of fabulous sentiments for all seasons, months, and more to create one-of-a-kind cards! I chose to make this an autumn birthday card for my Botany Minor Mother! ha ha! It is definitely heavy on the fauna side, rather than flora, but I think she'll still love it anyway!


I die cut the divider three times from Kraft cardstock and glued them together using liquid glue. I really wanted to achieve the illusion of this being a wooden curio box. Once the dividers were stacked I glued them to a 4 by 5 1/4 inch piece of Linen cardstock that has a hint of grey ink around the edges for a worn look. I glued the wooden pieces around the edges and then had fun placing the different pieces into their rectangles! I toyed around with the idea of adding some corsage pins to the winged creatures to give the illusion that they are pinned down, but it made the card a little busy, so I opted to leave them off!

I stamped the different sentiments onto the little labels and added them with mini foam squares. I glued the hinges and closure pieces on with liquid glue to finish off this curio design!

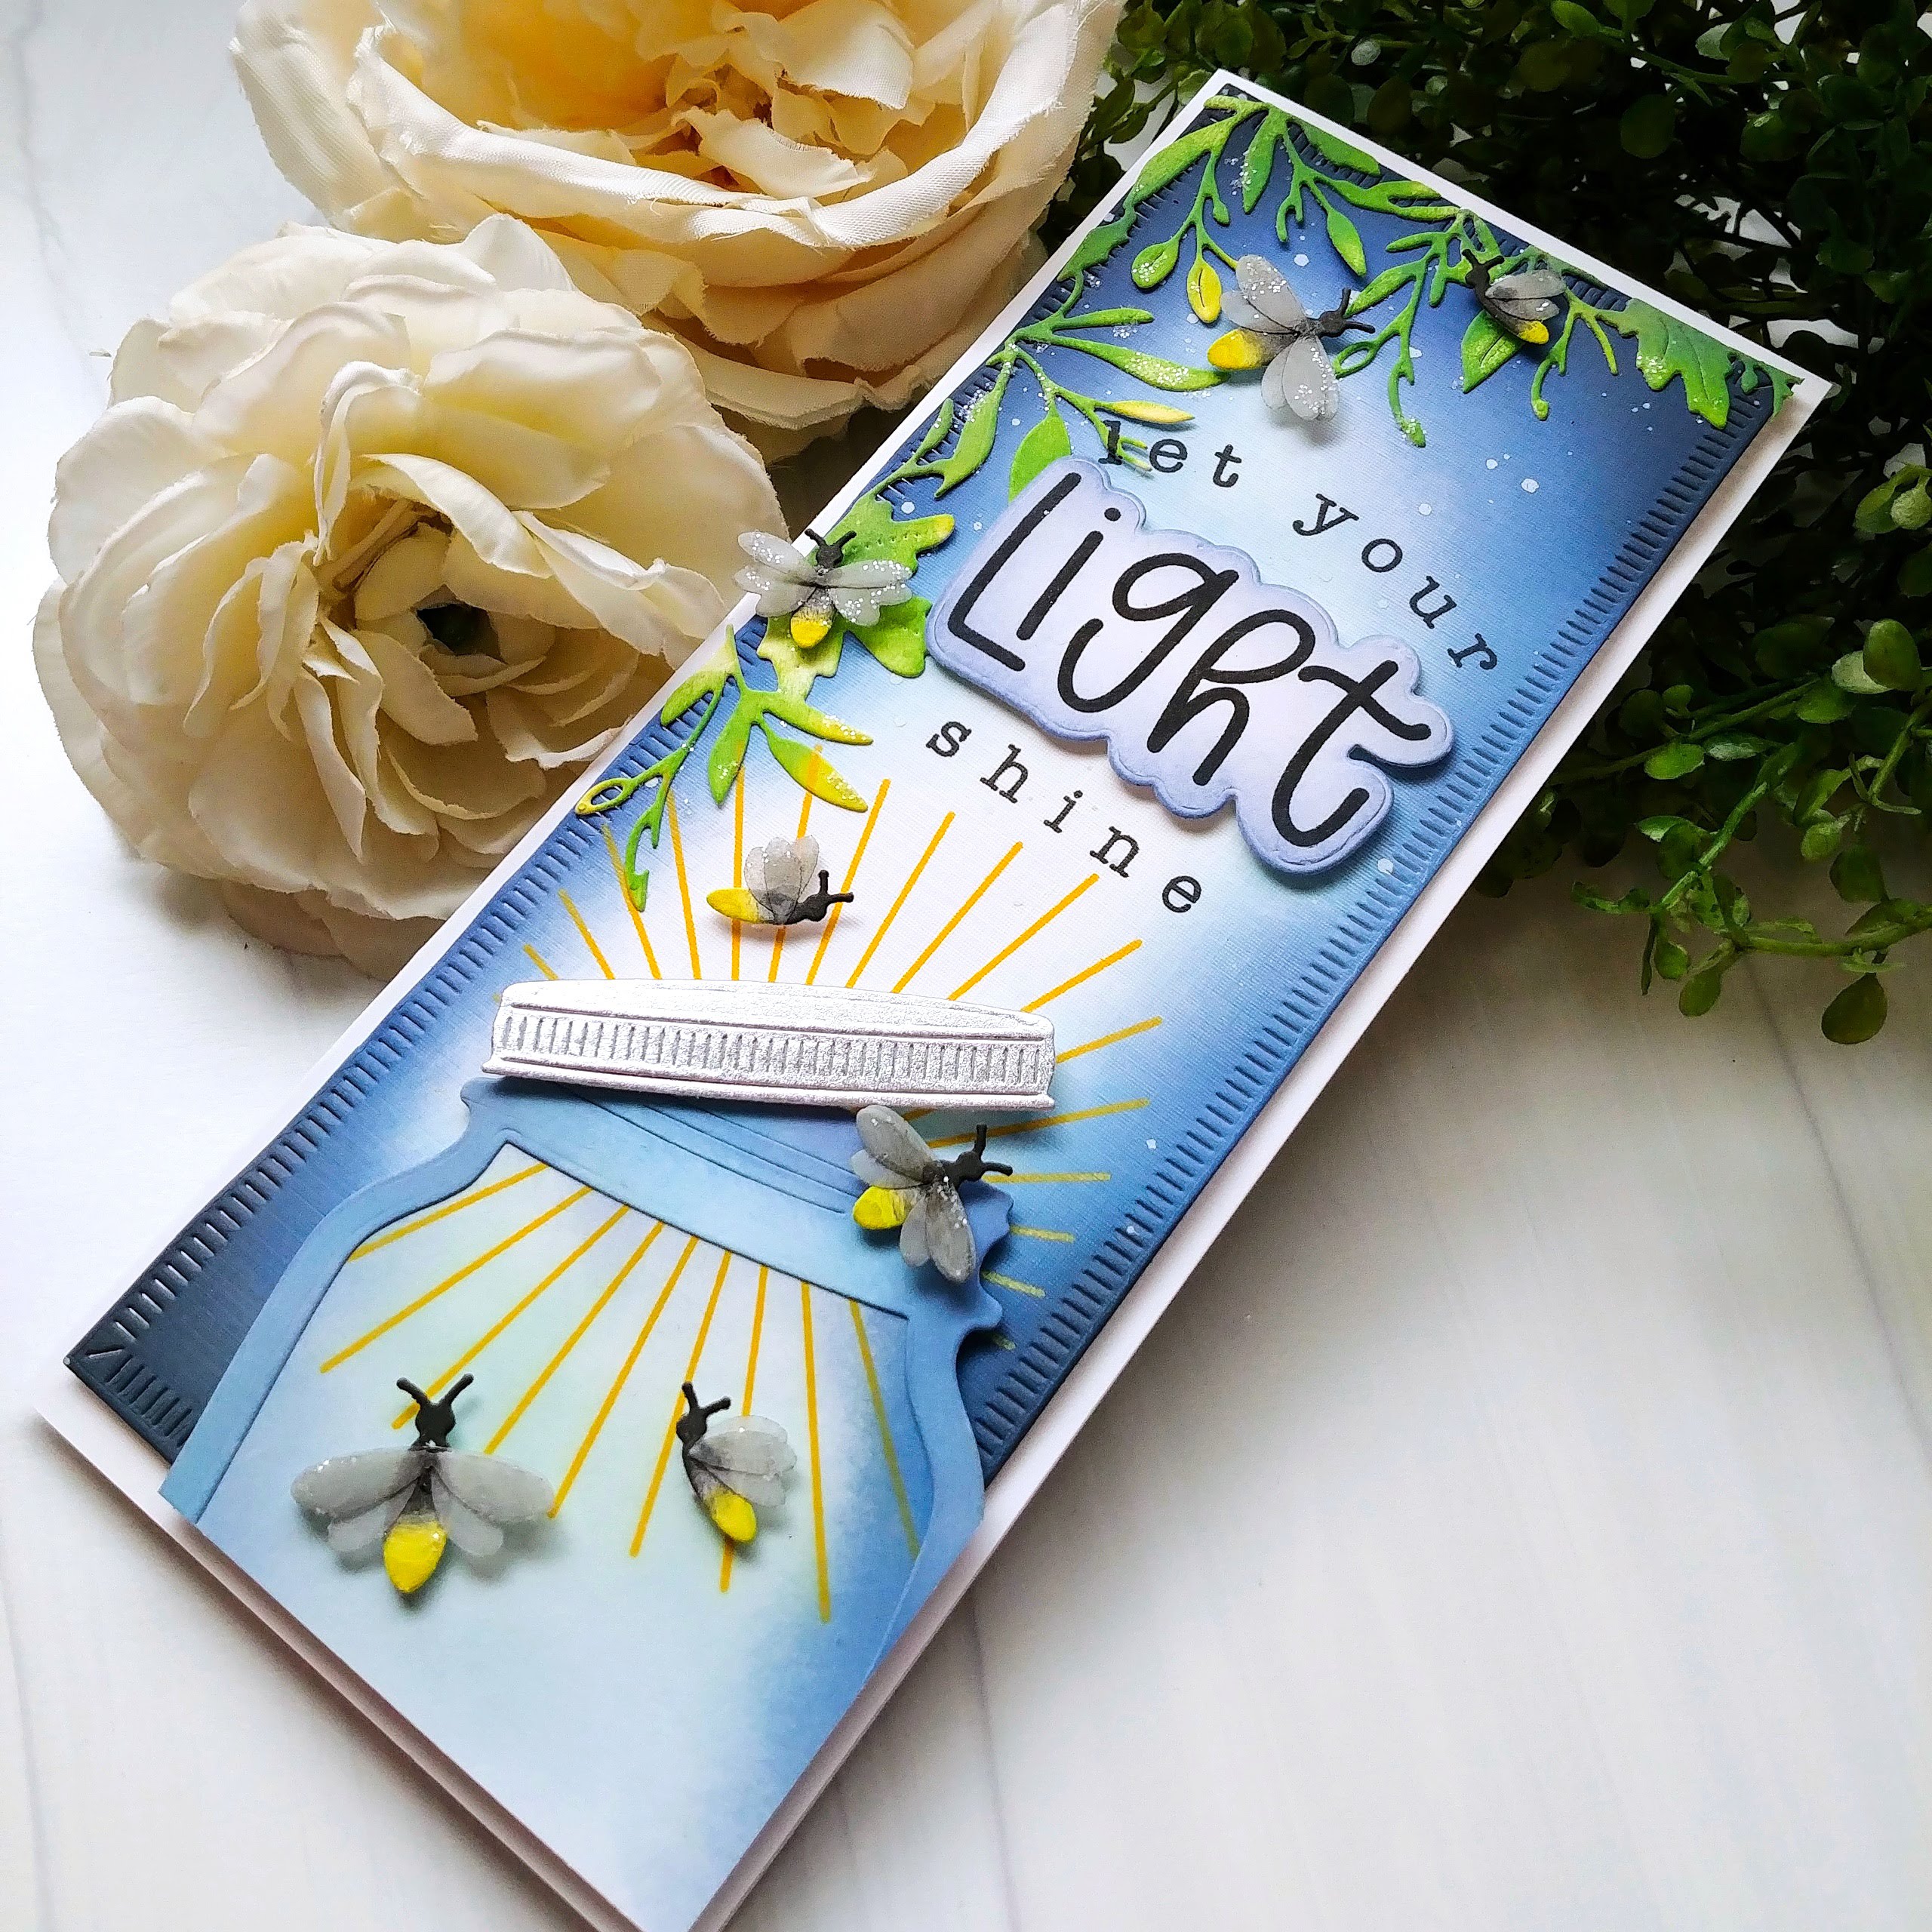
My second card for today brings back in the Jumbo Jar die that was showcased yesterday, but this time I've paired it with the new Container Garden stamps/dies accented with the Side of Greens die that was shown yesterday as well!

Do you remember Betsy's steak card from the last release that had realistic looking "seasoning" on it, but it was actually glitter? I, of course, HAD to buy some, and at the same time found some that looked like dirt! I was so happy I did because it worked perfectly for the bottom of this cute jar garden!

This cute container garden also has a pair of bumble bees to add to your project that are just sweet as can "bee"!

You were all so complimentary of my jar lid yesterday and this project also uses another metallic jar lid to accent the design!

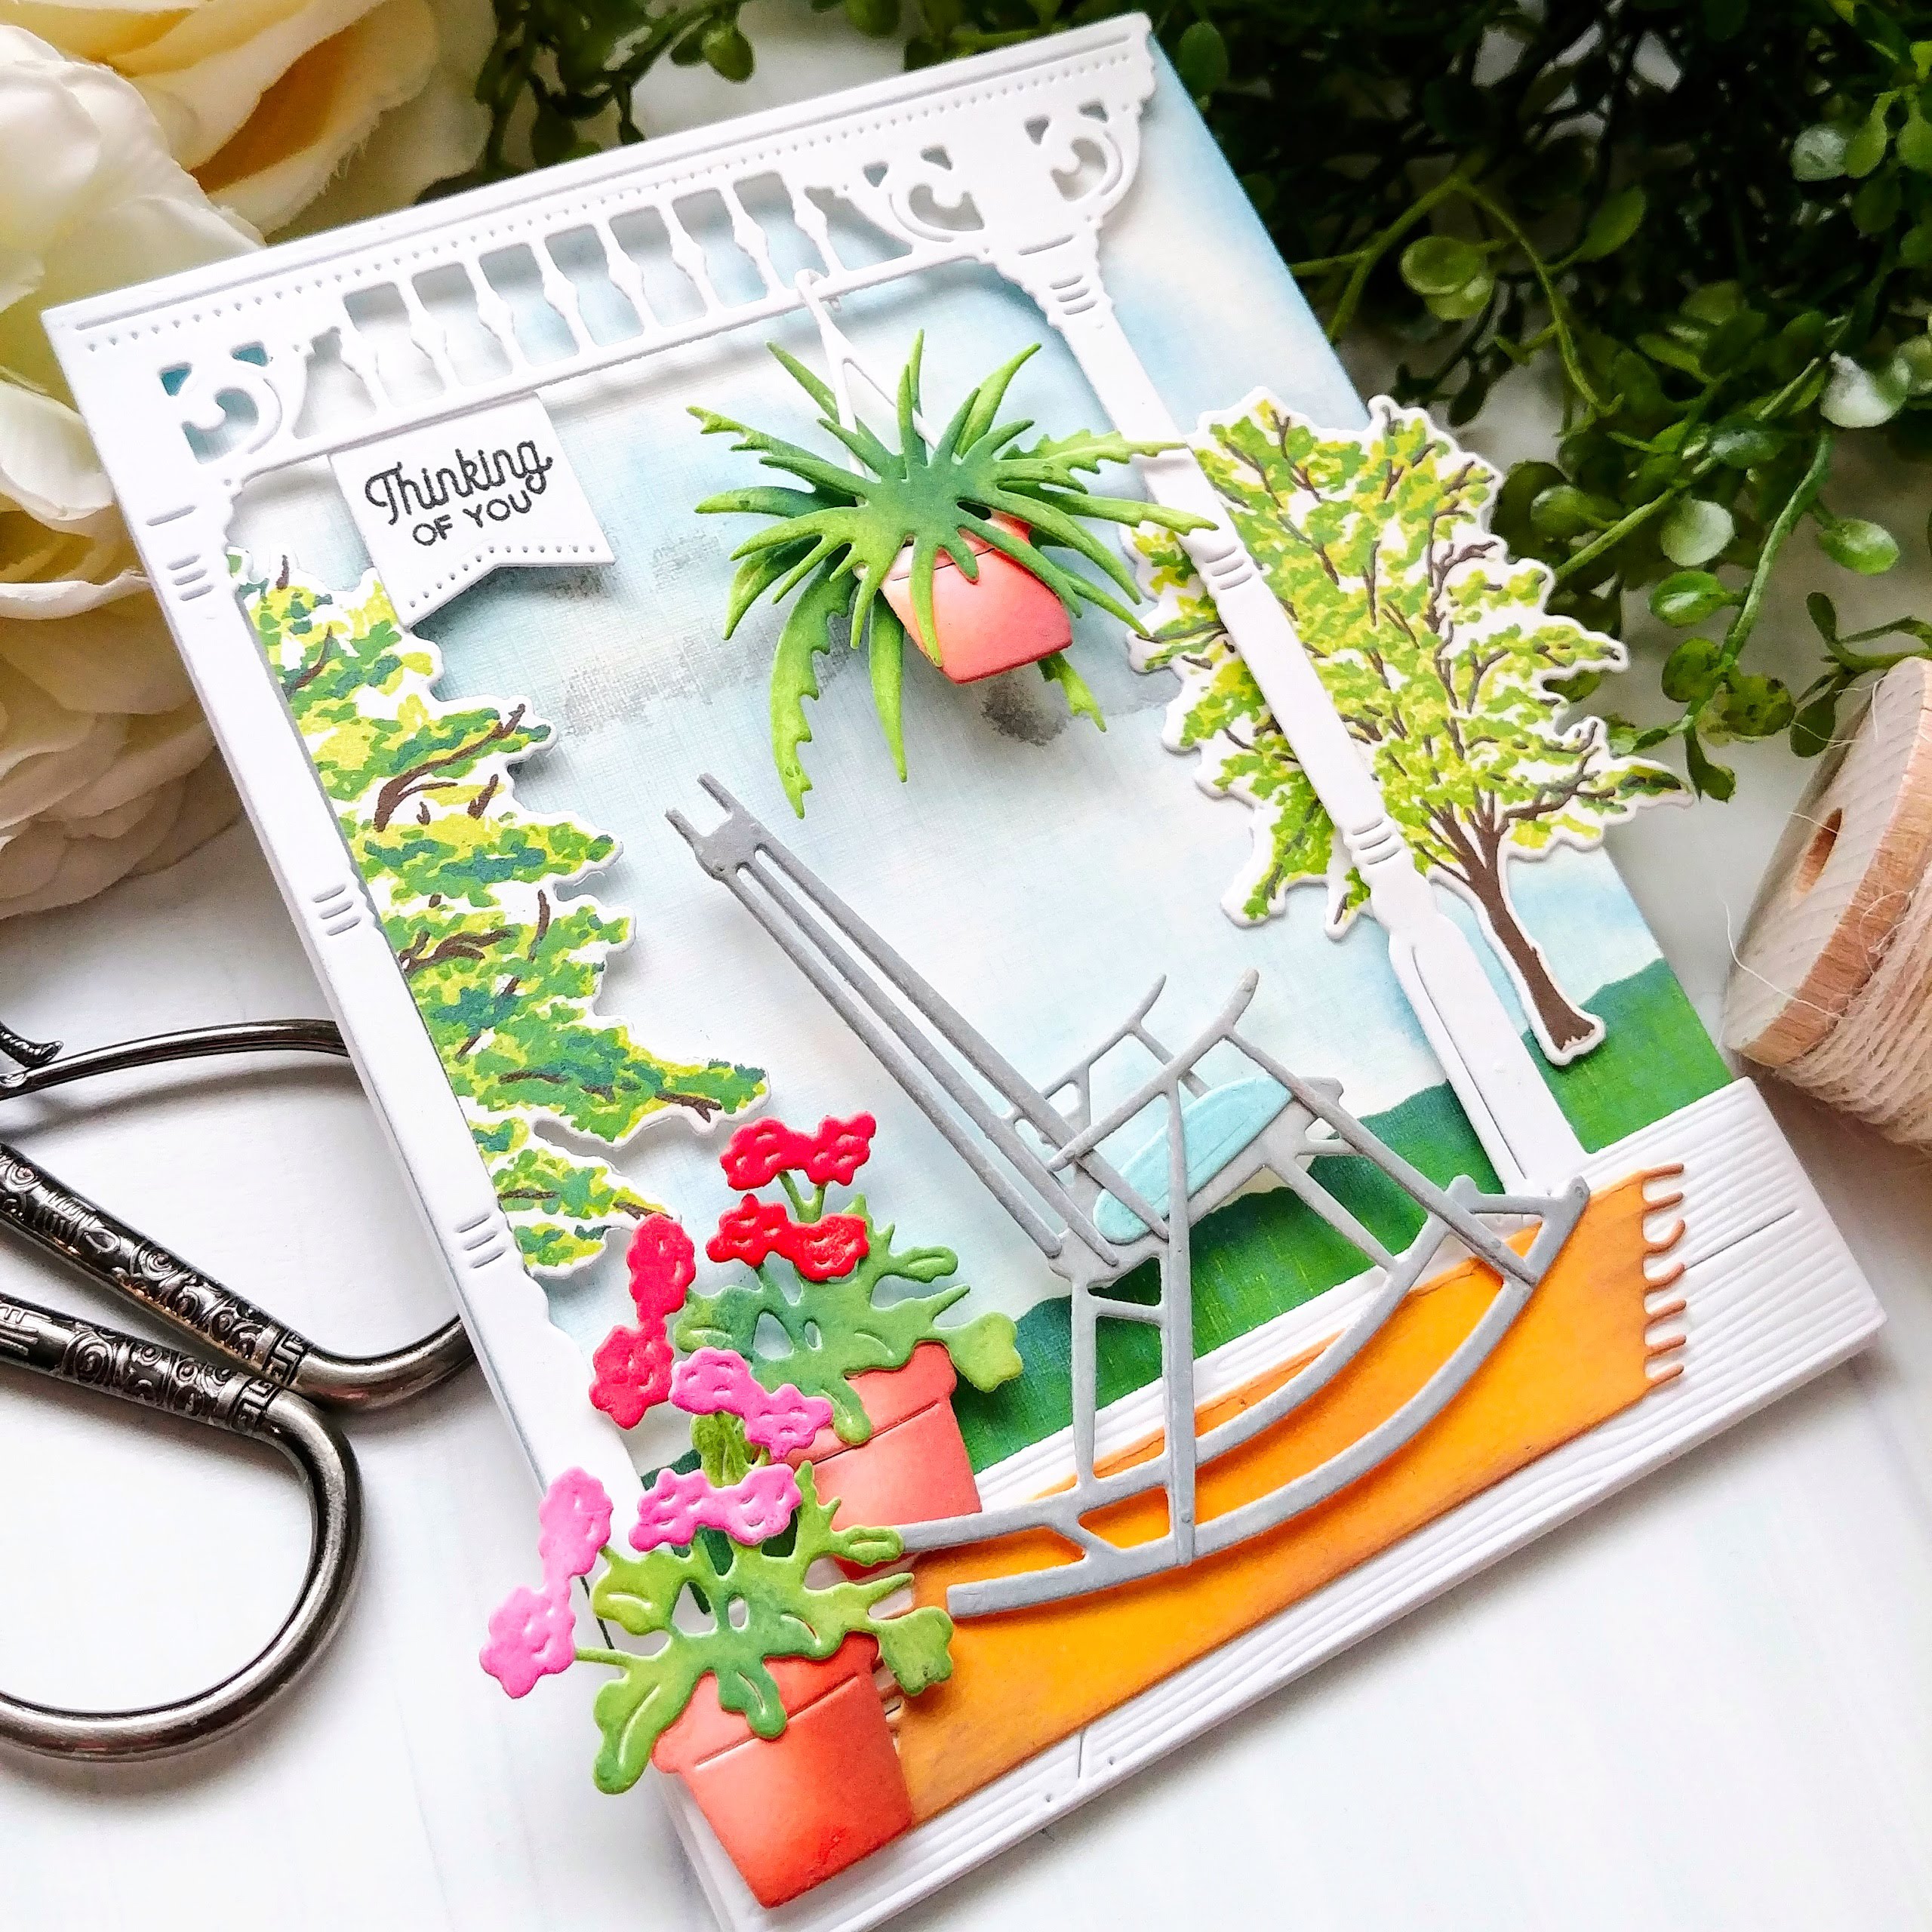
My third and final card for today, and the release, uses the latest installment in the BotaniCuts series! These are the fabulous geraniums and I am IN LOVE! I plant quite a few geraniums in my yard and in my pots, so my card today is actually inspired by one of my own pots.

I actually made some red geraniums as well, and I really tried to get them both onto this card, but it just wasn't working out! This particular card was actually supposed to end up being a "close-up" of the porch from yesterday! I had the rest of one of the trees left over so I thought it would be fun to add some perspective to this card and imagine it off in the distance with the potted geranium on the porch.

I used the Shiplap Builder dies to create the porch floor and then had fun adding the pot and the geraniums. The pot is a new die and I love it! It's called Pretty Pot Die and I know I will be using it A LOT!

I die cut all of the leaves, pot, and blooms out of white cardstock and then colored them using Distress Oxide inks and finger daubers. This is my favorite way to add realistic shading to the dies.

Well friends, this concludes my post for today and this fabulous release! Don't forget to head to the other designers' blogs to see what they've come up with! Thanks for fluttering by!


Monday, July 12, 2021

The Greetery {Capturing Summer} Day 1

Hello and welcome, friends! I'm so excited to be here today sharing a few projects for day 1 of The Greetery Capturing Summer release! There will be two days of full reveals and then the release will be available for purchase on Wednesday, 14! I have fallen head-over-heels in love with the entire release and I know you will, too! Betsy always has a fabulous "Meet and Greet" over on The Greetery Blog where she introduces each new product with all of the details! Also, make sure to leave a comment here, and on each of the designers' blogs, for a chance to win one of two $50 gift certificates to The Greetery's shop!
Up first is the fabulous new "Sitting Pretty" dies! These are all just absolutely squeal worthy, don't you think? I had the best time creating all of these fun details to put together this fun porch scene! My card also includes the new Sunset Skies stamp set so you can create different sky scenes. I chose to use the base image (stamped to look like grass) and then the clouds. I didn't want to create a sunset, but I love that you can still use the images from the Sunset Skies set for multiple uses! I know I will be reaching for these images often to use to add details to my "scene" cards!

The porch portion and the rocking chair are included in the Sitting Pretty die collection and then the rug, flowers, pots, and hanging plant are included in the Sitting Pretty Accessories die set! There's even a sleepy kitten included, but I didn't use it on my card. I'm sure some of the other designers used the cat, in fact, I'm betting Wanda added a cat FOR SURE! ha ha!

To begin my card, I die cut everything out of white cardstock and then used Distress Oxide inks to color all of the pieces. This is my absolute favorite way to add color to dies, especially so I can add different shading to give everything a more realistic look.

I eat my breakfast on my porch every morning, so I understand the necessity of a good porch! ha ha! I added a few trees that are from the Fir and Foliage No. 1 stamp set. They just added a little bit more detail and perspective to make this porch scene come to life!

I hadn't really thought about a sentiment when I first set out to create this scene, but felt confident that I would be able to sneak one in somewhere! I just love the sweet and simple "thinking of you" tucked up in the corner! The sentiment is from the Sentiment Suite: Thinking of You stamp set and is die cut using the Sentiment Suite: Basics Die. Once I had it tucked up there, I thought how cute it would be to adorn the porch with a bunch of these in different colors for either the 4th of July or a birthday card! Can you imagine the pinwheels hanging down, too? Oh, the fun we will have with these dies! I'm sincerely hoping for a few grinning Jack-O-Lanterns and cornstalks for the columns come autumntime!

My second card for today uses the new Jumbo Jar Die, the Fireflies Die, Firefly Nights stamp set, and Shining Light Die! The greenery up in the corner is from a fabulous new die called "Side of Greens" that I know I will be reaching for often! It will be a perfect base to add flowers to, and so much more! 
This card was really fun to plan and execute, but did take some thoughtful consideration as I put each piece in place. To begin, I die cut a large panel from Linen cardstock using the Crimped Slimline Die and then I added the layers of blue Distress Oxide ink to create an evening sky! I knew I wanted the jar to be in the lower right corner on an angle, so I purposely left that area a little lighter so that the rays of light could be stamped in a white area, if that makes sense! Once that was done, I added some white paint splatter to mimic stars or fireflies that are off in the distance! 

Now, in hindsight, I would have stamped the rays at this point, BEFORE I added the foliage and the sentiment, but I think it turned out okay anyway. I got to work on the jar and die cut it twice; once with the center portion cut out and once with the entire solid piece. The bottom portion of the rays were stamped on the solid piece with a touch of ink blending and then I layered the outline portion over the top that had already been blended.


I colored the greenery using Distress Oxide inks and then added it to the upper right corner using liquid glue. The sentiment is stamped directly onto the panel with the exception of the "Light" portion which was die cut and stamped and added using foam squares.

The best part of this card are the CUTE fireflies! I had a ball creating these little cuties using vellum for the wings and oxide inks on the bodies. I dipped the tail of each firefly into the new "Glow Powder" to let them light up in the dark! I kept thinking of Little John in Disney's animated Robin Hood when he says, "Glow little fireflies, glow!" It's the scene where he's pretending to be the fortune teller and needs to crystal ball to light up! ha ha!

I did toy around with the idea of sprinkling the glow powder over the white paint splatters when I was first getting started, but opted not to. I think I may need to revisit that idea! I added fireflies here and there using foam squares; some are still in the jar, while others have flown the coop and escaped from the lid that is slightly ajar! The lid was die cut using silver specialty paper for a realistic look! I couldn't resist adding some glitter here and there for a bit of midsummer magic! Don't forget to head to the other designers' blogs to see how they've used today's products! Thanks for fluttering by!

Thursday, July 8, 2021

Reverse Confetti July Release Blog Hop

Welcome to the Reverse Confetti July release blog hop! It's such a fun, summery release that I know you're going to love! I have two colorful cards to share with you today using two of the new stamp sets!

My first card for today uses the bold and beautiful new Bloom stamp set. I love this set because you can use the large cluster of flowers or simply use the single images to create your own bouquet! I used the large cluster and then added in a few of the single leaves to balance out the card since the sentiment is off-set.

To begin, I stamped the floral cluster and additional  leaves using black ink and then colored them using an assortment of alcohol markers. Once they were colored, used the Bloom Confetti Cuts to die cut the images. I set them aside and  got to work on the other design elements.

I heat embossed the "live your life in full bloom" sentiment using black detail powder onto a strip of vellum. This particular sentiment is from the stamp set I'll be showcasing on my second card. The background was created by die cutting a purple panel using the Peekaboo Cover Panel . Once that was done, I was able to assemble the card using foam squares. A few sequins and some glitter finish off this bright floral design!

My second card for today uses the super sweet new set called Hummingbird. I just HAD to use this cute "fluttering by" sentiment! To begin this card, I die cut the Peekaboo Cover Panel from white cardstock and then aded some blue ink and splatter at the top.

I stamped the cute birds and flowers using black ink and then colored them using alcohol markers. I had fun adding all of the colors onto the birds using quite a few different markers!  I used the Hummingbird Confetti Cuts to die cut the flowers. I arranged them here and there using foam squares. I decided that the card needed some green leaves so I used some of the leaf images from the Bloom set I used on my first card!

I heat embossed the sentiment using white powder onto a black strip of cardstock. I added it to the bottom using foam squares and then a few sequins for some shine! This was such a fun card to create! Don't forget to hop along to the other designers' blogs to see what they've created using this fun new release!
Thanks for fluttering by!
 

Kelly Lunceford

Amy Kolling

Tricia Barber

Amy Rohl

Lisa Henke

Deanne Kuntz

Becky Roberts

Tracy Ware

Ali Farmer

Cheiron Brandon

Dilay Nacar

Jeanne Jachna

Heather Ruwe

Kelly Griglione

Audrey Tokach

Jenny Colacicco

Olga Moss

Candice Fisher

Michelle Short

Olga Matyushevskaya

Amy Tsuruta

Joe Sysavath