Friday, November 30, 2018

25 Days of Christmas Tags (Days 20-26)


I'm back today sharing my final tags for the 25 Days of Christmas Tags starting with Day 20 and working my way to Day 26. I have SO many tags this year that I will be able to add one to every gift I give this year, and then some! I didn't realize how many I had left over from last year, so I want to get them all used up! I think I may even make bundles of tags to give away as early Christmas gifts to some friends! 
These two tags were inspired by Nora Noll and her colorful watercolor tags! I loved the colors she used, so that is the direction that I went with my tags. I used the Tag Sale #5 die for the tag base. The blue one is stamped using the AMAZING Buffalo Plaid background stamp and the pink one is die cut using the Chicken Scratch Pattern paper. For some reason these tags make me feel like I've stepped onto the set of Holiday Inn! I love the vintage charm they have!
The main images were stamped using the Seasonal Borders: Winter stamp set and coordinating die set. The sentiment, which is one of my very favorites, is from Painted Poinsettias stamp set. I added a few rhinestones for some sparkle as well as a spritz or two {or three } of Shimmer Spray!


For Day 21, I was inspired by Kay Miller and her sweet little snowman scene. Her snowman is wearing ear muffs and it reminded me of this sweet little guy from Pom Pom pals which must be retired. I sure love this set!
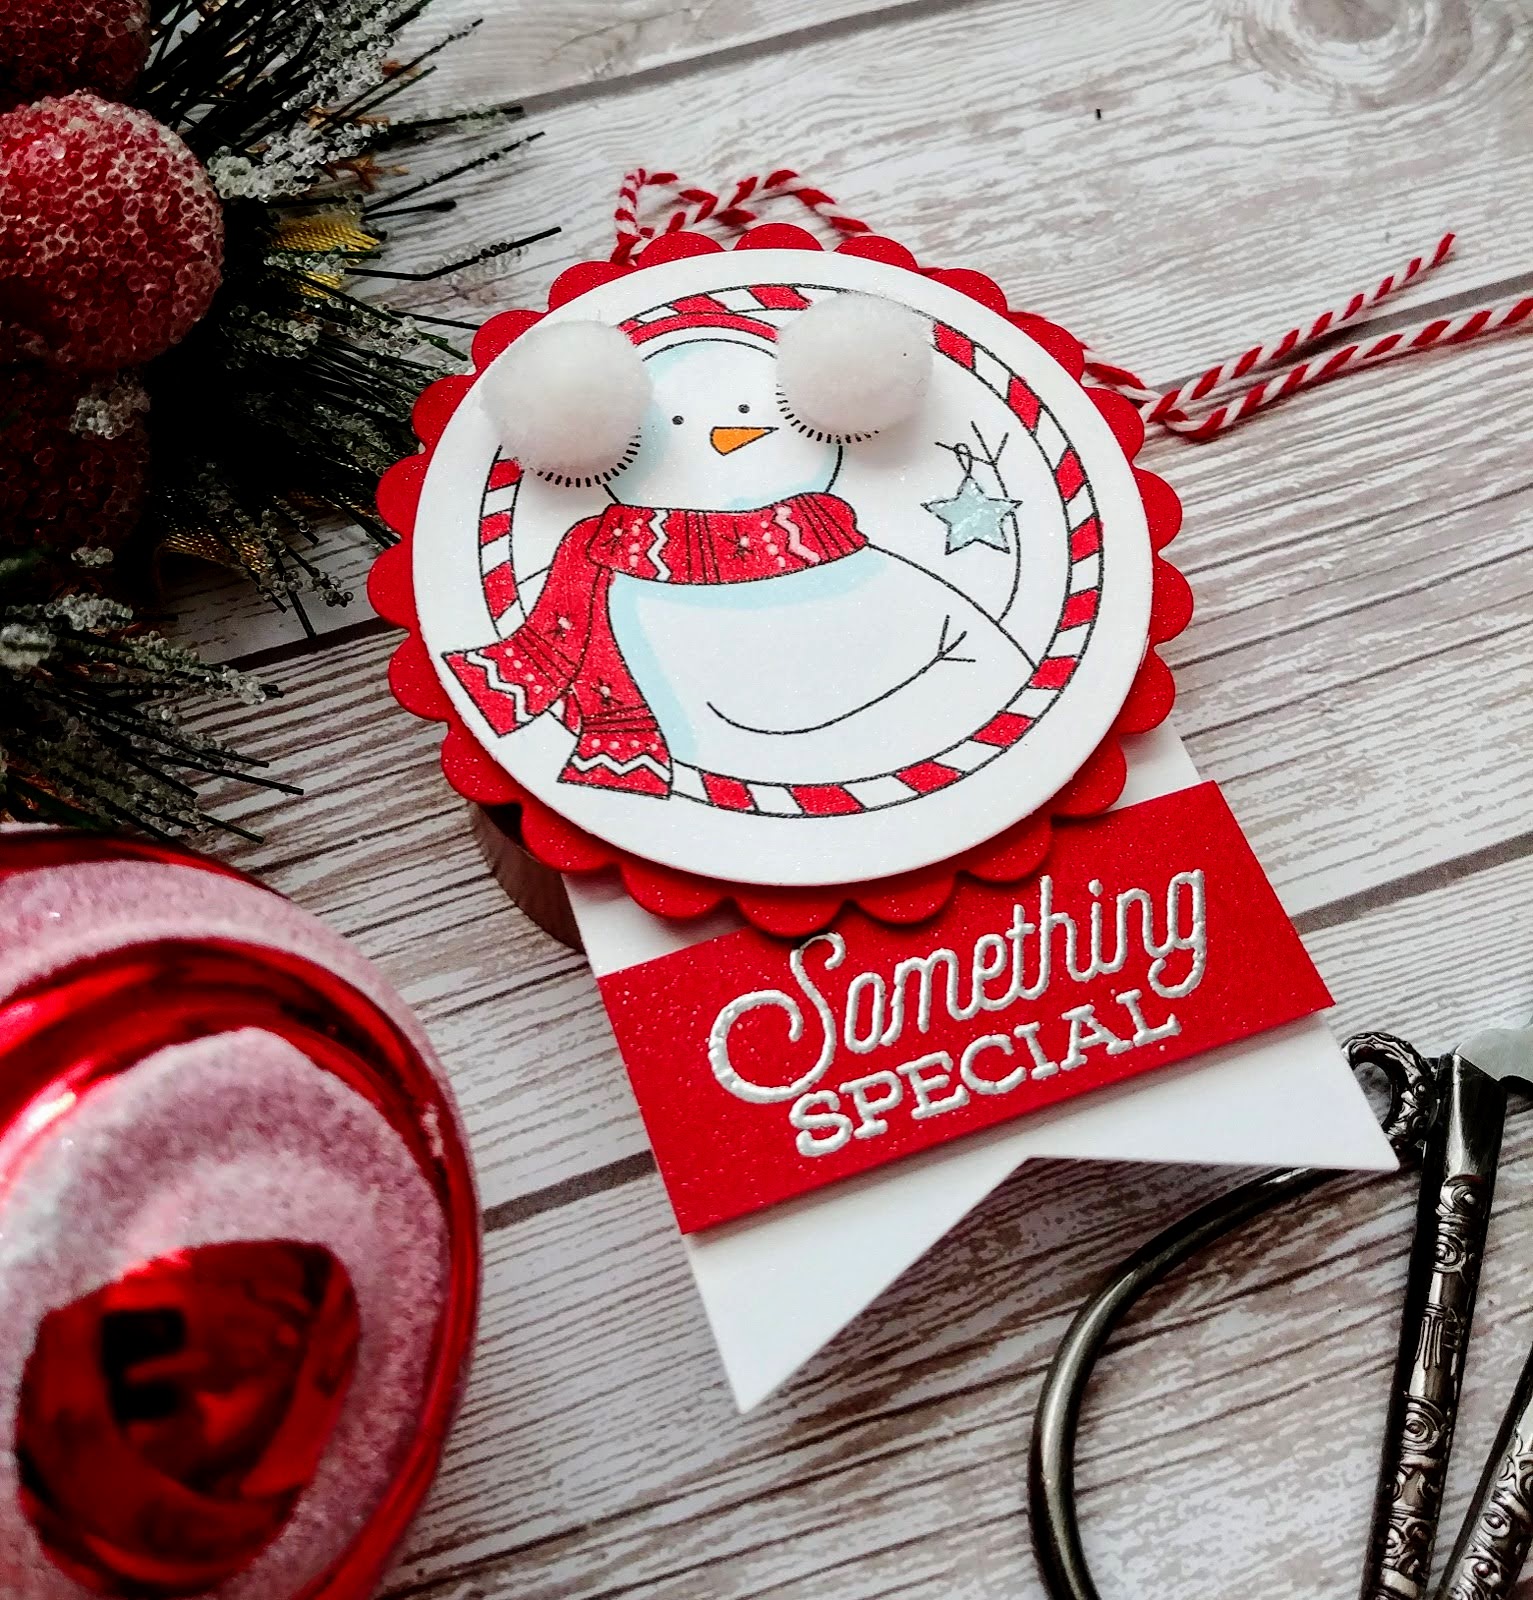
I used the same tag base as I did on the previous tag. I added the embossed sentiment at the bottom. I stamped the image directly onto a piece of white cardstock using black ink. I colored it using copic markers and then used my circle and scalloped circle nestabilities dies to create the focal image. 

I bought the pom poms at the dollar store and they are added to the ear muffs using liquid glue. I added some red baker's twine to the hole.
This tag is for Day 22, and I was inspired by the gorgeous 3D Christmas tree tags made by Channin Pelletier. I was wishing I had some way of making one of those gorgeous trees, but just opted to use one of my favorite trees instead. I haven't done much vintage stamping lately, so this tag will be a nice addition on some of my rustic wrapped gifts. I used the O' Tannenbaum stamp set for the tree and heat embossed sentiment.

I used my MISTI to get everything aligned correctly. I used a piece of pattern paper with the lyrics of Silent Night printed on it. Too bad I didn't have one with the O' Tannenbaum lyrics! LOL!
I added some twine and a red jingle bell at the top.

I had a hard time deciding which tag to use as inspiration for Day 23, but the tag from Kimberly Rendino and her darling Santa captured my heart. I love this sweet Santa from the Tremendous Treats: Christmas stamp set so that is where I started! I stamped him in black and colored him using Copic markers.

Once he was colored, I used the coordinating Tremendous Treats: Christmas die set to die cut him out. The stars that are around him don't cut out with the die, so I stamped a second image onto the circle so that I would have the stars included. I layered the circle onto a black tag base that was die cut using the Tag Sale #5 die.
The sentiment is from Floral Fantasy and it is one of my favorites all ready! I added some glitter to the centers of the stars for some shine! Some twine and a red jingle bell finish off this tag!

I fell in love with the tag that Leanne West made for Day 24. I loved the plaid at the bottom and her gorgeous Poinsettia, and I had stamps to recreate that! I loved the embossing and the vellum, but I knew if I added that, I may as well have just copied it! LOL! 


The Poinsettia is from the Painted Poinsettia stamp set as well as the sentiment. The gingham image is from the Sending Joy stamp set . I added a red jingle bell at the bottom and a few sparkling gems here and there for shine!

This trio of tags were some of my favorites to make! For Day 25, I was inspired by Gemma Campbell and her sweet tags. I loved the deer she used on one of her tags, and it reminded me of this sweet set from MFT that I love! I have 3 gift card holders that I made last year that will go perfectly with these tags and I found some cute mugs at the Dollar Tree that will match, too! That is why I made 3! I will bundle everything up in a cello bag with some hot chocolate packets, a gift card and some lotion!

I used some WOW! puff white embossing powder and the Snowfall background from MFT for the snowy background. The sentiments are embossed in gold, which I love!

I did some quick Copic coloring to each of the images and die cut them using the coordinating dies. I added some red Nuvo drops to the sprigs of greenery at the top. I LOVE how they look! I also added some white details using a white jelly roll pen and some tinsel glitter here and there!

And finally...Day 26! I was inspired by Ardyth's tag! I had SO MUCH fun on this tag and this tag was actually the inspiration for THESE tags! Once I had this one done, I knew that those penguins paired with the Holiday Double cuts would be so cute! 
I used the Potbellies Santa die and added him to the tag base. The tag is from the Mix Ups Pocket Tags dies. I realized after I had made both this tag and yesterday's tags, that I totally could have made a pocket behind the penguins and Santa to hold a gift card! Oh well! Usually the creative process is an evolution! 


I added some Tinsel glitter to his hat band and a pom pom to the top. Because the eyes are die cuts, rather than stamps, there was some residual wet glue around the edges when I added the glitter. I noticed that some stuck to his eyes, but when it was all said and done, it looked like Santa had frosty eyelashes, so left it! LOL! The sentiment, which is from Penned Elegance: Christmas, is heat embossed in silver onto red paper for a seamless look. I love that this set has coordinating dies because it made it possible for me to give the sentiment dimension with some foam squares. I spritzed the entire thing with Shimmer Spray which looks great in real life! This is one of my favorites from the series! Thanks for fluttering by!

This post contains affiliate links and I may receive a small commission (at no cost to you) from any sale generated from this post.

Thursday, November 29, 2018

Throwback Thursday {Holiday Double Cuts}


Welcome! Today is "Throwback Thursday"  and a few of us PTI gals are revisiting the adorable Holiday Double Cuts Dies! I love how easily you can add detail, style, and charm to your holiday projects with a few quick passes through the die cut machine! I'm currently obsessing over tags and these adorable Penguin Potbellies Die  were begging to share the stage today! Don't they complement each other so well?  Playful Christmas charm! These will look so cute all tied up on my packages tucked under the Christmas tree! If you aren't as jazzed about tags as I am, you could add the tag to a basic white cardfront for a boutique chic card! I'm dying to try it!

These tags also use some of my favorite things from the November release, so let me get started! To begin, I die cut three of the Penguin Potbellies, beaks, and tummies. I stamped the eyes using the Potbellies Sentiments stamp set. The die set does include the eyes, but they are a little tricky to get the placement correct, so I took the easy way out and stamped them using black ink. I used the new trio of Mix Ups Pocket Tags for the tag bases. I used Aqua Mist cardstockPure Poppy cardstock, and Simply Chartreuse cardstock . I stamped the snowflake from the Glorious Globes: November stamp set using Fresh Snow pigment ink in the top corners and sides.

I used the same tag shape to die cut around each penguin so that it would fit nicely onto the tag. The round tummies are the perfect fit to add the Holiday Double Cuts dies. I die cut the intricate top layer using Stamper's Select White Cardstock and then the solid piece underneath is die cut using the same colors as the tags. I made sure to mix up the colors so that each tag had each of the three colors I used in today's project.  I was thrilled to see that the sentiments from the Sentiment Staples: Season's Greetings stamp set worked so well to accent each of the large die cut words. I heat embossed them in silver and then used the Skinny Mini Banners die cuts to cut them out. I love all of the different sizes and shapes that this die set has to offer. They really give me some different options for adding these skinny sentiments to my projects. 


I added some crystal glaze to the eyes and beaks for some realistic shine and dimension. I spritzed the cheeks with some pink ink using my Color Spritzing Tool and then used a sponge dauber and chalk to blend in some additional color.  I tied them up with red Baker's twine for a pop of color and to add them to my packages! I had so much fun on this project and don't be surprised if these Double Cuts make a few more appearances this holiday season! LOL! Thanks for fluttering by!

Wednesday, November 28, 2018

Thank You {for the gift}

 I finally finished up the last of the 25 days of tags on Sunday and Monday. During the process, I got a little side tracked {and carried away} with the fabulous Seasonal Borders: Winter stamp set. I was using it for one of my tags and since I was lining everything up in my MISTI, I just couldn't help making multiples of these borders. I also die cut  some of the individual pieces and the bow to create additional clusters below each sentiment. I was also using the Painted Poinsettia stamp set for my tags and I LOVE the sentiments included in this set, so I used them for today's thank you cards. I made another set that I shared on Sunday that you can see HERE
 It is so fun to watch these borders come to life as each step is added into the design. I have some additional ideas that I want to implement using this stamp for some Christmas cards, so stay tuned! 

 To begin each card, I started with the stamped borders and the single images that I  used to create the clusters below the sentiment. Once I had all of those stamped, I got to work with the rest of the pieces. I used the Woodgrain Impression plate to add some texture to the pink portion of each card.  Then I stamped the "thank you" and "for the gift" onto a strip of white cardstock using black ink. I dropped the "y" from the "thank you" stamp into the space between "for" and "the" to give the sentiment a sense that it was one stamp, rather than two sentiments stamped separately. I do like that they are two separate stamps for versatility, though! I hope that makes sense! LOL!

On this blue card, I created my own background by using the Buffalo Plaid background from Taylored Expressions. I created three cards in total and for the other two, I used the Chicken Scratch pattern paper pack for the backgrounds. I don't think I can decide which one is my favorite!
This one uses the Berry Sorbet Chicken Scratch paper and I love this one, too! I used a lot of foam squares to give the borders and clusters a lot of dimension. Once I put the cards together I spritzed them with Shimmer Spray, which you can't see in the photo, but in real life is looks absolutely gorgeous!


To finish off this trio of cards, I added some sparkling gems from Studio Katia to the centers of each of the snowflakes for some added sparkle! Thanks for fluttering by!

Tuesday, November 27, 2018

Tuesday Ideas {Special Delivery}

I'm over on the Precious Remembrance Shop Blog today sharing this festive Christmas design! I created the background by using the oval/circle image from the newly released Everyday stamp set. I stamped it directly onto the Kraft panel using white pigment ink to create a fun background. I rotated the stamp as I went to give the background some movement and variation.

Once the background was done, I stamped the "Christmas" sentiment, which is from the Oh Christmas stamp set, directly onto the Kraft panel using black ink. I used my MISTI so that I could get a nice impression.

The rest of the images are from the Happy Mail stamp set. I really love how this non-Christmas set works so well to bring in the fun and whimsy of Christmas by stamping it in traditional colors. I also did some machine stitching along the bottom before I adhered it to the white A2 card base.

The holly sprig adds just the right amount of holiday charm without going over board. The finishing touch is a trio of sparkling gems to add some shine. This design could also work well for a birthday or Valentine's day by swapping out the big sentiment and the colors! Thanks for fluttering by!

Sunday, November 25, 2018

Keeping Christmas {Thank you for the gift}


Well friends, here we are at the very last Keeping Christmas Blog Hop of 2018! It sure has been fun and I am thrilled with all of the cards, tags, and gifts I have ready to go! I decided to take an actual inventory of what I have so that I could decide what I needed to make this month. Here are the totals: 17 treat boxes, 8 "sweets" favor boxes, 10 mug mixes, 16 gift card holders, 10 wristlets and gift card holders, 48 cards, and 111 tags! Oh my! I still haven't even finished the last few days of the 25 Days of Christmas tags! So...once I'd taken inventory, the only thing I felt that I needed was Christmas gift thank you cards! LOL! I usually  hold off until after Christmas to get these made because I feel sad putting all of the Christmas stamps away, but since I've started creating Christmas things all year long, I don't really care! Before I dive into the details on today's cards, don't forget to hop along to the rest of the designer's blogs to see what inspiration they have for us! And, we're welcoming Nancy Guse as a permanent member of the team! Yay!

Kelly Lunceford (you are here)

 I always get excited when a stamp set includes a "Thank you for the gift" sentiment, especially when it is as gorgeous as the Blooming Amaryllis Stamp set that came out last month. I have been dying to use it and it was perfect for these cards! I love that you see Amaryllis blooms during, and of course after Christmas, which makes this the perfect set for those Holiday thank you cards!
I used my MISTI to stamp the blooms using Pale Peony inkPure Poppy ink, and Scarlet Jewel ink. The centers are black for some contrast. I googled "Amaryllis" to see some realistic color combos and this, of course, was one of them. The possibilities of colors are endless, but since I was in "mass produce" mode using my MISTI, I just kept them all the same.

The leaves are stamped in Ripe Avocado ink and Olive Twist. The pot is a separate stamp and I really like how the Blooming Amaryllis Dies have a slit in the pot so that you can slip the stem down inside for added realism. I just used a piece of clear tape to secure it in the back.
 The pot is stamped in Hawaiian Shores ink and then the details are stamped using Tropical Tea ink. This color combination is one of my favorites at Christmas, but I really like it for these cards. It looks fresh, yet festive!


I made 4 cards, 2 of each design. I used the Shape Shifters: Oval 3 die for the two on the bottom and I used the Pierced Feature Frames Oval dies matted onto a panel that has been die cut using the Scallop Stackers: Large dies. I love the added depth and dimension it gives to the design.

The "Thank you for the gift" sentiment is stamped in grey ink onto a strip of Aqua Mist cardstock. The "thank you" portion is separate from "for the gift" so it is even more versatile. I really love all of the beautiful sentiments included in this set! I added a few sparkling clear sequins here and there for some sparkle. I also spritzed them lightly with Shimmer Spray for even more sparkle and shine!
Thanks for fluttering by!


This post contains affiliate links and I may receive a small commission (at no cost to you) from any sale generated from this post.


Saturday, November 24, 2018

'Tis the Season

I spent the day yesterday working on a few DT assignments and then took down the Autumn and Thanksgiving decorations. Right now everything is bare, blank, and ready for some festive holiday colors! I love decorating for fall, but I REALLY love when the house comes alive with Christmas cheer! Before I get to work on the house, I wanted to play along with this week's Color Throwdown Challenge. It is also for the current Inspired By Challenge. I'm a sucker for Kraft and greenery!


 I used quite an assortment of Reverse Confetti stamps on today's design! To begin, I used the Stitched Rays Coverplate to create the stitched lines on the Sand Cardstock. This is one of my favorite "Kraft" colors and I use it quite a bit. Once that was done, I spritzed it with Frost Shimmer Spray for a subtle snowy feel! I set it aside to dry and got to work on the rest of the elements for today's design.
I stamped a bunch of the greenery from the Christmas Candles stamp set and then die cut them using the Christmas Candles Confetti Cuts. After those were all finished, I moved onto the trees. The trees are from the Triangle Trees stamp set and I stamped them in Avocado ink onto Avocado cardstock and then die cut them. The candle and jar are heat embossed using silver powder. I colored the tip of the candle using a yellow alcohol marker.

I originally planned to have the snowflake sprigs poking out of the greenery, but instead decided to make a snowflake using the Snowflake Magic stamp set. I added a trio of sparkling gems for some extra detail and shine. Thanks for fluttering by!

This post contains affiliate links and I may receive a small commission (at no cost to you) from any sale generated from this post.

Thursday, November 22, 2018

Grateful, Thankful, Blessed

I couldn't let the day slip by without saying Happy Thanksgiving to all of you! I'm sharing my last autumn/Thanksgiving card for the rest of the year! I seem to have a hard time saying goodbye to each season, so I hang on until the very end! I slso wanted to let you know about the SugarPea Designs Black Friday sale going on NOW! Here is the link to shop: SugarPea Designs Shop
                                      

I stamped almost all of the sweet images from the Fall Fox stamp set and colored them with Copic markers. I tried to use some of the purple/gray shades from this month's Mix it Up Challenge.
I used the coordinating Fall Fox SugarCuts to die cut them all. The background is just a quick blended panel of Stormy Sky Distress Oxide Ink. I also spritzed some Shimmer Spray over the top for some added detail and shine.
The sentiment is heat embossed in white powder onto a black strip and adhered using foam squares. I layered the focal panel onto some Terracotta cardstock for added contrast and color. The pumpkins and caramel apple have crystal glaze over the top for some shine! I hope you all have a wonderful holiday! I'm so grateful for all of you! Thanks for fluttering by!