Friday, March 31, 2023

The Greetery {Spring Rustic Wreath}


 Hello and welcome! It's my turn for this week's T.G.I.F. feature for The Greetery! Today I'm sharing a springtime card using an idea that I’ve had swirling around in my head for a while; actually, since the Rustic Wreath Base die and the Rustic Wreath Twigs die were first released. I thought it would be fun to swap out the twig looking wreath and color it with some green Distress Oxide inks and add some of the petite flowers from the BotaniCuts Wildflower Mix.

To begin, I die cut the wreath base and 4 each of the two twig branches and used the assembly guide to put the wreath together. I used liquid glue and followed each step on the guide until it was complete. I used springy colors for the flowers and attached them using liquid glue and mini foam squares until I was satisfied with the arrangement.

I stamped the sentiment, which is from the Lovely Blossoms stamp set, directly in the center of a Crimped Circle using black ink. I added the wreath over the top using foam squares for dimension. The background was created using the Seed Catalog Background stamp on an A2 panel of white cardstock. I also added the swirl die that is included in the Frosted Frames collection to frame the wreath.

I added the wreath in the middle of the background panel using additional foam squares. I also stamped the accent sentiment, that is also included in the Lovely Blossoms stamp set, and die cut it using one of the small banner dies in the Sentiment Suite Basics die collection. The bow is from the fabulous Put a Bow on It Stamp/ die set. I used three different colors of ink to the main bow image, layering the ink with finger sponge daubers for a natural look. The detail image was stamped using the darkest of the 3 yellow inks. I added it to the bottom of the wreath and then positioned the accent sentiment portion using mini foam squares.

I added the panel to a top-folding A2 card base using liquid glue and then sprinkled some glitter over the top of the wreath for some sparkle and shine. I didn’t have a particular recipient in mind when I sat down to create this card, but I love that it could be used for a sympathy card all the way to a birthday card, depending on your needs. This is one that I’ll add to my stash for a rainy day! Thanks for joining me today!  I hope you’ll take some time to re-think new ways to use some of your seasonal supplies for a fresh, new look! Thanks for fluttering by!

Friday, March 24, 2023

Papertrey Ink March Release Countdown Day 1

Hello and welcome to day 1 of the March Papertrey Ink release countdown! I am, unfortunately, under the weather, so I'm only sharing one project with you today and will be back with bit more toward the end of the countdown (hopefully). My project for today features the new Stationery Kit and the new  Floral Garden Hot Foil Plate

I do love a nice set of coordinating stationery and this new kit will allow you to create so many different styles and types of kits for gift-giving or for yourself. I chose to create a set of 6 notecards and a stationery box to hold them.

To begin, I chose a color scheme that I thought would look nice with the new Floral Garden Hot Foil Plate; Ocean Tides, Sweet Blush, and Soft Stone. I cut 6 A2 panels, two of each color. I have the Gemini foil machine so I set it on a medium heat for 20 seconds which gave beautiful results with this plate. I don't normally use plates with this much foil coverage so I was a little bit worried, but with some tweaking, I found this combination to work the best!

I also hot foiled another panel to use on the top of my stationery box. You could make your own box like I've done, or you can buy the Pale Yellow Stationery Box if it works with your color scheme. There are three different mini hot foil shapes that work well for monograms, like I've done for the top of my box to personalize it to the recipient.

Each of the notecards has a stamped sentiment from the new Stationery Kit stamp set; some say Just a Note, some Hello, and some Thanks. There are a few more options to choose from, but I chose some of the most common sentiments that will be useful to the recipient. I also used one of the included stencils to accent the flap of each of the envelopes with the corresponding coordinating color for continuity.

You can see how nicely they fit inside the box; like I mentioned earlier, I made a set of 6, but you could definitely fit a set of 10 or so.

I've always loved things that are monogrammed, and I'm not even from the south! ha ha! The new Stationery Kit Letters are perfect for monogramming, and you could also use them to spell out sentiments!

As you can see, I chose a silver foil to use and this photo shows its shine; in some photos it just looks white, but rest assured, it is high-shine silver! ha ha! It looks so pretty in real life! The possibilities with this new kit are endless and once I'm feeling better, I'll definitely want to play around with some of the other pieces in the kit, especially some of the additional stencils! I'll be back as soon as I feel up to it and thanks for fluttering by!


Wednesday, March 15, 2023

Take Time to Relax

Happy Wednesday, friends! I hope you're doing well! I went to a 50th birthday party over the weekend and needed a masculine card! I perused my masculine stamp/die sets and settled on the amazing Scene Everywhere: At the Lake . I took the month off that this particular stamp set was released, so I haven't used it until now! It is such a fun set and now that I've played with it, the ideas are flowing! It also happens to be part of this week's Flash Sale.


To begin, I die cut all of the pieces I would need for the card and then stamped them using my mini MISTI. The fun thing about this stamp set is that the dock is a die cut, but then the water and skyline is a stamp, so you can stamp that and then line the dock and the boat up in the negative spaces.


I die cut a piece of Vintage Cream cardstock using the Love to Layer: Torn Edges Die and did the base layer stamping and inking around the edges, adding in a little splatter. I stamped the sentiment in black over the top. I stamped it again on a scratch piece of paper so that I could add a popped up piece above RELAX. 

I love the cute little geese/duck images that are included that you can add to the lake and the extra cloud dies.

I layered the focal panel on to a piece of Enchanted Evening cardstock and then added it to an A2 Kraft panel that was stamped using the Weathered Wood Background Stamp. I added some ink around the edges for contrast.

I didn't want to neglect the inside since this is a milestone birthday! I die cut the number 50 out of Ocean Tides cardstock using the Numbers Die. I also added a little bit of Ocean Tides ink to the edges to weather it a bit. The sentiment is stamped in black and is from the Inside Greetings: Endearing Birthday stamp set.

I  like stamping the inside of cards to make them seem a little bit more professional and polished/finished! I really should take the extra time to do it more often. Thanks for fluttering by!


Friday, March 10, 2023

The Greetery New Beginnings Collections Release Day

Yay! It's release day for the New Beginnings Collection from The Greetery! All of the new products will be available for purchase beginning at 10 am ET. I've got a bonus card to share with you today using some of my favorites from the new release! I chose to combine things from day 1 and day 2 to create this floral and feminine baby card; I never seem to have enough in my stash!

To begin, I stamped the gorgeous new Spring Meadow Background stamp using Tattered Rose Distress Oxide ink onto an A2 panel of white cardstock. I'm pretty certain one of my fellow designers die cut this background with the Patchwork Die for one of their cards, and I fell in love and knew I had to give it a try. I love how it gives the look of a cute baby quilt!
I also stenciled an envelope using the Flappable Stencil and a new baby sentiment from the new Tear Strip Tags: Baby stamp set; I just used a post-it note to cover up the other three sentiments while applying the ink and then removed them before stamping.

Of course, Betsy kept incorporating the beautiful Ribbon Maker: Large Scallops Die, so I just had to pull that out, too! ha ha! I die cut it out of white cardstock and layered it over the top of the background panel using foam squares for dimension. Confession time: I didn't clean my Spring Meadow Stencils when I made my Rejoice card I shared yesterday (hangs head in shame) so I decided to just recreate the same bouquet for this card and then cleaned each stencil as I went along.

I'm actually quite smitten with this particular color combination; it would be so lovely to make a quick notecard set as a gift for spring or for your Easter hostess. I used SU! inks in the following colors: stencil 1-Mellow Moss, stencil 2-Sage Shadow, stencil 3-Saffron Spice, stencil 4-Cameo Coral, stencil 5-Almost Amethyst, stencil 6-plum pudding for the purple flowers, and Really Rust for the yellow and coral flowers. The Spring Meadow die also includes some stand-alone flowers; I simply inked them using the same colors as the stenciling, using my SU! Stampin' Write markers for the centers so that the ink would match. I used my foam mat and my stylus to curve them for realism, detail, and dimenison.

I die cut the baby using the Baby Face Swaddle die and then colored the head using Tattered Rose Distress Oxide ink, stamped the face in black and the cheeks in the same rose ink. The swaddle and headband were colored using the same yellow ink as the flowers. I glued the baby all together using liquid glue and foam squares and set it aside to dry.

I used one of the smaller sizes included in the A2 Arches die as a place to anchor the baby and place the sentiment, which is from the new Tear Strip Tags: Baby stamp set. I added a few of the stand-alone flowers using liquid glue and sprinkled some glitter here and there for some sparkle and shine! Thanks for fluttering by!


Thursday, March 9, 2023

The Greetery {New Beginnings Collection}

Well friends, it's day 2 of full reveals for the New Beginnings Collection from The Greetery! Thanks for all of your sweet comments on yesterday's post; I'm glad you are enjoying the new collection! I've got 3 more cards to share with you today, but I wanted to let you know that the official "meet and greet" for today's featured products can be found on The Greetery Blog. Also, leave a comment here and on each of the designers' blogs for a chance to win one of 2 $50 gift certificates to the shop!

My first card for today using the AMAZING new BotaniCuts Morning Glory die set. It is such an easy set to use with fantastic results! I had so much fun creating these two different clusters. I die cut everything twice and then just followed the guide for assembly. I found two different varieties of Morning Glories and just colored them as closely as I could to make them look realistic.

I set them aside to dry since I assembled them with liquid glue and foam squares. Since each cluster is quite large (large enough to nicely cover an A2 sized card), I decided to make a slimline card. I die cut a black panel using the Nordic Slimline Die and then added white acrylic paint splatter and let it dry.

I cut and scored the card base and then added the die cut panel over the top using black foam squares. I layered the Morning Glory clusters over the top using additional foam squares.

The sentiment, which was carefully chosen because of its use of the word morning, was heat embossed in white onto black cardstock. This particular sentiment is from the New Day Sentiments stamp set and then die cut using the coordinating New Day Sentiments die.

I placed the sentiment in the middle using additional foam squares.

I used a Wink of Stella pen on the leaves and blooms for some understated sparkle.

My second card uses a lot of new favorites: Jumbo Curiosity: Nest, Jumbo Curiosity: Feathers, and the new Spring Meadow Background stamp, and another sentiment from the New Day Sentiments stamp set.

I think this is one of my favorites in the Jumbo Curiosities collection; I love birds and nests so I can see myself reaching for this often.

I love that the New Everyday stamp set has coordinating dies; it makes card designing a little bit more versatile.

I used the Spring Meadows Background stamp as a background for the curio box. I used the Curio Cover Die to make the curio box and then colored it with Distress Oxide inks.

I had a few extra flowers left over from my first card, which are from the BotaniCuts Wildflower Mix, and added them here and there.

I used the Big Branches: Ruscus Die and die cut the large branch that the nest is resting on. A few gold hinges finish off this card.

My third and final card for today, and for the release, uses the new Spring Meadows stencil/die set paired with the new Spring Meadows Background stamp.

I chose to add the die cut flowers over the top of a few of the blossoms, but leave the rest stenciled for some variation.

I never used the Rejoice! die yesterday, so I decided to use it with this floral design. That being said, the New Day Sentiment stamp set is designed to go with this set perfectly. I figured a few of the designers would show it with those beautiful sentiments, so I chose this one.

This is such an easy-to-use stencil set you will be wanting to create bouquet after bouquet; I know I am! Don't forget to leave a comment here and on each of the designers' blogs for a chance to win one of the 2 gift certificates! Thanks for fluttering by!


Wednesday, March 8, 2023

The Greetery {New Beginnings Collection}

Hello and welcome to day one of full reveals for the New Beginnings Collection from The Greetery! Today we're sharing all things spring and baby; what a delightful combination, don't you think? Just fitting for the New Beginnings title! You'll want to make sure to head to The Greetery Blog for the official "meet and greet" for all of the beautiful new products! Make sure to leave a comment here, and on every designers' blog, to be eligible to win one of (2) $50 gift certificates to the shop!

My first card features the new Spring Sprays Stencil and Spring Sprays dies. This is such a fun and easy combination that allows you to create the two beautiful floral sprays that are on this card. To begin, I used the numbered stencils to create the sprays and then die cut the outlines using the Spring Sprays dies.

Once that was done, I die cut all of the stand-alone flowers and inked them up using the same ink colors that I used for the stenciling. (my next card uses JUST the stenciled sprays so you can see the difference) Once they were all inked up to my liking, I added them to the spray using both foam squares and liquid glue. I added some Copic marker detailing to all of the flowers for added detail and interest.

You'll notice that a few of the designers paired the Spring Sprays stencil/dies with the new Rejoice hot foil/stamp/die; I chose to use a different sentiment so you can see how easily it is to incorporate other sentiments. That being said, the Rejoice sentiment was designed specifically for these sprays.

The "Happy" portion of my sentiment was stamped in an ombre look using the previously released All Kinds of Happy stamp set and then I die cut it using the All Kinds of Happy Shadow Die. I ended up die cutting the shadow twice so that I could glue them together for a more sturdy piece. The "Spring Wishes" portion of the sentiment is stamped in black using the new Tear Strip Tags: Spring Stamp Set. I simply placed post-it notes over the top of the other sentiments while I inked it up and then removed them before stamping it down. I used my mini MISTI so that I could repeat the steps until it was saturated enough. 

My second card features the oh-so-sweet Bunny Kisses die (this is a larger version of the cute bunny that was released last year for the hourglass) paired with the new Ribbon Maker: Daisy Chain die and the new Tear Strip Tags: Spring Stamp Set. As I mentioned earlier, this particular card also uses the new Spring Sprays stencil/die, but doesn't included the additional die cut flowers. This is definitely a softer look and I felt it complemented the watercolor look I was going for with this shaped card.

To begin, I die cut the pieces for the bunny, eggs, and tulip and colored them using ink and blender brushes; I also added some details with Copic markers. I  adhered some Nuvo Crystal Glaze over the top of the bunny's eye for some added realism. 

I used watercolor paper to die cut the arch pieces, except for the smaller arch for the focal point. I used the A2 Arches dies to die cut the arched frame and then used the middle portion that was left from die cutting the frame to add some watercoloring. I just feel like spring/Easter just work so well for a soft watercolor look.

As I mentioned earlier, this is a shaped card, so I took an A2 card base and placed the arch die slightly above the score line to create the base, and then glued the entire watercolor piece over the top.

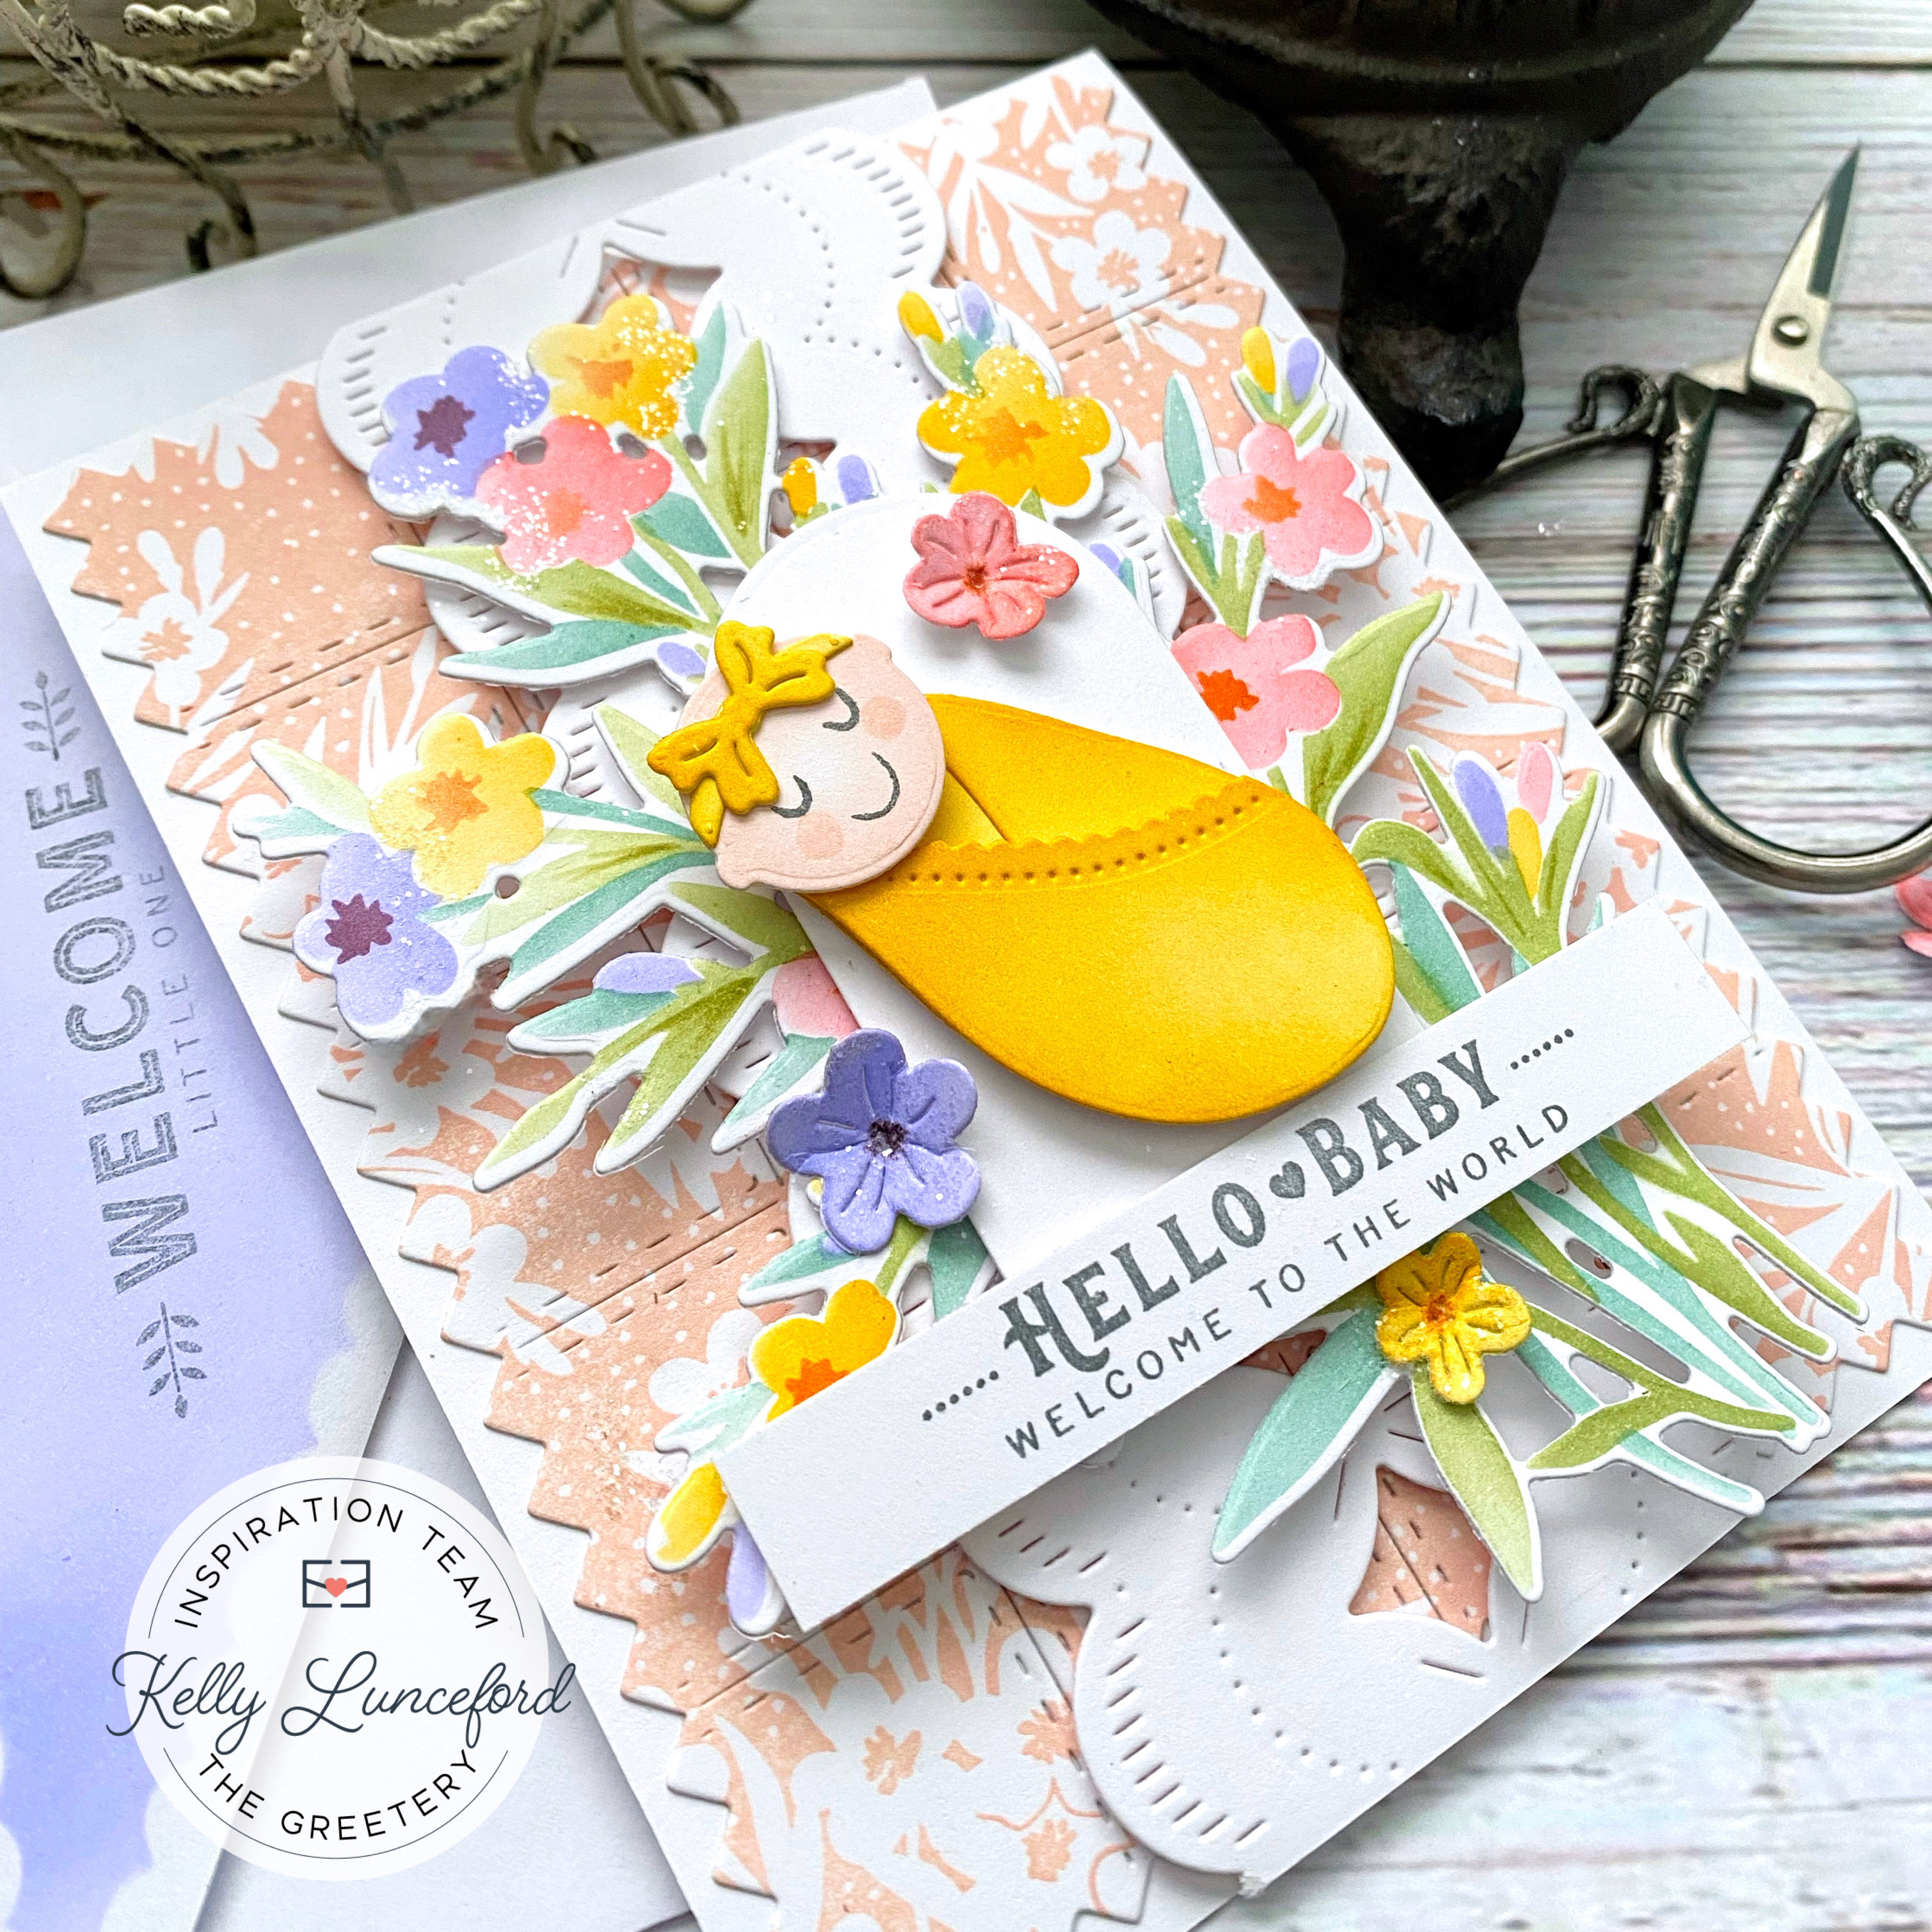
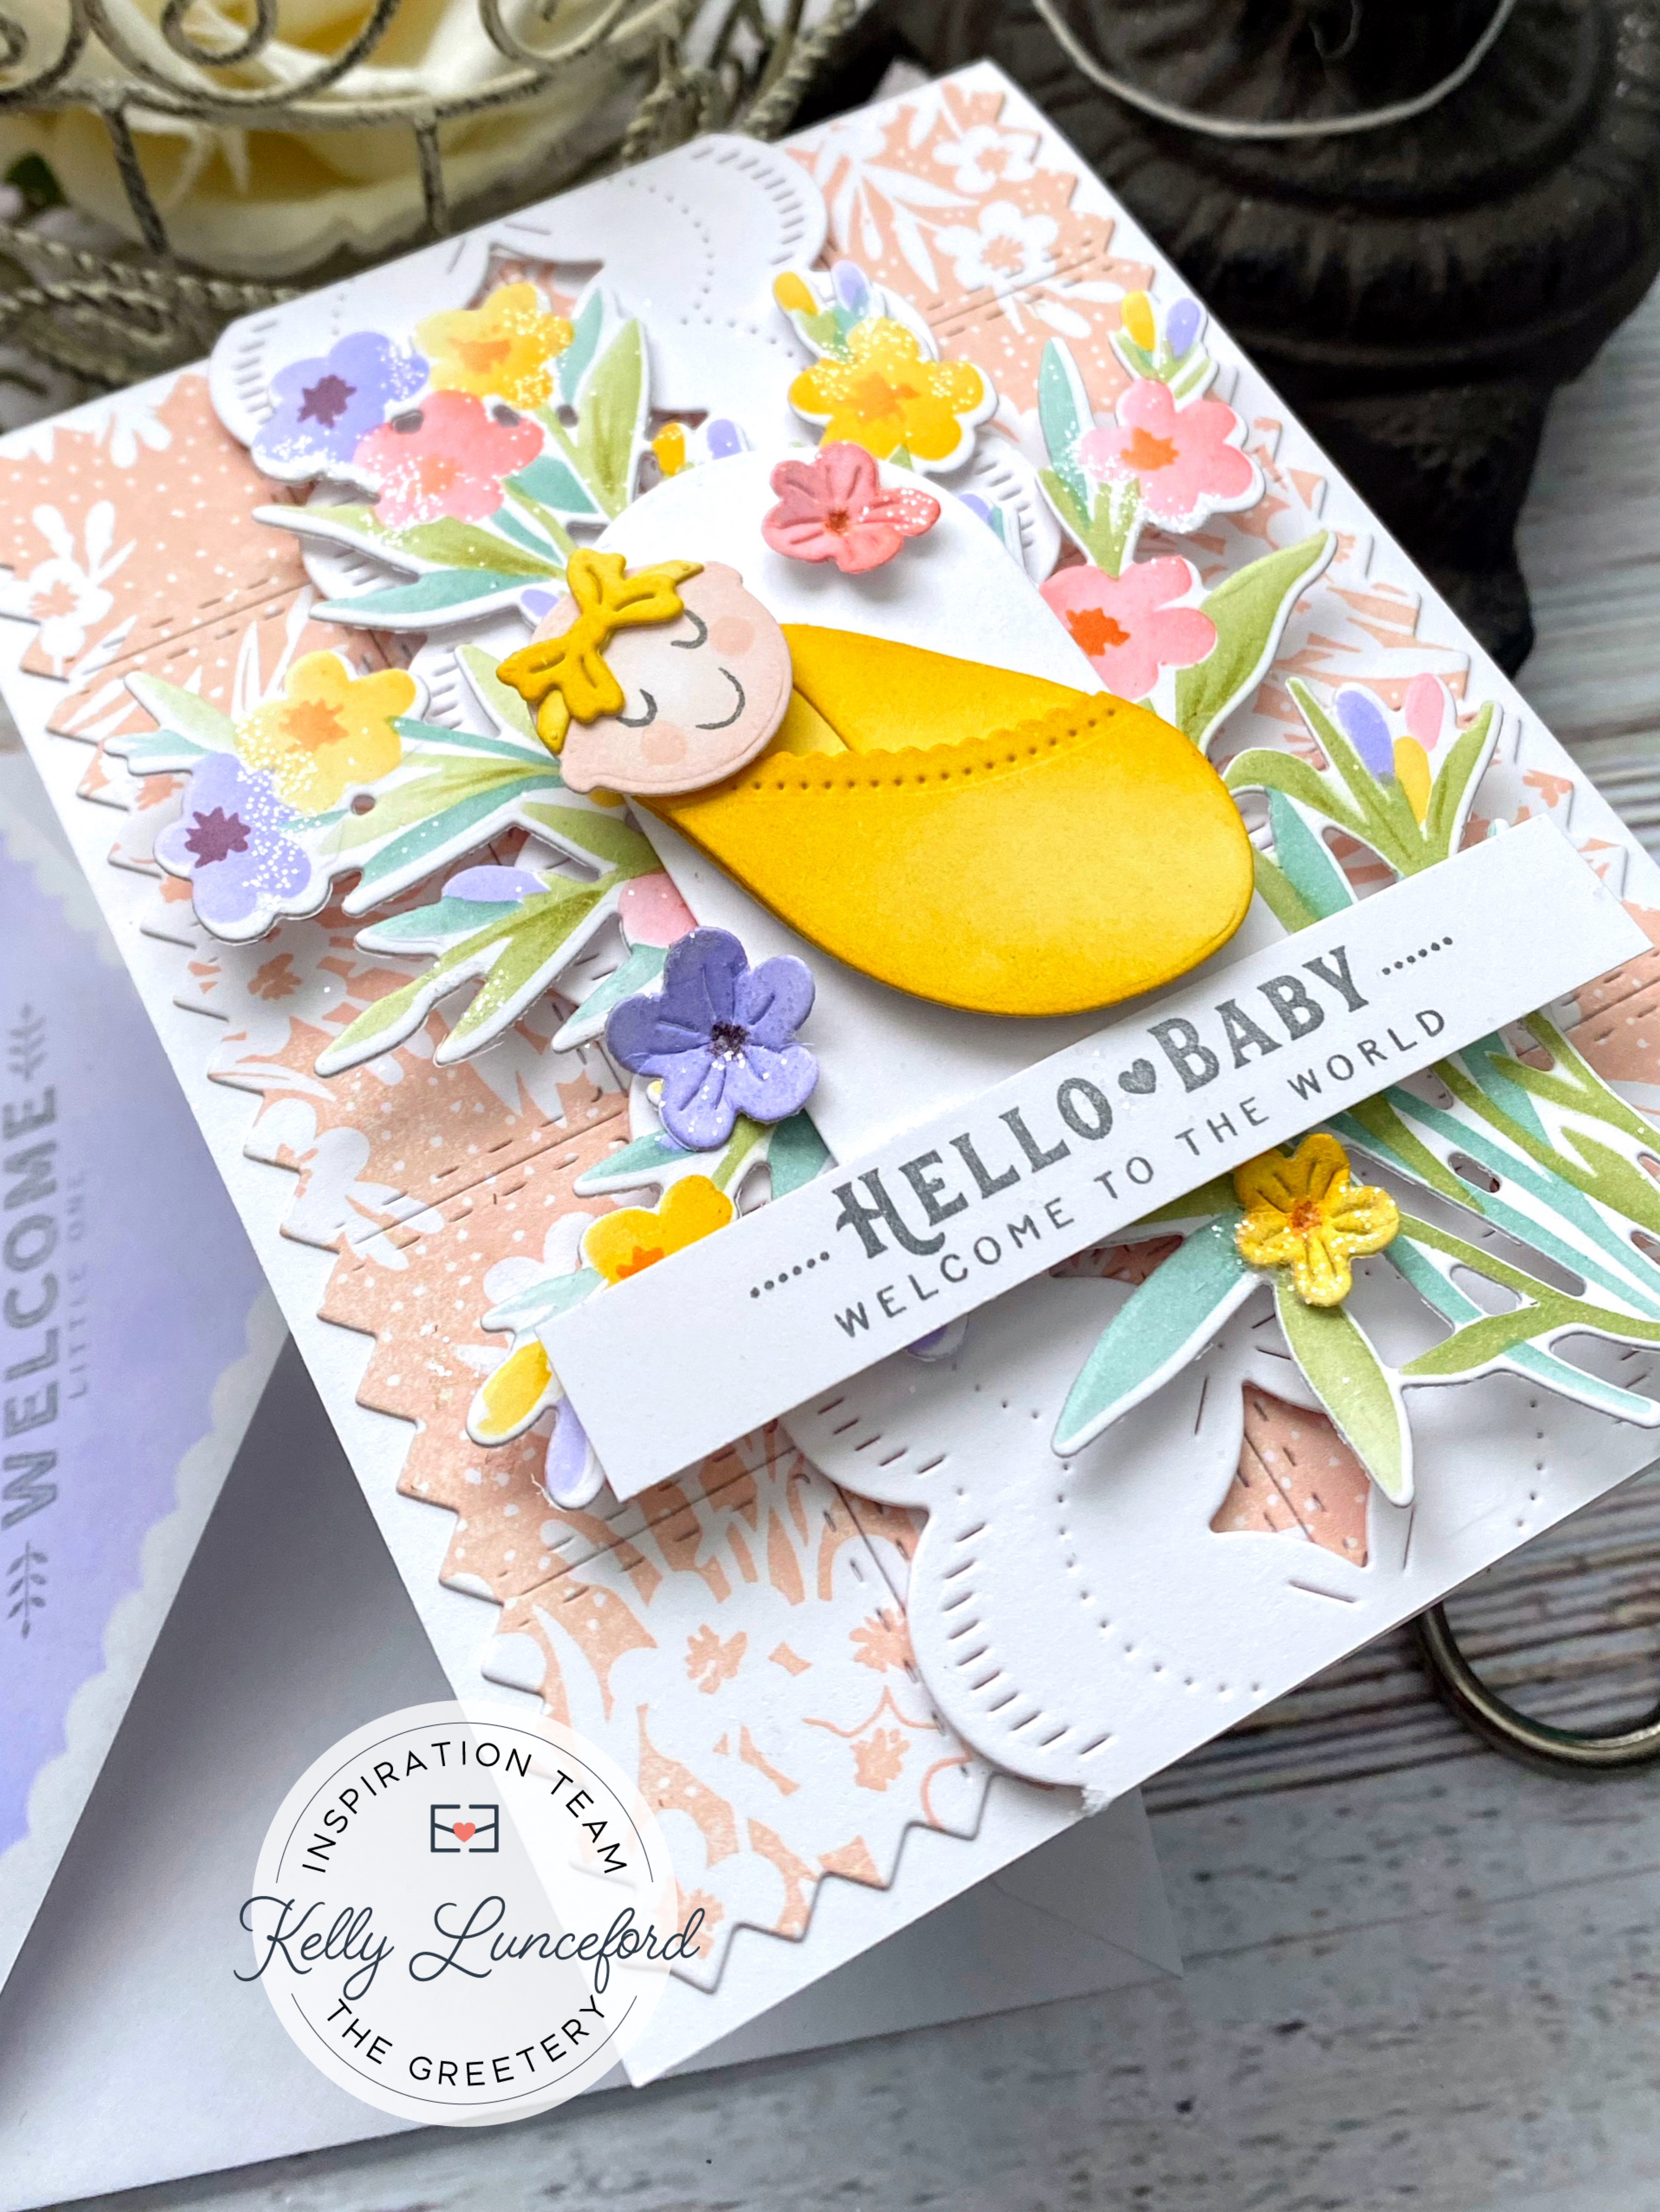
The sentiment was simply stamped and then cut using my paper trimmer and then I added the notched ends using scissors. You could definitely use the coordinating Tear Strip Tags die for another option. 

Eep! My last card features the sweetest new series called "Baby Face"; I chose to use the new Baby Face Swaddle dies, but each of the designers chose a different die to use, so by visiting all of our blogs, you should see each of the different "Baby Faces" represented and I'm sure Betsy is using all of them as well.

To begin, I stamped the Elegant Arches Stamp using white ink on a Kraft A2 panel. I never actually used the BotaniCuts Bluebells Dies when they were released and haven't since! Such a shame because they are absolutely wonderful! Anyway, I die cut them from Vintage Cream cardstock and then colored them using Bundled Sage, Peeled Paint, and Forest Moss Distress oxide ink for the greenery, and then added just a touch of Scattered Straw Distress Oxide ink at the base of each of the flowers. I glued them together and set them aside to dry.

I die cut the Baby Face Swaddle pieces from the same Vintage Cream cardstock; the baby's head is colored using Tattered Rose Distress Oxide ink (the cheeks are stamped using the same ink). The swaddle and bow are both colored with Scattered Straw ink. I stamped the face using the new Baby Face Sentiments stamp set using black ink.

I glued the baby together using liquid glue and foam squares for a touch of dimension. I die cut focal arch from Vintage Cream cardstock and then stamped the different portions of the sentiments; there are so many different combinations for each of the different "baby face" dies.

I used three of the Spring Sprays flower dies to accent the left side of the card and grouped the bluebell stems on the right side. I stenciled and stamped a coordinating envelope using the Flappable stencils and the new Tear Strip Tags: Baby stamp set.

A touch of glitter finished off this baby card. You could omit the bow on the top of the head and use the "hair" die and this could work for a gender-neutral card to add to your stash. I couldn't resist adding the bow, so this one is for a sweet, baby girl! Make sure to head to the other designers' blogs to see how they've used these fun new products! Thanks for fluttering by!