
Happy Tuesday, friends! Thanks for joining me yesterday for my Keeping Christmas post! I always love when the 25th rolls around! I hope you all had a nice Memorial Day honoring those who have died in the service of their country {USA}and those loved ones who we cherish and honor as well! I'm back today sharing some fun birthday cards using the clever and whimsical Secret Agent stamp set! This is such a fun set and I love the assorted sentiments that make this perfect for different occasions and kids of all ages!

One of these cards will be going to a 7 year old which makes the "agent number #007" so much fun at the bottom! I made two even though I only NEEDED one...I knew this would be a "MISTI intensive" project {ha ha} so I decided to just make 2. You know what I always say...if I'm going to make one, I may as well make 2! I've mentioned it before, but for those of you that don't know, I'm in charge of the kids at church and teach them music. Since we haven't been to church for a few months, I've been sending thinking of you cards and dropping off a religious gift and a birthday card at their doors. I bought some doorknob bags which are perfect to tuck the gift and the card inside and hang on their doorknob and go.

To begin these two designs, I cut two pieces of Rustic Cream cardstock measuring 5 1/2 inches by 8 1/2. Once that was done, I used the Edgers #5 die collection to die cut the different edges to make the card look like a file folder. Once that was done, I scored it in half and folded it using a bone folder, which once the edges are cut is around 3 3/4 inches. I stamped the "Top Secret" image on the file tab using Pure Poppy ink and then stamped the "Confidential, Top Secret" circle image over the top in black as well as the front.

I stamped the rest of the images that are directly on the card front using black and red ink and my MISTI for alignment. I die cut the secret agent twice for each card using the Secret Agent die collection and them stamped the images. He is just a series of two stamps; the pants and head portion and then the second step is his jacket. It really keeps the retro feeling of the stamp set by just using the two colors!

Next comes the fun part! I die cut the magnifying glass three times for each card. I stamped one using my MISTI and then just used the other pieces for stability. I made a sandwich making sure to put the Pure Poppy transparency sheet between the layers. There is a circle die cut that cuts this to the right size so that it sandwiches nicely. I just used liquid glue to adhere the layers. I like using liquid glue for these types of projects because it gives me some "wiggle" time to make sure all of the edges are lined up properly.

I attached the magnifying glass using a half circle of Velcro so that the recipient can take it off to use it to decipher the inside message as well. I was showing my 6 year old how it all worked and he was enamored with the idea! Then my 8 year old came around a while later and I showed it to him. I asked if an 8 year old would like something like this and he replied no. I said that was good to know so that I could make sure only 7 and younger would receive a card like this. He then said that maybe he did like it a bit...then he said, "fine, I really like it"! LOL! I guess 8 year olds are a go as well! I like that the stamp set comes with the "boy" and "girl" sentiment so that you can make it for either one.

For the front of the card, I used Tropical Teal ink ink to stamp the hidden message, but found that it was too obvious. I then tried it with Weathervane ink for the inside and that was the winner. I found that I could stamp it lightly, but the colored transparency sheet made it stand out nicely when it is held over the image.
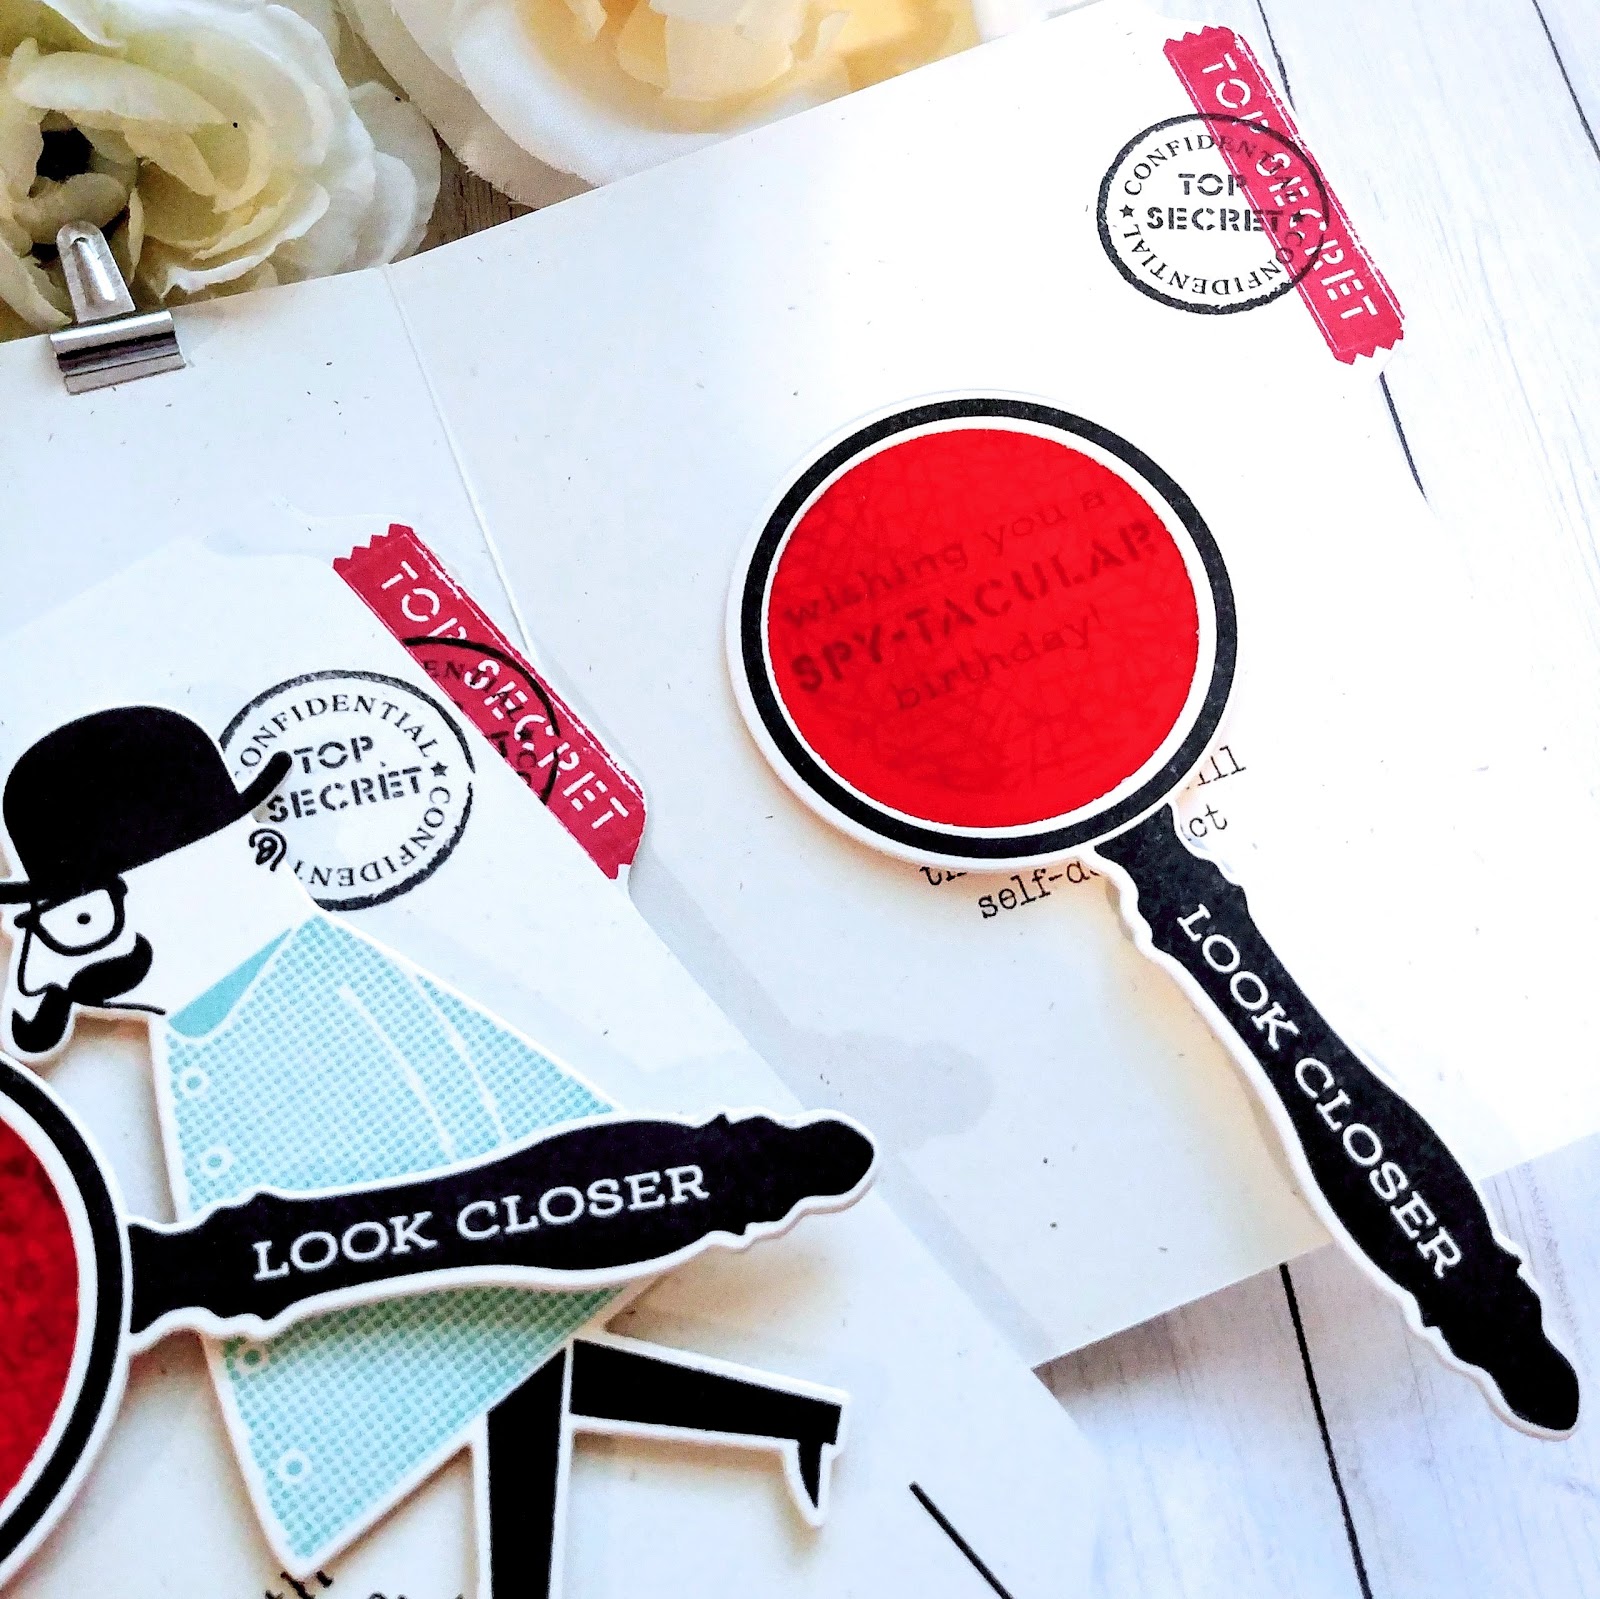
I put the magnifying glass over the top so you can see it better in this photo. You could add as many scrambled messages as you want on the inside of the card, especially on the left hand side. I think I'll try adding more on the next batch that I make!

I added a little silver clip to the top. It isn't holding anything in place, but more for aesthetics. You could definitely rearrange some of the design elements so that it could have a purpose. It was a last minute decision and I felt if I added any more words or image the card would look too busy!

These were so much fun to put together and I can't wait to make a girl version as well! I have a lot of birthdays coming up so it is a definite possibility! Join me tomorrow for the first day of reveals for the new release from The Greetery! Thanks for fluttering by!
5 comments:
I love this! I'm sure the birthday boy will be excited to receive it. You have such a talent for gift giving and sharing of your creativity!
Adorable card! Thank you for explaining how you created it. Love it!
Isn’t it cute what kids will say? ( most of the time, lol!) I just love the extra creativity you used in these fun cards! Your ideas are always wonderful and that translates to your beautiful artwork! 😊❤️
Kelly, I have this set & use it for church too! It is an ADORABLE SET!!! Kids DO LOVE this set! ;) I have the feeling the kids will want this little treat to continue! LOL SO CUTE & SO THOUGHTFUL TOO!!! BLESSINGS!! ;)<3
CUTE!
Post a Comment