Hello and welcome! It's my turn for this week’s TGIF
feature! I’m shocked that we’re nearing the end of October and heading into the
holiday season! As a card maker, I’m often inspired by store-bought and pre-printed
Christmas cards! I’ll see one that catches my eye and say to myself,” I have
stamps or dies that would work perfectly to recreate that look or feel”! Do you
do the same thing? For today’s card, I saw a beautiful Christmas card featuring
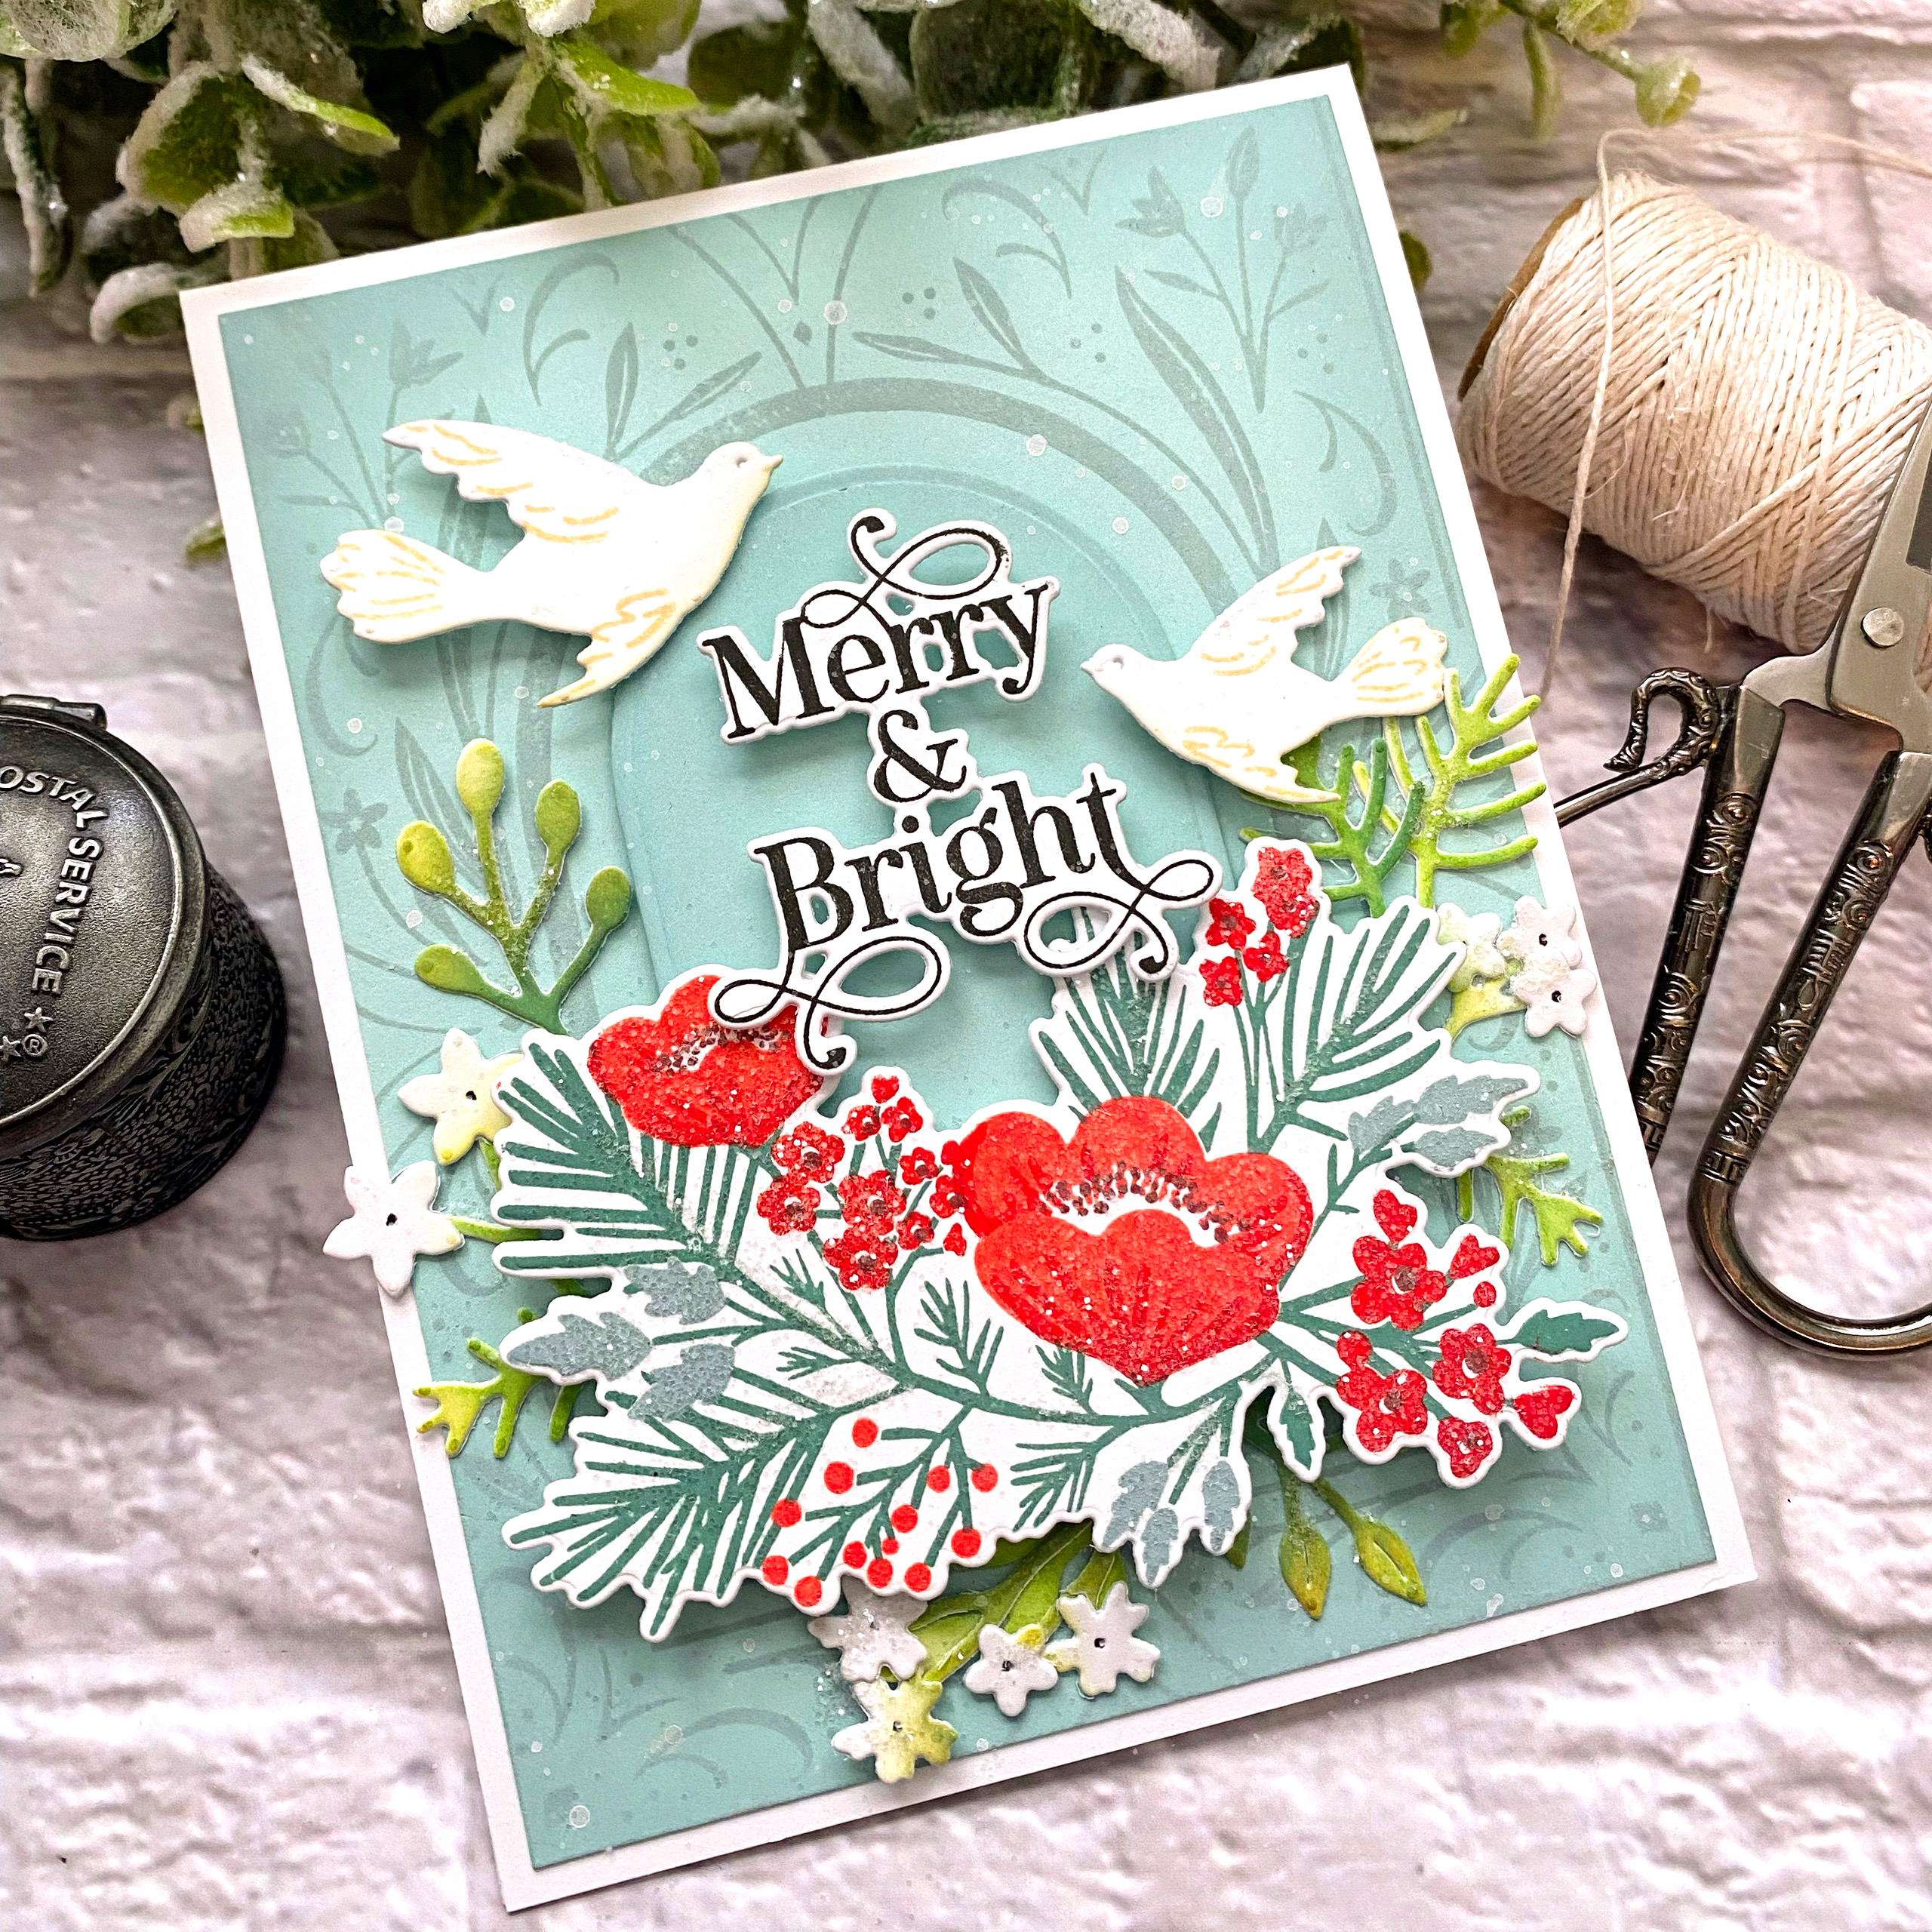
a large dove gracefully flying above a cluster of flowers and a central
sentiment! I knew for certain the new Peaceul Doves die and the Winter Doves Details stamp would make an appearance and for the flowers, I chose the beautiful Pine Blossom stamp set. This is one that I haven’t used for awhile so it was
fun to pull it out and give it some love!

To begin, I die cut the main bouquet using the Pine Blossom die and used the step-by-step stamps to bring the image to life. I set it aside
and got to work on the background; I don’t know about you, but I can’t get
enough of the arches! I used the beautiful Elegant Arches stamp and stamped
it onto a panel of Aqua Mist cardstock using Speckled Egg Distress Oxide ink. I
also blended a bit of the same ink around the corners for some dimension. Since
I love layers so much, I decided to add even more depth by adding an Aqua Mist
arch that was die cut using the A2 Arches Die with a hint of ink around the
edges. I layered it on top of the background using foam squares.

The card I used as inspiration used a Peace on Earth
sentiment, but I opted for the Merry and Bright sentiment from the Arched Holiday Stamp Set. I like to die cut all of the different sentiments
at once and then stamp them using my MISTI so I have them on hand for other
projects! I die cut the sentiment using the Arched Holiday Sentiments die and
then stamped it in black. I have been saving all of the bits and pieces from my
projects for quite some time now and my plan is to sit down and make a bunch of
tags with the leftovers! Can you believe that I haven’t made a single Christmas
tag this year? My packages will be bare if I don’t get going!

I placed the Pine Blossom bouquet at the bottom of the arch
leaving enough room for the sentiment. I used foam squares for both the bouquet
and the sentiment; using double thickness for the sentiment so it would rise
above the bouquet. I placed the two doves that had been stamped with the
details, on either side of the sentiment.

I felt like the card needed just a little something more, so
I die cut the little sprigs and flowers using the Winter Medley die and colored
them using finger daubers and Distress Oxide ink. These particular dies leave
all of the pieces intact when they are cut, so I simply left them in place and
colored them all quickly with the finger sponges. I added the tiny flowers
using liquid glue and then had fun tucking them here and there until I was
satisfied with the arrangement. I added some white paint splatter for a snowy look and then I added some glitter to the doves, the flowers,
and the extra dies for that holiday sparkle I love so much! I layered the
entire panel onto a top-folding A2 white card base using liquid glue. Once it
was done, I was so happy with the depth and dimension that was certainly not on
the pre-printed design!! Ha ha! I hope you get a chance to let something spark your
creativity and pull out some fun combinations of products! It’s fun to get your
mind working in new and different ways, especially if you’re in a rut (we’ve
ALL been there}! Thanks for fluttering by!
2 comments:
Wow, Kelly, your Christmas card is absolutely gorgeous! Love it!
LOVELY WORK, Kelly! I actually NEVER go down the card isle a the store anymore! LOL Now that I'm making my own. My ONLY WISH is that stamp companies would come out with some BEAUTIFUL SENTIMENTS for INSIDE the cards too on a regular basis! Your work is TRULY LOVELY! LOVE the tone on tone back ground arch & the doves too! ;)
Post a Comment