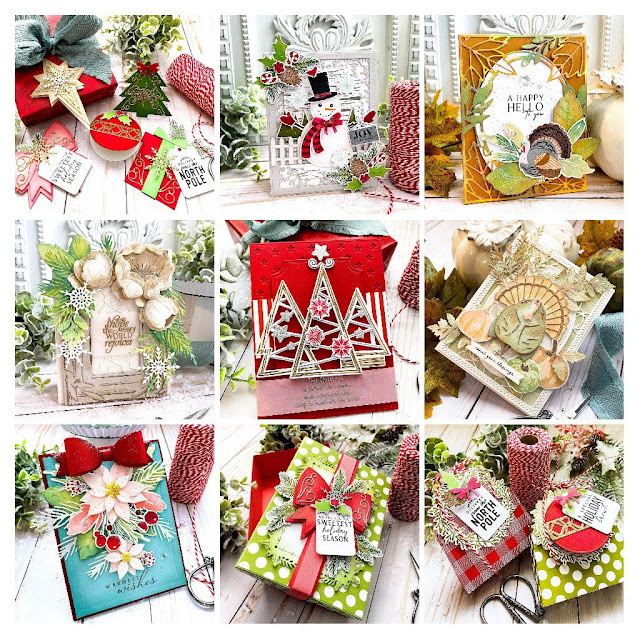
Hello friends! It's release day for the November Papertrey Ink release! Even though we packed an entire release into two days of posting, I loved every minute of the creative process using these beautiful new products! Everything will be available for purchase beginning at 10 PM ET! I think this will be a very popular release, so without causing any extra stress, if it were me, I would get my shopping done early. Keep in mind, I DON'T have any "insider" information (ha ha!) this is just my gut feeling. I also wanted to share my card for this week's Flash Sale. These products are on sale now, but you can add them to your cart tonight and still get in on the sale!
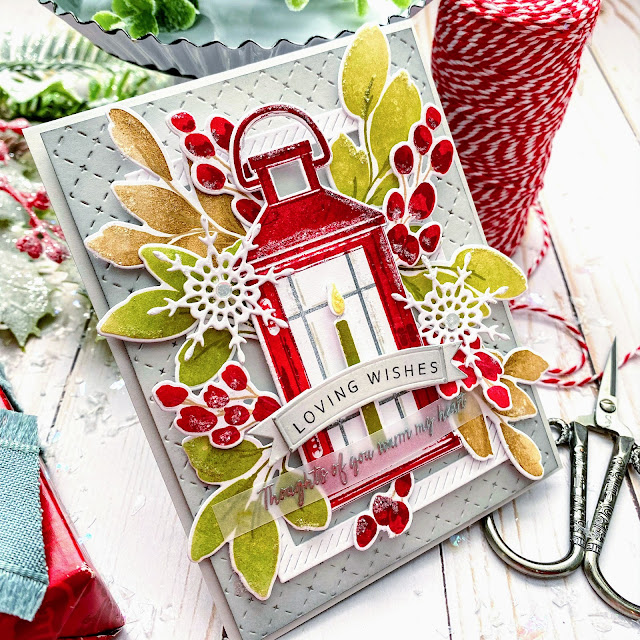
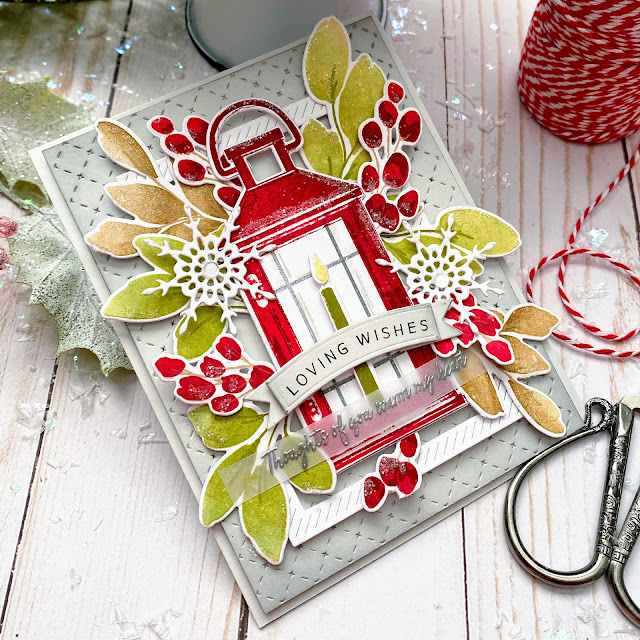
My card for this week's Flash Sale uses an assortment of stamps and dies to create a Christmas inspired "thinking of you" card! I'm planning on using it as a Christmas card, but if I need a "thinking of you" card during December, this will be used for that! To begin, I die cut the lantern, candle, and flame from the Vintage Lantern die set and stamped them in Pure Poppy, Scarlet Jewel, Ripe Avocado, Weathervane, and Harvest Gold inks using the Vintage Lantern stamp set. I set them aside and got to work on the foliage and berries. I die cut just the pieces I planned on using from the Effortless Beauties Die set; the berry clusters and leaves. I stamped them assembly line style using my mini MISTI.
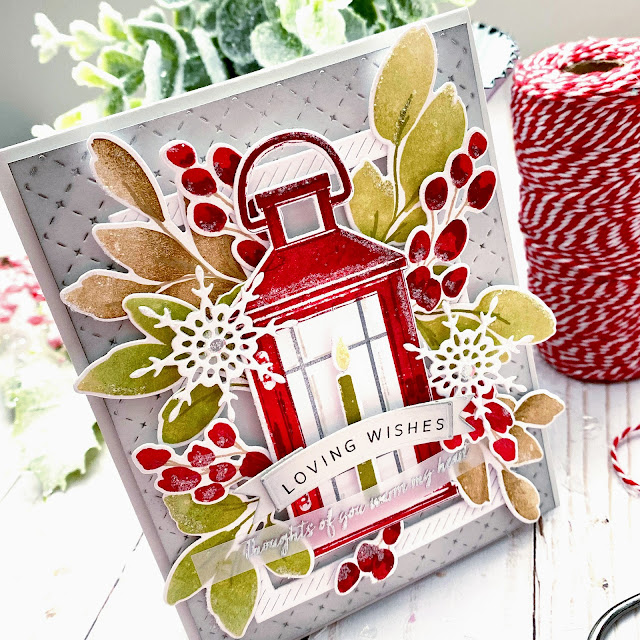
Once the stamped images were all done, I got to work on the background. I cut a 4 by 5 1/4 inch panel of Soft Stone cardstock and then die cut it using the Border Bling: Tin Stitch Die to give it that beautiful detail. I added some Weathervane ink around the edges using a blending brush for some contrast. I layered it up onto a top folding A2 card base using foam squares.
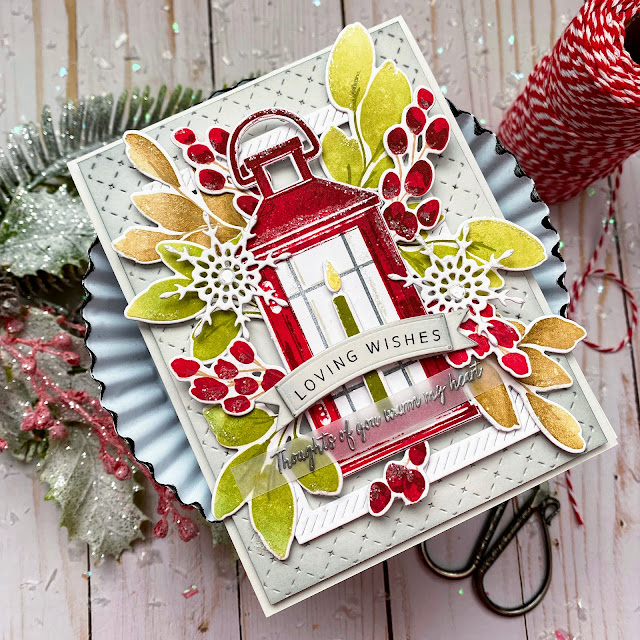
I wanted to frame the lantern so I die cut the smallest frame in the Border Bling: Skinny Diagonals Frames using white cardstock and added it to the base using mini foam squares. Once that was done, I adhered the lantern to the center of the frame. The candle is popped up using a thin strip of foam tape. The "flame" is simply glued to the candle using liquid glue.
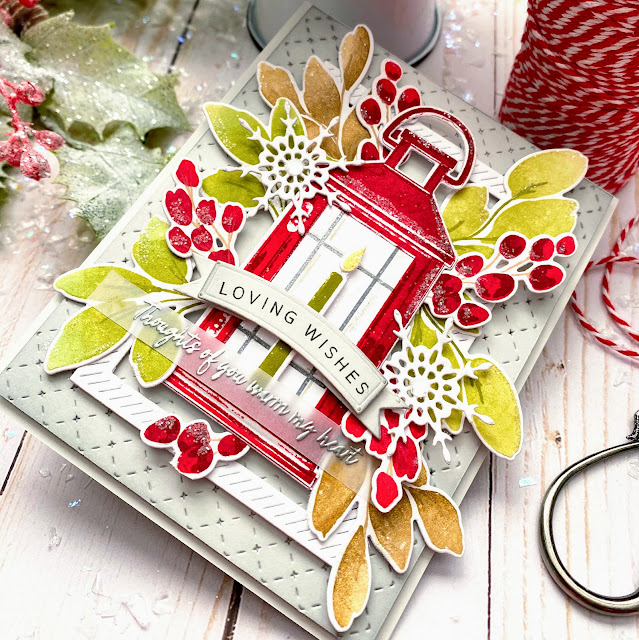
I had so much fun tucking the foliage and berries here and there until I liked the arrangement. This is one of those cards where I didn't pre-plan the sentiment! I decided it had been too long since I've used a banner so I die cut the smallest curved banner from the Banner Builder Basics. Once that was done, I chose the "loving wishes" sentiment, which is from the Just Sentiments: Belated Birthday, and curved it on my acrylic block and stamped it in black.
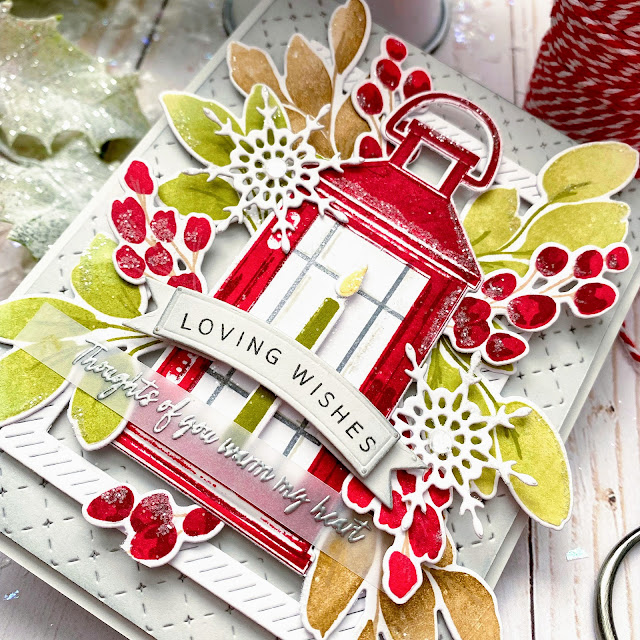
My tip for getting them curved the right way is to place the die cut piece under a clear acrylic block. Once that is done, I look through the block and bend the image/sentiment the way I need it and secure it to the block. Then I just stamp as usual and it turns out great! I also heat embossed an additional sentiment from the Just Sentiments: Warmth onto a strip of vellum using silver powder.

I also couldn't resist adding a few snowflakes from the soon-t0-be-released Cheerful Tag Overlay dies! They look so cute tucked in the foliage framing the lantern. Of course, I added some glitter here and there for some sparkle and shine!
This card was a joy to create and I'm thrilled to add it to my stash of holiday cards! I didn't do my Keeping Christmas series this year, so I was a little bit worried about how my Christmas stash would look, but it's shaping up nicely and I think I will have everything I need! I DO, however, really need to get going on some tags! How about you? Are you ready for Christmas? Thanks for fluttering by!
3 comments:
This card is so gorgeous and full! I'm sure whoever receives it will love it!
Love this lantern!
Your card is fantastic, Kelly!
What an amazingly beautiful card!!!
Post a Comment