
Happy new week, and happy new month! I can't believe it's already November! The countdown to Christmas is upon us and I've chosen a fun suite of products for this week's Papertrey Ink Flash Sale: Holiday House Stamp Set, Tent Style Packaging: Holiday House Accessories Die, and of course the Holiday House Die. I had grand plans of making an entire neighborhood of these last year and never ended up getting it done! I decided to make 3 today; one in Vintage Cream, one in Sweet Blush, and one in Aqua Mist! It's funny because the Vintage Cream house ended up being my favorite! Who would have guessed?
To begin, I die cut two panels for each of the three houses; one for the front and one for the back. Next, I die cut the roof/eaves portion from Smokey Shadow cardstock and stamped the Nifty Plaid Background using white ink. I stamped two for each house so that the back would look a little more "finished".
After that was done, set those aside to let the white ink set a bit and stamped the Rustic Brick Background using Soft Stone ink on each of the panels. I used the stamp that has the least amount of detail because I didn't want the brick design to overpower the rest of the fun holiday details.
After that was done, set those aside to let the white ink set a bit and stamped the Rustic Brick Background using Soft Stone ink on each of the panels. I used the stamp that has the least amount of detail because I didn't want the brick design to overpower the rest of the fun holiday details.
I die cut enough trees, windows, bows, swags, wreaths, doors, house number, and bows for each of the boxes and got to work getting everything stamped, glued, and assembled. The doors are cut from Berry Sorbet cardstock and stamped using berry Sorbet ink. The trees are stamped in both Ripe Avocado ink and Pine Feather to create the shadow effect.

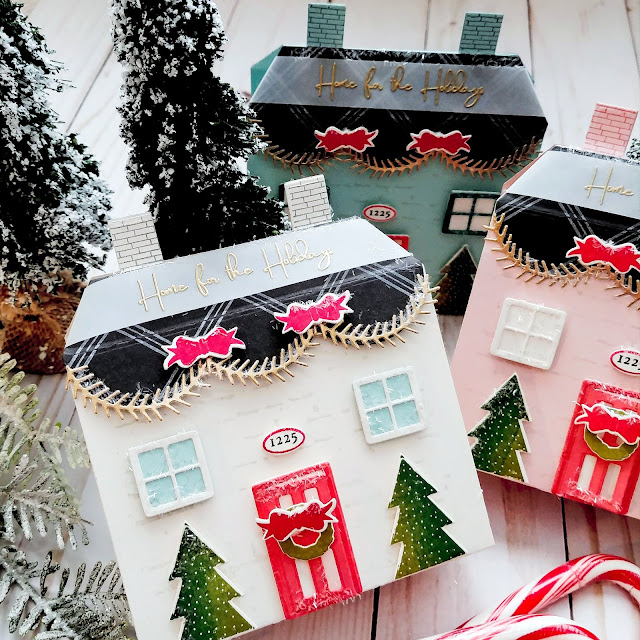
I love the cute little chimney detail stamp that adds just the right amount of charm! I stamped those and then used my bone folder to crease all of the score lines crisply. I glued the roof/eaves portion on to the top slant using liquid glue. I added the door, windows, trees, street number sign, wreath, and bow using foam squares. The gold swags are attached using liquid glue.

I heat embossed the "Home for the Holidays" sentiment, which is included in the Holiday House stamp set, onto a strip of vellum and secured it under the roof using glue. I added quite a bit of tinsel glitter to the top of the chimneys, the roof, the swags, window, doors, and trees! I pretty much just added glitter wherever snow would naturally fall!

I glued the bottom flaps together using a strip of ScorTape and then secured the chimneys together using liquid glue. Once that is done, you can easily slide a cello bag of treats, or whatever inside the packaging. I used the one I made last year to put a cello bag of homemade caramels! yummy! These were so much fun to make and I'll definitely need another crafty session to get even more made! Thanks for fluttering by!
2 comments:
These are SO adorable! Thanks for the inspiration!
Hi Kelly! I’m just popping by to say hello and also how sweet your holiday houses turned out. I love the cream color too but honestly I love them all. I know this is a very busy time for you but I wanted you to know I’ve enjoyed your blog full of beautiful Christmas projects. I hope you have a great week with a little time for yourself. ( if that’s possible! ) All my best always! 🙋♀️
Post a Comment