I'm thrilled to be here today welcoming you to day 1 of the Papertrey Ink November release countdown! We've got two days jam-packed with so many new products that are sure to make your heart skip a beat! I'm over-the-moon excited to share all of this holiday goodness with you today, so grab a cup of cocoa, get comfy and let's get started!
My first project for today is a set of Christmas tags using the AMAZING new Holiday Cheer Gift Tag Dies, Holiday Cheer Overlay dies, and the new Just Sentiments: Holiday Tag stamp set! If you saw my sneak peek the other day, then you already got a glimpse of these beautiful new dies!
For this set of tags, I wanted to showcase each of the 5 different tag shapes; ornament, tree, star, bow, and present/gift. I die cut all of the main tag pieces from regular colored cardstock and then die cut the overlay pieces from gold glitter cardstock! It's such a quick and easy way to add instant holiday sparkle and shine without any extra work!
I decided to create three tags that can be opened with a greeting stamped inside. I felt like the tree, ornament, and star would work nicely for this technique. I measured each of the three dies to get a rough estimate on size and then all you need to do is place the die slightly below the score line to create a folded shape. I then layered the decorated and embellished piece on top.
I also added some shading around all of the tags except the Kraft star to give them some added detail and dimension.
The new Just Sentiments: Holiday Tags stamp set is so fun to accent these cute tags. My favorite is this "Special Delivery from the North Pole", but there are so many other cute options that I will be showcasing today!
Next up is a cute stationery box that I gussied up using the bow from the Holiday Cheer Gift Tags. I have made these boxes before, and honestly, from this picture it really just looks like a card, doesn't it? I think I might recreate this same design for a card!
You can tell it's a box a little bit better in this photo. I die cut the bow from Berry Sorbet cardstock and then added Pure Poppy ink around the edges of each piece to really give it some dimension. I added the added glittery die cuts that are from the Holiday Cheer Overlay die set. I layered these ones a little bit differently than I did on my earlier tag. Honestly, you can just do whatever makes you happy!
This is another one of my favorite images from the new Holiday Tag set. I added some foliage from a new set called Corner It: Festive Holiday that I will be showcasing a little bit further down in today's post. Let me just tell you know...I am in LOVE with this sweet set! These pine boughs are the perfect touch for pretty much ANY holiday design! As soon as I stamped them, I knew they'd be getting a workout, and I was right!
The base of the box is Berry Sorbet cardstock and the lid is Green Parakeet with Bitty Big: Green Parakeet pattern paper panels glued to each of the 5 sides. I just love this twist on traditional Christmas colors!
Once the box was done, I layered a Mix and Mat: Berry Boughs Diecut over the top of the lid using foam squares. I added some New Leaf ink around the edges before I adhered it to give it some dimension.
I measured the tails of the bow tag and then cut a strip of Berry Sorbet cardstock the same width. I added some matching ink blending as the bow and then adhered it over the top of the first die cut. I also added a length of Berry Sorbet 5/8 Inch Grosgrain Ribbon and wrapped it around the lid of the box and secured it inside using glue dots. I wanted to give the illusion of a wrapped gift without having to actually un-wrap anything at all! The recipient can simply pull the lid off and keep all of the cute details in place!
I haven't decided what I'll put in it, or who it will go to, but it would make a really cute box to hold a set of the new Holiday Cheery tags!
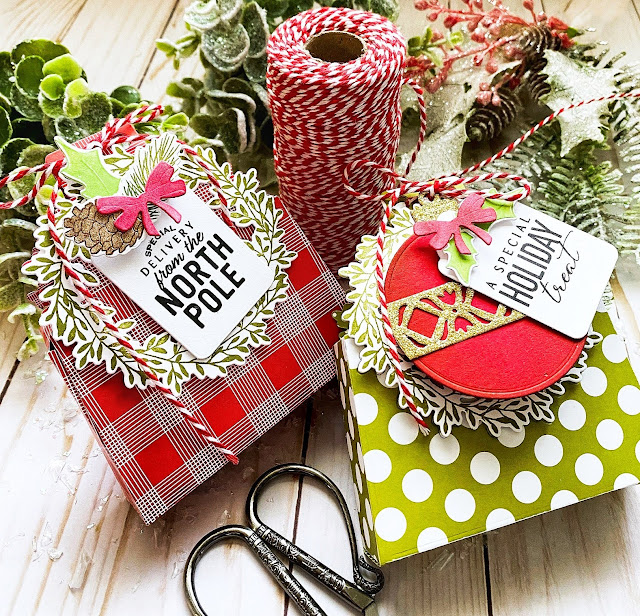
My third project using the Holiday Cheer tags is a pair of treat boxes. I really wanted to use the "A Special Holiday Treat" sentiment from the new Holiday Tags set, and I thought the cute Wreath Favor Box Die would be the perfect thing!
I couldn't resist making another one using my favorite new sentiment! ha ha!
The cute bow and holly are from the new Corner It: Festive Holiday stamp set that I talked about earlier. I die cut five of everything and stamped them all out so I could use them for the entire release! I just love having little details like this to add here and there and they look so cute on these tags!
The wreath is from the Wreath Favor Box Sentiments stamp set and is the perfect backdrop for these cute tags!
I used pattern paper to give these two boxes instant charm without any extra work! I tied them up with Baker's Twine.
For this plaid box, I lined the die up with the lines from the plaid to make sure the box wouldn't be wonky!
My next card features the latest addition in the Into the Blooms family...this one is the new Into the Blooms Peonies! I couldn't resist working them into a holiday card, even though I don't think of peonies as holiday flowers! ha ha! I've paired these gorgeous blooms with the new Just Sentiments: Heaven and Nature Sing! I'm obsessed with this beautiful new sentiment set and can't wait to use it all season long!
I had a BALL creating this card. To begin, I die cut the Antique Wishes frame from Kraft cardstock and then stamped the solid image from the Antique Wishes stamp set using Fresh Snow Ink and then stamped the detail portion using Dark Chocolate ink to give it some contrast.
I set the frame aside and got to work on the flowers and foliage. I die cut the Into the Blooms: Peonies from Vintage Cream cardstock and then added shading using Distress Oxide inks. I added some additional shading to the built-in score marks using a colored pencil. I glued them together using a combination of liquid glue and foam squares for realistic dimension.
The leaves are from both the Into the Blooms: Poinsettia and the Into the Blooms: Dahlia die sets. I also couldn't resist adding a few pine sprigs from the Tag Creations: Modern Gift die set. I used an assortment of Distress Oxide inks to color the leaves and pine sprigs.
I heat embossed the sentiment using gold powder onto a strip of vellum. I layered it over a panel that uses the Cover Plate: Ornate Die and wrapped it around and secured it with a tape runner. I layered the frame over the top and had fun arranging the flowers and leaves. I couldn't resist adding a few snowflakes from the Holiday Cheer Tag Overlay dies with sequins in the center and of course, glitter and some white paint splatter.
My next card features the precious new Joyful Florals and I have to admit, they truly are joyful! For those of you who've been around here a bit, know how excited I am about the new Large and Small Dimensional Bow die sets! I used a simple bow from the small set to accent this card, but you bet your bottom-dollar that I'll be putting a bow on everything from here on out! LOL!
My card also features a few sprigs and leaves from other sets as well; I've linked them in the previous card, but they are the pine boughs from the Tag Creations: Modern Gift and the leaves from the Into the Blooms Poinsettia and of course, I actually used the poinsettias as well on this card.
I love how nicely Ocean Tides ink looks around a panel of Aqua Mist cardstock. It gave me all the vintage Christmas vibes that I so dearly love; popped on top of a Pure Poppy card base and a Pure Poppy dimensional bow was the cherry on top!
There are two fabulous sentiments included in the set. I chose to use the "warmest wishes" sentiment, but there is a fabulous LARGE sentiment with a coordinating die that needs to be used ASAP! Quite a few of the other designers have used it so you won't want to miss that!
I had so much fun tucking berries and sprigs here and there until I liked the arrangement1 I added glitter and sequins for that holiday shine that is a MUST in my book!
I used hot glue to secure my bow, and I find that using a pencil or a tool that same size is perfect for rolling the paper before assembling to get a natural curve to the paper.
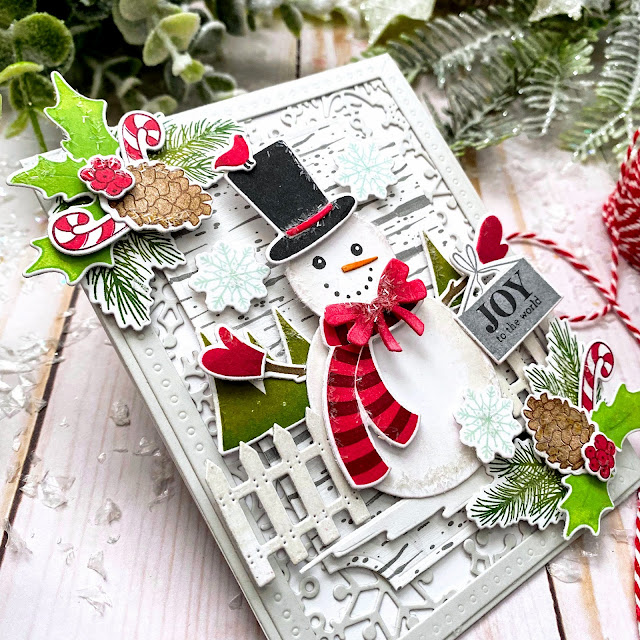
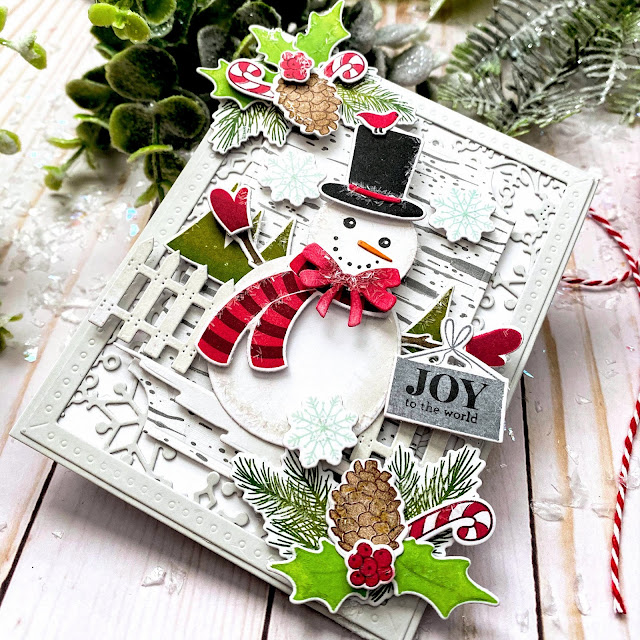
And last, but CERTAINLY not least, is the precious new Jolly Snowman stamp/die set! I've fallen in love with him and can't wait to use him all winter long!
I had a ball stamping his cute accessories to get him ready for his holiday show! His sign says Joy to the World, but there are so many other cute options included in the set!
I adorned the corners of this card using more images from the Corner It: Festive Holiday stamp set. I used the pine boughs, holly leaves and berries, pinecones, and of course the candy canes and snowflakes!
I added the bow included in the corner set over the top of his scarf to really get him looking fit for the holiday! A generous sprinkling of tinsel glitter finishes up this card! Thanks for fluttering by!
P.S. Join me again tomorrow for day 2 where we'll finish up the countdown!


10 comments:
Love your work Kelly!! That peony card is spectacular!!
Oh my gosh Kelly ALL your card designs are STUNNING! The level of detail is amazing ! - Liz E
ALL your cards and tags are BEAUTIFUL Kelly, but your Peony card has got to be one the most STUNNING Christmas cards I've ever seen!! The depth to those flowers and surrounded by all that lush greenery just blows my mind it's so pretty! And the colors and the vintage feel...I just can't say enough about how lovely this card is!! It is truly frame worth, and I envy the person that will receive it! A true work of he(art)!! :0)
I'm guessing that you feel the same way about this release as I do. Everything is so fun and festive! BUT...that peony card...WOW, it is simply stunning. It ranks in the top 5 of your cards for me, & I love your artistry, so that's saying something. It is totally frameworthy! I couldn't pass this by without leaving a comment for you. Happy Holidays to you and your family.
Everything is amazing! Love this release so much! Gorgeous projects!
Wow, Kelly! These are totally awesome creations!
You make me want it all!
Of course, that is the idea, but absolutely desirable.
Thanks for your continual inspiration.
Marisela Delgado said: Kelly, your cards never disappoint. Your eye for the smallest detail is amazing! I always wonder, "Could I do that?" You just amaze me. I don't know if I will ever reach your level of rock stardom, but I sure do love and admire your work. Happy Thanksgiving and warm hugs from San Antonio, Texas. ☺ Marisela mariandmonsterd@yahoo.com
Wow, Kelly, so much loveliness! Love them all!
WOW! Just had to 'flutter by' to comment on your latest PTI beauties. The Peony card will have to cased... Magnificent!!! They're all works of card art, Kelly. You set the bar!!! Happy Thanksgiving!
Hi Kelly, love your work! I was hoping you would explain the Jolly Snowman card background that looks like Birch bark/weathered wood/peeling paint. Is it a stamp, or did you freehand it with paint? I love the look of it, and tracked you down from a picture of this card I saw. Thanks for your help.
Post a Comment