
Hello and welcome to day 2 of the Ink to Paper October release countdown! I have a couple of projects to share with you today, but first up is a fun project created using some fun and clever new products! Christmas is definitely the time for homemade sweets and treats but finding the appropriate packaging can sometimes be a challenge!

If you're anything like me, once the goodies are baked or made, I want to get them off to their destination in a timely manner so they can arrive as fresh as possible! This new "Bag-It Holiday stamp set" works perfectly to decorate these windowed treat bags! The frame image stamp fits perfectly around the window and then the berries and sentiments work nicely to accent the border.

You could whip these up over the long Thanksgiving weekend and be ready for your holiday baking as soon as the season begins! I used my MISTI to do the stamping on both bags, but if you were making a lot, they would be ready lickety split!
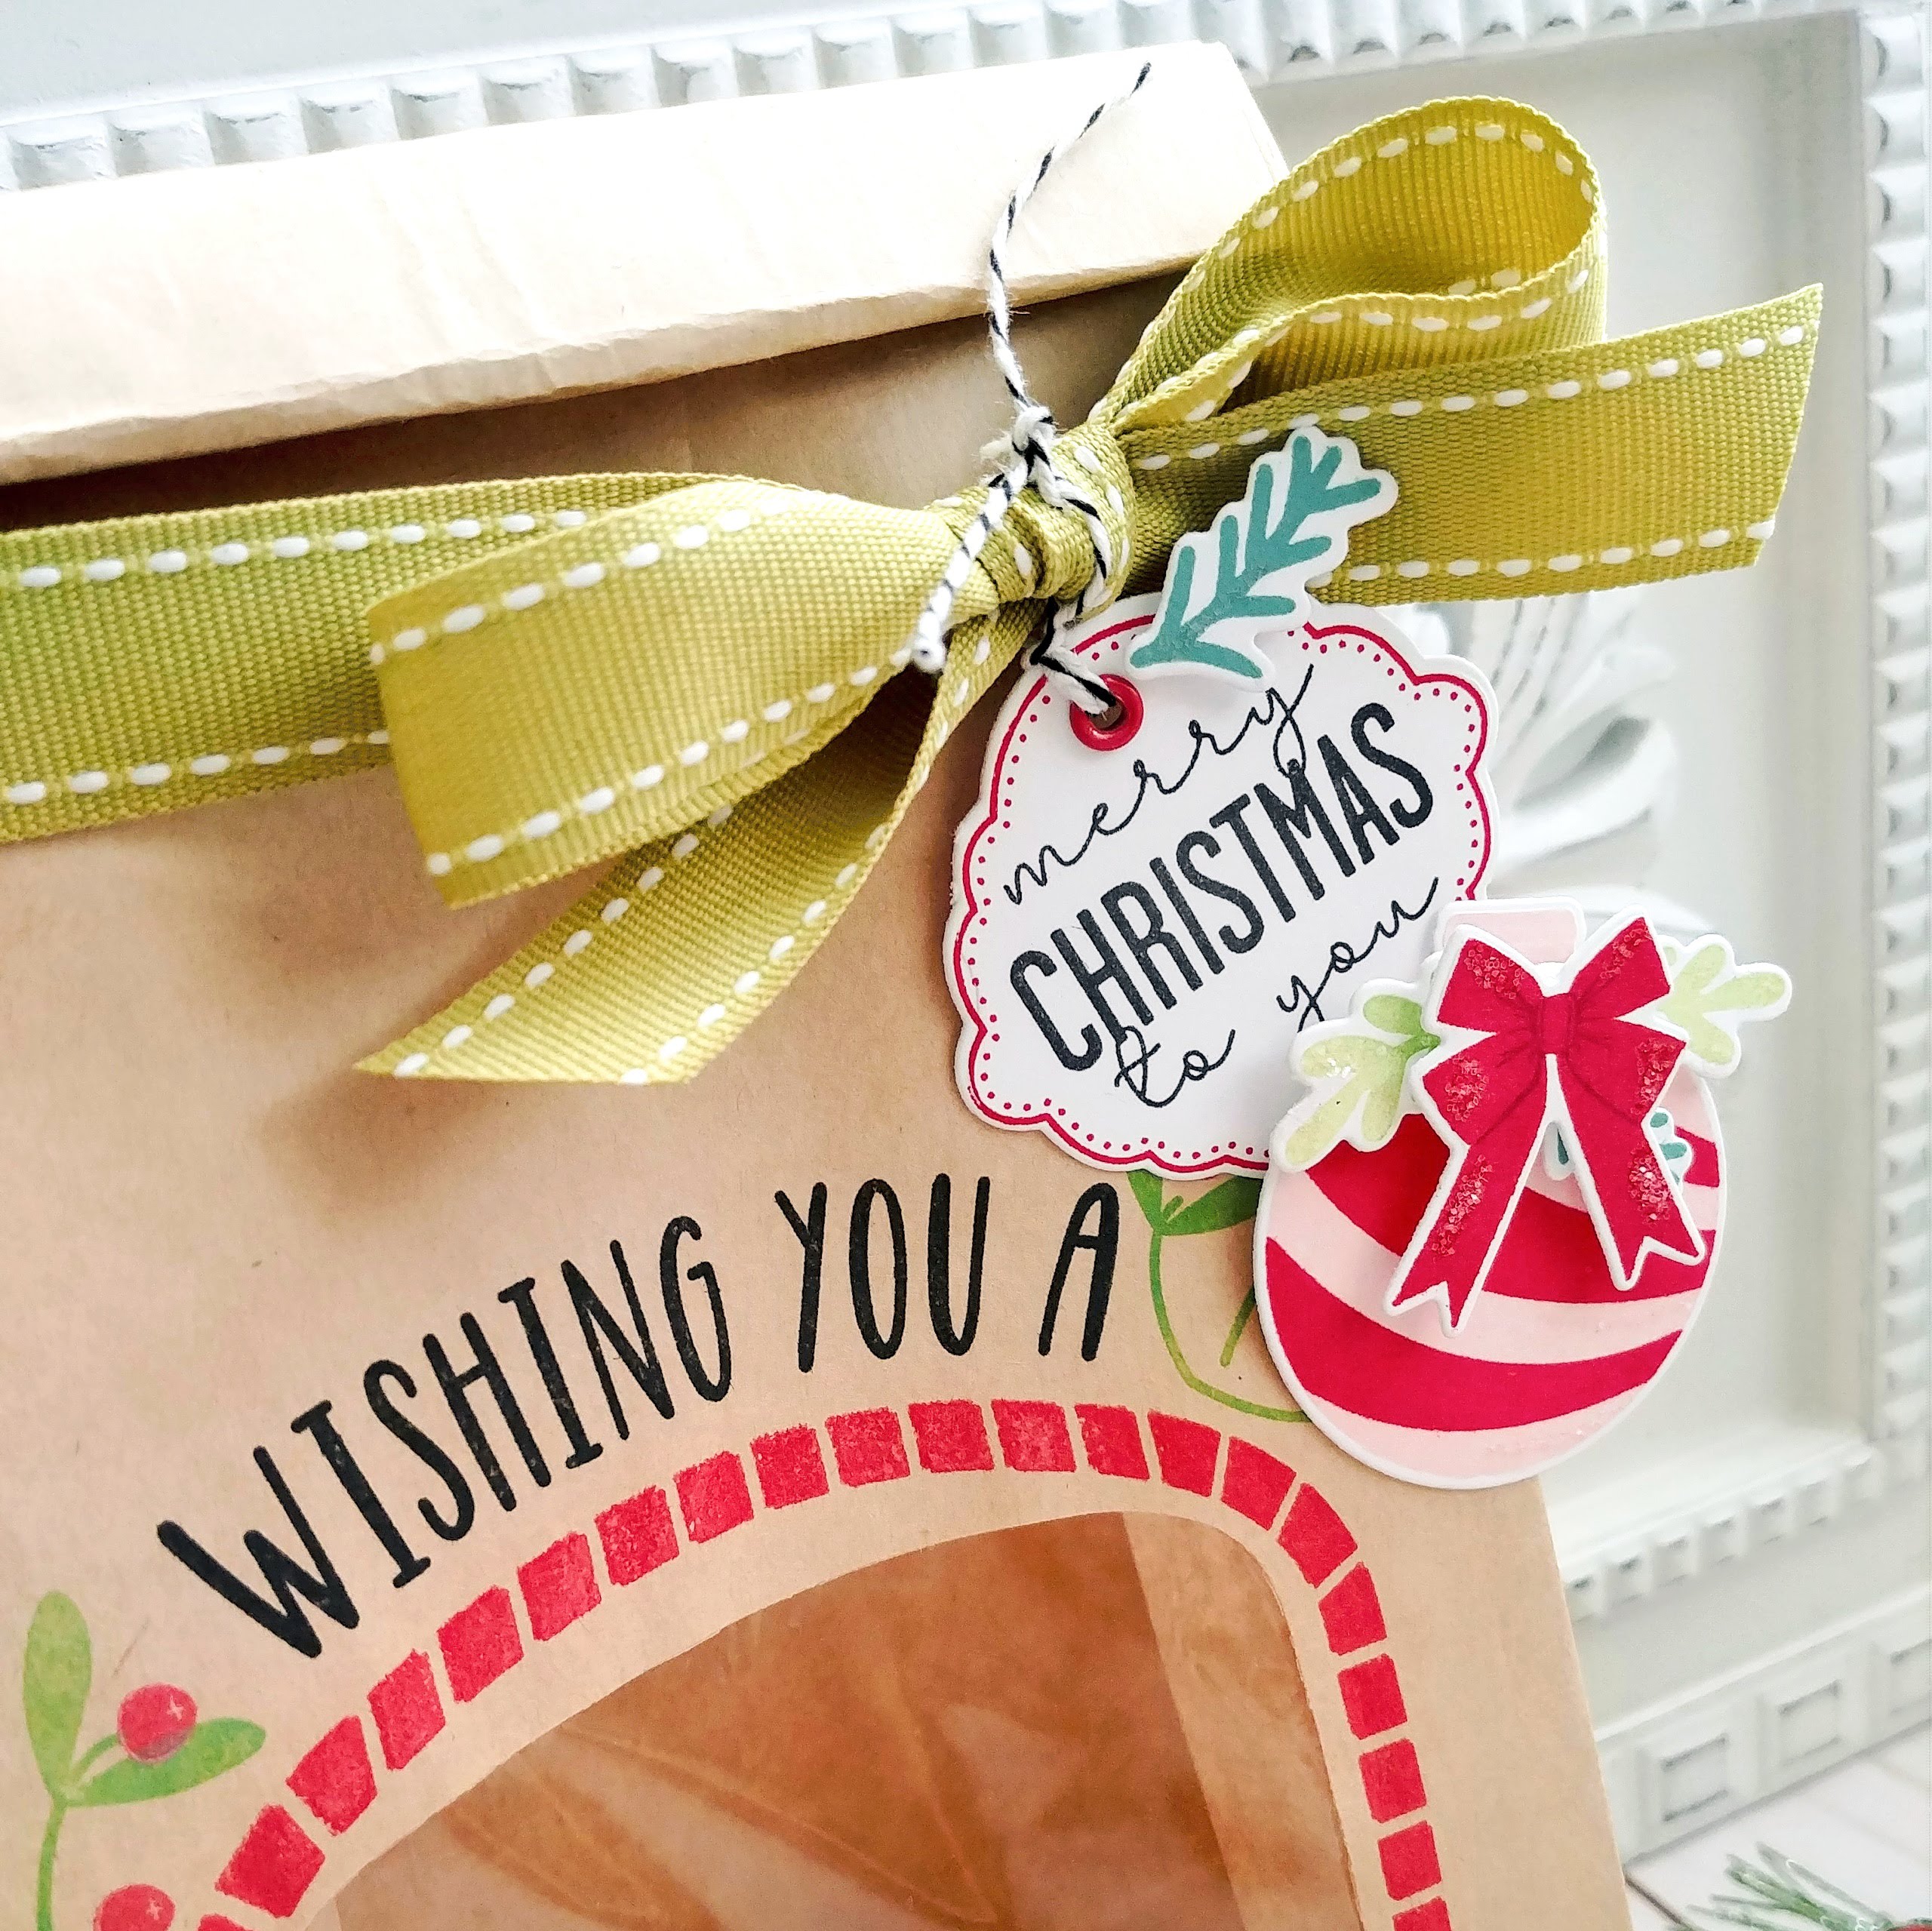
I decided to add a little tag using another fun new stamp/die set! The ornament, sentiment and label are all from the new Ornament Greetings stamp set. I also used some added foliage and a bow (of course) from the Home Door Decor set I showcased yesterday.

This is the perfect way to add a little more holiday cheer as well as a place to write to: from: so the recipient knows who baked the delicious treats!

My second project for today uses some new stitching dies called In Stitches: Noel. I chose to use these paired with the new Joyous Holiday stamp set to add some extra holiday touches. Aren't those birds so sweet? I colored them with Copic markers.

I die cut the N, E, L onto a panel of Pure Poppy cardstock and then stitched them using 6 strands of floss since the holes are quite large. Once that was done, I added the circle for the O and had fun embellishing it with sprigs and greenery and of course, those sweet birds!

I added some white paint splatter to the top for just a touch of added detail. I didn't want to cover up the stitched letters and this gave the card that little something extra without hiding the letters.

The sentiment, which is also from the Joyous Holiday set, is die cut and them stamped and added to the front of the card using foam squares. I added some red Nuvo drops here and there as well as a few sparkling clear sequins. Join me tomorrow for Day 3! Thanks for fluttering by!
7 comments:
Goodness, a labor of love! When someone receives a hand stitched card they’re receiving something special. Love how your’s turned out!
Hi Kelly--What a sweet card! I love the stitching, and the embellishments on each letter. I am especially in love with the circle you used for the "O" that has the heart cut-outs all around the edge. Could you please tell me what die set that is from? Thank you
I love the beautiful treat bags. What a fun way to dress up your holiday baking. The stitching on your card adds a perfect touch.
Thank you so much, Lisa!
Thank you so much! The circle is from the Love to Layer: Scallop Circles
Thank you, my dear! It was a fun one!
شركة تنظيف مكيفات بالرياض
شركة تنظيف كنب بالرياض
شركة تنظيف شقق بالرياض
شركة تنظيف موكيت بالرياض
شركة تنظيف واجهات زجاج بالرياض
Post a Comment