I promised to share the project that I have been working on earlier this week. My older kids were supposed to bring an item to auction for their youth camp fundraiser. I decided to work on two card sets and that made it so I got to play! I was worried that I wouldn't be able to make the deadline, but it was so much fun that I didn't want to stop. I made 28 cards in total, 4 each of 7 designs (2 of each design per set) which I will share the rest after my "keeping Christmas" post on the 25th of the month.
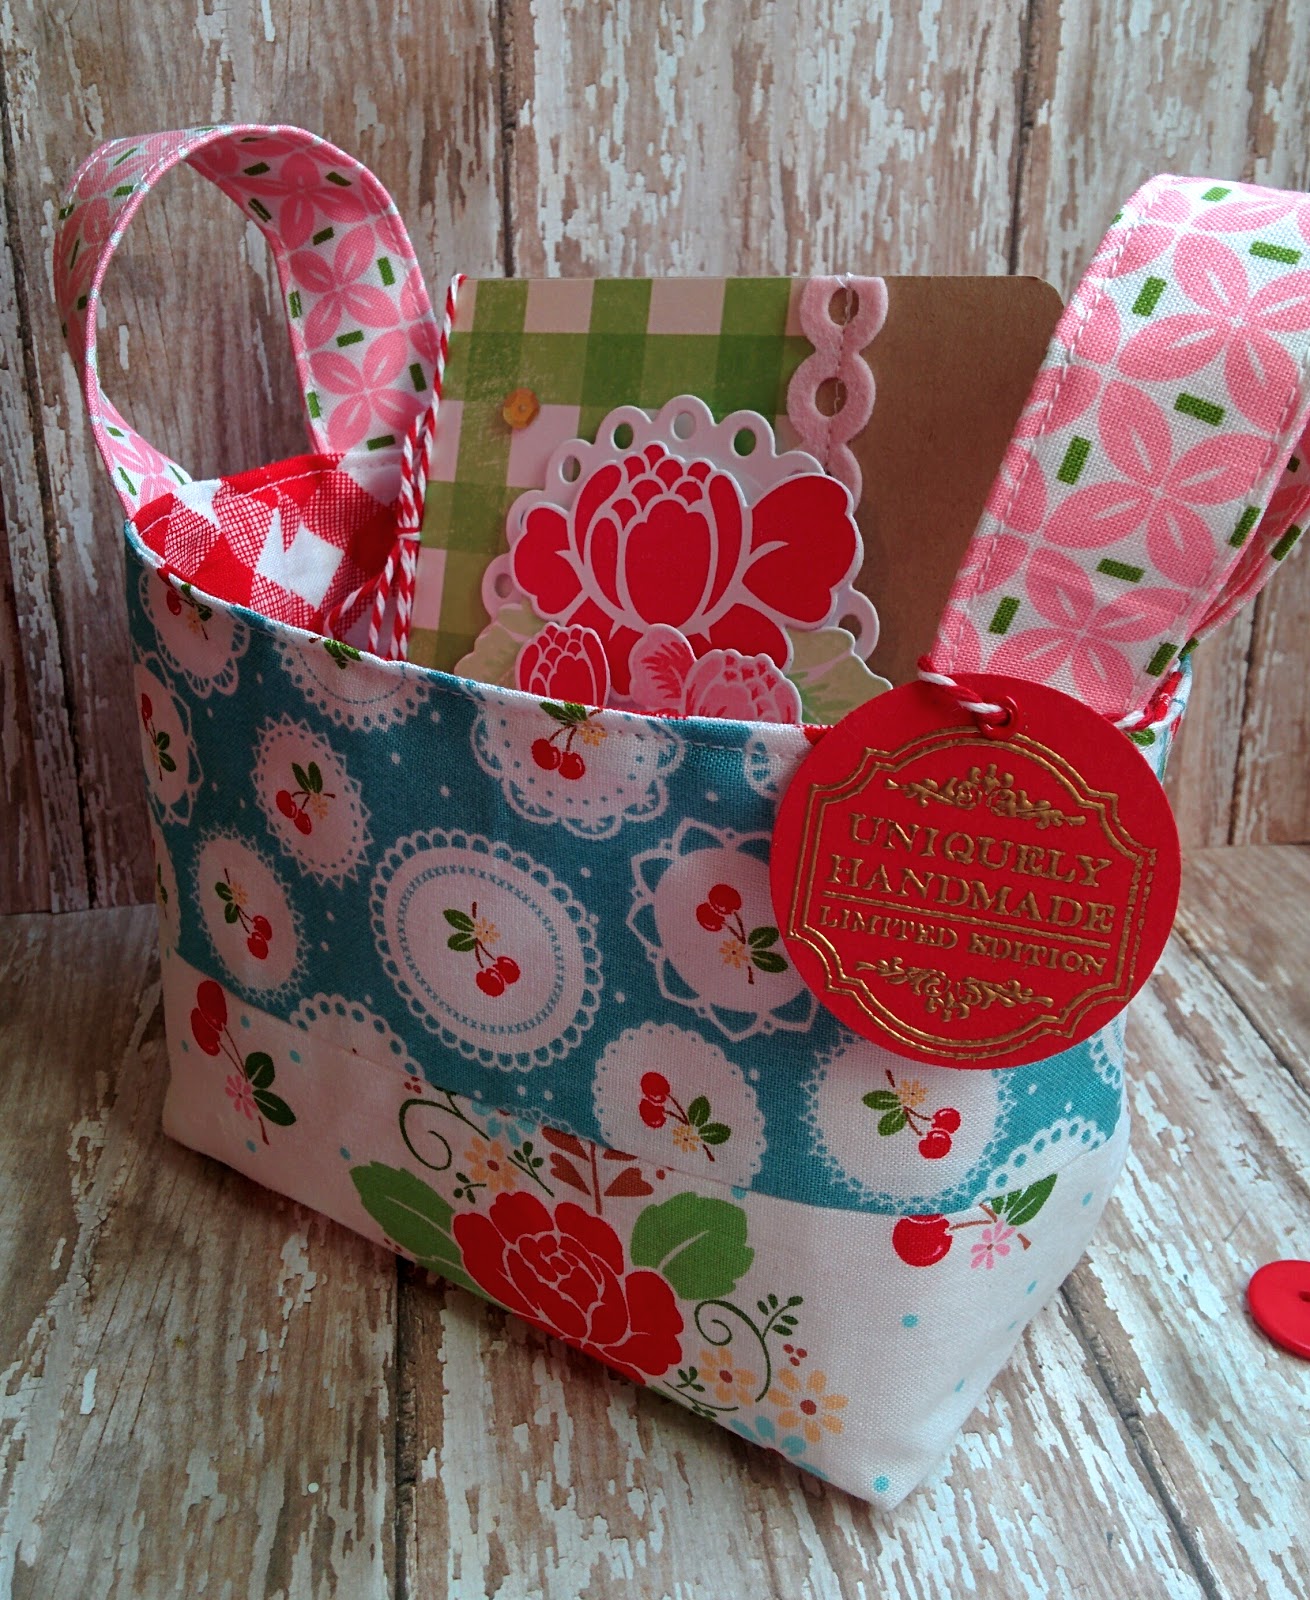
I couldn't resist this beautiful vintage cherry fabric collection. I knew it would be the perfect inspiration to create a nostalgic, vintage collection. The fabric that I have shown here, reminded me so much of the flowers in PTI's "Rosie Posie" so it was the perfect starting point.
You can see the rest of the darling fabrics worked up into the basket here. If you'd like to see more of the basket, pop over to my other blog Thimbles and Thread. There are additional photos as well as a link to the tutorial I created earlier this month.
I started the design by diecutting a circular nestabilities die that I have had for years. It reminded me of the circular pieces on the blue cherry print fabric. The flowers were die cut and stamped using coordinating inks to match the fabric choices.
The sentiment is from the last PTI release! I love all of them that came in the set and have used a few throughout the entire card set.
I diecut the felt pink border and machine stitched it down for some extra charm and detail. I used a lot of stitching, lace, buttons and twine to give it the vintage feel I was going for.
You can see all 4 of the cards here! Such fun to create! The finishing touch is a gold embossed "uniquely handmade" tag using a stamp I picked up a few years ago at Hobby Lobby. Thanks for fluttering by! Stay tuned for my "keeping Christmas" post coming up on the 25th.
Paper creations made by me! I love making cards, 3-D projects and more! I love sharing my passion for creativity!
Sunday, April 23, 2017
Wednesday, April 19, 2017
Boy cards {3 ways}
The sentiment was also heat embossed with silver powder for continuity and shine. I also did some dry embossing on the bottom panel for some added texture. A few white stars and burnished silver sequins finish it off for a fun, boyish card. This would actually work well for a teen as well.
I got a bit creative with this second design. I'll see if you can guess what the theme of the party was.....hmmmmm...let's see; repeated cloud pattern, purple green and white, "To Infinity and Beyond"....that's right! Toy Story! I also included the new sentiment from PTI's "Simple sentiments: Friendship" which says "You've got a friend in me". How perfect is that? I added it to the inside but didn't take a picture.
The space ship was diecut and stamped using Palette Black ink and then colored using Copic markers. I added some Stardust Stickles here and there for a fun galactic feel. The sentiment was heat embossed using silver powder.
The sun burst design was stamped in blue over the top of the clouds to give it a more dynamic feel. The stars and moon were diecut and colored as well and then added using foam squares. This one might not be the prettiest or cutest card in the world, but it was so fun to design.
Last but not least, the sports card! This one is clean and crisp with a few fun details to make it pop! I really like the foam cork that I used as a background for the pennant detail. I absolutely love this realistic football texture paper. It totally makes the card with minimal effort. A little bit of gold embossing add some shine.
I added some machine stitching to anchor all of the layers and I love using it as a detail on many of my sports designs. I love the craftsmanship of sports equipment. Lots of stitching, lacing and leather work.
I added a length of black twine for some contrast and a tiny clothespin for added detail.
I really wanted to use the jersey image but felt it would be too cluttered on the front. It worked well for me to add the "Future Hall of Famer" sentiment to the inside! Thanks for fluttering by! Join me soon as I post what I'm currently working on and don't forget to join me on the 25th for this month's "Keeping Christmas" segment.
Labels:
boy designs,
gold embossing,
masculine designs,
Papertrey Ink
Friday, April 14, 2017
Bon Voyage Bunnies!
I'm popping in one more time before Easter to share the last of my Easter designs. My desk is clean, the Easter sets have been put away and I'm ready for our annual egg hunt tomorrow! I was able to spend some time in the flower beds and yard getting ready for the eggs to be hidden! I love this time of year!
My first design is a quick card using the new "So Sweet" stamp set from PTI. I thought it would be so fun to make a Mr. and Mrs. Bunny. I added a narrow gingham ribbon to the bunny's ear and then made a bow tie for Mr. Bunny out of the same gingham ribbon. Don't they look like they're ready for the Easter Parade? I only added color to their ears, nose, and eyes. A little bit of Stickles on the nose and ears finish it off. I diecut a tag using one of the ones included in the carrot treat box die set. The sentiment was stamped using Palette Noir ink. I covered up the hole on the tag using a button threaded with button twine. I didn't want to add more ribbon to the design.
My next design uses a very old SU! set called "A Good Egg". I've used it every year and in pretty much this exact same way because it's just too cute! I love paper piecing the egg shell! The pattern paper I used is "Pretty Pastels" from PTI but I think they just retired it. The sentiment and circle piece are from the "Tags for Spring" set that is always fun to use. A ribbon and a button finish it off! Super simple spring designs today!
I needed a few tags for some Easter tins I put together for a few special people. I used a new "Tag Sale" diecut that I recently purchased in preparation for my upcoming "Keeping Christmas" series that I am doing this year on the 25th of each month.
This particular tag die comes with three separate pieces; the base, which is cut out of pink card stock, the slotted background piece, which was cut from "Pretty Pastels" pattern paper and then the white piece which inserts into the slotted piece. These were simple and fun to make! Thanks for fluttering by! Follow me on Instagram @kellylunceford
My first design is a quick card using the new "So Sweet" stamp set from PTI. I thought it would be so fun to make a Mr. and Mrs. Bunny. I added a narrow gingham ribbon to the bunny's ear and then made a bow tie for Mr. Bunny out of the same gingham ribbon. Don't they look like they're ready for the Easter Parade? I only added color to their ears, nose, and eyes. A little bit of Stickles on the nose and ears finish it off. I diecut a tag using one of the ones included in the carrot treat box die set. The sentiment was stamped using Palette Noir ink. I covered up the hole on the tag using a button threaded with button twine. I didn't want to add more ribbon to the design.
My next design uses a very old SU! set called "A Good Egg". I've used it every year and in pretty much this exact same way because it's just too cute! I love paper piecing the egg shell! The pattern paper I used is "Pretty Pastels" from PTI but I think they just retired it. The sentiment and circle piece are from the "Tags for Spring" set that is always fun to use. A ribbon and a button finish it off! Super simple spring designs today!
I needed a few tags for some Easter tins I put together for a few special people. I used a new "Tag Sale" diecut that I recently purchased in preparation for my upcoming "Keeping Christmas" series that I am doing this year on the 25th of each month.
This particular tag die comes with three separate pieces; the base, which is cut out of pink card stock, the slotted background piece, which was cut from "Pretty Pastels" pattern paper and then the white piece which inserts into the slotted piece. These were simple and fun to make! Thanks for fluttering by! Follow me on Instagram @kellylunceford
Labels:
Easter,
Papertrey Ink,
Spring,
Stampin' Up,
tags
Monday, April 10, 2017
Bunnies in my {Basket}!
Easter is coming WAY too fast and I am having WAY too much fun creating all kinds of fun things to celebrate one of my favorite Holidays! I'm back today to share my new current obsession...besides the carrots! LOL! If you saw THIS post you know I've been making a paper garden of carrot treat boxes! I decided that I needed something to put all of them in. Of course a basket comes to mind and I remembered a darling fabric basket that one of my dear friends gave me a few years back. I asked her for the pattern and she told me that she got it off of Pinterest. I decided that it would be easier to come up with something myself rather than try and read confusing instructions that just make my head spin. So...I came up with my own confusing instructions and a tutorial that you can see HERE.
I'm calling my version The {Flutterby} Basket! They are really fun to make and they are the perfect companion for Mr. Bunny's cute carrot treat box! Isn't the argyle carrot so super cute? I think my kids would eat carrots better if they looked more like this!
I had so much fun mixing and matching the fabrics that I picked up to make each one unique. They're just like snowflakes...no two alike!
You can see the assortment of fat quarters that I picked up the other day at my favorite sewing store. They are from Moda which is one of my favorite manufacturers.
The carrot treat box was diecut from the new "carrot treat box" die from PTI {go figure}.Ha ha! The paper is old DSP from SU! but it perfect for these boxes. I also discovered that you can get two carrots from one piece of 12 by 12 paper. On some of the earlier ones I made, I didn't position the die on the paper to maximize the paper and I ended up wasting it. I was so thrilled to see that if I layed it out better, I could get two from one paper.
The tag was created using one of the other dies that comes with the box. I wasn't planning on threading anything through the hole at the top, so I used a PTI button to cover it up. I thought the cute flower button was the perfect touch. The bunny is from "Sweet Treats" another new set from PTI and the sentiment was heat embossed using gold powder onto Kraft paper. I added some stickles to Mr. Bunny's ears and nose for an extra detail. Thanks for fluttering by! Follow me on Instagram @kellylunceford
I'm calling my version The {Flutterby} Basket! They are really fun to make and they are the perfect companion for Mr. Bunny's cute carrot treat box! Isn't the argyle carrot so super cute? I think my kids would eat carrots better if they looked more like this!
I had so much fun mixing and matching the fabrics that I picked up to make each one unique. They're just like snowflakes...no two alike!
You can see the assortment of fat quarters that I picked up the other day at my favorite sewing store. They are from Moda which is one of my favorite manufacturers.
The carrot treat box was diecut from the new "carrot treat box" die from PTI {go figure}.Ha ha! The paper is old DSP from SU! but it perfect for these boxes. I also discovered that you can get two carrots from one piece of 12 by 12 paper. On some of the earlier ones I made, I didn't position the die on the paper to maximize the paper and I ended up wasting it. I was so thrilled to see that if I layed it out better, I could get two from one paper.
The tag was created using one of the other dies that comes with the box. I wasn't planning on threading anything through the hole at the top, so I used a PTI button to cover it up. I thought the cute flower button was the perfect touch. The bunny is from "Sweet Treats" another new set from PTI and the sentiment was heat embossed using gold powder onto Kraft paper. I added some stickles to Mr. Bunny's ears and nose for an extra detail. Thanks for fluttering by! Follow me on Instagram @kellylunceford
Labels:
3-D Projects,
Easter,
flutterby basket,
gift giving,
Gift Ideas,
Papertrey Ink
Friday, April 7, 2017
My cup runneth over...{thank you}
I took hints of the inspiration photo as my guide. I began by sponging green ink onto 40 lb. watercolor paper and then spritzing it with water. I applied the ink a little heavier in the areas where I knew that I would be placing the teacups. I wanted there to be a nice contrast between the cups and the background. I taped the watercolor paper down with washi tape, leaving the slightest white edge for contrast and to keep it from curling.
While that was drying, I die cut all 6 of my teacups out of the same watercolor paper. I knew that I would be watercoloring at least 3 of them, but just did them all just in case. I used "Tea for Two additions" from PTI, an oldie but goodie, for today's design. I heat embossed 3 of the cups using the line art image and 3 using the solid images included in the set. The line art cups were watercolored using a watercolor pen and "Apricot Appeal" ink.
The embossing gives it the perfect amount of delicate shine that I was hoping for. After the watercolor background piece was dry, I measured the height of the teacups and used my paper trimmer and scoring blade to make 2 indentations for some extra detail, beneath each row of cups as well as creating a "sandwich" for the sentiment panel as well. The sentiment was heat embossed as well and I just love the impact it gives the card. The roses were diecut from "Apricot Appeal" cardstock and then brushed with gold ink for some extra detail and continuity.
The background of the inspiration piece boasted a backdrop of lights, which I love. I decided to add a hint of sparkle by adding a few gold sequins here and there.
The spoon and tea tag were some extra finishing touches that made the card feel complete and balanced. The focal piece was layered onto "Apricot Appeal" cardstock and a Kraft card base sponged with white ink. This card was so much fun to create! I was actually inspired twice for this particular design. I was standing in line at the post office to mail out THESE AND THIS card and I saw a card available for purchase there that struck my fancy; not the colors, not much really, but it had teacups on it. As soon as I saw this photo, it was the teacups that caught my eye as well...and that is how an "inspired" card was born! Thanks for fluttering by!
Tuesday, April 4, 2017
Sweet {Easter} treats
I just love when Easter is in April as opposed to March. I love that the grass is greener, the spring bulbs are flowering, and the blossoms are...blossoming! I've gotten started on a few Easter projects that I wanted to share today. I'm getting my carrots all in a row...or is the saying "ducks"? LOL! Just kidding!
Once I had done my trouble shooting, I got to work. I used a window cut out for this one because who doesn't love Cadbury mini eggs? They are so utterly adorable, too! They are the perfect candy to use with a window.
For this trio, I used a traditional carrot combination; orange and green. I've started asking my daughter for her opinion on different options while I am crafting. I said,"Bunny, or no bunny?". She said no bunny, but now that I am looking at the photos, I'm really liking the bunny. However, the options are endless with this new set of dies.
I had a lot of fun gold embossing the sentiment which is from the "So Sweet" stamp set that is the perfect companion for these adorable treat boxes. It is not everyday that you find gingham paper on the bias. I scooped it up as soon as I saw it.
This is the sweet little bunny that is included in the "So Sweet" set. He was diecut using the coordinating die and I just added a hint of color on the ears, nose and eyes to give him some depth. The cheeks were stamped using an image from the set.
This is another tag and sentiment option that is included in the set. There are so many great ones, it was hard to choose. I really like that there are a few that a hostess could use as favors for an egg hunt or Easter get-together.
This is one of the designs that strays from the traditional carrot feel, but I just love how these turned out. I found the "He is risen" pattern paper at Hobby Lobby. It is beautiful. This tag was heat embossed using gold powder as I have shown on some others. I loved the addition of the rolled paper rose and leaf. It mimics the feel of the paper, but gives it added dimension.
Labels:
3-D Projects,
Embossing,
gift giving,
Gift Ideas,
Papertrey Ink
Sunday, April 2, 2017
Hello, Spring!
![]() |
| DESIGNER KELLY LUNCEFORD www.flutterbyatomicbutterfly.blogspot.com |
One of my dearest stamping friends Amy Rohl made a card last year using an umbrella image to hold a bouquet of flowers. I just LOVED it and it inspired today's design, even though I haven't actually seen the card in months! LOL! Some things just stand out in your mind, ya know?
![]() |
I started my design by stamping some fun florals from one of my favorite sets "Bitty Bouquet". The cute umbrella image is from another one of my favorites,"Scattered Showers" by PTI, along with its coordinating die. I chose a springy color palette to make it pop! Of course I can't seem to get enough of this lattice die from the "Garden Gate: Make-it-Market kit"!
The background was dry embossed using an embossing folder I picked up at Hobby Lobby by The Paper Studio. The "Hello" sentiment is also from "Bitty Bouquets" and was wet embossed using gold powder. A cute button from my stash, threaded with button twine adds a nice detail as well.
![]() |
| DESIGNER KELLY LUNCEFORD www.flutterbyatomicbutterfly.blogspot.com |
Subscribe to:
Posts (Atom)


