Sunday, October 6, 2019

The Greetery Candy Pops {Trick or Treat}

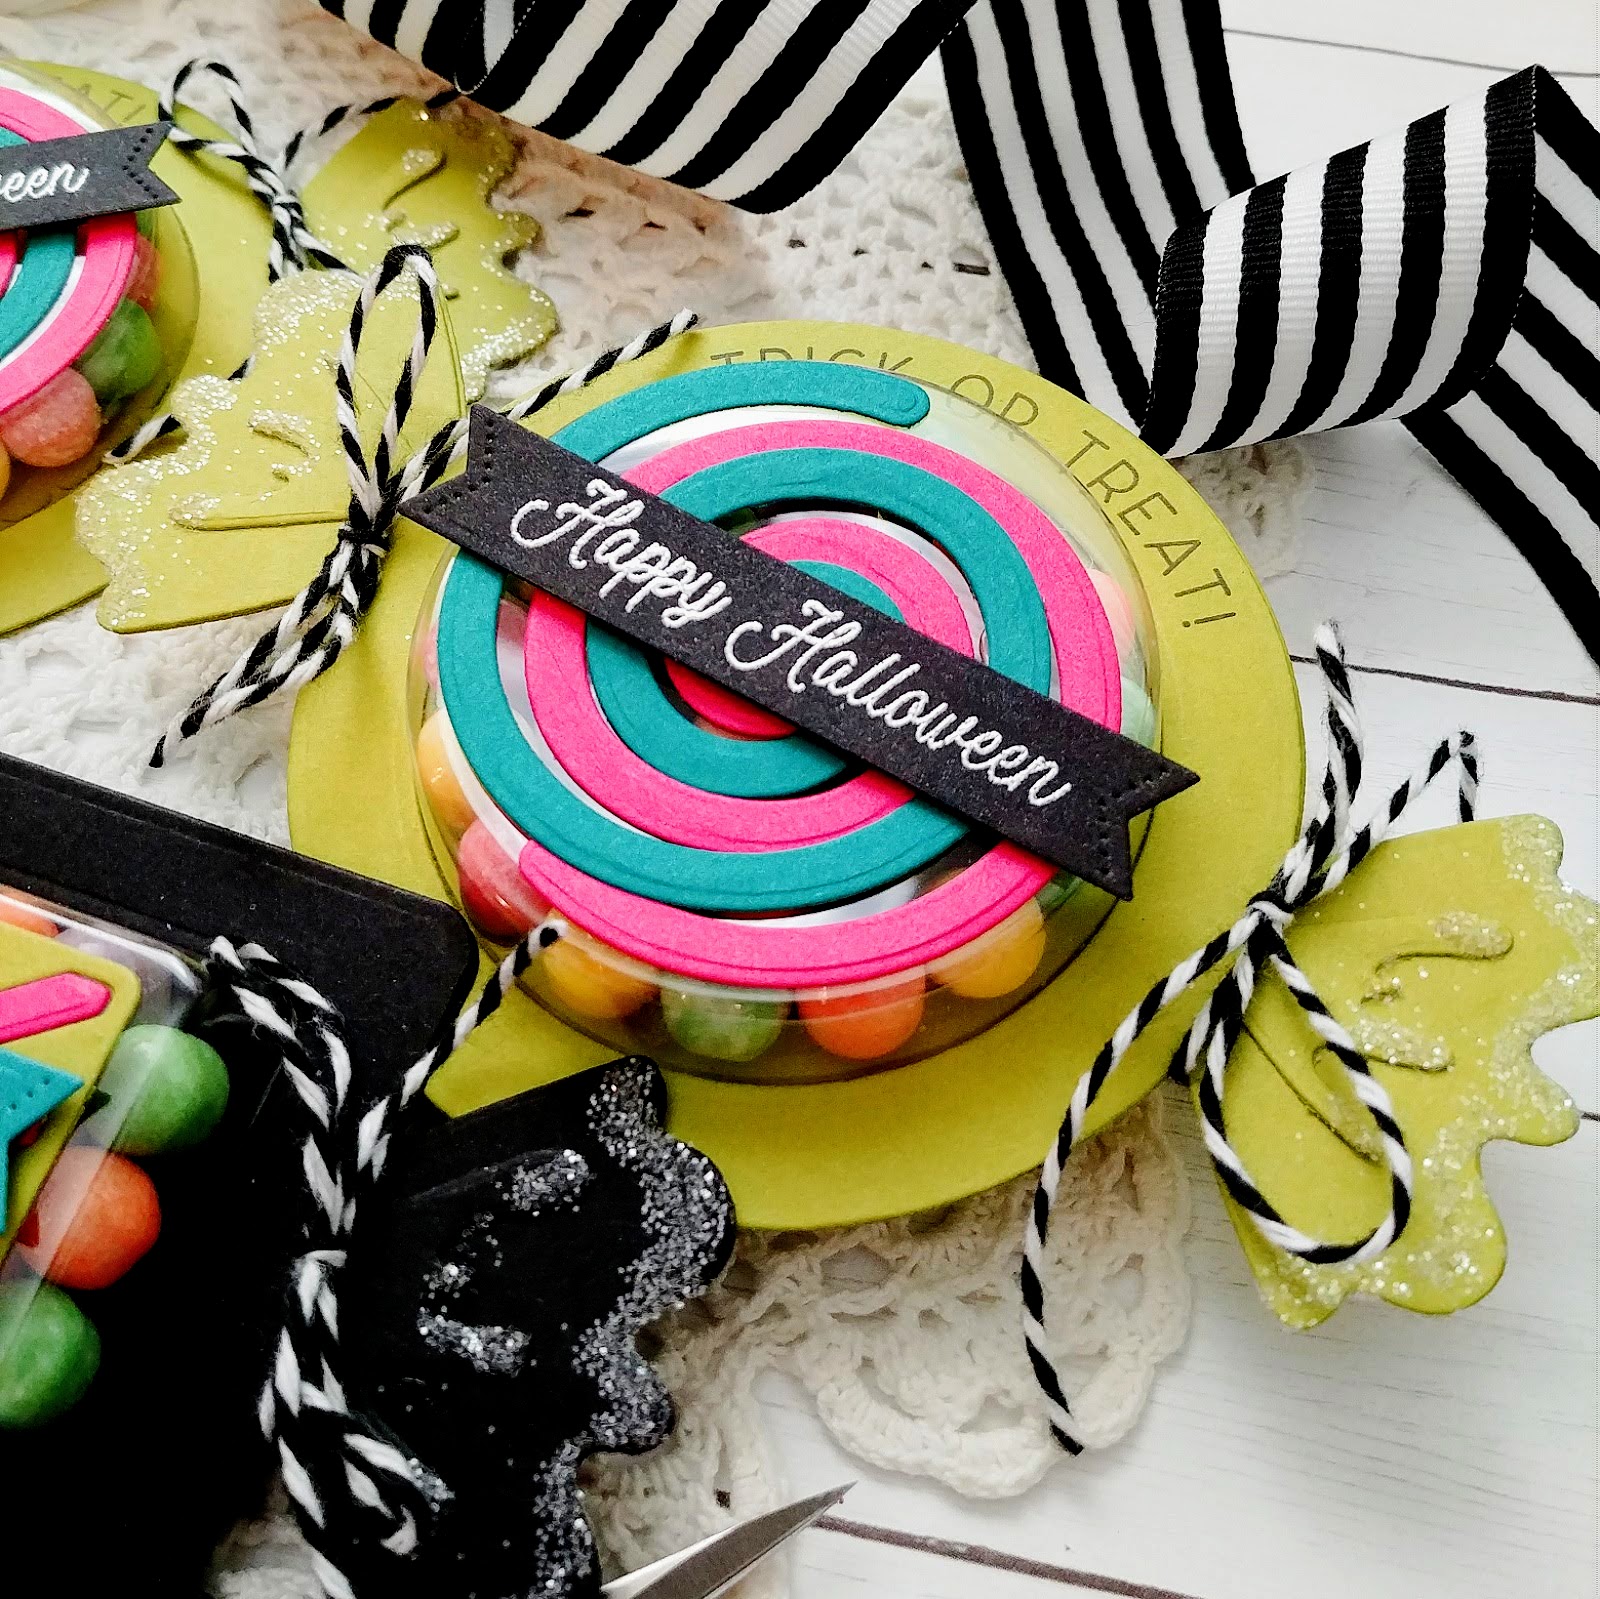
Happy Sunday, friends! As promised, I'm popping in to share some Halloween projects using the new Candy Pops  from The Greetery! During the release, I had mentioned that I was itching to create some using the Halloween sentiments and today I was able to scratch that itch! I also mentioned that my cute son brought home a Halloween treat sack from his lunch with the Mayor that was the inspiration for the colors I used for today's projects!

I created two Candy Pops circles and one using the Candy Pops Rectangle Die! Each treat container is filled with Chewy Sweet Tarts which fit perfectly into the Circle and Rectangle bubbles! The rectangle die is also large enough to be transformed into a gift card holder, which would be so cute to include a gift card and candy!

To begin these projects, I die cut two each of the base, the extra pieces on the ends and the spirals, just out of two contrasting colors, as you can see!

The circle Candy Pops use the Trick or Treat sentiment from the Candy Pops Sentiments stamp set as well as the Happy Halloween embossed in silver. I die cut the embossed sentiment using the Sentiment Suite Basics Die and added it to the top using foam squares.


The back side of each of the treat boxes uses either the Tear Away Circle Die or the Tear Away Rectangle Die. This creates a place for the recipient to tear away the back to access the candy, treat, or gift without destroying the rest of the creation! I am loving this feature!

I used Scrappy Glue to glue everything together and used bull clips to secure them together while they dried. I tied the ends with Baker's Twine while they were drying and added the glitter to the ends of the "wrappers".


These will be so cute to tuck in with the Halloween gifts I will be putting together! I had so much fun putting these together! Thanks for fluttering by!


Saturday, October 5, 2019

Saturday Showcase {Ghosts and Ghoulies}

It's been a whirlwind week of Christmas, Christmas, and more Christmas! LOL! Today, we've returned to our regularly scheduled season and I'm sharing some fun Halloween  treats for today's Ink To Paper Saturday showcase using the Ghosts and Ghoulies stamp set!

I couldn't resist adding some orange bows to the top of the ghosts to make them perfect to give to a few "ghoul" friends! Is that cheesy enough for you? LOL! I couldn't stop myself!

To begin these treat boxes, I used the Favor It Box 8 die collection to die cut the orange pieces. This die is on sale for only $8! I can't believe it! Once the pieces were all cut, I assembled them using ScorTape for security. I also added some Halloween Prints pattern paper around the box using ScorTape as well. This paper is on sale for $2! Wowza! I have been buying up loads of the discounted paper because it is perfect for projects like this!

Each ghost is stamped in black ink and then I stamped the bows in Orange Zest and used the coordinating Ghost and Ghoulies die collection to die cut them out. The bows are attached to the ghosts using a small piece of foam squares for dimension.

I used the Boo sentiment from the To Die For Sentiments: Halloween collection for the greeting on two of the treat boxes. It is adhered to a black banner that I created using theBanner Builder: Basic Die using foam squares.

Once that was done, I added the ghosts using foam squares as well. The middle ghost has a fun sentiment banner attached to her tummy that is from the Halloween Fillings stamp set. I omitted the "check box" that is included in that set by simply placing a post it note over it while I inked it up. I removed it to sprinkle on the embossing powder.

I used the smaller version of one of the ghosts so that it could be popped up right onto the Boo sentiment for some fun! The ends are tied with True Black Baker's Twine; I tied up one end and then filled them up with candy and then tied the 2nd side shut. I can't wait to "gift" these to my friends! Thanks for fluttering by!

Friday, October 4, 2019

Ink to Paper Design Team Tips {Tag Kit for Gift Giving}

Hello and welcome to this week's Ink to Paper Design Team Tips! I've got a bit of an unexpected project to share with you, but something that was so fun to put together and I can't wait to share it with you! As papercrafters we normally give or send a finished card or project, but for today, I am sharing a Tag Kit for Gift Giving! Many of us probably have crafty friends that would love to get something like this or maybe a friend that is new to this craft or has maybe shown interest. There is always something exhilarating about creating, and it can be especially thrilling for someone who is just getting started.

This simple kit contains 8 tags in assorted sizes and colors. I die cut them using the Tagged and Labeled die collection. I kept the tag design very simple, but festive enough to dress up any holiday package! The box I created is one of my go-to designs and I have shared it quite a bit. You can read how to make it in THIS post. You'll need to scroll down a bit, but the instructions are there, I promise!
 
I created a simple divider by scoring Raspberry Fizz cardstock to make three "wells" to place the die cuts, tags, twine, and embellishments. 

I used the Just Sentiments: Be Merry stamp set to stamp an assortment of sentiments and then I used a circle punch to cut them out. I also added some buttons and sequins into the kit so that they could dress up the tags!

I die cut the snowflakes in coordinating colors using the Splendid Snowflakes Dies. I also cut eight lengths of True Black Baker's Twine and gathered it up to place in the box.

Everything fits so nicely inside. Because the box is so deep, you could add a handmade card or even additional supplies if you are so inclined!

I kept the outside of the box simple, but festive and added a tag so the recipient could have an idea how to use the supplies. I die cut an oval using the Geometrix Oval die and added that to the box top using liquid glue. I also added two pink snowflake borders that were die cut using the On The Border: Splendid Snowflakes Border Die and glued them over the oval. I tied it up with some black gingham ribbon and added some sequins!

I finished it off with a tag, of course! I had a lot of fun putting this kit together! Now I just have to decide who to give it to! Ha ha! Thanks for fluttering by!

Thursday, October 3, 2019

The Greetery {Let's Make Memories} Holiday Collection Day 4

Well friends, it's the 4th and final day of The Greetery's Holiday Release Countdown! Today is jam packed with awesomeness that is a fitting finale for this beautiful Holiday Release!! As for all of you, I'm sure you're chomping at the bit until you can place your orders and get started on your own creations! LOL! Everything will be available for purchase TOMORROW at 10 am ET! What's on your wish list? My wish list includes extra time to use these products! Ha ha! In the meantime, make sure you head to The Greetery Blog as well as the other designers' blogs to see what they've come up with!

The thing I love about Betsy is that she thinks of things that we all want/wish that the industry had! She has fulfilled my design/creative desires for YEARS and this new "Candy Pops" collection is no exception! I had so much fun putting these together and the sky is the limit! The "Candy Pops Sentiments" stamp set is chock full of sentiments to make these dies pertinent year round! I can't wait; my cute son got to have lunch with the Mayor yesterday and he brought home a cute goody bag that was printed with the funnest Halloween candies! It was the perfect inspiration to make some Halloween "Candy Pops", so stay tuned for those as well! 

Betsy has made so many of these new products versatile for different seasons and occasions, but I just couldn't stray from the Holiday frame of mind! These peppermint striped candy pops are so much fun to make! I made two of the circles and one of the rectangles. There is an optional "Tear Away Circle Die" and "Tear Away Rectangle Die" that will come in handy for removing the treat/gift that you put inside the bubbles! I'm so excited for this feature. I remember that MaryBeth Lopez did something similar with her Potbellies from last year and I thought it was GENIUS! 

These are able to accommodate a deep circle bubble or a shallow circle bubble, depending on what you plan on filling them with; same with the rectangles. The rectangle bubbles are deep enough to hold some lip balm,which I am 100 percent sure I will be doing! I didn't actually fill mine with anything but just faked it by tying them up with the twine on the ends. I want to wait until the Christmas candy comes out in stores to make sure I get them filled with what I want! Although, knowing the current retail trends, it probably IS already in stores! LOL! I do my grocery shopping online, so I wouldn't know! I guess I better actually step inside the store! Ha ha!

You will need to die cut two of each shape if you plan on using them as stand-alone gifts as I have used today. If you plan on attaching them to a card, you would only need to die cut one! These would make amazing tags as well, either filled up or just as a shaped tag! 

I used the "Candy Pops Peppermint Addition" to all of these treats, which are so much fun! If you use two together, it really creates a lot of visual interest and movement; they look just like the real thing! The coarse glitter sprinkled on the holly and the ends of the "wrappers" add just the right touch of sugary, holiday sweetness!

The sentiments are heat embossed around the outside of the two peppermint discs using white embossing powder. I stamped the "just for you" sentiment on one of the Sentiment Suite Basics Die and tucked it under the holly! 

My final project for today and for the release uses a GENIUS collection of products that is called Tagging Collection: Speed Tagging-This includes the Speed Tagging die and the Speed Tagging Rubber stamp, and the Speed Tagging Christmas sentiments stamp set/coordinating dies! 

This collection of products makes it possible to stamp multiple tags, die cut them all and voila, you're ready to add the sentiments and any added embellishments!

I removed the foam mat from my MISTI, since this stamp is a rubber cling mount, and stamped the tags in both green and red. Once they were stamped, I used the amazing die cut to die cut them in one pass of the die cut machine! Betsy has included some clever marks to line everything up to die cut these easily!

I used the Speed Tagging Christmas sentiments stamp set to quickly add these beautiful sentiments.

The finishing touches are the berries, sprigs, bells, etc., and of course some glitter to make these really sparkle! I had a leftover church and tree from all of my mass producing, so I added them to a few tags as well. The Tree didn't match the rest of the collection, so it didn't get photographed! LOL! I had so much fun working on these tags and they came together really quickly, or should I say "Speedy"? LOL! Thanks so much for joining me this week and for leaving all of your sweet, sweet comments! You know how to make a girl's day! Thank you, thank you! I hope you've enjoyed this countdown as much as I have! Thanks for fluttering by!

Inspired By...truckload of fall {Sweet Treats for You}

It's October; time for all things pumpkin, all things cozy, all things FALL!!! It's finally sinking in that it's actually this time of year but my porch still has summer flowers out, wreath, etc! LOL! I've got to get my behind in gear! I'm too busy making Christmas cards to transition to fall! LOL! Go figure! Well, today there is a new Inspired By Challenge that should get us all in the fall spirit!

Of course, as soon as I saw this inspiration photo, I knew what had to be done! I just  HAD to make some pick up truck treat containers!
I picked three Autumn inspired colors to create the pick up trucks with; Saffron SpiceHoney NutCanyon Clay. I used the Dashing Through the Snow Pick Up Die to die cut everything out. I did it assembly line style so I was quick and effective! I've made these quite a few times so it goes pretty quick!

Before I began the assembly, I added Nuvo Crystal Glaze to all of the windows and set them aside to dry while I got to work on everything else! The metal pieces are die cut from specialty silver cardstock that I purchased at Hobby Lobby.

I stamped the back using the Dashing Through the Snow sentiments. I really love the rusty/worn look of the truck in the inspiration photo so I added some ink splatter to mimic the look.

Once the trucks were all assembled, I made some pumpkin/gourd tags to tie up the treats. I will add those later because I don't always like how bows and cellophane bags look in my photos! LOL!

The tags were die cut using the Scalloped Tag Dies out of white cardstock. I used the Simply Gourd-eous stamp set to stamp the pumpkin and gourd; I tried to use the colors from the photo. Once they were stamped, I used the coordinating Simply Gourd-eous die collection.

The sentiment is from Sentiment Staples: Halloween and is stamped in black. I added it over the top of the pumpkin/gourd using foam squares. These tags also got some "splatter" to give them that same rusty/rustic look! I had a lot of fun putting these together! I hope you get a chance to join us! Thanks for fluttering by!


SugarPea Designs {Merry...'tis the Season}

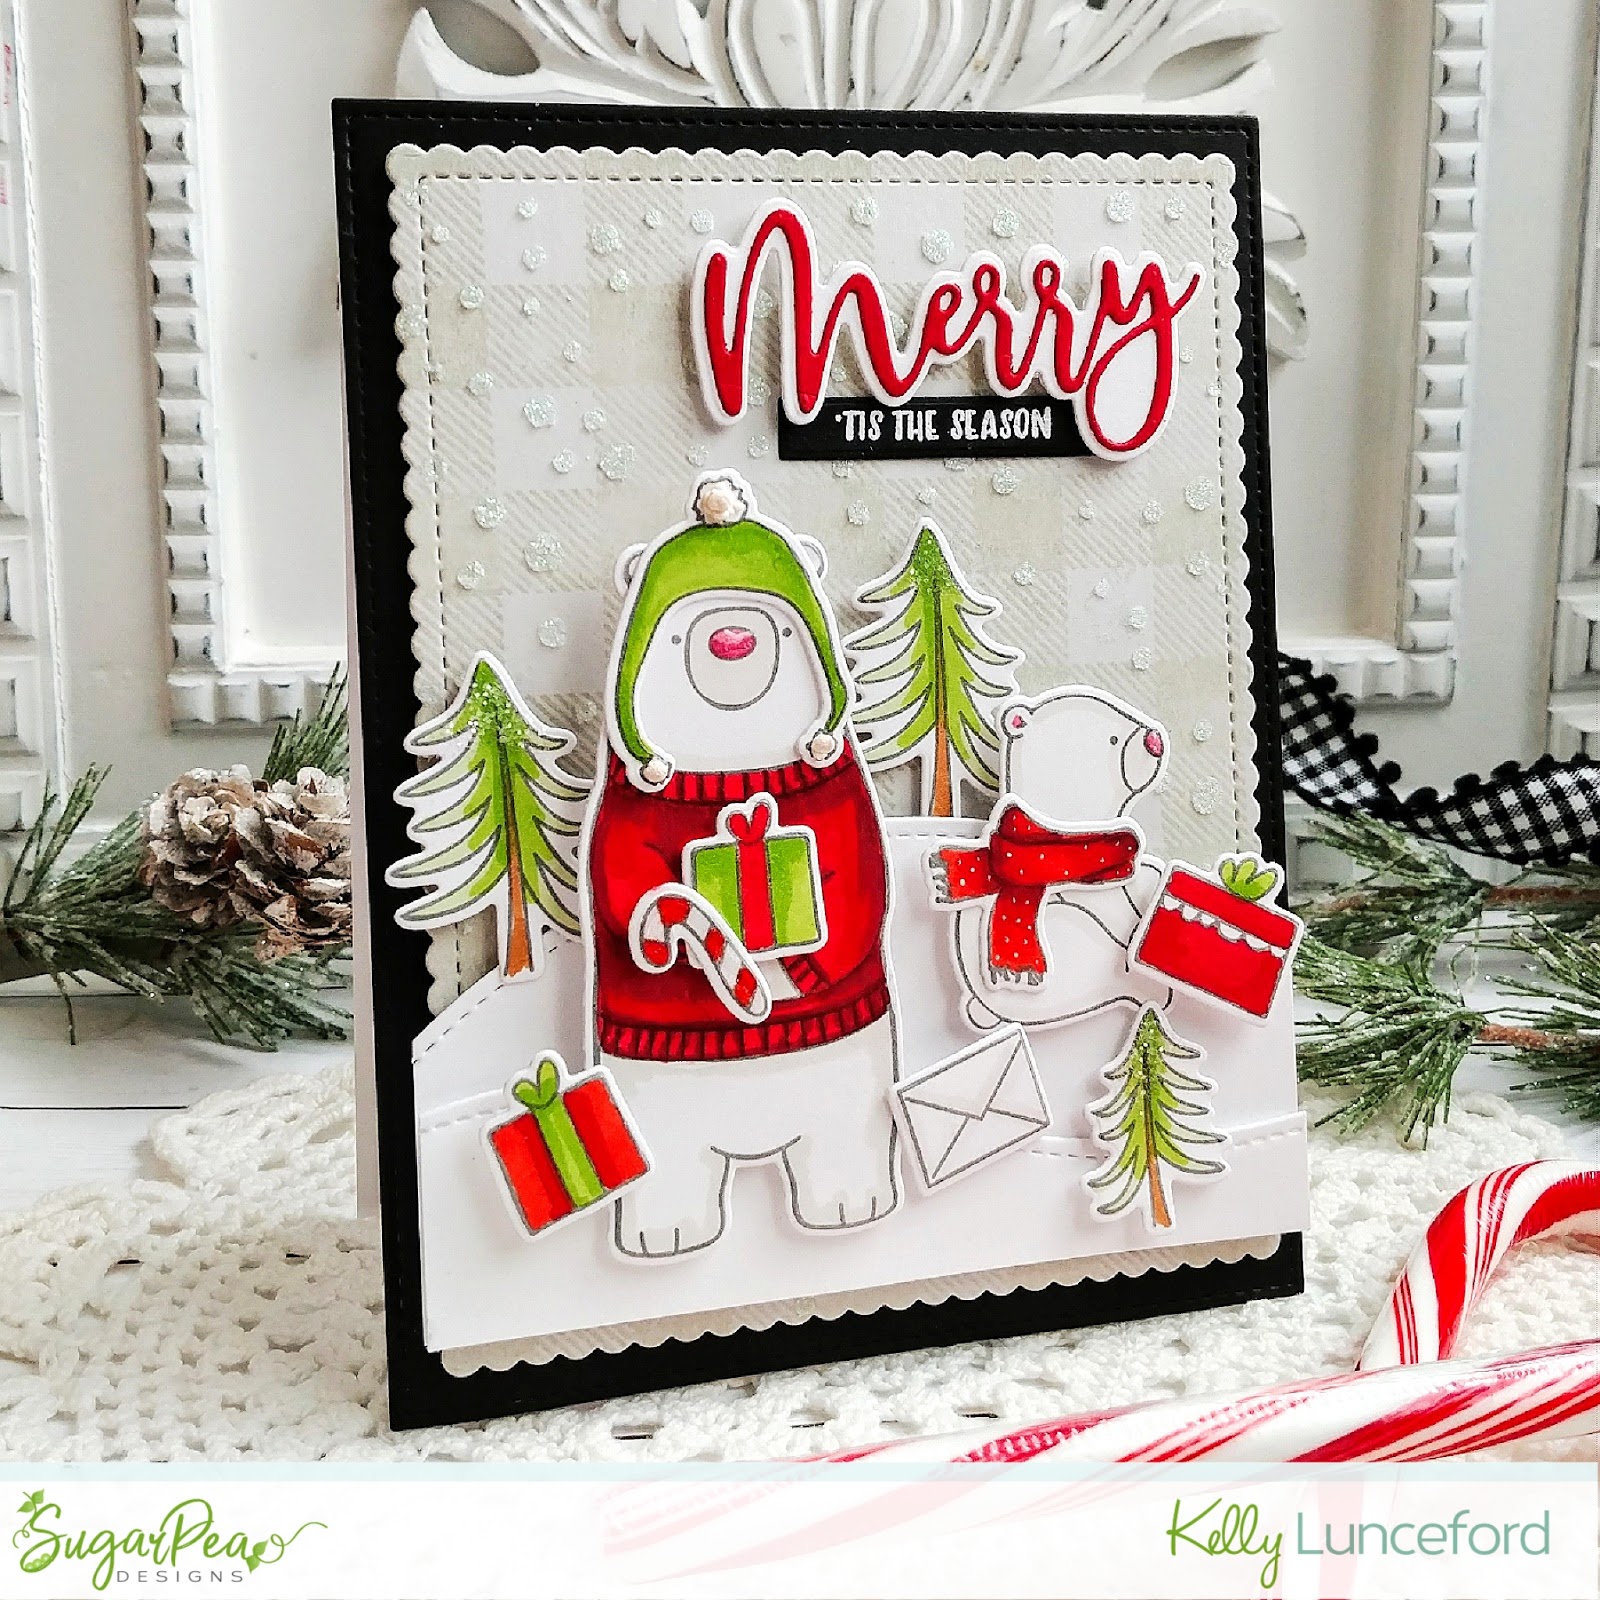
Hello and welcome! I'm excited to be over on the SugarPea Designs Blog today sharing this fun and festive Christmas design using many of my favorite products from the new release! I had so much fun making this card using the Hey Winter stamp set; let me tell you how I created it!

To begin, I stamped all of the images that I knew I wanted to use in Grey ink. Once that was done, I used Copic markers to color them. I used the coordinating Hey Winter SugarCuts to die cut all of the images.

I've been having so much fun with all of the new stencils, but I felt like I haven't showcased the Falling Snow Stencil as much as I would like. I decided to create something a little bit unexpected. I used the Buffalo Check Background stamp to create a tone on tone background, but then I added some Moonstone Glimmer paste with the stencil to create the sparkly snow!

I set that aside to dry while I worked on the sentiments. I used the new Merry SugarCut to create the red and white word at the top. I also heat embossed one of the fun sentiments from the Hey Winter set in white on black cardstock. I used the Sentiment Strips SugarCuts to die cut it out. I love how nice and crisp it looks!

I used the Card Front Element Builder, which is back in stock (yay!), to die cut the black panel, the snowdrifts and the scallop portion around the background, once it was dry, of course! I added some Liquid Applique to the pom poms on the bears hat and activated the puffiness with my heat tool. I love what fun detail it adds to the design.
I had so much fun assembling this festive scene using liquid glue and foam squares! The finishing touches include some coarse glitter to the tops of the trees and some Crystal Glaze to the candy cane and the bears' noses! I hope you've enjoyed today's fun Christmas design!

Wednesday, October 2, 2019

The Greetery {Let's Make Memories} Holiday Collection Day 3


I can't believe it's already day three of The Greetery's Holiday Collection countdown; I've been having so much fun! There's nothing quite as fun as Christmas crafting, wouldn't you agree? Today is going to be a fun one; the team is showcasing a beautiful collection of products that you're sure to fall in love with! Just a note: I didn't get some of the products in time, so I am sharing what I DID get. I do have everything now, so stay tuned for some additional projects in the next few days showcasing the remainder of the products! You can read all about the specifics of today's showcased projects on The Greetery Blog. Also, make sure you pop over to each of the designers' blogs to see how they have used these amazing products!

My projects for today use the new stamp and die set called "With Love at Christmas"! This set is geared toward creating beautiful envelopes, address labels, and more! I decided to create some embellishments for some glassine bags to hold gift cards, goodies, cards and more! To begin, I die cut 4 of the large bouquets that are included in the "With Love at Christmas" stamp and die set. I used my mini MISTI to make fast work of stamping this bouquet! I chose a color combination that reminds me of something from the 60's, but in the end, it feels fresh and modern as well!

Not gonna lie; one of my favorite things from this set is the wax seal image! Isn't it so cute? Back in the mid 90's, I got addicted to the brass stamps and wax to make my own seals. I really should see if I can unearth the box/bin where they are! Anyway, this stamped version is just as fun and I don't need to fuss with wax! LOL!

This label has a coordinating die, which I just got, and is called "Addressed die". I just cut my own rectangles and stamped everything using my MISTI. 

The rest of the collection has some stencils called Flappable Stencils and are just gorgeous! They coordinate perfectly with this stamp set and will work for all of your holiday envelopes. The Greetery will also be selling gorgeous cream and white envelopes in packs of 25 to use with these stencils.

I tied the glassine bags up with some specialty black and white gingham ribbon. I tied the top with some black baker's twine in a bow and then trimmed the edges of the gingham ribbon!

Join me again tomorrow for the 4th and final day of the countdown! Tomorrow is going to be a fun one, so make sure you stop back by! Thanks for fluttering by!