Thursday, September 26, 2019

Inspired By...Tailgate Party {Happy Harvest}

It's Thursday and that means it's time for a brand-new Inspired By Challenge! I decided to create a set of three quick cards to mail out this week! Now that fall is officially here, I can get some of these autumn cards flying out the door! 

I was inspired by the leaves at the top of the photo; there just beyond the tailgate, the plaid of the thermoses, the picnic basket, the twine wrapped around the thermoses and the colors.

To begin these quick cards, I die cut the Bold Borders: Foliage Die out of Olive Twist cardstock. Normally I would stack them about 2 or three times, but for these quick designs, they just got a single layer, which looks great because of the pierced detail! I layered them onto panels of Fall Prints & Patterns pattern paper, using prints that looked like the leaves in the inspiration photo.

I used the Vintage Picnic dies to die cut the picnic baskets and then used the (retired) Vintage Picnic stamp set to stamp them. I did some simple Copic coloring to get some of the fun plaids from the photo incorporated into the design.

After the baskets were cut, stamped and colored, I stamped the pumpkins directly onto the panels of Rustic Cream cardstock as well as the "Happy Harvest" sentiments. I used Copic markers to color the pumpkins and added some highlights using a white gel pen.

I used foam squares to pop up the baskets and the panels using foam squares. I also added a quick bow of Jute Button Twine. Once that was done, I added the entire panels onto top folding A2 card bases using ScorTape. These were a lot of fun to make and I always love pulling this old set out! Thanks for fluttering by!

Wednesday, September 25, 2019

Keeping Christmas {Wishing you sweet Joy}


It's the 25th; time for September's installment of the Keeping Christmas Blog Hop! As soon as Christmas hits the Instagram feed, you know things are getting serious! LOL! I've hesitated sharing my Keeping Christmas posts on Instagram for fear of them looking out of place, but that is no longer the case! And...I have officially started listening to Christmas music....for crafting, that is! Here is the list of the other designers' blogs so make sure you pop by each one of them to see what they've created this month!
Broni Holcombe (off this month)

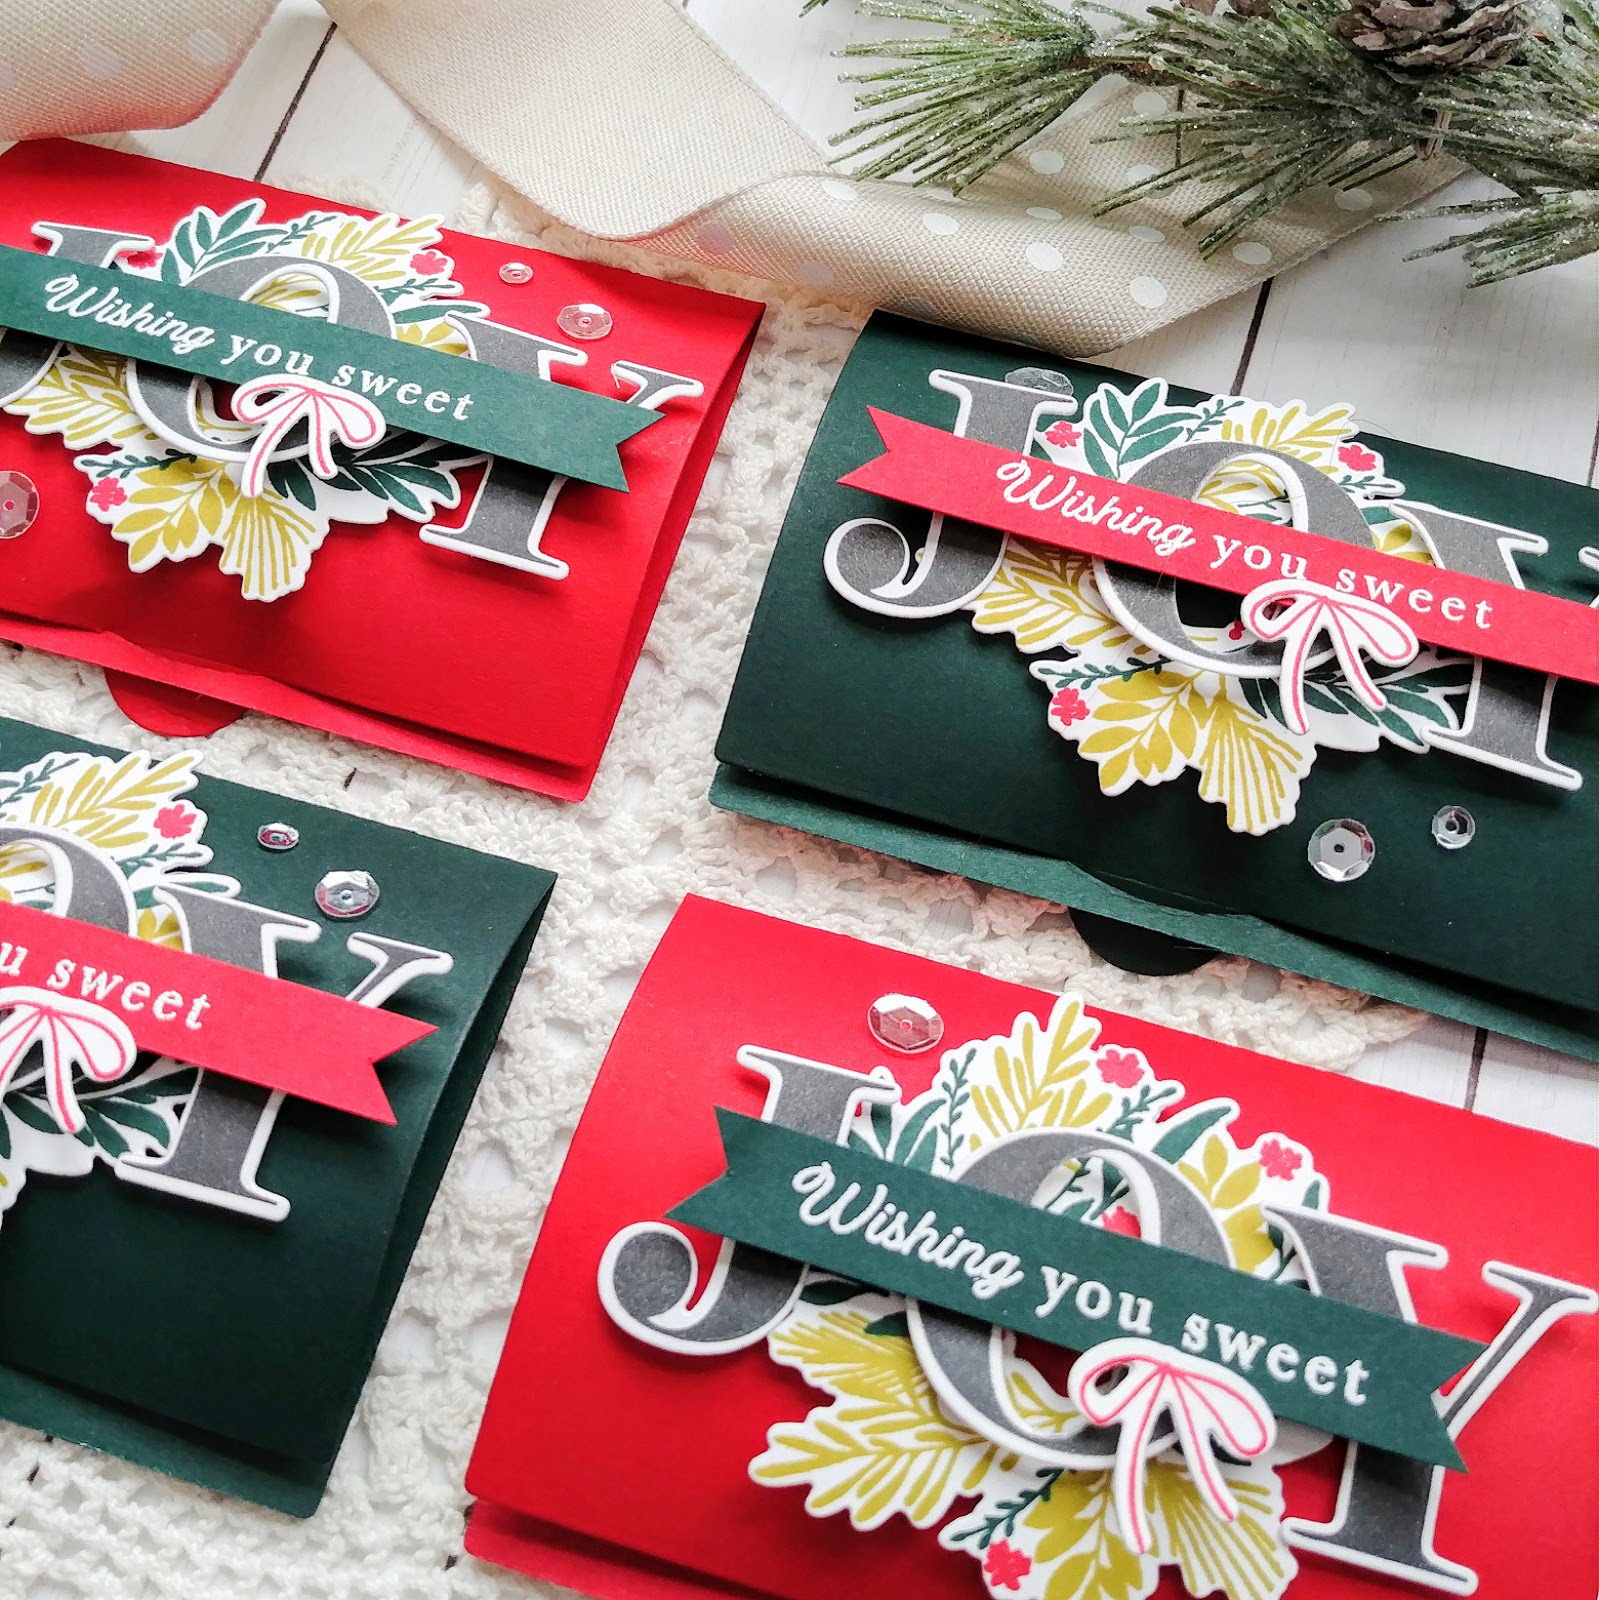
I'm obsessed with the new Seasons of Joy stamp set and had so much fun making THESE projects for the release! I decided to make a set of four gift card holders using the same idea, but tweaking a few things here and there.

To begin, I die cut the wreaths using the Season Of Joy die collection and then used my MISTI to stamp all of the different images to create the multi-colored wreath. The thing I love about this set, is that is also has a one step wreath image included in the set for those quick projects. I'm sure I'll be needing that one the closer we get to Christmas! LOL!

I also die cut the JOY letters and stamped those with black ink. The sentiments are heat embossed in white onto sentiment strips to really make them pop! I used this particular sentiment because I may use these gift card holders to hold a gift card to a local sweet shop, so that will be perfect!
I used the new Tag Creations: Modern Gift die collection to die cut the four gift card holder bases. I used Pinefeather and Pure Poppy cardstock and cut two of each color. Once that was done, I did a little ink blending around the edges using coordinating ink and the fabulous Taylored Expressions Blender Brushes. I love that there is a brush for each of the rainbow colors!


At this point, I was all ready to get everything assembled. I used foam squares in two sizes as well as some liquid glue to get everything adhered. 

I'm 100 percent sure I'm not folding these right and I absolutely 100 percent don't care, either! LOL! I really like the rounded edge that they have; more like a gift. I also love that they have a hole on the back so they can be used as a tag if need be.

Last year I gave quite a few actual gifts with a gift card attached, so these will be perfect for those situations! Or...they don't have to be attached to anything at all.

These worked up pretty quickly, which is always a plus! I hope you all get a chance to get started on your holiday crafting! Thanks for fluttering by!

Sunday, September 22, 2019

SugarPea Designs STAMPtember {Merry Christmas...from our home to yours}

Hello and welcome! I'm thrilled be sharing yet ANOTHER amazing Simon Says Stamp collaboration for the STAMPtember event with SugarPea Designs! This new set is called "Nordic Village" and works so well with all of the NEW RELEASE products! I couldn't resist adding quite few! As always, these are limited edition sets and when they are sold out, they are GONE! This is one you definitely will NOT want to miss out on! This one will stretch far beyond Christmas and will pair perfectly with the Warm Welcome stamp set.


Of course I'm in full blown Christmas crafting so I was eager to use the Christmas sentiment paired with "From Our Home To Yours"! This card was a joy to make even if I did run into a few snags! LOL! I'll explain my design process and hopefully with some of my tips you can avoid any of my mishaps! ha ha!

As I mentioned earlier, the name of this set is called "Nordic Village". The new Geo Snowflake Stencil has a Nordic feeling to it, so I decided to use it for my background. If you recall, I used the same stencil and technique on THIS card, but kept it a little lighter for a more "daytime glow"! LOL! To begin the background, I prepared my work surface by putting down a large piece of grid paper and sprayed my stencil with Pixie Spray. I let that set while I got my panel ready to go. Once I had it measured and cut, I placed it on the grid paper and then carefully lined the stencil up where I wanted it. The Pixie Spray really grips the paper so that you can blend your ink and Glimmer Paste easily without any fear of it coming up. I used Tumbled Glass and Faded Jeans Distress Oxide ink to blend and then Moonstone Glimmer Paste over the top.
I set the panel aside to dry so I could clean my stencil and tool. I like doing this step first so that it can dry while I am working on the rest of the elements. After that was done, I got to work creating the snowdrifts that are at the bottom of the card. I did this by die cutting pieces of white cardstock using the Card Front Element Builder SugarCuts. At this point, you will want to stamp the "Merry Christmas" portion on the snowdrift. I decided when my card was COMPLETELY finished that I wanted it here and ended up ruining it. I carefully removed it and made a new panel, SOOOOO....do it at this point rather than later! ha ha!

After the snowdrifts were done, I set them aside and die cut the pieces for the Snow Globe. I die cut the outer circle portion three times as well as the base and the portion that has the white embossing on it. I stacked them together and adhered them using liquid glue. I also cut an additional snowdrift portion for the inside of the globe just like I did for the bottom of the card, but once it was cut, I used the circle portion of the snowglove to make sure it would fit nicely inside.

I stamped the images from the "Nordic Village" stamp set using black ink and then colored them with my Copic markers. I did minimal stamping to give them a light and bright look to keep the card cohesive. I used the coordinating die cuts, which you can purchase in the bundle on Simon Says Stamp's website. The Holly leaves and berries are from the new Christmas Characters SugarCuts. I added some tiny sparkling sequins to the center of each berry.

I also die cut the large green panel using the Card Front Element Builder SugarCuts. At this point, the stenciled panel was nice and dry and it was time to get the card put together! To begin, I added the snowdrifts to the bottom. The rounded portion is layered directly onto the stenciled panel using ScorTape. The glitter surface from the paste makes regular adhesive tricky, so make sure you use something strong. I added the other piece with the "Merry Christmas" sentiment using foam squares for dimension. Then I added the circle portion of the snowglobe at the top.I wanted to make sure I had enough room so I did that first. I was able to add the grey base easily after that. I added the extra snowdrift inside the globe, but I tucked it down a little bit so that you wouldn't see the harsh line where it was die cut at the bottom. The houses and trees were tucked here and there using glue and foam squares. A few sparkling clear sequins finish off this fun design! Thanks for fluttering by!

Saturday, September 21, 2019

Saturday Showcase {Love and Kindness}

Welcome to this week's Ink to Paper Saturday Showcase! Today a few of have created some new cards and projects using the Love and Kindness stamp set! I've been dying to use it with the cute frame that is included in the previously released It's a Sign: Beautiful stamp set. I love the trendy look that it gives this fun sentiment. I actually realized that this card goes perfectly with this week's Inspired By Challenge. All of those elements just really seeped into my head! LOL!


To begin these two cards, I die cut the frames using the It's a Sign: Beautiful die collection and then stamped them with Cocoa Bean ink in my MISTI. I heat embossed the sentiment using white powder onto True Black cardstock. I used the It's a Sign: Love & Kindness die collection to die cut the embossed images. I set those aside and got to work on the leaves.

These leaves are from the AMAZING new Tag Creations: Modern Gift die collection and are adhered to the sign using small pieces of foam squares. I also added a few sparkling clear  sequins for some sparkle and shine. This framed portion is added to and oval that is die cut out of Weathervane cardstock using the Geometrix Oval die. I really love the shadow effect if gives to the design.

All of this is added to 4 by 5 1/4 inch pieces of Bitty Big: Soft Stone pattern paper that are adhered to black top folding A2 cardbases. I love the style and font of this sentiment and it looks so nice inside these stamped frames! Thanks for fluttering by!


Thursday, September 19, 2019

Inspired By...L is for


Welcome to this week's Inspired By Challenge! I'm happy to be back after taking two weeks off because of the insanity that was my life! ha ha! 

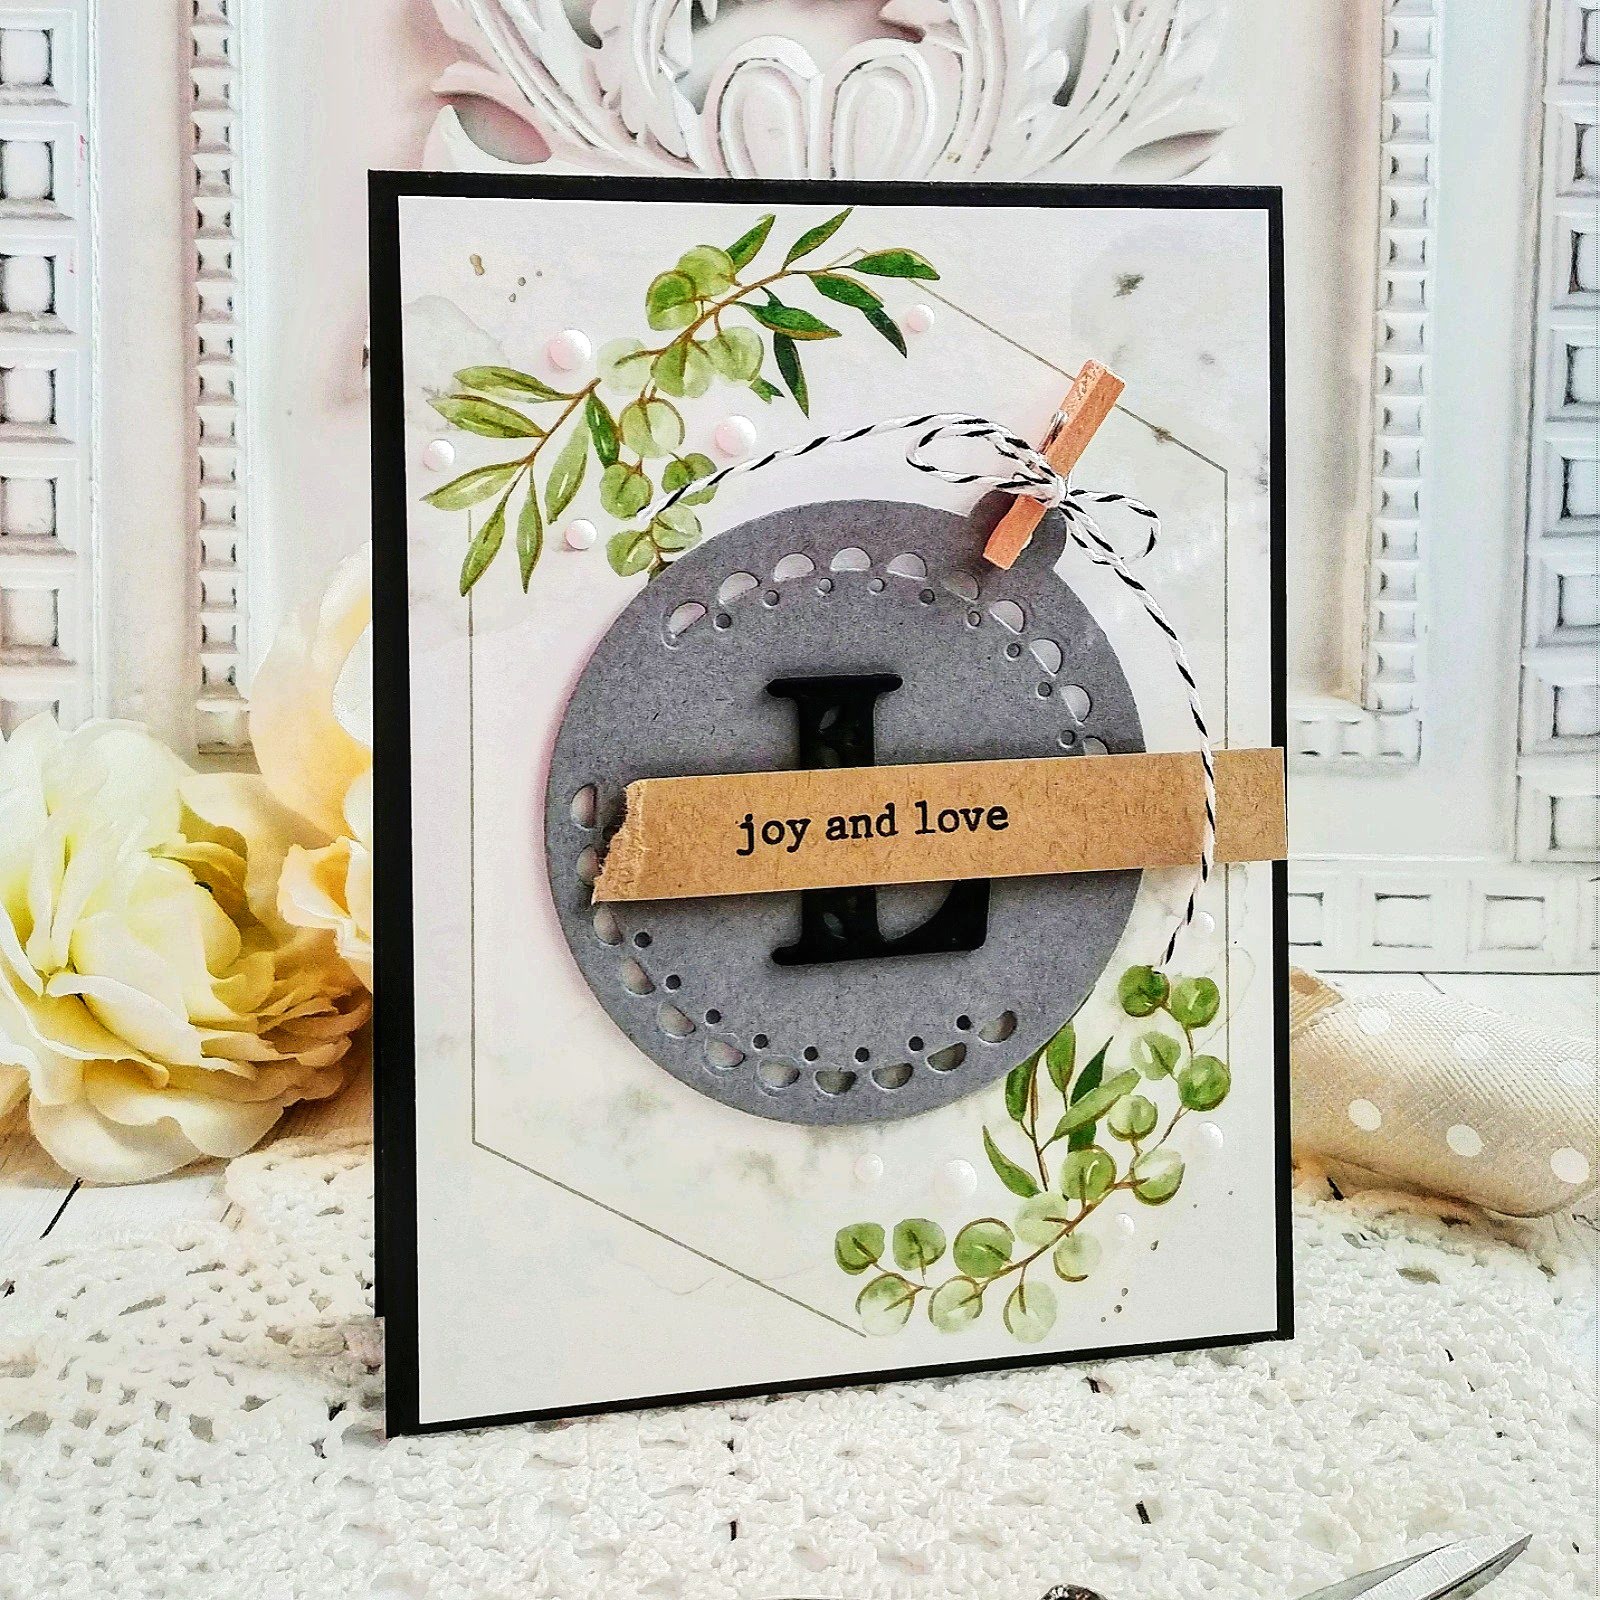
Here is the inspiration photo for this week. I was inspired by pretty much all of it! Of course the L...and for me, L is for "joy and love" and as always, Lunceford! I use the letter L in a lot of my decorating so it was fun to use it on a card as well! I was also inspired by the greenery tucked in the metal bucket/basket with the twine handles. I used the shiplap look for my card photography, so does that count? LOL!
I was thrilled to finally have an excuse to use the awesome Eucalyptus Fantasy washi tape ; it was the perfect choice to use for the touch of greenery in the photo. There is a coordinating Eucalyptus Fantasy stamp set and coordinating die collection. The awesome thing about the die is that is can die cut the images from the washi tape, all except the portion of the tape that I used today! LOL! This portion doesn't have a need to be die cut, but the other sections, do! Anyway, I was excited to use it!
I added the washi tape panel to a standard top folding A2 black card base using foam squares. I created the tag by die cutting the Essentials Classic Tags with fillable elements out of grey cardstock. I used the little dots and scallop portion of the "fillable" elements in the tag set to mimic the look of the galvanized bucket/basket in the photo. 
I die cut the "L" three times using the Kelly Alpha  and glued them together using liquid glue. I added it to the center of the tag using liquid glue as well. Once that was done, I added a tiny clothespin to the hole on the tag that is tied with black Baker's Twine.
The "joy and love" sentiment is from the Floral Vase stamp set and is stamped in black onto a strip of Kraft cardstock. I had stamped it a few other times trying to the "finish" just right, but in the end a ripped edge won! Go figure, right? My daughter said,"Mom, did you see that the edge is ripped?" Yes, yes, I did! She didn't understand the aesthetic I was going for, but oh well!
I added some white Nuvo drops around the greenery in the washi tape for some added detail and interest.
I had a lot of fun putting this card together. I never would have made it if it wasn't for the challenge! I hope to see your card in the gallery this week! Thanks for fluttering by!

Wednesday, September 18, 2019

SugarPea Designs Mix It Up Challenge #59 {Holding you in my Heart}

Hello and welcome! I've got a post over on the SugarPea Designs Blog today and I'll be sharing here as well! It's my turn for the current Mix It Up Challenge and I chose to use both sides of the challenge; sketch and photo/colors and lots of beautiful New Release products!
I picked my cardstock colors from the swatches in the photo and followed the sketch better than I usually do (wink, wink). 


The current status of my card stash is as follows: Sympathy-0; birthday-slim pickins, baby-sad, everything else-explosive! So...with that in mind, I decided to create a Sympathy card using the challenge! The new die cuts from the Floral Pocket Tag were the perfect starting point for today's card! I die cut quite a few flowers and leaves so I would have a lot of options using the colors in the challenge. 
I die cut the blue panel using the Card Front Element Builder II just to get some of the stitched dots along the diagonal edge at the top. Once that was done, I used the new Leaf Cover Plate to dry emboss the blue panel. I am obsessed with the deep, beautiful impression it leaves; it reminded me of the bird's feathers in the inspiration photo, too!


I also die cut a 4 1/4 by 5 1/2 inch piece of Soft Stone cardstock using the same stitched border from the Card Front Element Builder II. Once that was done, I used the amazing new Buffalo Check Background Stamp to stamp the pattern. I love the feel that the printed plaid paired with the embossed detail gives the card!


I attached the blue portion over the plaid panel using foam squares. I die cut a white circle using the Zig Zag Stitched Circles SugarCuts and added that using foam squares as well! At this point, I was ready to add the sentiment and the flowers. I stamped the sentiment using the Heartfelt Sympathy stamp set and then attached it to the circle with foam squares. I added the flowers and leaves here and there until I liked the composition! I added some white Nuvo drops here and there and added a trio of sparkling clear sequins for some shine! I know I will be using these die cut leaves and flowers A LOT! LOL! Thanks for fluttering by!
P.S. I hope to see your card in the gallery!


Sunday, September 15, 2019

Taylored Expressions {Come Let Us Adore Him}

Happy Sunday, friends! I hope you have all enjoyed your weekend! Things have been a whirlwind over here; lots to make, lots to share! I feel like I've been on creative high-speed this month; I decided to count up all of the projects I've made so far this month. I asked my husband to guess and he guessed twelve. Ummmm.....no, that is not correct. The actual number is 55...FIFTY FIVE!  That is INSANE!!! I finally got my desk and stamp area cleaned up after the whirlwind that has been September and it's only the 15th! LOL! Anway, things are slowing down, which will be nice so that I can actually enjoy the fall that is creeping in and get some decorations up in my house!

I'm thrilled to be here today sharing a few Christmas projects I made using some of my favorite Taylored Expressions products, including the amazing Taylored Expressions Blender Brushes! If you'll recall, these came out back in June and were sold out within hours. The good news is that these will be shipping soon and are available for preorder using the link above! I promise you will NOT want to miss out on these this time around. I use these at LEAST once a day, if not more and they truly are fabulous. Long gone are the days of foam blender circles that tear and wear away while blending!

To begin these two designs, I stamped the Twiggy Background using my MISTI for a nice, crisp image. Once that was done, I used my green blender brush to blend in the green around the edges. The blender brush set comes with one brush for each color, which is so nice! I haven't cleaned mine once since June. If I'm worried about switching from a darker shade to a lighter one, I just rub it over a scratch piece to get any remaining ink off of the brush, but it only takes a few strokes.

Once the blending was finished, I die cut the ovals and got to work on the focal images. These focal images are from the Let us Adore Him stamp set and are so fabulous! I love that I can create on trend cards using the true message/meaning of Christmas! I'm so thrilled to add these two to my ever-growing stash of Christmas cards!

I added the two focal image ovals to the card fronts using foam squares for some dimension. I also couldn't resist adding a little holly sprig that I picked up at Hobby Lobby last year. It is added to the card using hot glue. This particular card won't be able to be mailed without extra postage, but I send a lot of cards to school for teachers and around the neighborhood with neighbor gifts, so this will be perfect for that!

The blended panel measures 4 by 5 1/4 inches and is adhered to a standard top folding A2 red card base using some additional foam squares. I ended up by stamping two of the "O come let us adore him" ovals so I put one of them inside of the  card that says "Merry Christmas". I love adding sentiments or images to the inside of my Christmas cards for a professional look! I had a lot of fun working on these two cards! Thanks for fluttering by!