Thursday, April 11, 2019

Inspired By....Rainy Day Party {I'm here for you rain or shine}

We've had a lot of rain lately, so this card is just perfect for the current conditions! LOL! My kids keep complaining each day as it rains! I just keep saying "April showers bring May flowers" which they don't like one bit! Ha ha! Today's card is for this week's Inspired By Challenge which is such a fun one!

No photo description available.
When I saw the cute cloud plates, they reminded me of Reverse Confetti Clouds! I decided to pull out the perfect set for this challenge; the Sealiously stamp set! I also paired it with the Cue the Confetti 6 by 6 paper pad because the dots reminded me of the cute favors in the inspiration photo.

To begin this design, I die cut the Stitched Note Frame out of white cardstock. I used the largest frame to place over the polka dot paper using foam squares and I used the note portion as the anchor for the cute seal.

As I mentioned earlier, all of the images for the card are from the Sealiously stamp set and I stamped and then colored them using Copic markers. I used the coordinating Sealiously Confetti Cuts to die cut the images.


The sentiment is heat embossed in white onto black cardstock and placed across the card using foam squares. Once I had all of the pieces in position, I spritzed the clouds with some blue ink using my color spritzing tool. I also added a few Nuvo drops to the clouds for some added rainy day detail. The seal and the umbrella got a quick coating of Nuvo Crystal Glaze for some shine and detail. I hope you get a chance to join us this week! Thanks for fluttering by!

Monday, April 8, 2019

Pinkfresh Studio April Essentials Release Blog Hop


Hello and welcome! I am so thrilled and honored to be participating in the Pinkfresh Studio April Essentials Release Blog Hop! I've got some fun projects to share with you today using many of the new essentials that you are sure to fall in love with! These new essentials that I have used today are staples that I personally have already fallen in love with and will be used often as I reach for them again and again! This post contains a lot of information and photos, as well as links to the rest of the AMAZING designers that are participating in the hop so sit back and enjoy!

Pinkfresh Studio Blog
Alix Davis
Caly Person
Cathy Zielske
Emily Midgett
Enza Gudor
Erum Tasneem
Heather Hoffman
Ivana Camdzic
Kelly Griglione
Laura Bassen
Lea Lawson
Natasha Valkovskaya
Rebecca Luminarias
Svitlana Shayevich
Yoonsun Hur
Zsoka Marko

Also, Pinkfresh Studio will be giving away the FULL April Essentials release on the Pinkfresh Blog and Instagram! Wahoo! I will also be giving away a $25 dollar gift card to the Pinkfresh Studio shop to one lucky winner who leaves a comment here on my blog!
The winners will be posted on Sunday April 14th on the Pinkfresh Studio giveaway page! You MUST check that page and claim your prize within two weeks!

Also, there will be a really cute gift with purchase! It is this darling house die that is so versatile for so many designs. This will load directly in your cart, easy peasy!

We will also be offering free/discounted shipping from April 8-11th on orders $50+. You must use the code APRESSFREESHIP50. Shipping is free in the USA, and $5.50 off for our International friends.
I gasped when I saw the gorgeous new Classic Edgers die cuts and couldn't wait to put them to use! It was hard to decide which one I like best, so I decided to just go ahead and use 4 out of the 5! LOL! I actually used a few of the other new essentials as well, one of which is the beautiful new Braided Ovals die set. These, paired with the edgers, set the stage to create a classic and clean set of note cards. I also used the Oval Foliage stamp set which complements these new essentials so perfectly.

To begin these notecards, I die cut four pastel colored pieces of cardstock using the new Stitched Rectangles to give that polished and professional edge that I am always looking for in my designs. I especially like using dies like this for CAS designs, because it adds just the right amount of detail without a lot of effort!


I die cut the white rectangle piece using the Stitched Rectangles die set as well. It comes with both clean cuts and detailed cuts, which I love. I was able to add the detail from the Classic Edgers to one side of each of these rectangles, choosing a different design for each one. I have quite a collection of edger type dies, but none of them have the sweet details like these! I will be using these quite a bit, I can tell! 

The Braided Ovals were also die cut from white and they set the stage perfectly for the gorgeous foliage and sentiments from the Oval Foliage stamp set. I am so happy with how these cards turned out!
 My second set of projects uses the new Classic Words dies that I will also be reaching for again and again. I don't own any word dies that also include the "shadow" portion, so I am so excited to have these! 
To begin today's designs, I used some Distress Oxide ink to create two blended panels that I die cut using the new Stitched Rectangles as well as the previously released Oval Foliage Die set. I have seen some of the Pinkfresh designers use this die set recently and I have fallen in  love! I am so thrilled to have this; I just love the detail it adds to my designs! This set the stage for the white "hello" and the vellum shadow. I used the bright and fun fruit from the Fruitastic stamp set to complement the words.

For this project, I used the Braided Ovals dies to create coordinating tags to go with my cards. The sentiments from the Fruitastic set are so unique and unlike any I have seen on the market previously! I love when a stamp set fills a void that I have in my collection, which sometimes seems impossible based on the magnitude! LOL!
These braided ovals nest nicely inside the foliage on the card, which is another design idea I can't wait to try, so stay tuned for that! 

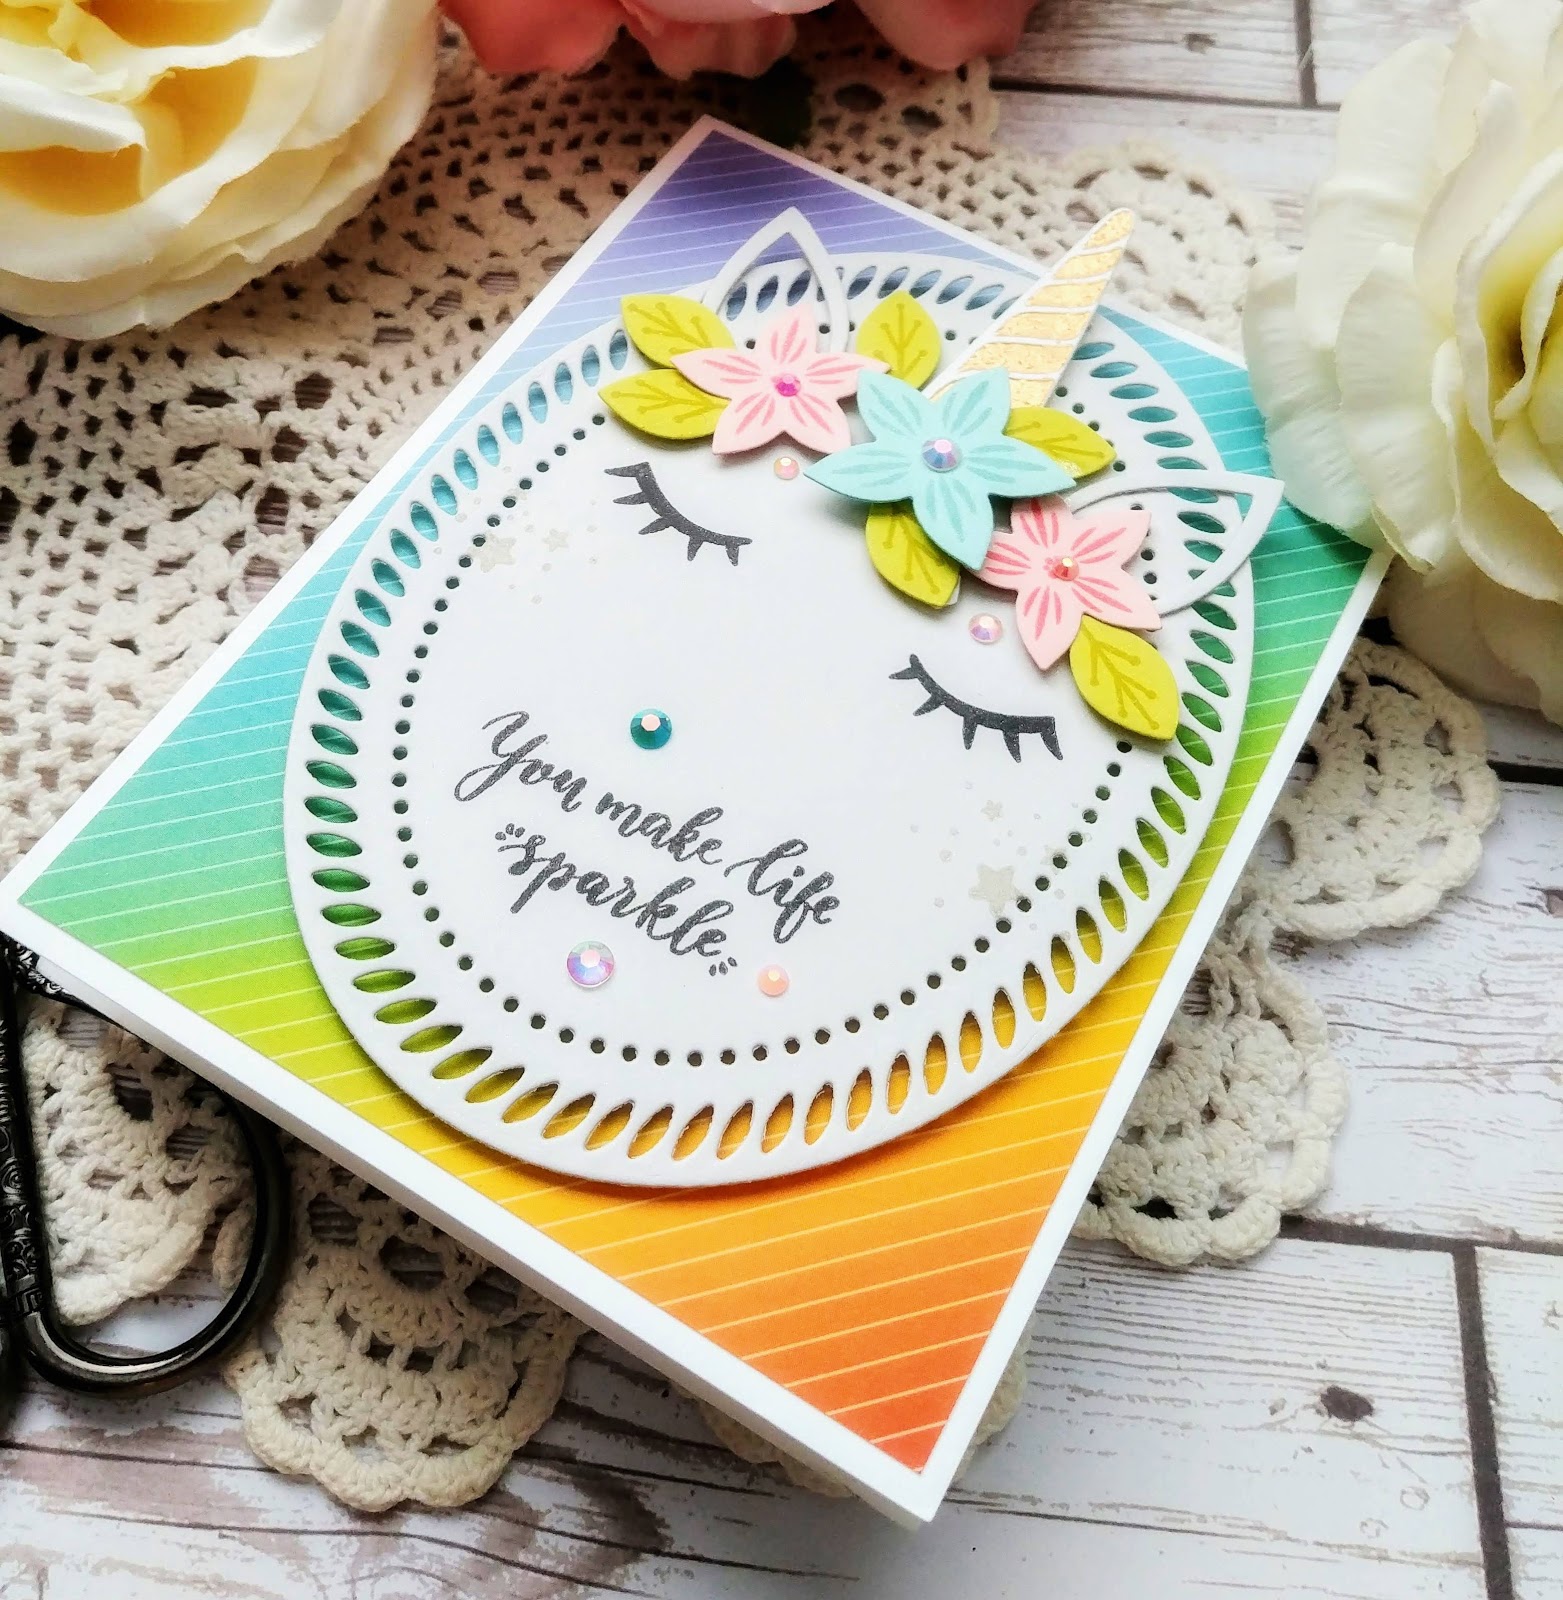
My final project uses the Braided Oval again, but this time I used the larger of the two to showcase this amazing unicorn. This is the first Pinkfresh Studio stamp set that I owned and it is so much fun! It is called Magical Unicorn and I just love it! I normally just make the unicorn on a rectangle piece, but stamping it on the oval really gave the unicorn some shape and extra dimension. 


This card is very straightforward, but I had so much fun making it and adding in all of the flowers and sparkles. The horn is heat embossed in gold, which I just love! I had so much fun working on all of these projects for the release! Don't forget to leave a comment to be eligible for the 25 dollar gift card! Thanks for fluttering by!


Reverse Confetti Blog Hop

Happy Monday, friends! Today is the 8th and that means it is time for the Reverse Confetti Blog Hop! Today I'm sharing a couple of bright and springy cards using some of the new release products! I've really gotten into the habit of making multiples of everything that I am working on, which I love! I'm slowly building my stash back up and it feels so good! Before I dive into the detail of these two cards, make sure you stop by the rest of the designer's blogs to see what they've created! I know you won't be disappointed! I always love seeing what everyone has come up with!

I haven't used the new Hatbox Florals stamp set since the release and I've been itching to color these beautiful flowers. It is very therapeutic for me to sit and color images and listen to music or just think. I actually colored two of the hatbox images as well, but didn't end by using them, so I'm sure they'll end up on a new project in the near future.

 Once the images were colored, I used the coordinating Hatbox Florals Confetti Cuts to die cut them. I had made these "hello" pieces when I created THESE cards, but didn't end up by using them so I was thrilled to see how well they worked with the colored flowers. I die cut the Thanks Word Duos, which includes the "hello" twice, once out of white cardstock and once out of the striped pattern paper which is from the Pattern Play 6 by6 pad.
I'm really loving the new Stitched Note and Frames Confetti Cuts. They easily add so much detail to your projects!
The sentiment for this card is from the Word Duos stamp set and is heat embossed in white onto grey cardstock. I love the softness that it brings to the card.


The mint and purple pattern paper is from the newly released Darling Dots pattern paper pad. I love all of the different colors that are included in this pad and they are perfect for all of your spring projects.


I used the "thinking of you" sentiment, which is also from the "Word Up" stamp set, linked above. Making multiples of cards gives you the opportunity to switch up the sentiments to create a variety of different cards. I added a few sparkling clear sequins to finish up these two cards. Thanks for fluttering by!

Saturday, April 6, 2019

Saturday Showcase {Brighter days are ahead}


We're just finishing up our nice and relaxing Spring Break week! I hope you've all had a nice week as well! I've got a bright and cheery card to share with you today that should bring some sunshine to your day! Today a few of the Papertrey Ink gals are sharing some projects using the Latin Motifs stamp set and coordinating Latin Motifs Dies. We all face difficult times in our life, and what better way to cheer someone up, than with a bright rainbow! The Latin Motifs stamp set is begging to be brought to life with vibrant and colorful stamping!
I knew I wanted to use the die cut that creates the Papel Picado banner pieces and use a lot of vibrant color! So, I created a blended panel using Distress Oxide inks; Festive Berries, Spiced Marmalade, Squeezed Lemonade, Twisted Citron, Salty Ocean, and Wilted Violet! If that doesn't sound like a celebration, I don't know what does! LOL! I die cut as many of the banner pieces as I could from the panel. 

In my original idea, I had planned on stamping all of the flowers separately using the same bright colors, but then I thought,"Why not die cut the flowers from the same blended panel for some multi colored flowers?". I'm so glad I thought to do that! I was able to die cut ALL of the flowers from the same panel. Once they were all cut, I added the black detail image over the top. 

I also stamped the pattern underneath the Papel Picado banner using the same ink as the blended panel. I didn't clean the image as I went from color to color to hopefully bring in some of the blended look. I really like how it turned out.

The sentiment is stamped in black at the bottom. I like having cards like this on hand for when someone could use a pick-me-up! I also added some rainbow gems to the centers of some of the flowers, some of the rainbow pattern underneath the banner and around the sentiment. It really gives the card some added sparkle! I had a lot of fun working on this design. I hope you all might try creating a card using one blended panel and see what you come up with! It was definitely an unexpected result, but I really like it! Thanks for fluttering by!

Friday, April 5, 2019

Just "Bee"cause you're simply AMAZING!

I thought it would be a good time for this cute Big Bear to come out of hibernation! I just love using this stamp set and he looks so cute wearing his spring scarf with a beautiful bouquet of fresh flowers! I always love using this stamp set and it pairs so well with the new Word Up stamp set and the Happy Bee Day stamp sets.

If you've stopped by this week, I shared two "hello" cards and 4 other cards for a small stash of cards I am working on and these two cards will be going to the same place. To begin, I die cut the Hex Panel Coverpanel twice and then did some ink blending using Wild Honey Distress Oxide ink. I recently got a storage system for all of my Distress Oxide inks and I am just loving having them all organized and labeled! Once they were all blended, I spritzed them with Shimmer Spray and set them aside to dry.

In the meantime, I stamped the line art and colored everything using Copic markers. The bear and bouquet is from the Big Bear set, which I linked at the top, and then I die cut them using the coordinating Big Bear Confetti Cuts. The bees, floral cluster and "bee" cause sentiment are all from the Happy Bee Day set and are die cut using the Happy Bee Day Confetti Cuts. I didn't have enough of the lined pattern paper to put behind both of the coverpanels, so I just left one white. 

I layered the bear and bees onto a piece of white cardstock that has been die cut using the Stitched Hex Tag Confetti Cut. I also die cut half of a tag out of  some of the Darling Dots pattern paper to give the card some extra color and pattern. The "you are simply amazing" sentiment is heat embossed in white and placed below the other sentiment! I also added some sparkling clear sequins here and there as well as some Nuvo Crystal Glaze on the bears' noses and the centers of the flowers. Thanks for fluttering by!

Thursday, April 4, 2019

Inspired By...Speckled Eggs {Just for You}

It's Thursday and that means there is a new Inspired By Challenge! I've got four cards to share with you today, each one different, but similar! I'm still working on the small stash of cards that I mentioned yesterday and these four will be going there as well.

I use a lot of bird's nests, bird images, ceramic birds, etc.  in my home decor. People who come to my home really know that I like birds! LOL! Anyway, when I saw this week's inspiration photo, I realized how lacking my stamp stash is in bird/nest/egg images! I remembered that the Cloche Quarters: Spring Fillers stamp set had a little nest and eggs so I pulled it out for today's cards.

To begin, I ran all of the Cloche Quarters: Spring Fillers die cuts through my machine and then got to work stamping everything. I also die cut the bases and glass pieces using the Cloche Quarters Die set and stamped those with the Cloche Quarters Stamp Set. I chose all kinds of bright springy colors! 

I used the Shape Shifters Oval 1 die as a base to build all of the spring vignettes. I also used some Aqua Mist ink to do some ink blending to bring in the speckled egg look. I also used my color spritzing tool to add some speckles around the perimeter. 

It was so fun to arrange all of the different elements to create these tiny paper vignettes. I used a lot of foam squares to get a lot of dimension.

I used the Pretty Pastels 8 by 8 patterned paper pad for all of the backgrounds. This is one of my all-time favorite pattern paper pads! I just love using it in the spring! I hope you'll get a chance to  join us this week! Thanks for fluttering by!

Wednesday, April 3, 2019

SugarPea Designs Mix It Up Challenge

It's a new month and that means there is a brand new SugarPea Designs Mix It Up Challenge! For those of you ready for some spring color, this is the challenge for you! I decided to use the cute Wagon Wishes stamp set paired with the Sending Sentiments for today's card. I felt like the flowers just bursting in the wagon would be perfect for the challenge!

I actually made 2 cards for this challenge; I am working on making a little stash of cards for an upcoming project that I am working on. I don't know if you remember, but last summer a few of us from the neighborhood made a bunch of cookies and went around to the houses where we didn't know who lived there and dropped off the cookies and a card. I am doing that again in a few days, so I am working on making a few cards to go along with the cookies.

To begin these cards, I did some Distress Oxide ink blending on panels measuring 4 1/4 by 5 1/2 inches. Once that was done, I spritzed them with water and Shimmer Spray. I also die cut the Large Striped Coverplate out of white cardstock and glued it over the top of the panels. As you can see, I decided to do one with the coral at the top and one with the coral at the bottom. I think I like the one with the coral at the top better, but I think both of them turned out nice.

I stamped the wagon images using black ink and colored them with Copic markers. I used the coordinating Wagon Wishes SugarCut to die cut the images. Before I added them to the card, I stamped the "sending" sentiment in black. 

I also stamped the "a little hello" sentiment, which is from the Wagon Wishes stamp set at the bottom in black ink. I added some Nuvo Crystal Glaze to the centers of some of the flowers for some added detail and dimension. I hope you get a chance to play along this month! Thanks for fluttering by!