Monday, November 6, 2017

Merry Monday #264 {Christmas Cheer}

Welcome to this week's Merry Monday Christmas Challenge! Today Marcia has asked us to create cards using Kraft and Red! I realized that the majority of the cards I have made for this challenge already have used a lot of Kraft and Red, so I was up for the challenge! LOL!

You can read about the rules for the Challenge HERE and see what the other designers have come up with! There are some super cute cards over there so I definitely suggest checking it out!

I've mentioned on more than one occasion the pile of stamps that I got for my birthday...today's card uses one of those sets. I used one of the included sentiments on my card two weeks ago, but I have been itching to use these gorgeous Poinsettias and I knew this week's challenge would be the perfect excuse! To begin, I stamped quite a few of the Painted Poinsettias in Pure Poppy Ink. These are a 3 step stamp, but I opted to just use the bold flower image and the vein image. I embossed the veins in gold AFTER I die cut them so that I wouldn't squish the raised quality. The centers are also embossed and added to the flowers using foam squares.

The leaves are stamped in Antique Linen Distress Ink with gold embossed veins. I really like how they turned out. I'm thinking that I will make some white Poinsettias using this same color combination on a different card. 
The little curly bits are die cut out of gold glitter paper. I actually googled "Poinsettia images" because I was unsure where these are on a real flower. I couldn't find an image with them, so I just put them where I liked! LOL! The sentiment is embossed in gold as well onto a strip of Pure Poppy Cardstock. I had originally planned on having a lot of flowers over the card, but in the end I only used three. I added another one to the inside with a different greeting. The Woodgrain background adds some extra detail and dimension. Once the entire card was put together, I spritzed it lightly with some Shimmer Spray. A few burnished gold sequins finish up this design. Thanks for fluttering by!

Saturday, November 4, 2017

Dedicated to Dawn Papertrey Ink Blog Hop {New Little Bundle}


I'm so thrilled to be participating in today's special Papertrey Ink Blog Hop for papercrafter and product designer extraordinaire, Dawn McVey! You can read about all of the details HERE. She has just undergone her transplant surgery and it has been so wonderful to see her smiling face post-op! She is such an inspiration to me as a papercrafter and a person! She is beautiful inside and out and I am fortunate to be able to call her a friend! That is why I love this industry so much...I have made lots of amazing friends!
We Love Dawn

 We are showcasing some of Dawn's amazing products that she has designed and I am a HUGE fan, so it wasn't hard to look through my stash to find some goodies to create a baby card. Most of the participants are most likely making cards FOR Dawn, but today's card is for another friend. I will be making another card just for her later. Dawn embodies everything that involves kindness and charity, sharing handmade kindness and love, so I didn't think she'd mind.
To begin, I chose to use Gran's Garden to build a pretty floral arrangement. I stamped out all of my images and then cut them using the Coordinating Die Cuts. I already had the Made With Love stamp and Tag Die out from making a project which you can see HERE, which is also dedicated to Dawn. I thought that the pretty flowers would look nice built on the tag base.

The tag is threaded with some Aqua Mist Stitched Ribbon and then tied shut using a snippet of Rustic Cream Button Twine and a Button. I also added some of the polka dot images from Made With Love at the top of the vellum using Fresh Snow ink.

Another one of my go-to sets for babies is the Boutique Borders: Baby mini stamp set. I just love this particular sentiment because this gift is for a mommy-to-be before she delivers her baby. I Die Cut the label and then stamped the sentiment onto a strip of Stamper's Select White Cardstock using grey ink. The label portion is embossed in silver for a professional look. I popped everything up using foam squares for some dimension. I spritzed the entire tag with some shimmer spray for shine.

I layered the tag onto a piece of Aqua Mist Chicken Scratch Gingham paper with a vellum overlay. I also did some zig zag machine stitching to add to the handmade charm.

You can see how the tag coordinates with the handmade items I made for the baby. If you'd like to head to my sewing blog, Thimbles and Thread, you can see all of the other handmade items I made as well.
Here is a quick peek at the "Baby's First Year" flip booklet that I made as well.


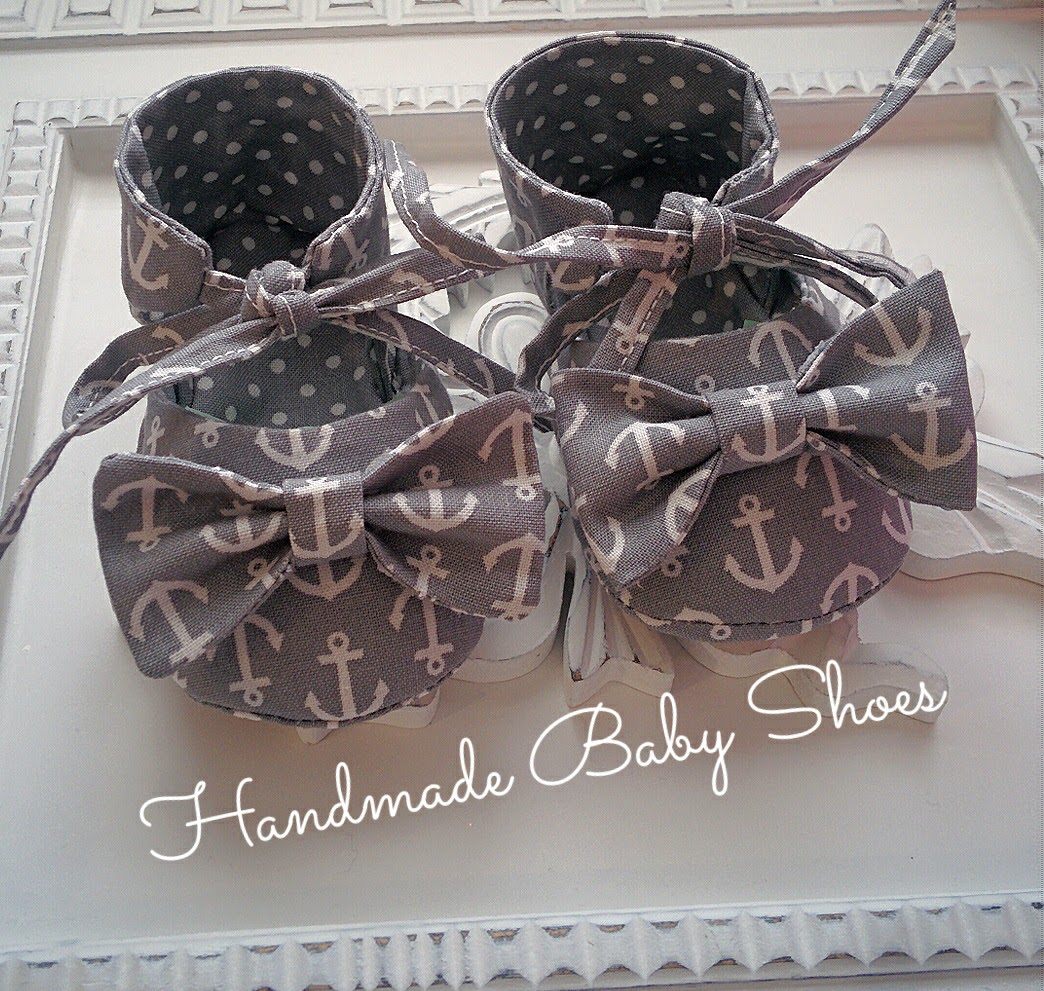
I couldn't resist sharing the shoes that I made. I just love how they turned out! Thanks for fluttering by!


Tuesday, October 31, 2017

Color Throwdown #467

I'm so excited to be helping out for this week's Color Throwdown Challenge! It's one of my favorites and I love participating when I get the chance! You can check out the challenge HERE. I have two cards to share with you today;same colors, different feeling!  Scroll down to see the second card.

For my first card, I sponged some Peacock Feathers distress ink onto a piece of Bristol paper and then spritzed it with shimmer spray.  While that was drying, I die cut the So Thankful for You out of white paper. I die cut some additional pieces to stamp using the So thankful for You stamp set in the colors used in the challenge.
After that was done, I added it to the sponged base and added a few sparkling clear sequins. 


For my second card, I went for a bright, summery combination. I absolutely love these flowers stamped in red! The sentiment is heat embossed in gold ink onto a piece of white cardstock. The Hawaiian shores cardstock has a circle die cut from the middle using a nestibilites die. I also used the Wood Grain Impression Plate for some added texture.
 I added some bright gold Nuvo drops here and there for some detail and shine! I hope you get a chance to play along using these fabulous colors! Thanks for fluttering by!


Halloween Treats

Happy Halloween! The big day has arrived and I am all set with my Halloween goodies I have been working on! It took me a while to get into the Halloween "feeling" this year and now that it is here, I realize that I didn't get my fill! Oh well! I had so much fun putting these projects together and I hope you find some inspiration!

I've shared these {Flutterby} Baskets before that you can see HERE and my Halloween post is HERE. For those of you who visit regularly, you may have seen my "Vintage Cherries" card collection last Spring and may remember THESE. They are seriously so much to make! I have plans to make some new card sets and baskets as gifts. You can see the cute little Candy Corn Treat Boxes that I shared yesterday peeking out. I made them for these baskets because I knew they would be perfect!

I wanted some quick cards to add to the baskets as well. These are 4 1/4 by 3 1/2 inches. I added some pattern paper that I picked up at Hobby Lobby and attached it to the front.

The black circles are die cut out of black paper and then stamped with and image from and old PTI set called Spooky Sweets II. I can only find the die cuts on their site now, which I don't own, so I am glad I just stumbled upon them. I guess the stamp set has been retired. I was thrilled to use some old Martha Stewart crafts dimensional stickers that my sweet sister gave to me a few years ago. They are the perfect quick accent to spice up my gifts.

The "Halloween Wishes" sentiment is also from the "Spooky Sweets II" set. I stamped it in black on a strip of orange paper.

These baskets are just as fun as paper projects because the fabric is SO cute!

I just love how cute the card look peeking out of the baskets.

I added some pom-poms to a few of the baskets and I have some left over to add to a few projects next year!

You can see a few of the things that I have tucked inside. I added more, but I wanted to show you all how cute the lining fabric looks inside! I will be taking these to school this afternoon as well as some caramel apples when I help with my 6 year old's party! Thanks for fluttering by!


Monday, October 30, 2017

Candy Corn Treat Boxes


The second I saw the Carrot Treat Box Die, I knew that I would #1 be buying it and #2 be making candy corn treat boxes. Some of you may remember the Watermelon Treat Boxes that I made in the Summer and of course I have made a few carrots which you can see HERE and HERE. But...I have been so excited to make CANDY CORN BOXES!!! Of course the die came out in the Spring, so you can imagine how hard it has been to resist making them and here I am a day before Halloween finally sharing them with you! LOL!

To begin, I die cut enough to make 4 boxes and got to work assembling them on one side. Once the two sides were attached, I got to work coloring the cardstock using Distress Oxide Ink. I just used washi tape as a mask and a guide to make the lines straight (well, straight-ish LOL!) They took some time, but it was quite fun getting them all blended. Once the inking was done, I assembled them on the final side to create the 3D shape.

I've had this orange and yellow polka dot ribbon for YEARS...like, I don't even know how many...and it just hasn't ever been the RIGHT thing on a project, until TODAY!! I was so thrilled to use it!

The tags are die cut using one of the included tags that come with the Carrot Treat Box Die. Once they were cut, I stamped them using a candy corn image from the Tiny Treats: Halloween stamp set and a sentiment from Spooky Smiles stamped in black. The candy corn images are colored using Copic and Prismacolor markers and then I added some Nuvo Glaze over the top. Very simple! I didn't want anything to detract from the "candy corn" vibe on this first attempt, but maybe next time I will add a few more colors and things to see if I like it! It's crunch time and I can't make any mistakes if I am going to get everything made before Halloween! LOL! Thanks for fluttering by!

Merry Monday #263 "Have a Holly Jolly Christmas"

Welcome to this week's Merry Monday Christmas Challenge! I LOVE this week's inspiration photo, in fact, I think I have it pinned somewhere on one of my Pinterest boards somewhere! LOL! Isn't it just lovely and inspiring? You can check out all of the rules and guidelines for the challenge HERE as well as see the gorgeous creations by the rest of the designers!

I had already been working on a hot cocoa project, which I will be sharing soon, and had pulled out Cup of Cheer as a possibility for that, but ended up not using it. I thought it would be perfect for today's card! All of my color cues came from the piece of plaid paper that I chose to use as the background which reminded me of the inspiration photo.


To begin, I cut a card base from Kraft cardstock and then layered the plaid patter paper over the top. I also added a strip of whitewashed wood that I thought worked nicely with the challenge. 


After that was done, I heat embossed the "Holly Jolly" sentiment in white onto a rectangle of True Black cardstock. After that was done, I smudged some Fresh Snow ink over the top using my fingertip. I just love chalkboard designs and follow quite a few chalkboard artists on Instagram. I love being able to recreate this look using stamps and ink! I also rubbed a little bit of ink around the edges as well. 

Once that was done, I die cut all of the cups, flowers and teapot out of Stamper's Select White Cardstock and stamped them in coordinating inks. It was so much fun arranging all of the bits and pieces here and there! Once everything was adhered to the card, I gave it a good spritz of Shimmer Spray for some sparkle. I added some Nuvo Crystal Glaze over the top of the flowers and the red cup and saucer. The finishing touches are a bow of black baker's twine and a few Sparkling Clear Sequins to frame the sentiment. I had a lot of fun putting this card together. I have been listening to Christmas music pretty much nonstop the last little while as I was preparing THIS and THIS project. I can't believe Halloween is tomorrow! It's one of my favorites! Thanks for fluttering by!

Sunday, October 29, 2017

Give me something good to eat!


It's the final countdown to Halloween and I still have so many things I need to make! I snuck snippets of time here and there to get these finished! I haven't made treat bags like this for a few years now, so I was excited to revisit them. I don't even remember the technical name for them but I'm 100 % certain I saw them on Splitcoast Stampers IONS ago...or maybe SU!?!? 

Anyway, they are always a fun way to showcase pattern paper. I ran to Hobby Lobby to replenish some ribbon I ran out of for another current project I am working on, and spotted this paper and I knew it would be PERFECT for bags like this!

 These will most likely be heading to the secretaries at my boys' school. I have plans for what I will be giving to the teachers, which I will be sharing before Halloween as well. The green tags were created using a few retired PTI stamps...some of my favorites. The spider web is stamped in black and then the creepy spider is heat embossed in silver. I sponged some Simply Chartreuse Ink around the edges for some definition.

The "trick of treat" sentiment is heat embossed in silver onto True Black cardstock. I really love how professional and polished a heat embossed sentiment looks.

The accordion medallions are created from some black and silver glitter specialty paper that I found at Hobby Lobby as well. It was hard to cut, because it had handmade qualities to it, but in the end it actually worked well for the medallions so it didn't tear at the score lines. I often have a hard time with paper tearing when I make these medallions.