Well, I'm over half way done sharing my Vintage Cherries card collection. I hope you've enjoyed seeing what I've been up to. I'm thinking of combining the last few designs because I have so many other things I want to share. I actually made a fun vintage video that I hope I will be able to share. I'll have to see if my phone will let me upload it.
Today's design showcases one of my favorite sets, Vintage Picnic, which was the perfect choice for this collection. I used Vintage Jadeite ink and paper for the perfect feel. The leaves in the white fabric were actually almost a perfect match. The lattice die cut piece is from the Make It Market Kit: Garden Gate. I also used the sweet florals from "Bitty Bouquet" to have coming out of the vintage picnic basket.
The picnic baskets are die cut and colored using copic and primacolor markers. I added glossy accents into the rectangles on every other space. I really like the dimension and shine it gave the baskets. The sentiment, which is also from Bitty Bouquets was heat embossed with white ink onto Kraft cardstock.
A few crystal clear sequins finish off the design. You can see how nicely it looks peeking out of the fabric basket. Thanks for fluttering by!
Just popping in to share a quick Mother's Day card and tag project that I put together for my ladies' church group! Prepping for it made me miss my stamp group days and my stamp-a-stack events! I might need to revisit the idea.
Because I was needing a lot of paper, I dove into my hoard of old SU! In Color paper packs. I found I had a lot of "Vintage Violet" from 2007. It's such a pretty color and perfect for mother's day!
I also used the new Grans Garden stamp set from PTI. The scallop mat stack, that is also new, was the perfect backdrop! The mother's day sentiment is from the "All Year Cheer" stamp set from SU! clear back from 2002, but I LOVE it! Super quick and fun! Thanks for fluttering by!
You probably were wondering if you were ever going to see a card that truly fit in the "Vintage Cherries" description and actually had cherries on it! LOL! That being said, I do hope that you have been able to see how I have been inspired by the fabric and the overall feel I was going for. Of course I KNEW that I would be using this sweet cherry image from the oldie but goodie set "Everyday Button Bits". The sweet little yellow flower that is stamped next to the cherry leaves is from "Graceful Greetings". The blue fabric that I used at the top of the basket had a cherry bunch that boasted a yellow flower so I made the addition to my card as well. I really like the extra detail that it gives the card.
This particular design showcases quite a bit of vintage charm and homespun details that I really like. These cards have felt a little bit more like my vintage designs that I used to create on a regular basis.
I knew that this particular design would showcase doilies and this particular nestabilities die. It really mirrors the doilies and patterns in the fabric. I stamped the cherry leaves in Simply Chartreuse ink and added the buttons from PTI. As I mentioned before, the yellow flower is from "Graceful Greetings". I added a little dot of brown ink to the center of the flower for extra detail and dimension.
I also created some felt ric rac from an older border die from PTI and machine stitched that down. The doily was folded in half. I really liked the contrast between the green paper and the white doily.
The sentiment is from an old Verve set called "Filigree Fantasy" that I have had FOREVER, but it is one of my all-time favorites and I felt it needed to be showcased in this set. It is heat embossed with gold powder onto Kraft card stock. My favorite little detail is the ribbon and lace treatment. The ribbon was crinkled using my embossing gun. I really like how it sortof mimicks actual cherry leaves. The lace and red baker's twine are knotted and then hot glued on top of the knot of the ribbon.
The pattern paper on top is from a REALLY old paper pad and I have never found the right chance to use it. I thought it worked nicely with this design and helped tie in the quilt from the second card I posted. The one thing my daughter DID NOT like was the paper! Of course not! LOL! Thanks for fluttering by!
I've had such a hectic week, but there's something calming about creating for a baby that makes me so happy! I had the opportunity to host a baby shower for my friend today. In fact, I am sorry that I am posting twice in one day. I don't think that has happened in years, if ever. LOL!
This card is a potpourri of happy elements that work cohesively together to achieve just the look I was going for. I received some new goodies from PTI and was itching to use them, but if you've visited this week, you know I've been up to my eyeballs in Lion King and stars! ha ha! I was able to incorporate these sets: Wee Folk, Gran's Garden, Cloche quarters, and Boutique Borders:Baby as well as the woodgrain background stamp.
I also made a "baby's first year" flip book using the "Wee folk" set as well.
You can see here that I was able to incorporate all of the fun bits and pieces on each page.
I was also able to use the new "Made with Love" set as well. It is going to be well loved and reached for again and again! If you'd like to get a closer look at the sewn projects you can visit my blog Thimbles and Thread .
The flowers from "Gran's garden" were the perfect companion for this project. They echo the patterns from the fabric I used so nicely. I love happy combinations like that!
This is the quilt all rolled up and ready to gift! So adorable with the tag!
I was also able to make a quick label for the handmade shoes.
The stamps from "Made with Love" were the perfect fit!
I also used my PTI felt for some fun headbands! Like I mentioned before, stop on over to Thimbles and Thread for a closer look! Thanks for fluttering by!
Well, this is the end of Teacher Appreciation Week and that means it's the end of my projects as well. It's been a hectic week, but it was fun to make a few things for the teachers.
I was beating myself up a little bit, because the gifts and projects weren't as elaborate as what I have done in years past. I had to tell myself that it was okay. I was proud that I managed what I did, despite my crazy week.
This fun, simple design was made using a SUPER old set that I got from Lizzie Anne Designs from a publication I had my work in YEARS ago. I was thrilled to have the perfect excuse to use it. It is called "You're out of this world" and I have no idea if you can even find it anymore.
I had so much fun creating my "galactic" background the other day which you can see on THIS project, that I was itching for more. I decided to go for more of an "earthly" look this time. I love how it turned out!
The rest of the images were stamped and then colored with Prismacolor and Copic markers. I added some Star Dust stickles here and there to give it a great space look! Thanks for fluttering by!
P.S. I will be returning soon with the rest of my "Vintage Cherries" collection as well as the photos of the baby shower projects I have been working on.I have had so much fun! I can't wait to share!
I've taken quite a liberal approach with the "Space" teacher appreciation week theme. I sent these to the teachers yesterday. I was happy to use up some scraps from the galactic background tags I made the other day. I was seriously running behind and it was the perfect solution.
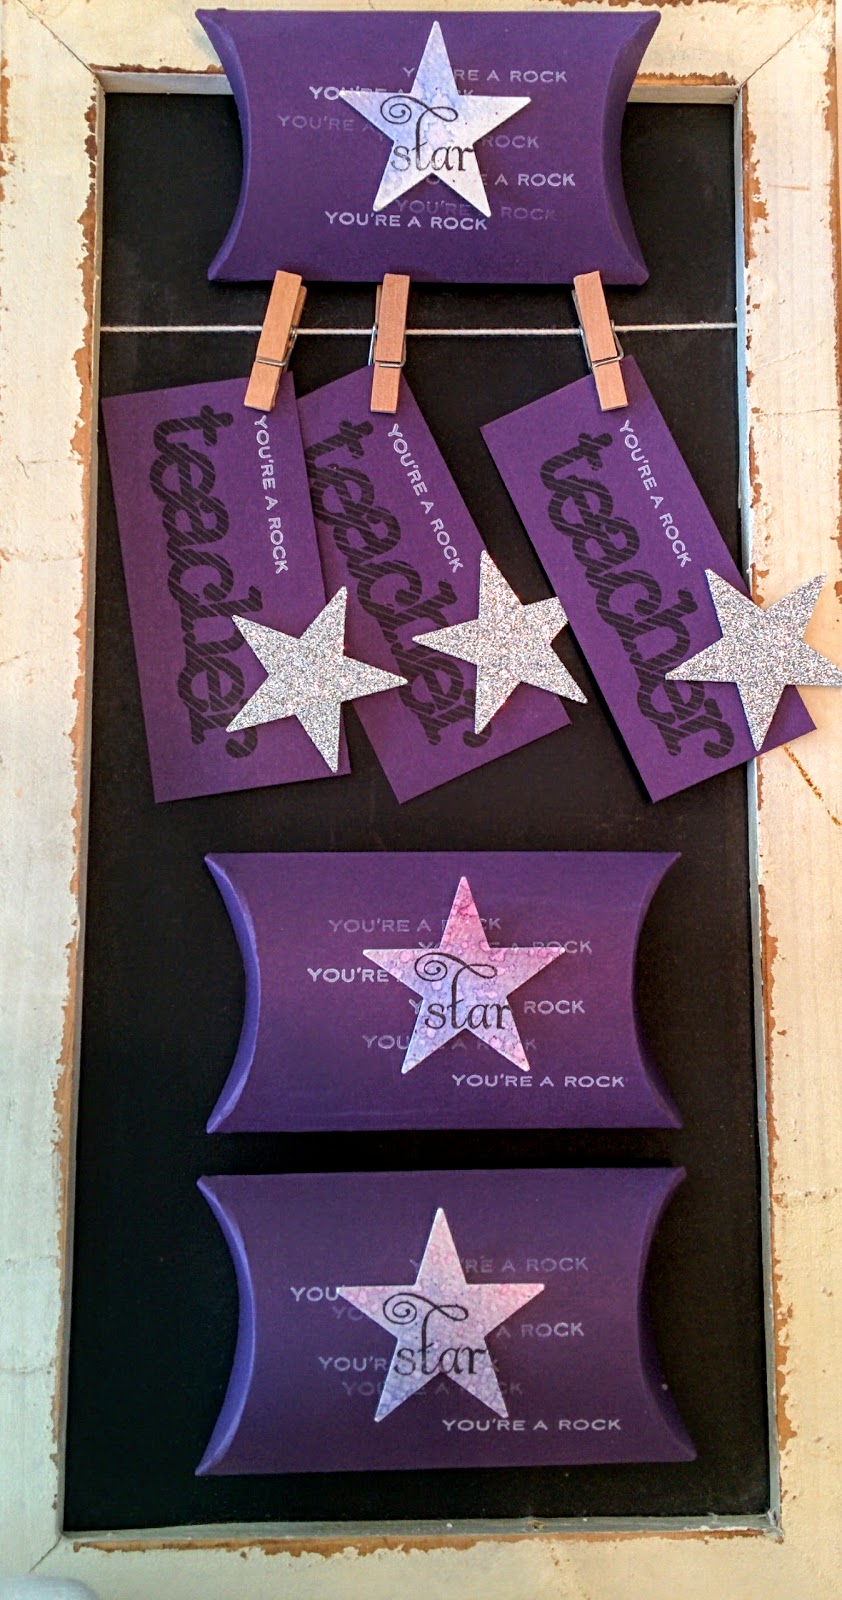
I quickly made up 3 pillow boxes to hold some restaurant gift cards. The tags were made super quick, too!
The pillow boxes were die cut out of Elegant Eggplant card stock. The "You're a rock" sentiment is from Star Prints and I repeatedly stamped it in a random fashion using white ink. I punched the stars out of scraps from my "You're out of this World" project that I made the other day. The "star" sentiment was stamped onto the punched stars using Palette Black ink.
There was just enough paper left over from the pillow boxes that was the perfect size for the tags. I stamped the same sentiment from "Star Prints" and then added the bold "Teacher" sentiment in black. I punched a star out of glitter cardstock and attached it with foam squares.
I found some fun Star wars Jelly Belly packages at the store that inspired the color scheme (the beans, not the package).
I packaged everything up in a cello bag and attached the tag! Super quick! I gave these to the teachers on "May the fourth be with you" day! LOL! I couldn't resist! I have the project from today on Instagram if you'd like to see it. I'll be posting it, but thought i'd let you know!
My sons' elementary school just put on "The Lion King, Jr." play and since I'm on the PTA board, I was put in charge of the thank you gifts for those who dedicated their time and talents to put it on.
I was thrilled at the opportunity. I've never really done anything with an African vibe, so it was exciting. I don't know if I achieved an authentic look, but it was sure fun trying.
The pillow boxes were made from a PTI die cut that is always useful for packaging up gift cards, which I did here. Each box was wrapped with burlap pattern paper, cheetah or chevron print and then a band of gold washi tape. The sentiment is from a very old SU! set and is punched with an oval punch.
I googled "Lion King" images on Google and picked this graphic print to use. I didn't want it to seem cartoonish. It is printed on Kraft paper.
The sentiment was computer generated and printed on Kraft paper as well. I love the buttons...they are threaded with hemp and adhered with glue dots.
You can see all of the supplies that I used here. This really was such a fun project to work on. I didn't share my Teacher Appreciation post today, but you can see the tag I made on Instagram @kellylunceford. Thanks for fluttering by!