Friday, February 23, 2024

Papertrey Ink February Release Day 1

Hello and welcome friends! It's day one of the Papertrey Ink February release and spring has sprung! I have been having a ball creating so many fun, springtime projects to share with you over the next few days! The weather has been a "little bit of everything" almost everyday lately! ha ha! Sunshine in the morning, snow in the evening....rain in the morning, turning to snow, and then beautiful sunshine! The day I made this umbrella card is was dark and stormy, so it was perfect....I needed an umbrella on my walk because I came home positively DRENCHED! Too bad I don't have one this cute! 

This cute new set is called Weather It Together and it's so much fun! There are coordinating stencils, but I didn't get them in time to use them, but I will definitely be using them because I just love everything about this new set! This is a "must-have" set, in my opinion!

The stamp set comes with two included sentiments, but I chose to use one from the new Thoughts of Spring Sentiments. I can't wait to use this set again WITH the stencils AND with one of the included sentiments! It's just too cute!

To begin, I stenciled the clouds using the Cloud Stencil Collection using Aqua Mist and Hawaiian Shores ink. I added some Hawaiian Shores ink splatter and then used the Cover Plate: Quilted die to add the pierced detail. I stamped the sentiment in black, but you could do this before you add the pierced detail; it's up to you!  I added the umbrella that was stamped using three of the detail images: polka dots, stripes, and the section details. I added the flowers here and there until I was happy with the arrangement. A sprinkling of glitter finishes it off!

My next card uses the new Radiant Radials die and the new Flutter and Flowers stamp/die set paired with another sentiment from the new Thoughts of Spring Sentiment set. 

As you can see, the Radiant Radial die adds the detailing to a panel of cardstock rather than cutting out a stand-alone piece. You could die cut the entire piece with a large circle die and use it that way; I think Betty did that on her card for today so make sure to check that out.

I did add another die cut to the center of the radial...this is the smallest die included in the new Reflections February die set that we will be showcasing in a few days. I couldn't wait to use it and you will see it quite a bit over the next few days before it is featured!

The Flutter and Flowers stamp set comes with two different butterflies, lots of grass images, and three flowers. It's a fun, easy-to-use set that's just perfect for spring! Join me again tomorrow for a BIG post using some of my new favorites! Thanks for fluttering by!


Tuesday, February 13, 2024

More Happy Heart Boxes

I had so much fun making Heart Boxes the other day that I decided to make 4 more for some friends in the neighborhood. You can see the earlier post HERE. Those ones are more detailed while these are simple. I figured that we all need simplicity from time-to-time, so I decided to share them with you.
I made four boxes in total, which meant I needed to cut 8 of everything; one top, one bottom! I used Rose Red cardstock from Stampin' Up!. I have quite a bit of it leftover from my demonstrator days so I figured I would use it since I would be needing quite a few pieces to get all of the cutting done.


I used the Happy Heart Box Dies for the boxes and they are so easy to put together once you get the hang of it and watch the video that is under the product description on the website. I did all of the die cutting one day and then put them together on a different day. My shoulders/neck have been tight and searing with pain lately (unusual when I papercraft) so I had to break it up into two sessions. That being said, I enjoyed the assembly SO much more because I broke it up into two sessions!

I got distracted and accidentally die cut the smaller heart included in the die collection for the top accent piece which in turn led to me keeping them simple. 

I used some leftover patterned paper that I used a few years ago for THIS collection of gifts! I forgot how much I enjoyed making those!

Anyway, regardless of their simplicity, they sure look cute all packaged up with the other goodies I am giving! I took some time today to get them all put together and I will deliver them today! I hope you all have a lovely Valentine's Day! Thanks for fluttering by!


Friday, February 9, 2024

The Greetery {Love Grows Here}


February is the love month, and love is in bloom!  I'm sharing a pair of wedding/shower cards using some older favorites. My daughter’s best friend is getting married this spring and so she’ll be attending many events to celebrate both the bride and the couple! I used inspiration from the bridal shower invitation for the colors and theme! This particular shower’s theme is “Love is in Bloom” so one of the cards uses the sentiment that fits that theme the best: Love grows here!
I photographed both cards on top of the invitation so you can see how well the Lovely Silhouettes Stamp/die set works to coordinate with the theme! To begin, I die cut all of the pieces twice (you never know where a design will take you, so I always like to have options at my fingertips) and then stamped them using Distress Oxide inks and finger daubers for control. Because these are silhouette stamps, there aren’t different steps to separate the blooms from the foliage, so I chose to do it this way to add more color. Hopefully that makes sense!
Once that was done, I got to work on the backgrounds for each of the two cards. I used the beautiful Elegant Arch Stamp that was released at the same time as the Lovely Silhouettes stamp set, so they are a perfect choice to use together! I took that particular release off, so I have tried to use each of the products because they are so beautiful. I chose to use white pigment ink on the darker background and then tone-on-tone ink for the lighter of the two. I love how you can get such starkly different results by changing up the ink color.
I used the A2 Arches dies in two different sizes to create a mat for the focal point. I simply used the lighter color on the darker card and vice versa. I added a touch of Antique Linen ink around the edges of the white arch for some added definition and detail. I layered them together using foam squares and then had fun creating the different bouquets. Because I wanted to use the “grows here” sentiment on the dark card, I chose to stamp it in black on the bottom of the arch and then on the lighter card I stamped the accent sentiment in black on the background.

The lighter card got some black ink splatter for added detail and I left the darker card as is. Both panels are attached to white A2 card bases using liquid glue. I didn’t add any glitter or sequins, so I’m not sure if I’m coming down with something or what! Ha ha! I might go back and give them a spritz of Shimmer Spray if I come to my senses! Ha ha! Thanks for fluttering by!

Thursday, February 8, 2024

Happy Heart Boxes

I've been busy as a little bee the last few days working on some "just for fun" projects, including these two heart boxes. My 4th grader has two teachers this year: one in the morning and one in the afternoon. He is my last child in elementary school so I was shamefully looking forward to only having one teacher to spoil, but that isn't the case, AND, it's not like I'm not used to making multiples of things, so it's been fine! ha ha! I've been having fun putting together their gifts for Valentine's Day, and wanted to make something to hold some chocolates and a lip-balm that is small and I don't want it to get lost with the rest of the items. Cue the amazing Happy Heart Box Dies from Concord & 9th! I made a few of these in 2022 and haven't revisited them since!

They are really easy to make; I simply followed the video that you can find underneath the product photo. I just fast-forwarded until I got to the part where she begins making the box, but she does show some ideas for the other dies included in the collection. I die cut all of the pieces for each box from Pale Peony cardstock and then assembled them using the video.

I used some cute pattern paper called Hello, Darling from The Paper Studio...this is a 4 by 6 pad I believe...something smaller in scale. I used the heart die included in the collection: once from the pattern paper and once from Pale Peony. This pattern paper is very thin so I wanted to glue the two hearts together for a more sturdy piece.

I heat embossed the sentiment, which is from the retired Be Mine, Valentine stamp set from PTI in gold powder onto a black strip of cardstock. I notched the end for added detail and then used black foam squares to pop it up on the box.

The flowers are from the Into the Blooms: Wreath dies and I colored them using SU! ink and small blender brushes. I added them to the boxes using mini foam squares. These boxes match the style of the  cute notebooks I found on Amazon and some cute pens. I will share the links here if you are interested. I am not an affiliate with Amazon, I just find quite a bit of cute stuff there! ha ha!
Thanks for fluttering by!

P.S. I feel really bad when people leave me comments and questions that I can't reply to. I'm not sure what's going on, but SUE asked a question about THESE cards and what color the pink is....it is Rose Red from Stampin' Up! I hope you see this....I feel bad that it's been so long! If you see this, will you please leave a comment so that I know that you have seen it?


Tuesday, February 6, 2024

Papertrey Ink Flash Sale {Psalm Reflections: February}

Hello and welcome! It's my turn for this week's Papertrey Ink Flash Sale. The stamp set that I chose to revisit is the Psalm Reflections: February stamp set. I chose this set in particular because when our packages arrived with the February release last year, this stamp set was missing so I didn't actually use it for the release! I absolutely love this verse, so I was happy to use it for this week's Flash Sale. Please note: the day I took these photos it was rainy and overcast which always proves difficult to get good photos! ugh! 

This card also fetures the coordinating Pslam Reflections: February die; it comes with two additional dies besides what you see here. It is perfect to use with other stamp sets as well. The smaller die would be perfect for a smaller sentiment.

The background is created by using the Simple Stitch Crochet Stencils: Small on a 4 by 5 1/4 inch panel of Kraft cardstock using Fresh Snow pigment ink. I also added the stitched detail by using the Cover Plate: Quilted die over the top for some added detail. I also used a corner rounder punch on each of the four corners. 

The flowers and leaves are from the Sweet Celebration Die and I die cut them from white cardstock and then colored them using blender brushes and dye ink.

I added some Moonshine sequins and some adhesive gems to the centers of some of the flowers. I mounted the entire panel onto a top-folding A2 cardbase using foam squares. Thanks for fluttering by!


Monday, February 5, 2024

Papertrey Ink Project Inspiration

Happy Monday, friends! I had a project featured in the Papertrey Ink newsletter last week, so I thought I'd also share it here and provide a few more details on how I made this card. I have step-by-step photos that should help, too! I'm currently obsessed with die cut and colored flowers, if you haven't noticed, so that was the starting point for today's card.

I feel like I do a lot of "flowers framing a sentiment" type cards so I thought I'd change it up and use this cute Country Handbasket Die to fill up with the cute die cut blooms! I die cut it out of Kraft cardstock and then added some shading using Classic Kraft ink and a blender brush for added depth and dimension.

I glued the two pieces of the basket together and then got to work cutting and coloring the flowers. All of the flowers used on this card are from the Into the Blooms: Wreath die. I'm currently obsessed with the flowers and have used them on quite a few projects lately, but since I took December off, I haven't actually used the wreath portion included in the dies....I really need to remedy that! I colored the flowers using assorted Distress Oxide inks and finger daubers.

I die cut the border using the lovely Border Bling: Scalloped Frame die using Sweet Blush cardstock adn then added some Saltwater Taffy Distress Oxide ink around the edges. I glued it onto a top-folding A2 card base using liquid glue. I then added a white oval that was cut using the medium-sized oval from the Love to Layer: Ovals Die. I adhered it to the card base using foam squares.

I decided AFTER I added the oval which sentiment I wanted to use, but I would suggest stamping it BEFORE , so that you don't have to worry about the foam squares underneath. ha ha! The sentiment is from the Garden Blessings stamp set and I stamped it in black ink. I added some black ink splatter, Moonshine sequins, and glitter. The flowers are arranged using both liquid glue and foam squares.

After I color the flowers, I used a foam mat and a stylus to shape the flowers. I didn't shape the pinks ones, though, just the yellow, blue, and white.

You could change up the color combination to create something more moody or seasonal depending on what you like! Thanks for fluttering by!


Monday, January 29, 2024

Papertrey Ink January Release Day 4

It's been a whirlwind, but we've made it the the 4th and final day of the Papertrey Ink January release! I have a few last projects to share with you; up first is a card using the new Tropical Frond Hot Foil Plate. I had so much fun creating with this unique plate. I used gold foil on Green Parakeet cardstock for a tropical feel!

I set my foil machine to the highest heat setting and then let it heat for 26 seconds. Once it was ready, I just wanted to look at it! ha ha! So shiny, so pretty!

I added a few daisies from the new daisy die set, some leftover leaves from my card yesterday, the super cute flip-flops from the Go-To Gift Card Holder: Beach Bag dies. I heat embossed the sentiment, which is from the Just Sentiments: Wish You Were Here, and then die cut it using the Just Tags Dies. I arranged everything and then added it to a top-folding A2 card base using foam squares.

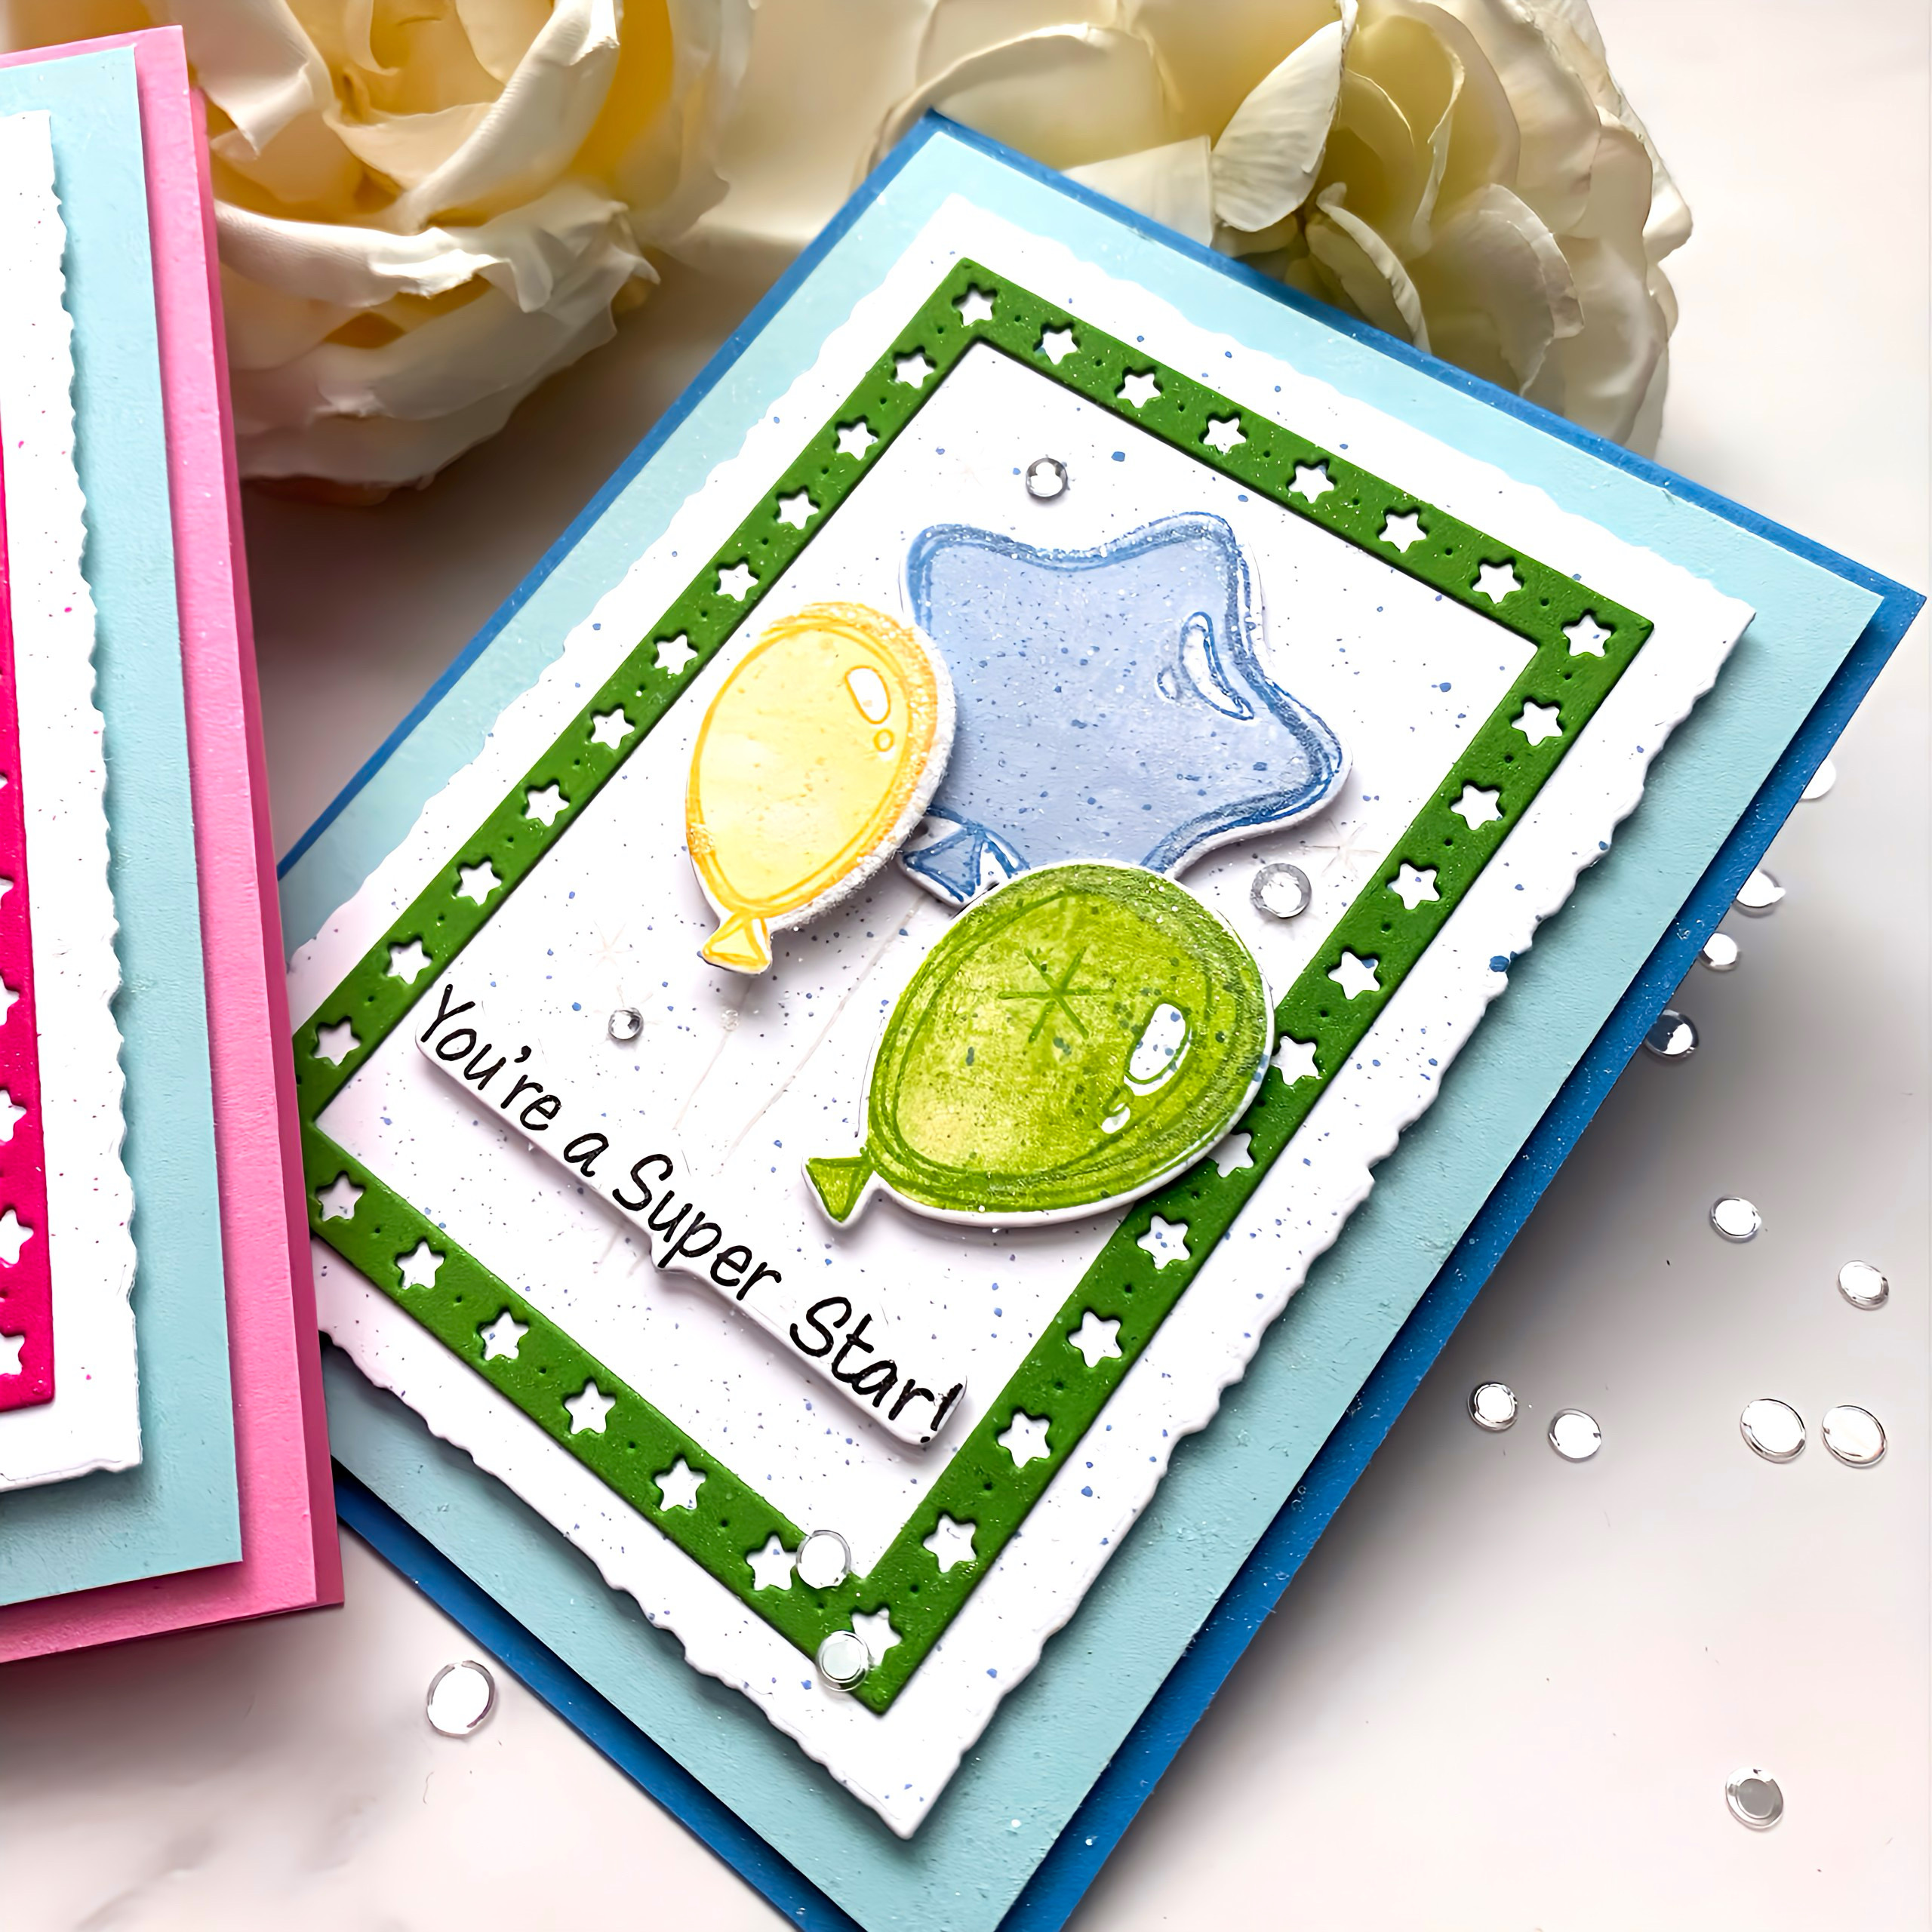
My last two cards for today and the release use the new Scribble Balloons stamp/die set. There are a few different sentiments included in the set, so I chose to make some "super star" cards, one boy and one girl, to add to my stash to use for the kiddos at church! They're always doing amazing things so it's fun to have cards on hand!

This is the girl design stamped in pink and yellow.

and the boy design in blues, green and yellow! Thanks for fluttering by!