Showing posts with label Richard Garay. Show all posts

Monday, April 9, 2018

Merry Monday #285 Dashing by with a Holiday Hi

Merry Monday, friends! I hope you all had a fabulous weekend! I just got back from a fabulous Spring Break vacation to Disneyland/California Adventure with my family! It was so wonderful and it was nice to just forget about real life and have fun! 

This week, Nina has asked us to add a ribbon to our cards! I don't know if a paper ribbon is cheating or not, but that is what I used. 


I think this Simple Gift Bow Die almost looks just like the real thing, don't you think? It was the perfect touch to add to this snowy scene. To begin, I die cut the newly released Shape Shifters Oval 1 Die out of some Pool cardstock. I then heat embossed the snow fall background stamp set using Wow Puff Powder for a realistic effect. I also die cut the snowy portions using the Round Off Edgers Die collection

I colored and die cut the deer and placed them onto the card using a triple stack of foam squares. The white layer underneath is dry embossed using the ever popular "knitted" folder from Richard Garay.

I couldn't fit the sentiment onto the front, so I decided to jazz up the inside with a gold embossed sentiment as well as a few sprigs of greenery. I hope you'll get a chance to play along this week! Thanks for fluttering by!


Monday, January 22, 2018

Merry Monday #274 Bits of Holiday Magic!

Happy Monday, friends! I'm so glad you've stopped by today! I have a fun card to share with you for this week's Merry Monday Christmas Challenge! I'm starting to realize how addicted to Christmas stamps I have become! LOL! I just ordered a few more new sets so it won't feel like a broken record around here! Ha ha!

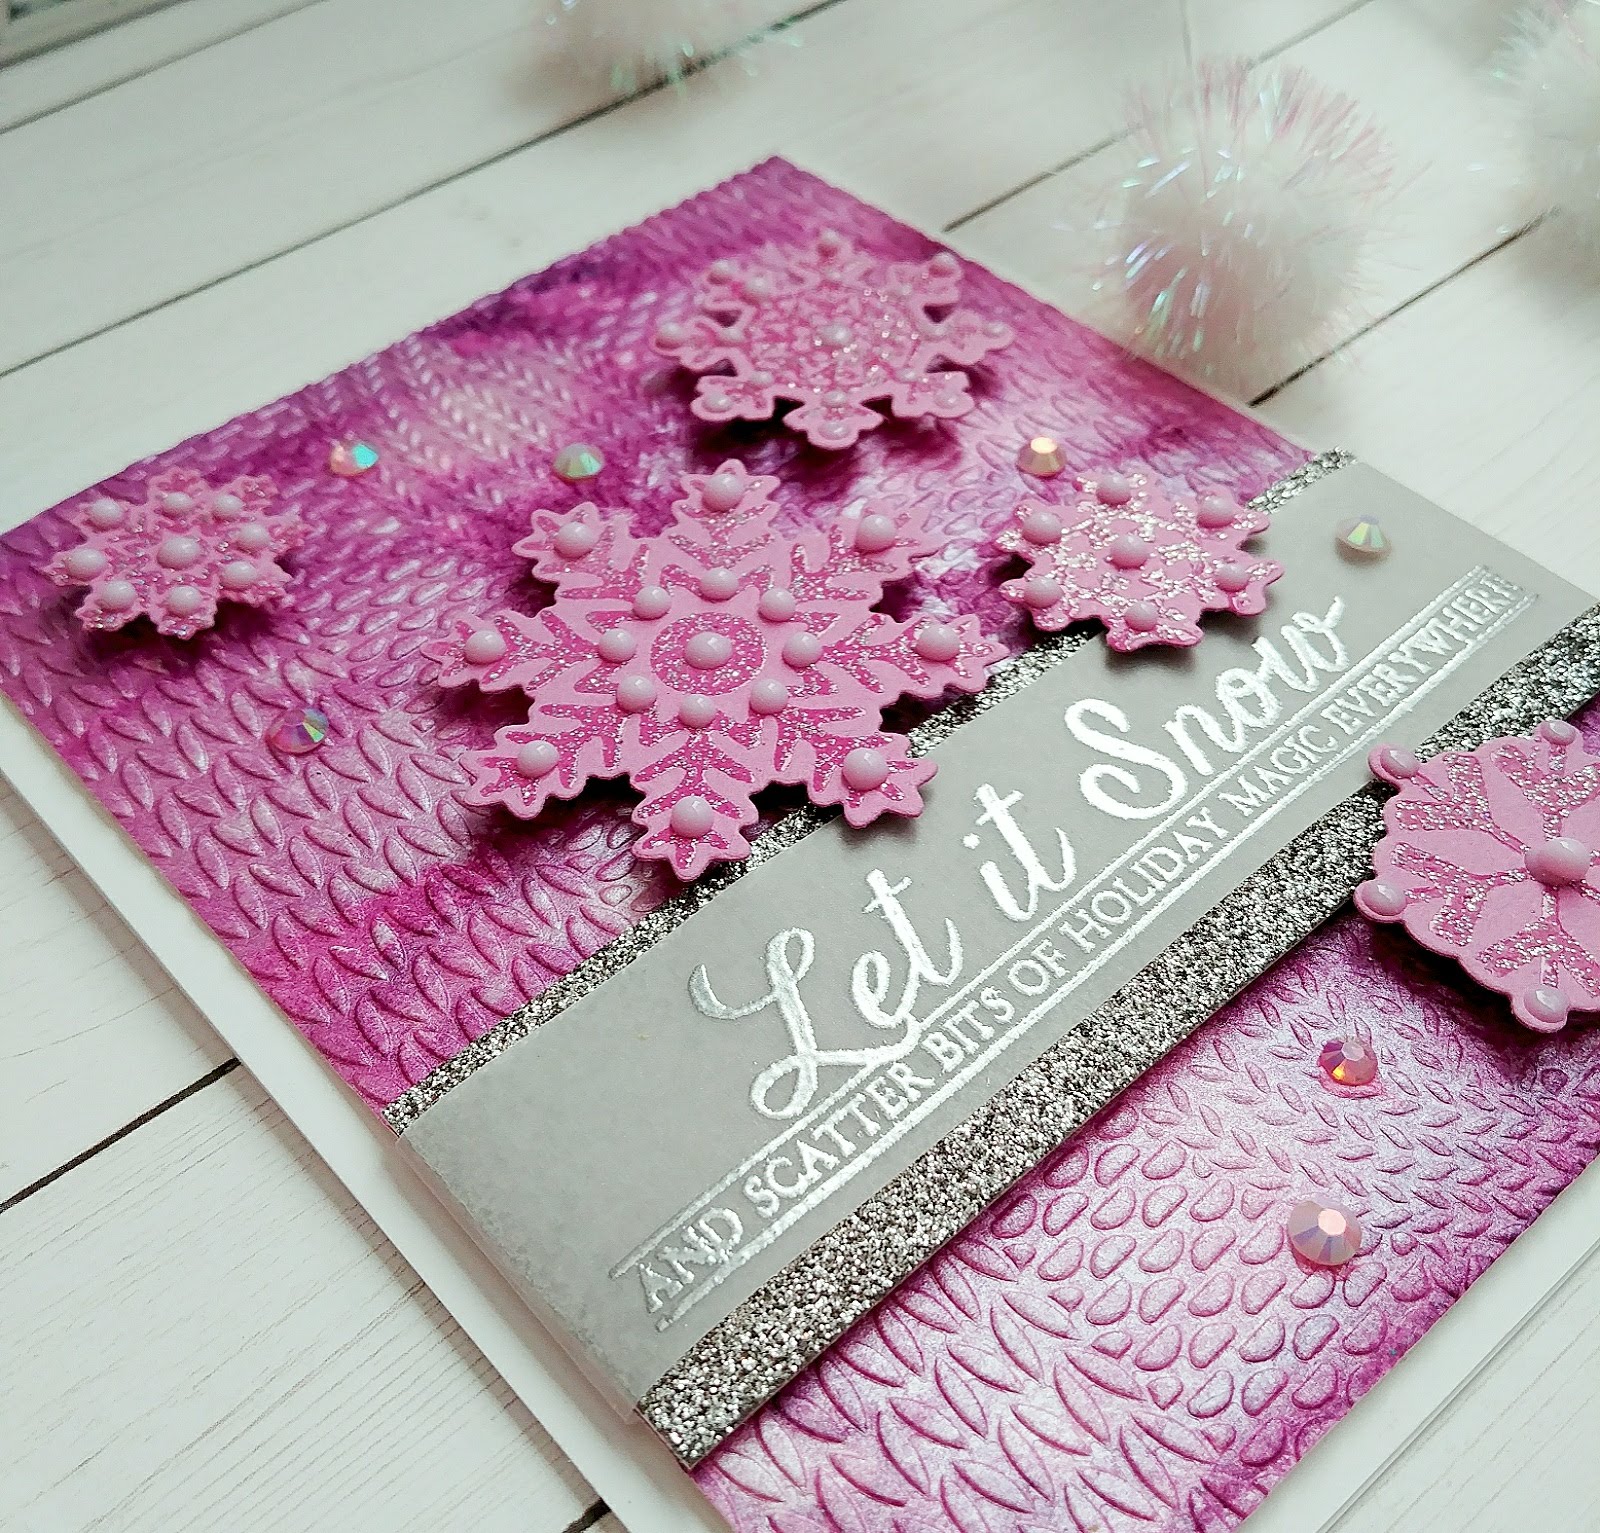
Isn't this snowy scene beautiful? Nina has challenged us to make a Christmas card with snow. I guess snowflakes count as snow, right? I was planning on making something much different for this week's challenge, until I saw some absolutely gorgeous photos that my stamping friend Dawn Lusk posted on Facebook. They were photos that she took of ACTUAL snowflakes and one of them was placed on a beautiful pink/orchid sweater or scarf! I was completely inspired and wanted to incorporate that into my design for today! Thank you, Dawn!

To begin, I needed to recreate the sweater element for my card. I started by watercoloring a piece of 140 lb cold-pressed watercolor paper from Strathmore. I used my Kuretake Gansai Tambi watercolors to create the different colors. I love using my Pearl watercolors, but the colors are limited, so I chose to use these, but add the white pearl paint over the top that is included in the 36 color set. I love that I can make any of the colors with a pearlescent quality by adding that over the top! I did have some interesting patterns on the watercolor piece before I embossed it, so I may try a design like this again, but without the embossing so you can see the "fractals" that I created with paint, but mimicked the fractals on a snowflake. I spritzed it with Frost Shimmer Spray and then dried it using my heat tool. 

I set that aside and got to work on the snowflakes for the card. I grabbed a piece of cardstock that matched the background nicely and die cut the retired "Snowflake Medley" snowflakes and then heat embossed them with some old SU! powder called Hologram Highlights. I knew it would give the snowflakes a translucent and sparkly quality that I was hoping to achieve.

Once the watercolor panel was good and dry, I embossed it using on of my favorite embossing folders called Knitted from Richard Garay. I picked mine up at Hobby Lobby quite a while ago. I heat embossed the sentiment onto a strip of vellum using silver detail powder. Once it had cooled, I added it to a strip of glitter cardstock slightly larger than the vellum strip. It helped flatten it out and I was able to tape it with scotch tape tightly to the back.

I wanted to give the snowflakes a little bit more detail, so I added some lilac Nuvo Drops here and there on each snowflake. I did this AFTER they had been adhered to the watercolor piece. I used this same technique on this non-traditional CARD I made last year. It ended up being one of my favorite Christmas cards of the year!

The watercolor piece is adhered to an A2 cardbase using foam mounting tape for some added dimension. I also added a few GEMS here and there for even more sparkle! Thanks for fluttering by!

Monday, September 18, 2017

Merry Monday #257 {Love from our House to Yours}


It's Monday and that means it is time for a new Merry Monday Challenge! I am so excited to be getting a head start on all of my holiday cards! 
                                               
This week, Sue has challenged us to add a decorated tag to our cards using texture, bling, and die cuts! Sounds fun, right? It is! You can find out about all of the details HERE and see how the rest of the team incorporated tags into their designs!
To begin, I die cut a postage looking piece using the "Post and Parcel" kit from Papertrey Ink. It has been discontinued, but it is one of my favorites! I sponged some Peacock Feathers distress ink onto the die cut and then layered it with different die cut pieces from the kit. I just love the vintage vibe, especially the bird pulling the bow!


After all of my bits and pieces were attached, I tied some red ribbon onto the tag and then a bow of True Black Baker's Twine and a red jingle bell. I usually buy a few packs of all of the jingle bells at the Dollar Tree as soon as they come out. I am sure it will happen any minute now! LOL!


The tag is attached to a piece of red card stock using foam squares and then adhered to the dry embossed piece. 


The finishing touch is a few drops of "Duck Egg Blue" Nuvo drops here and there for some added detail. I also added some Nuvo glaze to the ornaments in the arrangement on the mailbox. Thanks for fluttering by!

Friday, August 4, 2017

Color Throwdown #454 To all a good night!

I couldn't resist playing in this week's Color Throwdown challenge. You can check it out HERE. I decided to create a Christmas card for the challenge since you can't ever have too many! I thought the colors were perfect for a woodsy look and I have been dying to create a wreath like this since I made THESE gift tags last year. 


 To begin, I dry embossed a piece of Always Artichoke cardstock using a Richard Garay embossing folder called "Pine Needles" (i think). The sentiment was heat embossed onto a strip of white cardstock using ZING gold embossing powder. I attached it to the wreath using hot glue. 
 I threaded some black and brown gingham ribbon through a gold jingle bell for some extra dimension and addding in neutrals is acceptable with this challenge (thank heavens). The ribbon/jingle bell is attached with hot glue as well.
I die cut a nestabilities circle out of Kraft cardstock and then attached the wreath embellishment with hot glue. The circle was then added to the embossed panel using foam squares. The embossing design has a lot of little circles all over so I added some gold Nuvo Drops on top of those as well as some larger ones here and there. I really like how it turned out. Adding that much of "one" thing is a little bit scary, but in the end I really like the result. I think I will be experimenting with this more for holiday designs. It reminds me of twinkling lights in the branches of a Christmas tree. I think I will try it with some colored drops as well. So fun! Thanks for fluttering by!

Wednesday, July 5, 2017

You make the world beautiful


I hope you all had a wonderful Independence Day! We had fun as a family going to the parade, backyard BBQ and Fireworks! I had an awesome time with my husband over the weekend at my nephew's wedding as well. I was itching to get back to my creative space to work on this week's design for The Challenge which I will be sharing tomorrow as well as a few other ideas that have been floating through my mind. When I was a kid, my sister and I absolutely loved Shrinky Dinks and then I fell in love AGAIN when I would use them at my SU! workshops YEARS ago! I decided it was high time to revisit all of the fun that they have to offer!!!
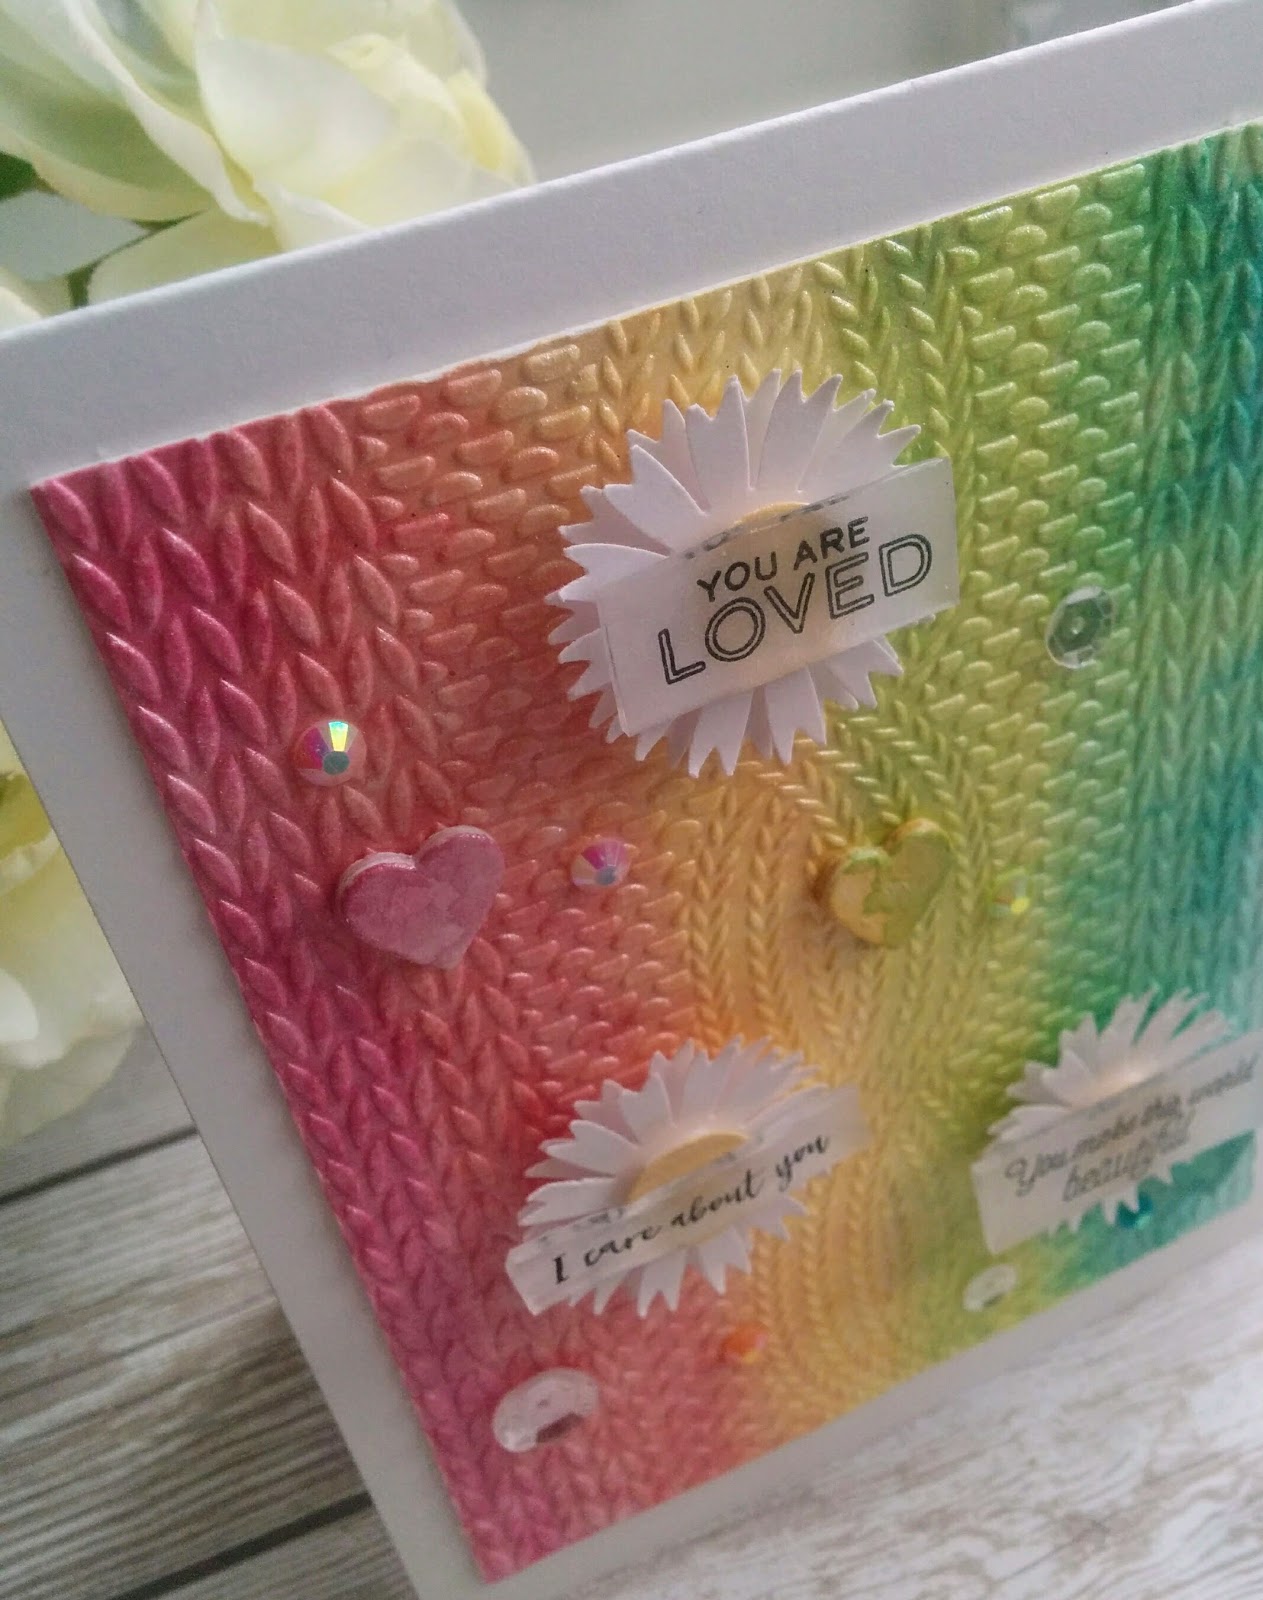
It's not often that I use multiple sentiments on the front of a card, but with the fabulous You are Loved stamp set and shrinky dinks, it made it possible to use them all together for a cohesive look. I ordered some "Rough and Ready" shrinky dinks from Amazon since I can't find my old stash of SU! sheets. I really like how easy it is to stamp and color on the rough side. I chose three of the sentiments that worked well together in theme: You are Loved, I care about you, and You make the world beautiful! My daughter is a "Hope Squad" member at her school and we have decided to work together to create a set of handmade cards that she can take to school in the fall. These cards will be given to the teacher in charge of the "Hope Squad" and they can be used as needed. The "You are Loved" stamp set is perfect for this. I got it for Mother's Day and am so excited to get it inky.
To begin, I created a pearlescent watercolor background using Zig Kuretake Gansai Tambi pearl colors. I used 140 lb. coldpressed watercolor paper to create a wash of gradiant colors included in the set. I just went from one color to the next, omitting the white. Once it was dried, I used the fabulous knitted embossing folder from Richard Garay. 


Before I began the card, I experimented A LOT with different shrinky dink elements: die cuts with stamping, sentiment strips with punched holes, Copic Coloring and more. You can see a little sample of them in the background of this photo. Don't worry, I'll be sharing lots more ideas using shrinky dinks because I just can't stop! LOL!
I was finding that some of the sentiments were coming out warped, which is common and it was really bugging me. After I fussed at trying to get the "perfect" piece, I decided to embrace the imperfection and use these pieces on today's design. The "I care about you" piece was wonky and curvy, which in the end, I really like!

I punched out some daisy-ish looking flowers using an old Martha Stewart punch as well as some yellow centers. I love how the sentiments look glued over the top. I also added some Rainbow Sparkle Gems placing them over the background where they blended the best. I did that in my last card which I just love! I also added three Sparkling Clear sequins as well as three watercolored hearts. 
There is a heart image included in the stamp set, but because of my textured background, it would be impossible to add them and I didn't want the stark outline. Instead, I opted to use the tiny heart die that is included in the Beautiful You die collection. I used it on THIS card but added glossy accents over the top. On today's card, I just watercolored the hearts using the pearl watercolors and stacked 4 on top of each other. I had a lot of fun creating this card and I can't wait to make more for my daughter to take to school. It will be a fun project that we can work on together! Thanks for fluttering by and join me tomorrow for a fun new challenge!