Hello and welcome! What a thrill to be celebrating The Greetery's 1 year birthday! Boy, does Betsy have a celebration for you! There is so much to love with this Confetti Collection release! I was thrilled a little over a year ago when Betsy asked me to help her launch her new company called The Greetery and I'm even more thrilled to be here today celebrating the one year anniversary! I think it is safe to say that The Greetery has blessed so many of our lives with all of the amazing products that help us to create projects to bless the lives of others! "Where Making and Giving Meet" is the tag line for The Greetery and it is just perfect! From the tag line to the logo, and all of the amazing products in between, The Greetery is a company to love and Betsy is a creative genius to be cherished! Thank you, Betsy, for all you do for the papercrafting community!
The festivities begin at The Greetery's Blog and then a hop filled with inspiration at every stop! The team will be showcasing many projects using the new products and some AMAZING guests have joined the hop as well!
Before I link the other designers, there will be a GIVEAWAY of TWO $50 gift cards that are picked from the comments on the designers' blogs, so make sure to leave a little love at each stop of the hop! Winners will be announced on Friday at 7 am on The Greetery Blog and the new release will be live in The Greetery Shop on Friday May 29th at 10 AM EDT!
Kelly Lunceford (you are here)
Guests:
I have SO much to share with you today! I had so much fun creating and creating with each of the sets being showcased today! First up is the new Balloon Bouquet stamp and coordinating dies paired with the new Twisted Crepe die and the Big Balloons die! I have a slight obsession with balloon stamps and dies, so these were definitely up my alley! This is such a fabulous collection of stamps and dies!
I set the scene with the previously released Silver Lining Die and the Crimped Frame Die with some ink blending! I often get asked which inks I use and the answer for every project made for this release is Pinkfresh Studio Ink. They are beautiful inks that give stunning results. Once the ink blending was done, I added the sentiment in the lower left corner which is from the Sentiment Suite: Love stamp set to accent the large "Happy Birthday" sentiment stamped on the balloon! The Balloon Bouquet stamp set has multiple sentiments to make this a very versatile set.
I stamped the large balloon using the multi step stamps and then die cut it using the Big Balloon die collection, including the smaller balloons. I also stamped the stand alone bloom that is attached to the pink balloon. The balloons are added to the cloud background using varying levels of foam squares to give it a more realistic look. I added some glitter to select edges of the pink and small blue balloon for added sparkle.
I added some Crepe paper streamers to the top using the Twisted Crepe dies! Each section is colored using ink blending. This particular die collection comes with one particular die that cuts individual sections of the crepe paper streamer so that you can give it the two toned look like I have done here. I just simply added some darker ink to a piece of white cardstock and then ran it through my die cutting machine using that particular die and then glued them in place using liquid glue.
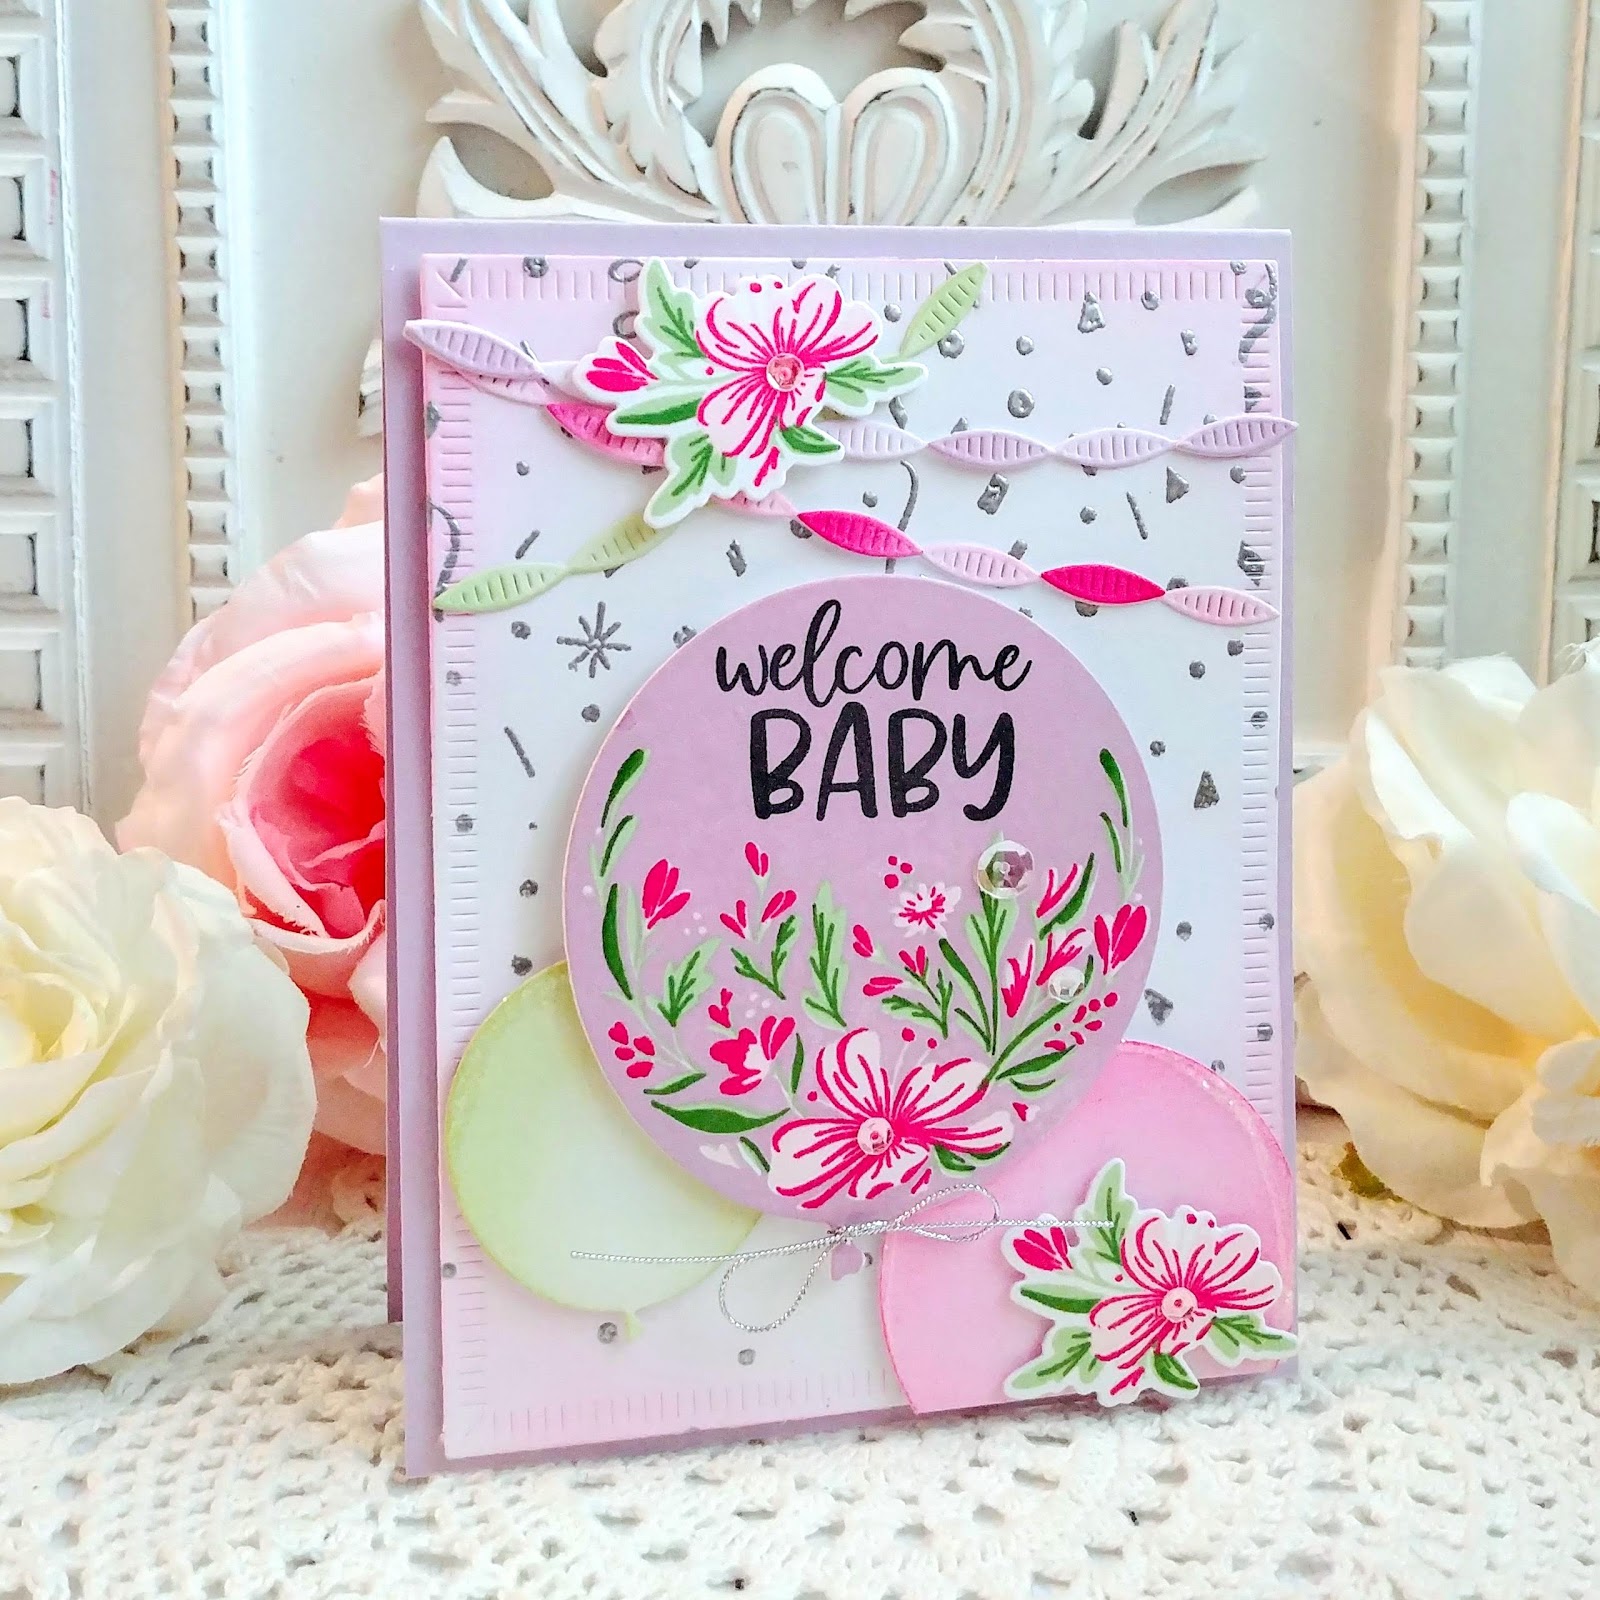
I tied the bottom of the large balloon with a simple bow of metallic cord for some added whimsy and sparkle! A few sparkling clear sequins finish off this birthday design! Up next is a baby card using the same supplies but with the addition of the new Ticker Tape background stamp! I heat embossed it in silver for a subtle look with lots of shine!
I've been needing an update to my baby collection and this is just the ticket! Balloons are so trendy now and they are used in such creative ways! I just wish these beautiful paper balloons were available at my party store! LOL!
The Balloon Bouquet stamp set comes with a five set stamp to get the look of the balloon that I used here. Step one is the solid balloon image with the outline for the leaves and flowers. Steps 2-5 are the leaf and flower images to make these balloons come alive. The die collection has a die for the small and large floral cluster so you can really give these balloons some dimension. I didn't add the extra die cut to the large balloon, but I'm guessing some of the designers did so you can see it throughout the hop! I can't wait to play with these balloons some more!
The green and smaller purple balloon both have glitter around the edges like I did on the first card. I also added some crepe paper at the top securing it to the edges with liquid glue.
I added a few of the smaller floral clusters to the top and bottom for added interest. The entire focal panel is layered onto a panel of Soft Lilac cardstock using foam squares. A trio of sparkling clear sequins finish off this baby card!
My next three cards use a fun new stamp and die set called "Think Happy"! This is a fun small set that allows you to create floral and rainbow cards using some of the funnest sentiments! I couldn't resist using the traditional rainbow for each of these next designs!
This entire card consists of ink blending on white cardstock to get each of the colored pieces. I love the variations in color that I can get by just doing some ink blending! To begin, I die cut two rainbow pieces. I used one as a guide to lay the colored pieces on top of. This particular die keeps the strips connected at the top and bottom, but I cut them apart to the do the inkblending on the second diecut. I layered them back onto the first die cut using liquid glue.

I also die cut two clouds; once without using any shims of any kind in my die cutting machine so the pieces wouldn't pop out. The second time, I made sure to use a shim so each of the pieces could be removed easily. I glued the two clouds together using liquid glue and then added in the ink blended flowers using both foam squares and liquid glue. I used foam squares to give this rainbow and clouds extra dimension. I stamped the "Oh Happy Day" sentiment in black as well as the Thank You sentiment which is from the Sentiment Suite: Thank You stamp set.
For my second card using this set, I thought it would be fun to add some of the fabulous images from the previously released Top Down Day Stamp Set. I stamped the bug in red and added some of the flowers from the same set and let the rainbow shoot behind her! I thought it worked nicely with the "Think Happy" sentiment!
I made sure to use my MISTI when stamping the sentiment to make sure I got a nice, saturated image. I also added some sparkling clear sequins to this design, but added some dew drops to the previous design. The clouds and rainbows seemed to be begging for some precipitation! LOL!
My third and final card is the simplest of the three and was the first one I created. I have a tendency of getting more and more ideas as I go along, so one card is just usually not enough! LOL!
I also wanted to use each of the sentiment combinations because they are just so much fun! My card stash was beginning to dwindle because of all the cards I've been sending, so these will be a welcome addition!
My final series of projects use the new Birthday Blooms stamp set. I got carried away and made 5 cards because I love all of the sentiments so much. I didn't actually end up by using all of them, but I did stamp the "Make a Wish" sentiment on the inside of each of these cards.
When I create floral cards, I always layer and stack the flowers and leaves, but this set is made to be used in more of a "pattern" type layout so that was fun for me.
To begin these designs, I die cut all of the images from white cardstock and then used my mini MISTI to stamp all of the larger sentiments first. I die cut two of each one, but in the end only used some of them. I realized that I was using more flowers than sentiments so I was running out! LOL!
Once I had the larger sentiments stamped, I got to work on the leaves and flowers. I went for a bright and cheery primary color combination that would appeal to many people and they are just perfect for summer!
I die cut the medium size of the Crimped Frames for each of the five designs. I stamped the coordinating smaller sentiment for each of the larger sentiments I chose to use. Once that was done, I got to work arranging the flowers.
I used foam squares on each of the leaves and flowers to give them dimension. I also added some sparkling clear sequins here and there on each of the panels.
In the end, I like the ones with the floral background better, but I still like the plaid ones, too!
The floral background cards are layered up onto white card bases using foam squares for even more dimension.l
I'm thrilled to have so many fun designs to add to my stash! Don't forget to leave a comment to be eligible to win one of the $50 gift cards! Join me again tomorrow for day 2 of the full reveals! You won't want to miss it! Everything is so cute! Thanks for fluttering by!