Hello friends! I’m happy to be here today sharing a slimline card that features some of my absolute favorites from the latest release from The Greetery! I had wanted to make a card featuring a wooden ball garland for the release, but just didn’t end up executing that particular idea. I couldn’t get it out of my mind, so I was happy to create this card to share with you today!
Paper creations made by me! I love making cards, 3-D projects and more! I love sharing my passion for creativity!
Tuesday, December 19, 2023
The Greetery {Christmas Garland Slimline Card}
Hello friends! I’m happy to be here today sharing a slimline card that features some of my absolute favorites from the latest release from The Greetery! I had wanted to make a card featuring a wooden ball garland for the release, but just didn’t end up executing that particular idea. I couldn’t get it out of my mind, so I was happy to create this card to share with you today!
Labels:
christmas,
die cuts,
diecuts,
Distress Oxide Ink,
Embossing,
slim line cards,
The Greetery
Tuesday, December 5, 2023
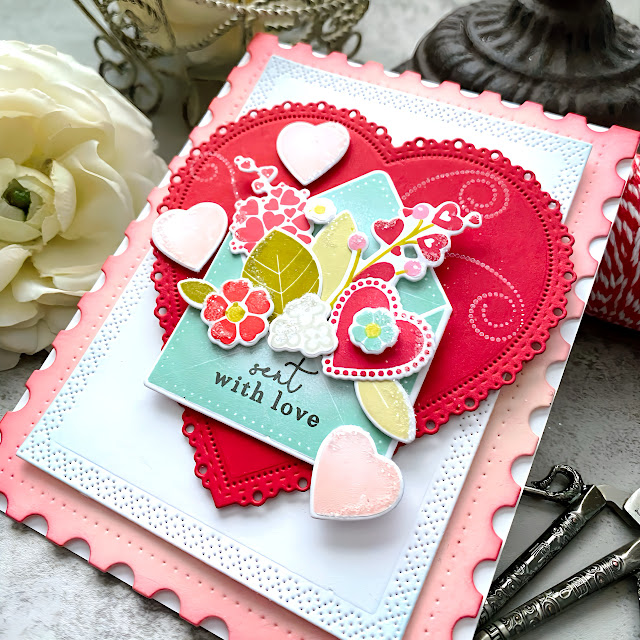
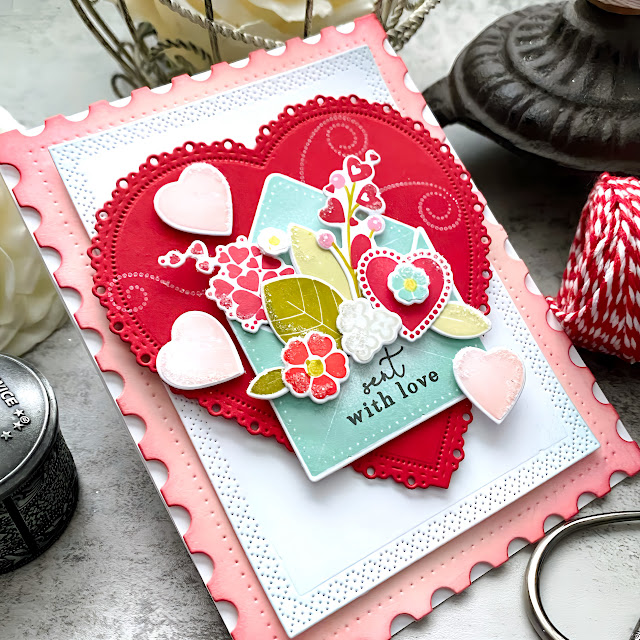
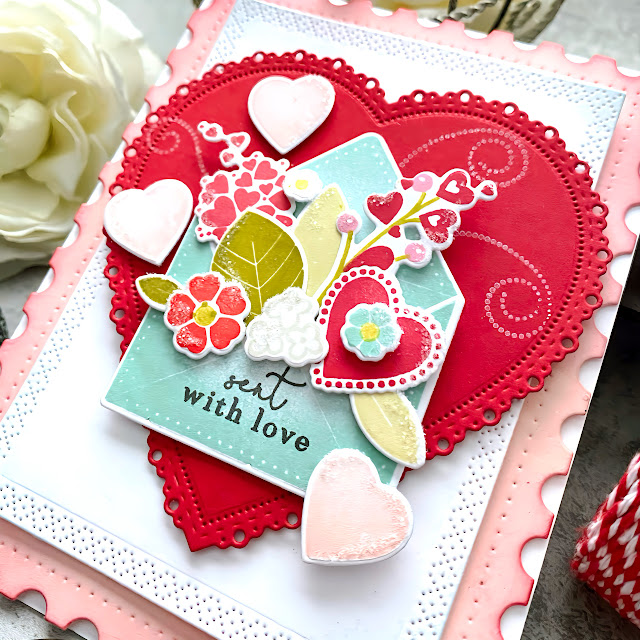
Sent With Love
It's my turn for the Papertrey Ink Flash Sale and since it's December, that means it will be a Valentine's Day theme! My card for today features the adorable All You Need Is Love stamp set! I took December off last year so this is actually the first time I have ever used this set and I absolutely LOVE it! This tiny envelope image would also be so cute for Christmas tags and cards! I think I might just leave it out and make some cute tags with it or something!
For this card I knew I wanted an overall postal theme so I chose to use the Border Bling: Postage Frames Die for the background and then layered up all kinds of fun things to pull this card together!
To begin, I die cut all of the pieces and then stamped them using reds, pinks, and corals! I die cut everything twice so I have enough left over to make another card! Yay!
The base of the envelope and the flap are two separate dies and images so it makes tucking everything in a breeze! I layered the two pieces onto the largest heart in the Love to Layer: Hearts die collection, cut from Pure Poppy cardstock, and then added that to the largest rectangle in the Love to Layer: Rectangles die collection.
I added all of the stamped pieces here and there. I would recommend stamping the cute little flourishes coming out of the heart BEFORE you add the envelope. I did it after, but it was a little tricky, so do that before if you can.
I arranged the three pink hearts around the envelop for added detail. I added the postage frame on a top-folding A2 cardbase using foam squares and then layered everything on top of that. I added a touch of glitter for some sparkle and shine! Thanks for fluttering by!
P.S. I mentioned at the beginning of today's post that I took last December off and I am doing the same this year. I have SO many stamp/die sets that I have purchased for my personal use that are just sitting there (like YEARS worth) and I am planning on taking some "me" crafty time and pull them out and do some Christmas crafting! I will be sure to share everything here! But first.... finish decorating for Christmas! ha ha!
Saturday, December 2, 2023
Season's Greetings Shaker Card
Welcome! I shared this card on Instagram a few weeks ago for the Papertrey Ink Flash Sale, but I didn't share it here. It seemed to be quite popular so I thought I'd share it here and give a few details on how I made it!
One of my favorite die sets from last year is the Christmas Shaker Dies; I love shaker cards, but I seriously struggle with them and these dies make creating shaker cards a dream! For this card, I wanted each portion of the tree to be it's own "compartment" so I chose to die cut the tree shape about 5 or six times and then glued them together using liquid glue. I used the "backer" die, which is also used for the acetate portion and glued the acetate layer underneath the top tree piece. I turned it over and added the tiny star embellishments in each compartment and then glued the pattern paper backer to the back using additional liquid glue.
I have gotten quite a few questions about the pattern paper that I used for this card; it really does set the tone of the card, doesn't it? It is called Holiday Spice from the Recollections brand. I did a quick google search and it looks like there is a pack available on Ebay and I saw one on Etsy I believe, but it is a 6 by 6 pad. Anyway, it DOES look like you could get your hands on some.
I carried out the star theme and die cut the included star from the shaker set from silver glitter cardstock and glued it to the top of the tree. I tucked some greenery behind the tree for added detail. The sentiment is from the Winter Globes Sentiment Set and is just perfect for this card!
The light panel is die cut using the Love to Layer: Rectangles Die and I just love the pierced detail! It lends itself nicely to the piercing on the tree to keep things cohesive. I chose the big plaid for the background to warm it up even more and glued it to a top-folding Kraft card base. Thanks for fluttering by!
Labels:
christmas,
Papertrey Ink,
Shaker card,
shaker cards
Subscribe to:
Comments (Atom)


