Friday, May 28, 2021

T.G.I.F {Thinking of You} Shaped Tri-fold with a belly band

Hello friends! It's my turn for this week's T.G.I.F {The Greetery Inspiration Friday} over on The Greetery Blog but I wanted to share my project here as well! My card for today is a shaped tri-fold design with a belly band! I’m enamored with the newReflections stamp set/die set and couldn’t wait to try using it for this tri-fold design! It was easy to put together, but DID require a little planning. I’m hoping that I can walk you through step-by-step easily so you can try your own!

To begin, I cut two panels from white cardstock measuring 4 ¼ by 5 ½ inches and then die cut the outline using the new Reflections die. I die cut one a little further down on the panel and one up a little bit higher so that when the card is assembled, it gives the realistic illusion of a forest. Once the two panels were cut, I went ahead and stamped both panels using assorted Distress Oxide inks. As you can see on the panel on the right, I varied the shore line to keep it visually interesting.


Once that was done, I was able to get the base for my tri-fold design put together. I cut a piece of Kraft cardstock measuring 5 ½ by 11. The two panels that fold in measure 3 ½ inches, but I ended up cutting them as I will explain in the next steps, but you’ll want to begin with these measurements. I placed the first panel on the left fold butted right up against the bottom and corner and then carefully placed the die directly around the trees, and secured it with washi tape. Once it was secure, I removed the stamped portion and ran it through my die cut machine. You’ll repeat this for the second flap, but you’ll need to leave it hanging off the edge of your die cut machine so it doesn’t cut through the back of the card. It might seem confusing reading it, but when you go to make your card, you’ll understand!


I used an Exacto Knife and a ruler to remove the pieces that I didn’t need along the fold. From there, I went ahead and glued the two stamped panels in place, using the die cut portion of the Kraft base as my guide. From there, you will see that you have pieces hanging over the edge that will need to be cut straight with your paper trimmer. Once I had it all squared up, I got to work on the inside!

I die cut the middle size of the Crimped Frame and added some blue ink blending around the edges for a sky. I stamped the sentiment, which is from theSentiment Suite: Thinking of You stamp set, directly onto the panel.  The smaller sentiment at the top AND the sentiment for the belly band are from the same set. I used theSentiment Suite: Basics Die for the little banner piece at the top. The belly band is just a strip of the same Kraft cardstock with the sentiment stamped in the middle and then scored slightly larger than the width of the card so it can easily slide off and on.


I finished off the card by adding some watercolor details to the trees, sand, and water. While I don’t enjoy needing Sympathy cards, I do like having a few on hand. I really like this particular stamp set for a sympathy card because flowers, etc. aren’t always the perfect choice, even if we want them to be (wink!).  I hope you get a chance to try your own shaped tri-fold design! Thanks for fluttering by!

Thursday, May 27, 2021

Papertrey Ink {I miss you, friend} The Great Cover-Up

I'm so in love with the new Into the Blooms II dies and I can't seem to stop using them! I thought creating a card using only white paper and ink would be a great idea for this week's installment of the Papertrey Ink feature "The Great Cover-Up"! There's something so magical about taking a plain piece of white cardstock and ink and transforming it into something bright and colorful!

To begin, I die cut quite a few of the flower pieces and colored them using Distress Oxide inks. I like to choose 3 colors for both the flowers and the leaves to give them more realism. I find creating these flowers to be very relaxing and just what my soul seems to crave!

I used the same colors of ink to color the On the Border: Floral Bliss background piece and then glued it to an A2 card base using liquid glue. Once that was done, I stamped the I Miss You portion of the sentiment using black ink. I die cut the friend portion using the Perfect Pairs: Commodities dies and then stamped it using the coordinating Perfect Pairs: Commodities stamp set. I strategically placed tiny bits of foam squares on the back to make the sentiment look like it's floating above the flowers!

From there, I adhered all of the flowers and leaves using foam squares! I added glitter and dew drops for some sparkle and shine! Thanks for fluttering by!

Monday, May 24, 2021

Pinkfresh Studio May Essentials Release Blog Hop

Welcome to the Pinkfresh Studio May Essentials Release Blog Hop! I'm sharing three projects with you today using a few of the new Essentials that you're sure to love! I always get so excited for the "Essentials" releases because the new products give me new ideas to freshen up my designs and to keep those creative juices flowing!
Before I dive into the details of my projects, there are a few details to make you aware of! As always, please leave a comment here and on all the stops of the hop for a chance to win one of 10 $25 dollar gift certificates to the shop! Also, head to the Pinkfresh You Tube and Facebook pages for two chances to win the ENTIRE release!


As I mentioned earlier, I have three projects to share with you today! Up first is something I am SUPER excited about and that is the new Mini Slimline Essentials Bundle! This particular suite of products is jam-packed with everything you need to make mini slimline cards! I can tell I will be using these A LOT!

I'm also beyond excited for the new Mini Slimline Envelope Die Set! I've always loved making my own envelopes and the fact that there is a die makes it even better! You know all of that 12 by 12 pattern paper that you've been hoarding? Well, now you can make your own envelopes to put your mini slimline cards in! There is also a new slimline envelop die for all of your regular sized slimline cards! 

To begin this mini slimline card, I used the Slim Leafy Squares stencil and rainbow colors to create the background panel. Once it was done, I die cut it using the largest diagonal stitched die from the new bundle! I also die cut the circle, which is also included in the bundle.

For the sentiment, which was super hard to photograph (grr), I did some quick inkblending onto  a white piece of cardstock and then die cut it using the Love You the Most die. I glued it all together and then added some Nuvo Crystal Glaze over the top of the letters to give them that retro puffy sticker look! The butterfly is from the Butterflies stamp set that was released last month! And of course, I couldn't resist making a rainbow mini slimline envelope to match!

My second card for today uses the AMAZING new Blanket Stitched Oval dies! These are one of those die sets that you KNOW you will be using again and again! I also used the delightful new Garden Wreath dies that were released last month!

To begin this design, I heat embossed the Enchanted Blooms cling stamp and then added Ocean Breeze and Aquamarine ink over the top. Once that was done, I used the smaller of the two oval sets to die cut the opening. I saved the middle portion and used it on my last card for today. I layered the embossed panel over the top of a white card base that has the flower die cut piece using the Modern Bloom die. I used to shy away from using this but as soon as I got my Gemini Jr., it cuts like butter and I can't stop using it!

I layered the leaves and flowers around the oval using liquid glue. I added the "you're a great friend" sentiment to the middle using foam squares.

My third and final card for today's hop uses the other butterfly that is included in the butterfly set I used on my first card. As you can see, I used that middle portion of the emboss-resist background from my previous card. 

I also used the largest oval to go behind the smaller blue oval. I heat embossed the sentiment using white powder on a black strip of cardstock to make it pop! Before I send you off to the other designers' blogs, there is something that I think you'll all be happy about! I love to use the Essentials: Jewels on most of my projects and know you can buy them in each individual color so you can replenish your favorites or simply purchase your favorites! With that, I'll send you on your way for the rest of the hop! Thanks for fluttering by!


You are invited to the Inlinkz link party!

Click here to enter

The Greetery Man Made Collection

Hello and welcome, friends! I'm excited to be here today sharing three projects from the new release from The Greetery! This collection is so fabulous and really is perfect for all of the men in your life! Up first is a super cute new set called "Dad Jokes High Steaks"! I chose to create a card and gift to showcase how cute and "punny" this new set is! Before I dive into the details, however, you'll definitely want to head to The Greetery Blog to get pricing and info about each new product! Also, there will be 2 winners of a $50 gift certificate picked from the comments, so make sure to leave comments on each stop of the hop!

As soon as I read this particular sentiment that says "You're not old, you're well-seasoned", I KNEW I wanted to incorporate some type of steak/meat seasoning! I've been working hard in my flower beds and made many trips to the store. The grilling section is right by the flowers and soil, so I grabbed a bottle and gussied it up! I used the new Tartan Builder Stencils, both the regular and diagonal for the card and seasoning bottle.

One of my favorite parts about this new steak set is that you can die cut the fork portion using silver paper to make it look real! 
The seasoning bottle also uses the new Dad Squared stamp set and die to create the "DAD-love you" portion of the sentiment and then the "You're not old, you're well seasoned" is from the new Dad Jokes High Steaks stamp set. I used ScorTape to secure the plaid strip around the bottle, but the back is left uncovered so you can read directions and see nutrition information!

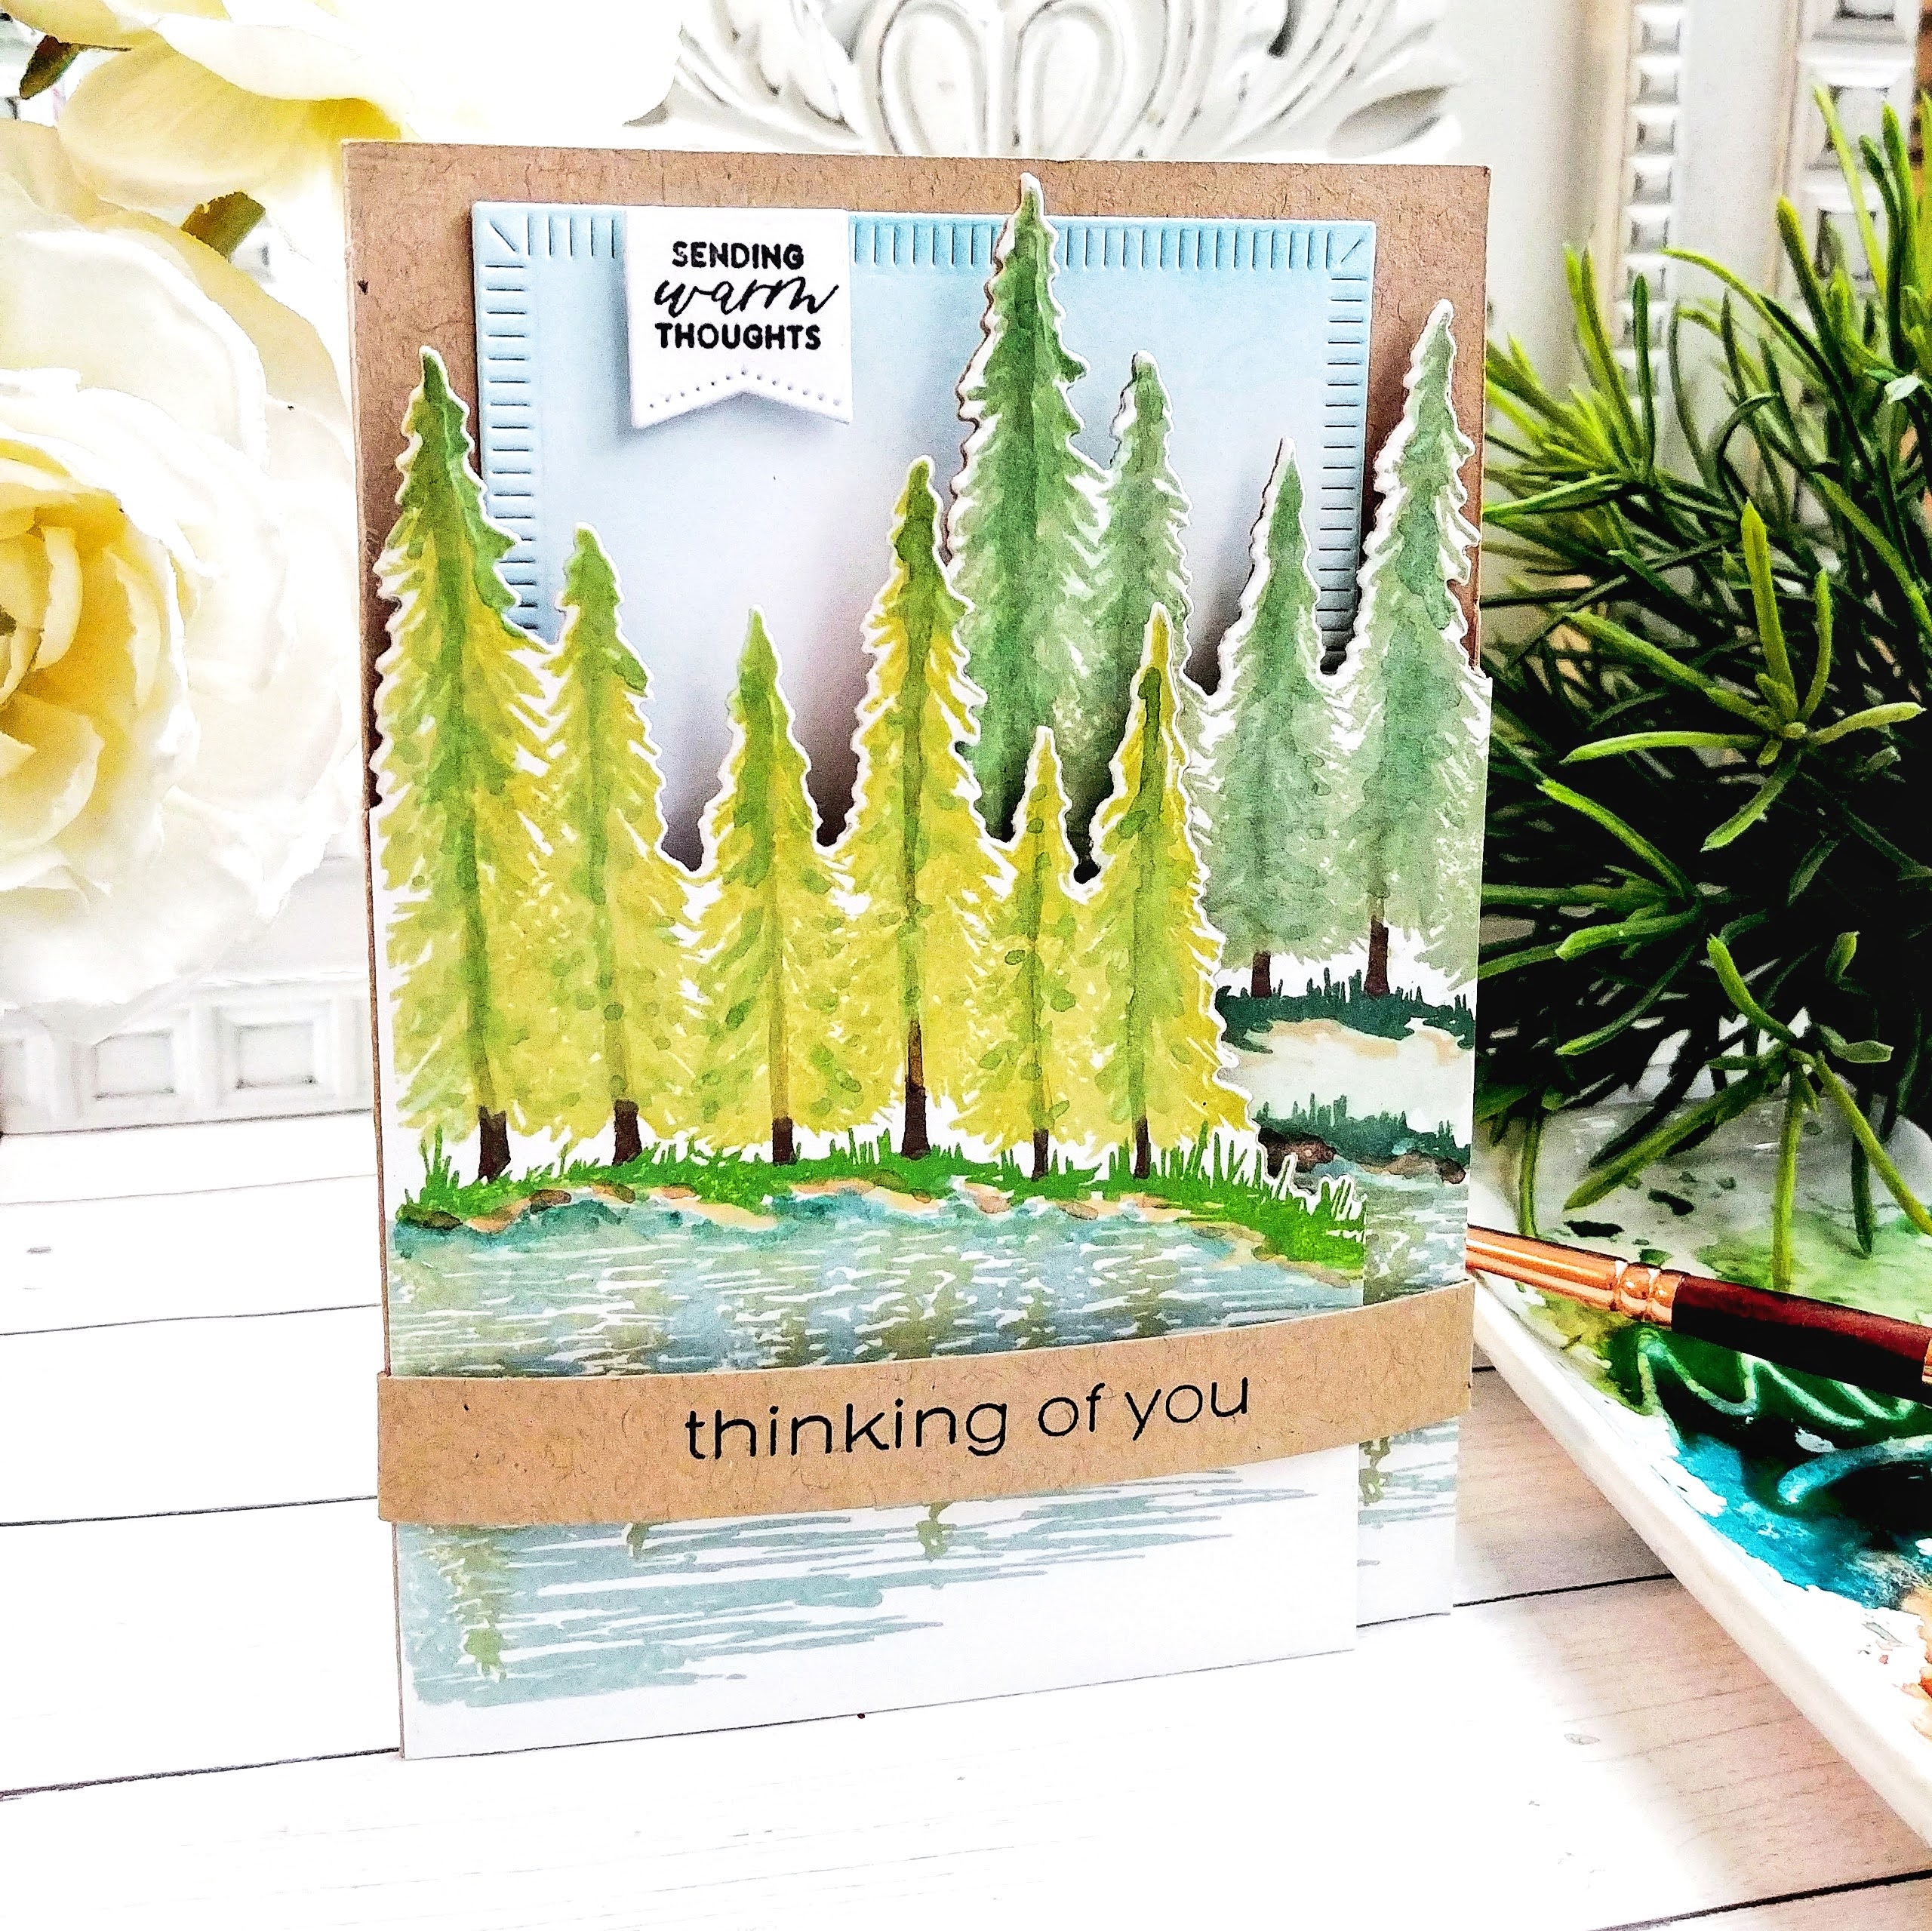
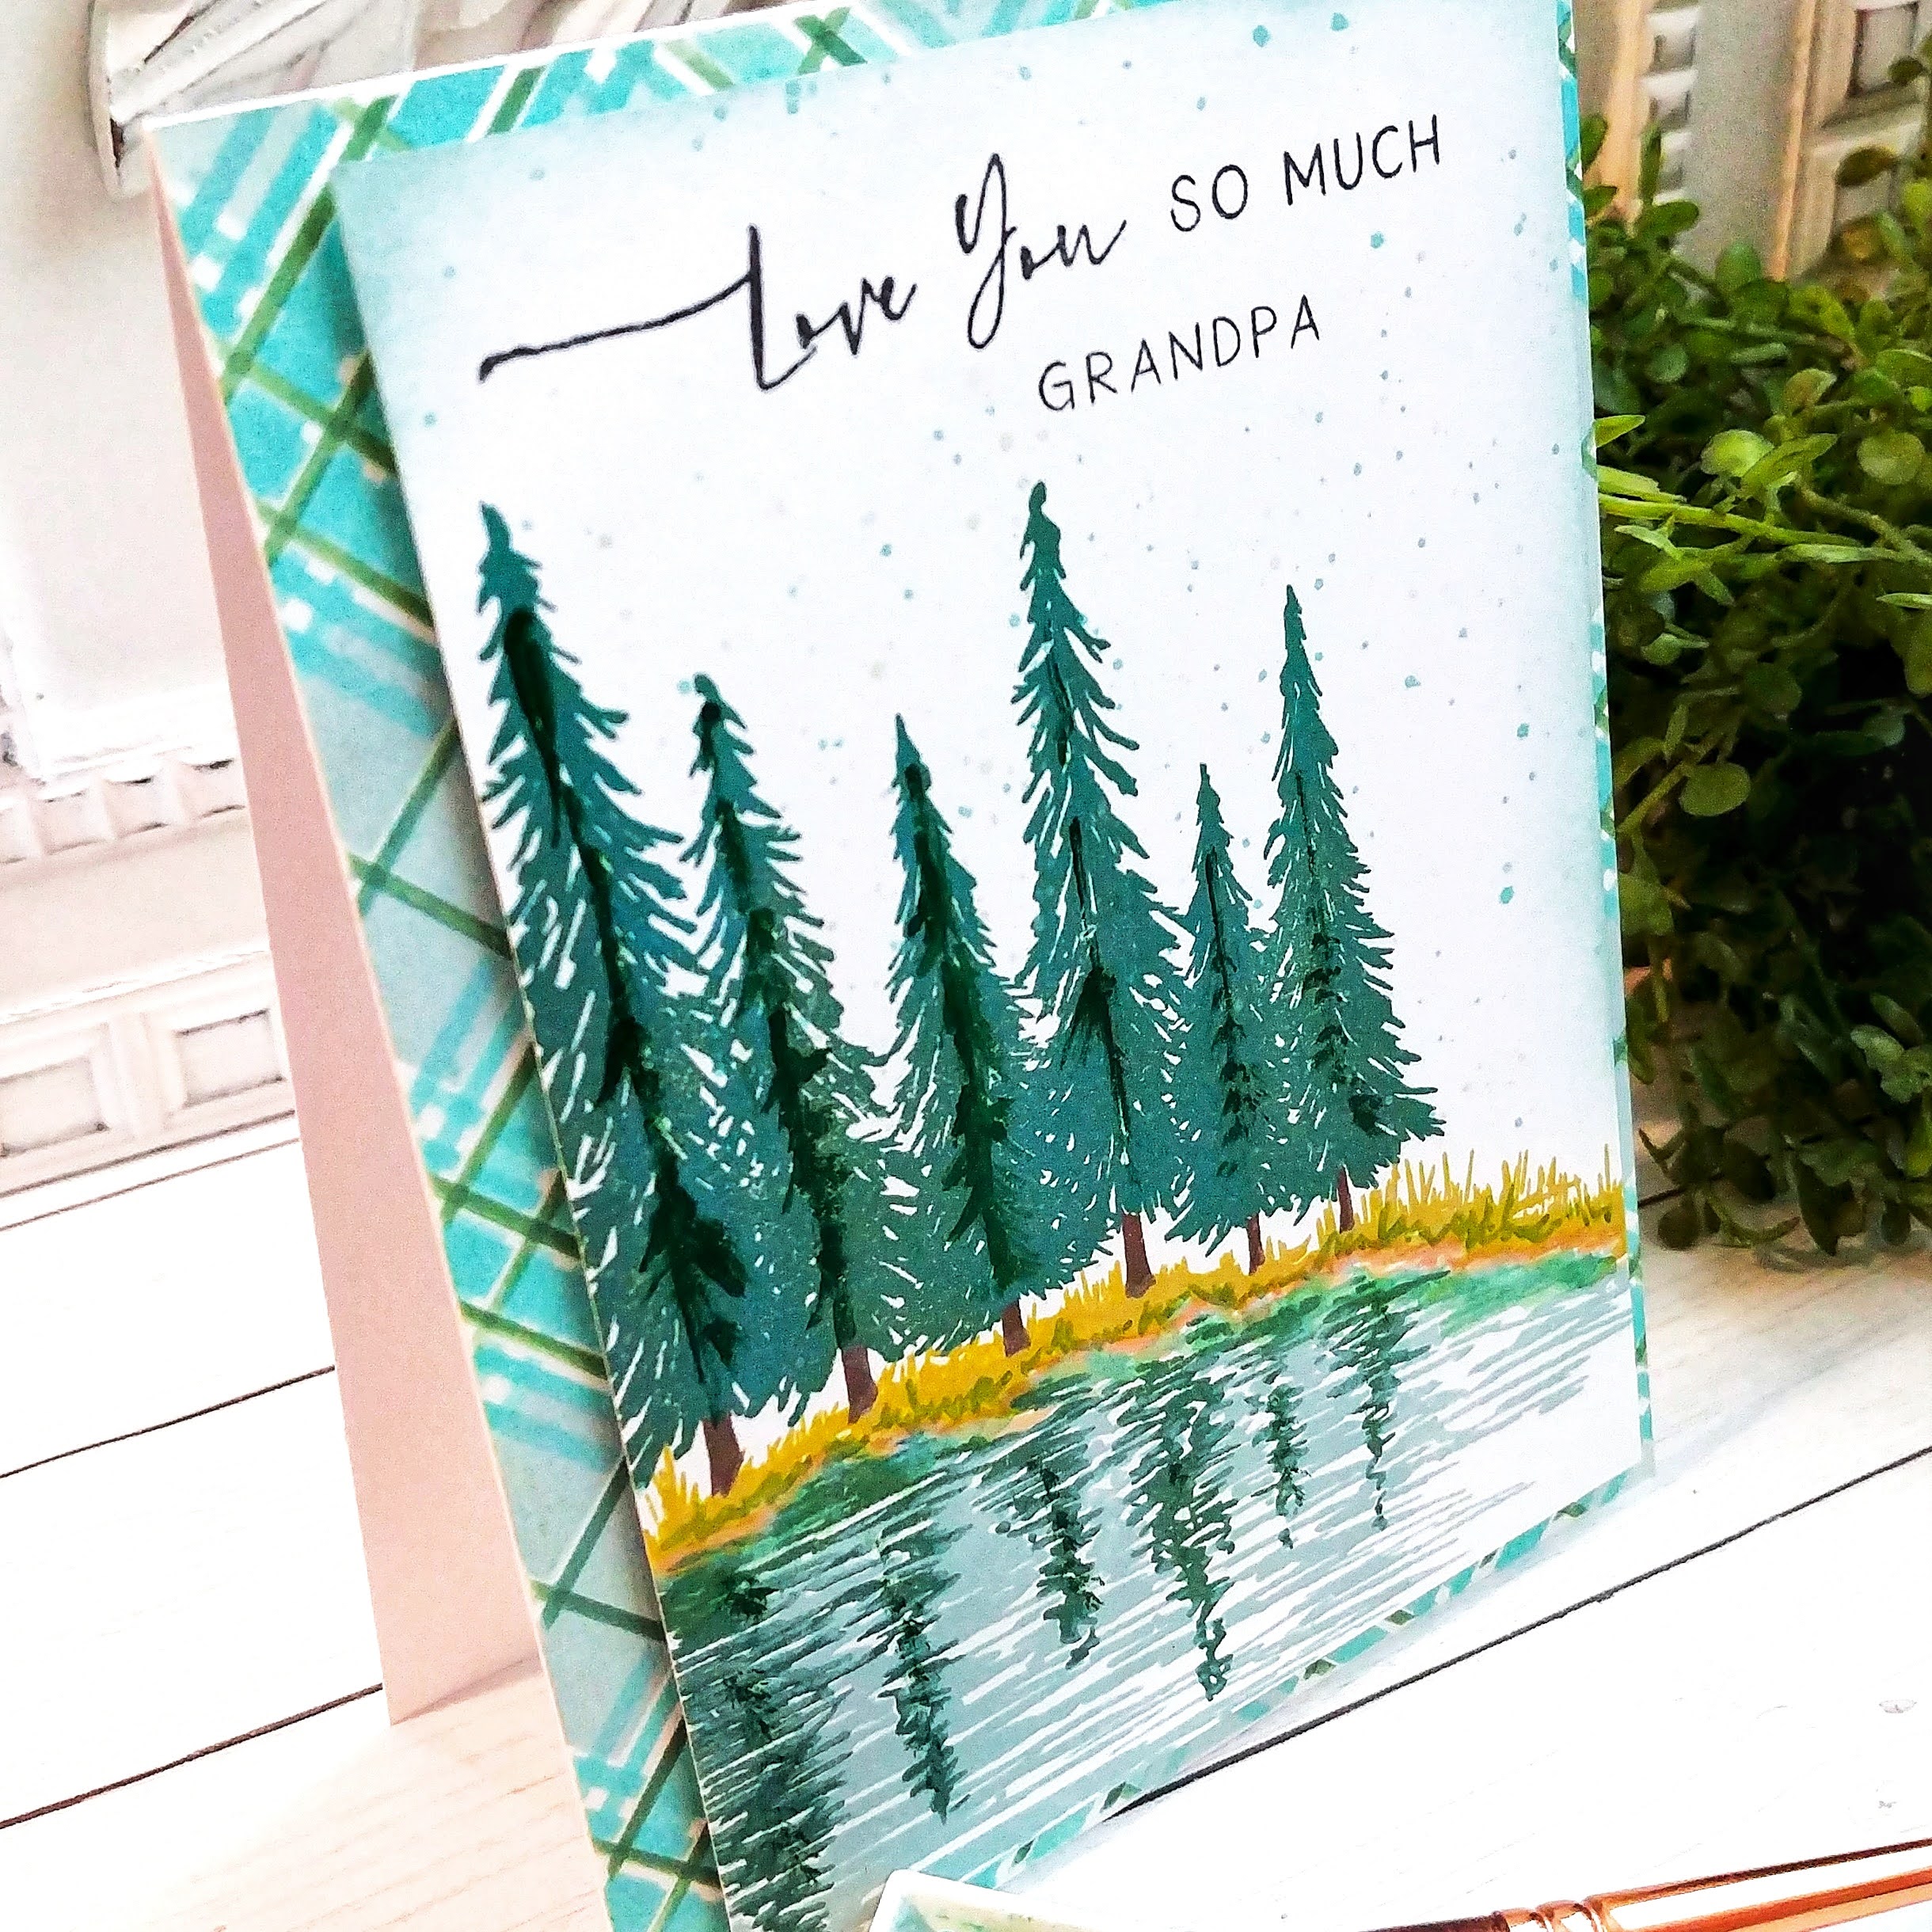
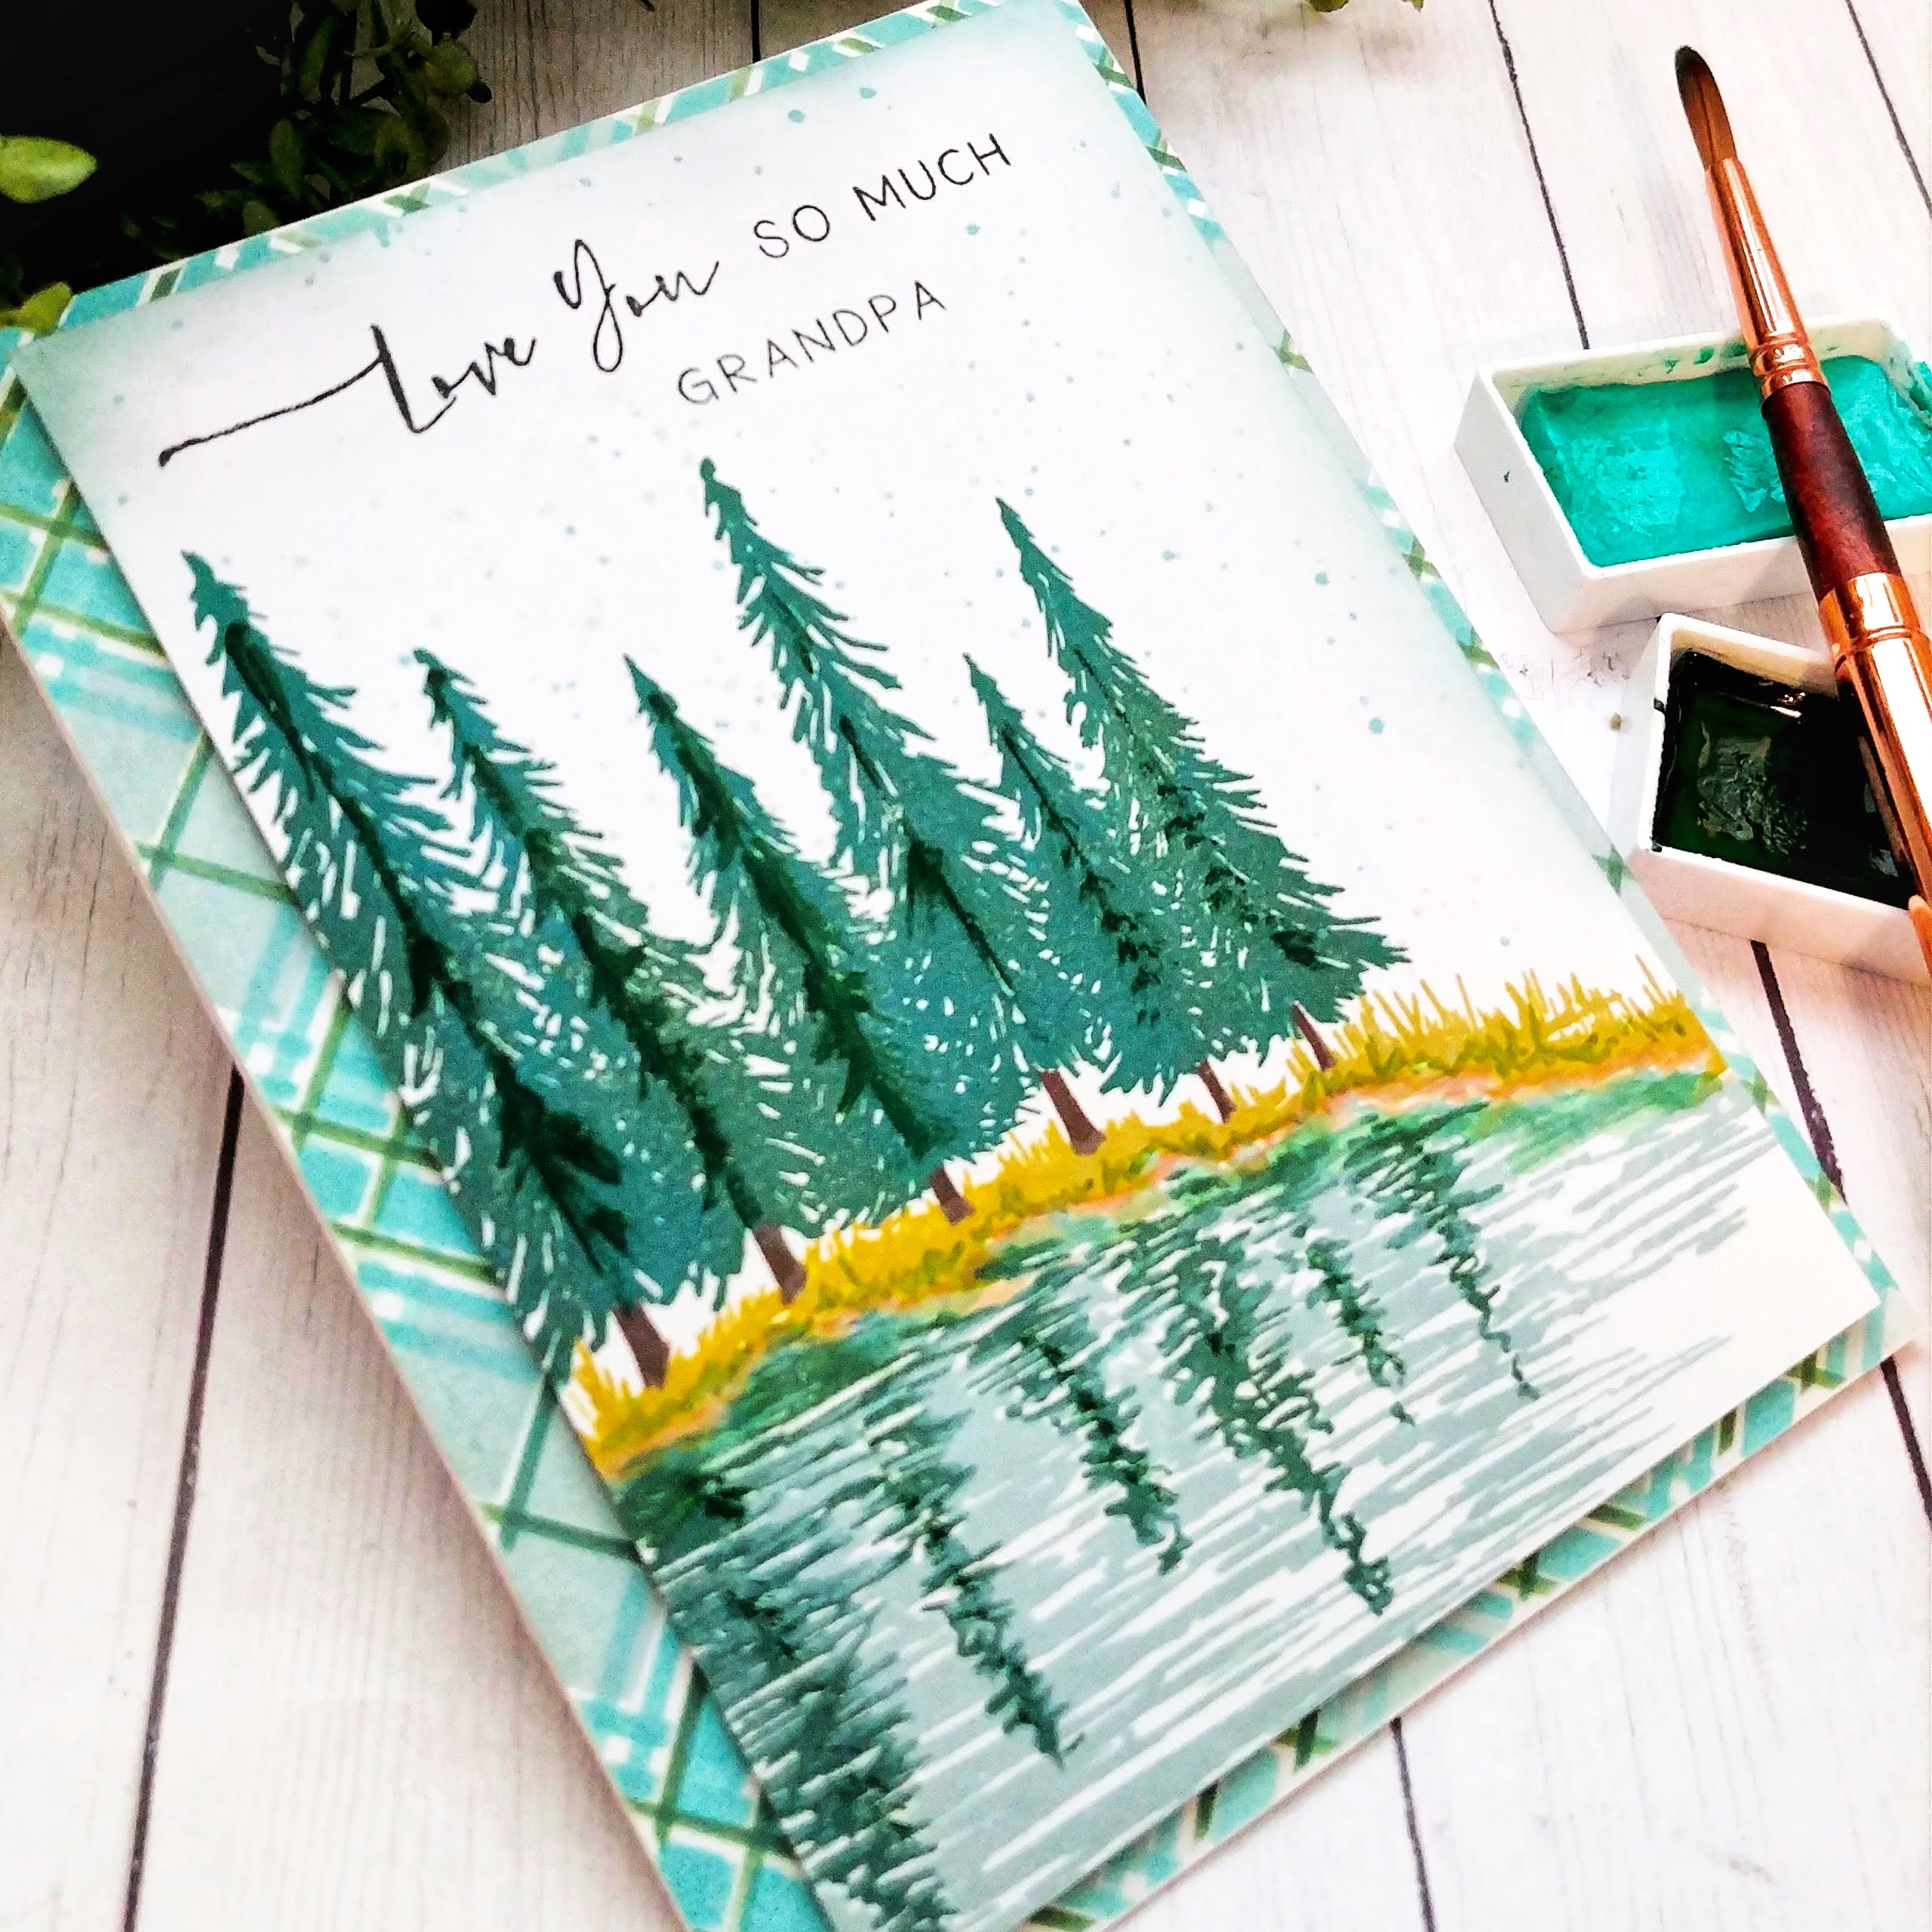
Up next is a fabulous new "artsy" set called Reflections! I absolutely love how easy this set is to use and gives you the look of a watercolor painting effortlessly!

I particularly love that is has the "Grandpa" sentiment to stretch its usefulness even further! As you can see, I've created yet another plaid background using the new Tartan Stencils Diagonal. I used Distress Oxide inks for this background as well. I used Washi tape to secure ALL of the stencils except the two stencils with the pinstripes. I got better results when I secured the stencil down with Pixie spray.

This set also has a coordinating die, which die cuts the tops of the trees and down the side of the grass. I chose not to use it, but now I'm kicking myself after seeing Betsy's lovely samples with it cut! Oh well....that's the beauty of stamps...you can make something over and over again as many times as you like and you never run out, right?

I stamped my images using Distress Oxide ink and then went in with some watercolors to add extra detail. I also used a brown marker to enhance the sand/shore portion a bit as well.

I stamped the different sentiments to create this phrase on my card. The Love You, So much, and Grandpa are all separate so you can mix and match to suit your needs!

I added a bit of ink splatter in both tan and blue to give the card a bit more detail. I cut the panel a bit so that you could see the plaid background peeking out. I placed it on the right side so that you could see the bigger portion of the tartan on the left side.

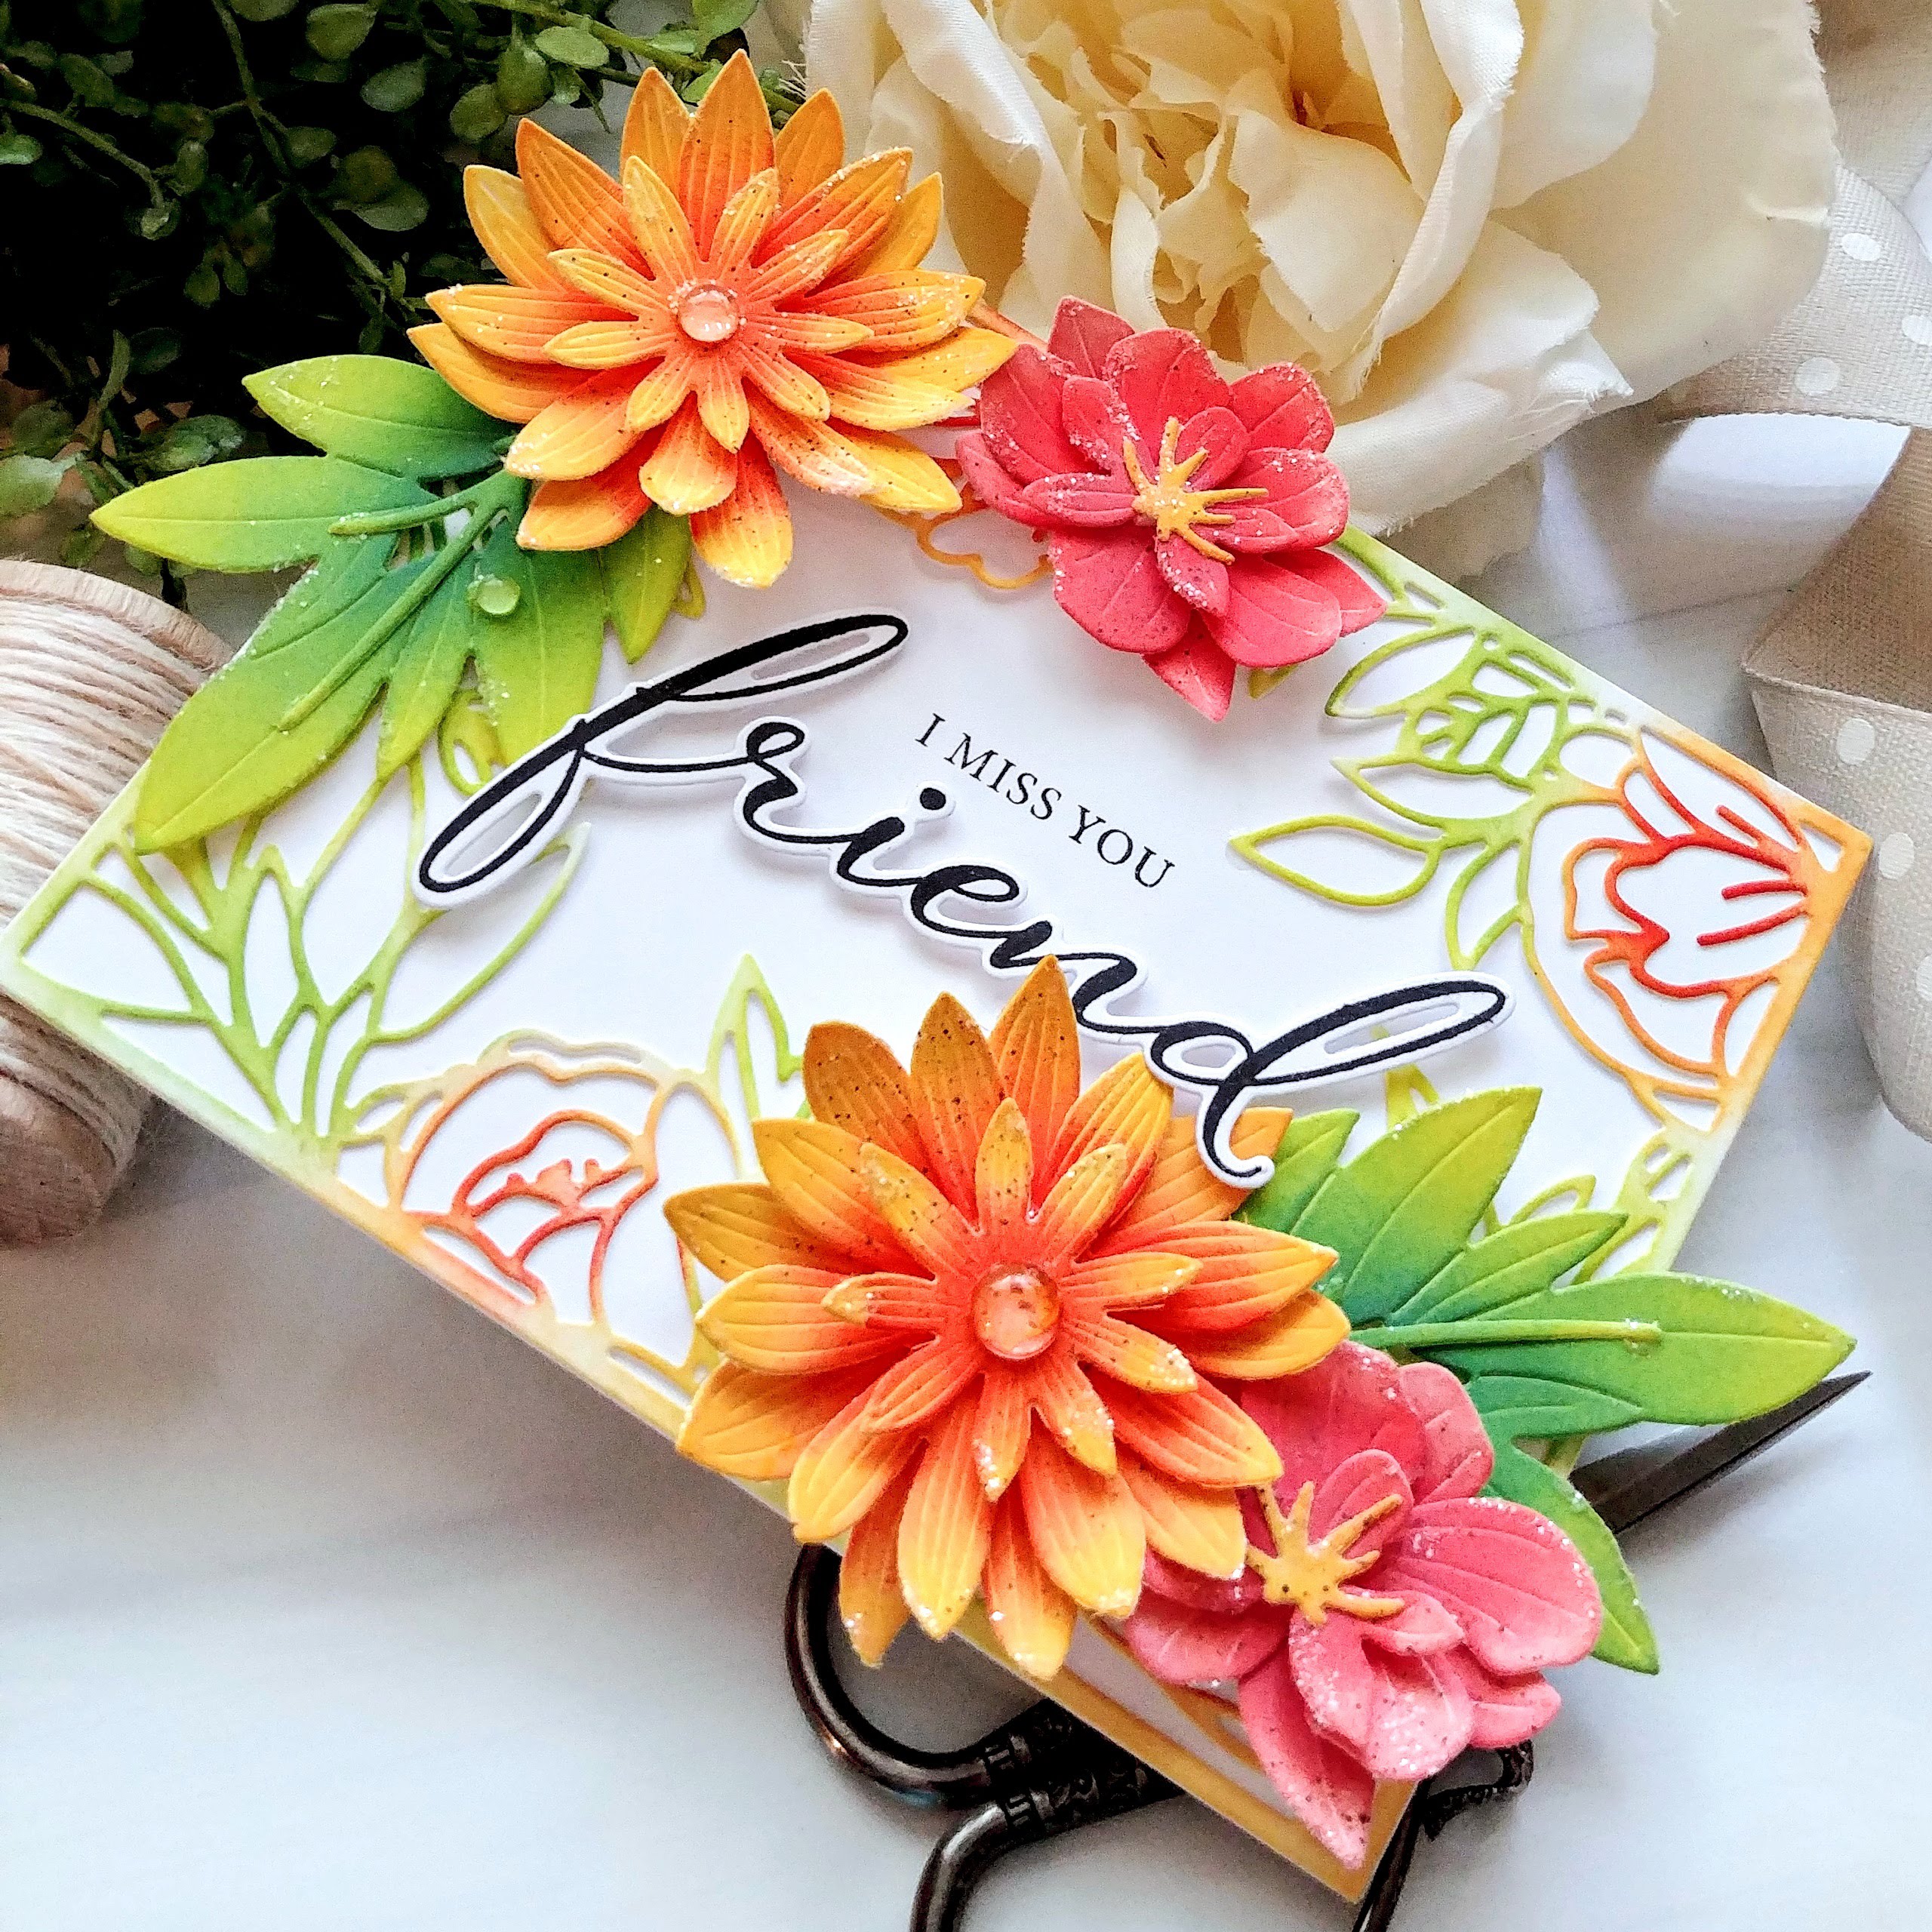
Even though this is the Man Made Collection, I couldn't help bring in a few flowers! ha ha! I used the new Sentiments Squared stamp/die paired with the new Text Box Die to create this bright and cheery Hello card!

To begin, I had a ball creating the beautiful Forget-Me-Nots. I used the new Fond of Foliage background stamp that was released last month and stamped it in a bright yellow! I love how it turned out, but kicked myself when I realized what a fun tartan background I COULD and SHOULD have made! ha ha!

I had fun creating the "hello" portion of the sentiment and putting it all together! I had a lot of fun using all of these fun new products! Head to the other designers' blogs to see how they've used them!


Saturday, May 22, 2021

Hello Bluebird {Blue Skies Ahead, Friend}

Happy Saturday, friends! I'm sharing a fun card using the new Singing in the Rain stamp set from the latest release from Hello Bluebird! I've been having so much fun as a guest designer for them this month! Utah is in a horrible drought this year, so I'm wanting the rainy vibes! Maybe I should have picked a different sentiment? ha ha! Anyway, this is super fun set and those little ducks are the cutest, don't you think?

To begin this card, I cut a panel of white cardstock measuring 4 1/4 by 5 1/2 inches and then used my NEW FAVORITE Distress ink color: Salvaged Patina! This is the only color that I have bought both pads AND the spray and paint! I'm obsessed with it and have been using it a TON! I used a cloud stencil to add the background clouds and then die cut the new Partly Cloudy Die to glue over the top. I saved a few of the clouds to add back ink to help ground the girl and the ducks. I added a few raindrops here and there using the included raindrop cluster image.

I did some quick ink blending on a scrap piece of cardstock in soft rainbow colors and then die cut the letters to spell the word "FRIEND" using the new Jane Small Alpha Die. I added Nuvo Crystal Glaze over the top and some glitter to the tops for some shine!

The images are stamped in black and then colored using an assortment of alcohol markers and then die cut and added to the panel using foam squares. I also added a small strip of rainbow paper to the bottom for even more color and pattern! Thanks for fluttering by!


Thursday, May 20, 2021

Pinkfresh Studio {Bloom with Grace}


Hello friends! I spent some "just because" crafting time the other day to create this BLOOM card using the new Be Strong stamp set and coordinating Be Strong layering stencil set and die. This one is particularly fun because even though the stamp/stencil is one image, the die cuts out the individual flowers so you can try all kinds of different design ideas!

It's no secret how much I love to use alphabets on my cards and one of the ways that I like to incorporate them is by using one of the key words in a smaller sentiment that is included in the stamp set, like the word "BLOOM" in this particular sentiment. I die cut the letters using the Kelly alpha upper case die, twice for each letter and glued them together with liquid glue. I added some Slumber ink over the top for a hint of color.

I added the letters to a white panel measuring 4 by 5 1/4 inches using small pieces of foam squares. Once that was done, I was ready to add the stamped/stenciled flowers. To create these flowers, I die cut the pieces first and then did the outline stamping. Once that was done, I was able to add the color using the coordinating stencils. I love watching them come to life as each layer of color is added!

I tucked the flowers into the empty white space using mini foam squares and then trimmed the sides using my guillotine paper cutter to square it up. I was able to use some of the discarded pieces to add to some of the smaller empty spaces.

The sentiment is heat embossed in white and layered over the top of some of the letters using black foam squares. The finishing touch is a few jewels in both purple and sapphire here and there. I added the entire panel to a top folding black card base to ground the design! I plan on using this as an unconventional graduation card that my daughter will be giving to one of her friends! Thanks for fluttering by!


Tuesday, May 18, 2021

Pinkfresh Studio {Rare and Beautiful}


 Hello and welcome!  I'm sharing a bold floral card using some of my new favorites! I'm in a "black background" phase right now, so I had fun creating this particular card with black cardstock and white embossing powder paired with the stamping/stenciling!

To begin, I used the Floral Bunch Die to die cut the base for the stamping/stenciling. From there, I stamped the flowers using the Floral Bunch stamp set and then used the coordinating Floral Bunch layering stencil set to bring this beautiful floral image to life. I chose Ballet Slipper, Sparkling Rose, and Raspberry Bliss ink for the main flower image and Lavender and Regal Kiss for the purple flowers. The leaves are inked with Grassy Knoll and Emerald ink for this bright, bold design!
Once I had the flower piece complete, I got to work on the background using the fabulous Diamond Tiles Cling Rubber Stamp. I heat embossed it in white onto the black cardstock for a dramatic, bold look. I also die cut the Stitched Scallop Rectangles using the same black cardstock and layered it over the heat embossed panel using foam squares. From there, I added the flowers using additional foam squares. Now, please note, this is one large image, but I strategically cut it to give me the split piece to maximize my efforts and use this floral cluster in a different way!

I'm currently obsessed with this particular sentiment from the Rare and Beautiful stamp set so I heat embossed it as well and added it over the top of the panel using additional foam squares. I added a few jewels as well for some sparkle and shine! The entire panel is layered onto a top folding A2 card base using foam squares. Thanks for fluttering by!