Monday, June 17, 2024

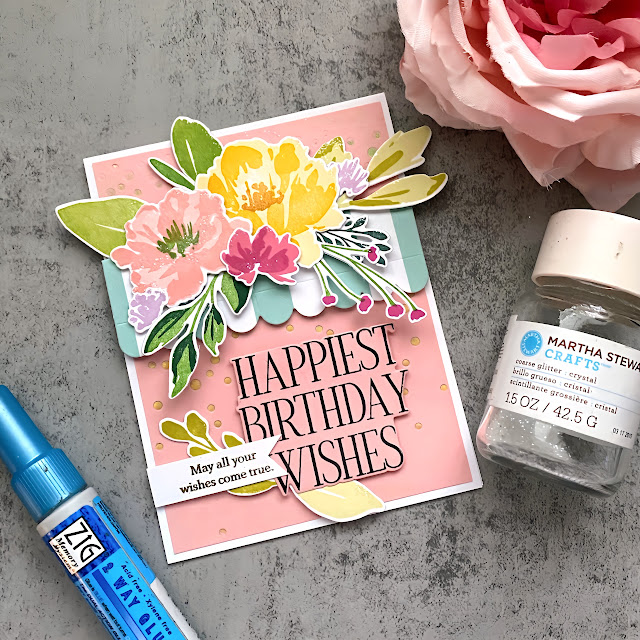
Project Inspiration (Happiest Birthday Wishes}

It's my turn for this week's  Project Inspiration from Papertrey Ink! It was shared in the newsletter, but I also like to post it here so I can give a more detailed description of how I made it! My birthday card stash has been suffering, so I have placed a higher emphasis on using birthday sentiments when I made certain cards and I took this opportunity to add to the stash! That being said, I went to a bridal shower today and I'm down to my last few cards! Looks like I know what I need to work on next!

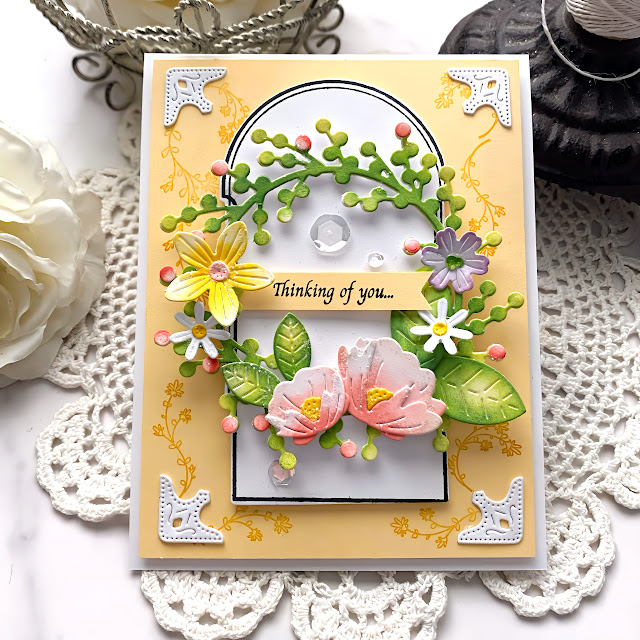
I had fun pairing the awning from the new Frozen Delights die collection with the beautiful blooms from the Always in Bloom stamp set!

To begin, I die cut all of the pieces twice, but didn't end up by using that many....I did make a second card, though!


I stamped all of the images is fun, summery colors!

I used the Cascading Dots Hot Foil Plate and then die cut the awning from the Frozen Delights Die using Bitty Big: Aqua Mist paper.

The sentiments are from the Birthday Your Way II. I wanted to keep it seamless so I stamped the large sentiment on the same pink as the background. The accent sentiment is heat embossed in gold to tie in the foiled background.

I adhered the flowers to the top using foam  squares and then added glitter to the blooms.

I was going for a flower shop vibe!

I tucked a few leaves around the sentiment. This will be a fun summer birthday card! Thanks for fluttering by!


Friday, June 14, 2024

The Greetery Garden Party Release Day plus tutorial

It's release day! Yay! The Garden Party Collection from The Greetery will be available for purchase today beginning at 10 am EDT! I have a bonus project for you today, PLUS a little tutorial on how I made the tea box favor a few of you asked about! You can find the new collection HERE!

Tea for two in the atrium, please! ha ha! My card for today features quite a few of the new products, but shaken up a bit to see them in a new way or with different possibilities! To begin, I used the new Atrium Hot Foil using silver foil on Kraft Gray cardstock. I also had a leftover wisteria branch from yesterday, so I added it to the top of the card using foam squares.

I used the pigment powder method on the two teacups that Betsy shared in her video on day 1.  I added some Aqua Mist ink over the top to color the two teacups.

I just HAD to add another sandwich from the Fancy Finger Foods die collection; they are seriously so much fun....much more fun than making real sandwiches! ha ha!

I added some lemons from the lemonade stamp set; just perfect to tuck inside the tea cups! The sentiment is die cut and then stamped using the Brew-Tea-Ful stamp set. 

You can see some of the details a little bit better with this close-up photo!

I had a few of you ask how I made the little tea favor box from day 1. It's SO easy and one of my go-to box styles for quick and easy packaging. Here are a few different shots to give you an  diea of what the sides look like. This box holds 4-5 tea packets....there is 5 inside the box when I took the photos. 

I cut a piece of Gray Kraft cardstock measuring 8 1/2 by 3. Score it at the intervals I've shown. The front and back are 3 inches and the sides and bottom are 1 inch. You will be left with a 1/2 inch 'tab' that you will use to add adhesive.

Use your bone folder and make all of the score lines crisp. Cut from the bottom up to the solid horizontal score line on each of the vertical score lines. Remove the portion that is shown in the bottom left corner.

You can see it a little bit better in this photo.

Add a piece of ScorTape to the  1/2 inch tab.

Add another strip to the INSIDE bottom flap.

Adhere the 1/2 inch tab first and then fold up the bottom and secure with the ScorTape. I found THIS old tutorial that you could use as well for something different, but using all of these fun new tea stamps/dies!

I gussied up the outside with another tea cup that was made using the exact same technique as the two on today's card.  I tucked in some extra lemons for some added detail!

Here is the link for the new collection: Garden Party Collection! Thanks for fluttering by!


Thursday, June 13, 2024

The Greetery Garden Party Day 2


Hello and welcome to day 2 of  The Greetery Garden Party Collection! I just can't get over how fabulous this new release is! As always, you can head to The Greetery Blog for the official 'Meet and Greet' for all of the new products being showcased today! Leave a comment here, and on each of the designers' blogs, for a chance to win one of two $50 gift certificates to the shop!
My first card for today features some of the cutest new products from the release! I'm in love with the new Trendy Tumbler Die and the new Sippin' Summer stamp set and die!

As you can see, I've created yet another background using the A2 Stitched Scallops Die paired with the coordinating Scalloped Gingham Stencils!

This card also features the new Squeeze the Day Stamp Set and Die...so many fun new products to make some fabulous and refreshing summertime!!

I stamped the 'hoping your day' portion of the sentiment directly onto the stenciled background, but then used the coordinating dies for the 'lemonade’ portion and placed it over the top of the tumbler using foam squares.

I used two of my leftover bouquets from the project yesterday to add in two of the corners for added detail.

I can't wait to use this tumbler for all kinds of projects!

My second card for today features the new Large Lemon Stencil (there is a die, but I chose not to use it). I used traditional lemon colors, but can't wait to try making a lime!

I absolutely love how easy this multi-step stencil collection is to use and the results are just stunning!

It probably comes as much as a shock to you as it does to me that I didn't use the coordinating die cuts to give this lemon additional dimension. I just can't explain it....this beautiful CAS lemon stole my heart! Don't fret, because this beautiful stencil collection is still calling my name and it WILL be die cut! ha ha!

I topped it off with an additional punn-y sentiment and some shimmer spray!

The lemon panel is an A2 size, but I wanted to give it a larger presence, so I added it to a Lemon Tart card base using foam squares.

Next up is the beautiful new BotaniCuts Wisteria! I'm always a big fan of the BotaniCuts series and this one is so lovely and easy to use!

I paired it with the new Filigree Frame Background die that was showcased yesterday....I remembered the name! ha ha!

The sentiment is from the new Bloom and Grow Sentiments set. The die is included in the die set that I'm sharing on my next project!

I'm particularly fond of wisteria because a sweet lady in the neighborhood has a beautiful fence just FILLED with vines; she will be getting this card!

My last project for today features the Garden Gateway die paired with the new Impressionist Garden Stamp Set and Die.

I can't wait to use this Garden Gateway all year long and tailor it to the different seasons!

As I mentioned earlier, the die for the sentiment is included in this Garden Gateway die collection.

I just want to pull the gate open and head on into this impressionist garden! There is also a few other dies being showcased today that some of the other designers are featuring, so make sure to head to their blogs! I will definitely be using those soon as well! Thanks for fluttering by!


Kelly (you are here)


Wednesday, June 12, 2024

The Greetery {Garden Party Collection Day 1}

Eep!!! Who is ready for a par-tea? A garden par-tea!!! I've had a ball using the new, beautiful Garden Party release from The Greetery! I hope you all love this collection as much as I do! All of the details for each of today's products are included in The Greetery's Blog post! Make sure to leave a comment here and on each of the designers' blogs for a chance to win one of two $50 gift certificates to the shop!

My first card for today features the AMAZING and ADORABLE new Sips Tea Stamp + cut combo and stencil! It includes four different tea cups with the coordinating stencils to add the beautiful detailing. I didn't use the Tipsy Strip die, but this particular die allows the stack of tea cups to move from side to side, yet stay stacked! It's super cute and fun; I'm sure the other designers will have cards to show you how cute it is!

The background is created using the must-have new A2 Stitched Scallops Die paired with the new Scalloped Gingham Stencils! I have had a ball using these and can't wait to incorporate them with previously released products; they're just perfect for so many occasions!

The darling flower bouquet poking out of the top tea cup and the tea bag are all from the new Brew-Tea-Ful stamp set and coordinating sentiments; the flowers can be cut from a separate die. The main bouquet is one die and then you have the option to cut out individual flowers if you want to make a multi-color arrangement, like I am showing here. I did add some additional details with a green colored pencil.

I made a cute little box to house 3-4 tea packets that could be used as a favor at a tea party or a hostess gift!

I used a Versamarker and gold embossing powder to selectively add some gold highlight to the teacup. 

I used another sentiment from the Brew-Tea-Ful stamp set; I always love a punny sentiment!

My second card for today uses the absolutely precious new Fancy Finger Foods die (I never thought I could love making sandwiches so much! ha ha) paired with the new Fine China Hot Foil. There is a coordinating Fine China stamp set that allows you to simply stamp the plate rather than the hot foil and there are floral images that I'm sure quite a few of the other designers' used. I have a plate with florals that I will share later.

I kept the tea cup white and added the bouquet. I didn't want the cup to detract from the darling sentiment and the sandwich! You can see that cute pink cup in the corner waiting for its time to shine, though! ha ha!


The background is created using another new fabulous product but the name is slipping my mind (hangs head in shame), but it will be part of today's 'Meet and greet' on The Greetery Blog today (link above).

One of the things that I like so much about this new sentiment set is all of the cut outs to really make the sentiment special and stand out without covering too much up on my card design!

I can't get over the cute tea bag with the tag at the end; totally makes the whole thing!

My final card for today features the absolutely adorable new Char-cut-erie board die! I paired it with the new Pours Tea die and stencil! Aren't those teapots so cute? You can also use the floral images from the Fine China set on the teapots as well ( you an see one of the floral clusters on the circle medallion to the left) That is the larger floral, but the smaller one would be so perfect!

I just had to add another finger sandwich to the board along wit the two different tea pots.

The gingham background was the perfect choice yet again...I know I'm never going to put these dies and stencils away!

I hope you've enjoyed day 1 of full reveals as much as I have! Join me again tomorrow for day 2 and don't forget to stop by the other designers' blogs to leave a comment and see how they've used these amazing new products!
Thanks for fluttering by!


Kelly (you are here)