Showing posts with label Sympathy. Show all posts

Monday, April 27, 2026

Papertrey Ink April Release Countdown Day 4

Wow! What a whirlwind it's been; we've made it to the 4th and final day of the Papertrey Ink April release countdown! As I mentioned yesterday, I have quite a bit to share with you again today! Up first is a card using some of my favorites from the new release and then the last 3 cards use a beautiful new sympathy set called Peaceful Meadow. I did use the leaf image from that set for the background on this first card.

To begin, I cut a 4 by 5 1/4 inch panel of white cardstock and then stamped the leaf image on two corner using Spring Rain ink. I didn't move the stamp, but rather just rotated the panel so that it would be the same for each corner. Once that was done, I added the hot foil design using the Filigree Frame Hot Foil Plate and champagne foil to the stamped panel.
I cut the middle-sized mat that's included in the Love to Layer: Top Notch Die from Spring Rain cardstock and attached it to the center of the foiled frame. I also cut the smallest mat from the same set and stamped the sentiment, which is from the Just Sentiments: You're on My Mind Mini Stamp Set in black. 

I created the Blueberry Sky banner piece using the Hold That Thought Die. I cut one of the pieces twice and then trimmed it and mounted them underneath the white portion to hide the cut seam.

I can't get enough of the Into the Blooms: Pressed Flowers Die, so I used it for the flowers and foliage.

I sprinkled some glitter on the flowers and leaves for sparkle and shine.

I added some pearls to the four corners of the foiled design and then mounted the entire background on an A2-sized Spring Rain panel. I glued it to a top-folding A2 card base using liquid glue.

For my next three cards, I'll be showing three different ways to use the new Peaceful Meadow Stamp Set. When I first saw it, I wondered if I would really be able to create anything other than the prescribed way of using this set, but much to my pleasant surprise, this set has become a favorite and I really love all of the delicate pieces that can be used in so many different ways! 

My goal was to use each of the three included sentiments on each of the three cards. For this first card, I paired the "remembering" sentiment, which is included in the set, with the Strength sentiment that was featured on day 1.

I used the new Regal Flourish Frame (yes, again) on a panel of Lilac Grace cardstock using champagne foil. I trimmed it down and then mounted it onto an A2-sized panel of white cardstock that has been cut using the Nesting Basics: Pierced Rectangles Die.

The die set comes with the option to combine the branches and leaves together one one die OR there's the option to cut the leaves or flowers separately and then add them to the branch image. I decided to omit the branches altogether on this card and just lay the leaves over the top for a delicate look.

I cut the flowers separately from the stems and then glued them together. This is the same thing you could do with the leaves and branches, but as I mentioned earlier, I chose to just use the leaves.

The stamp set comes with six different birds and I chose to use these two to perch in the leaves. I did add some black marker to create eyes, but in retrospect, I'm not sure if I like it!

I probably should have shared this card earlier, but this is more of the prescribed way for using the set. This shows the branches and leaves/flowers and stems put together on their singular die cut. I wanted something springy, so I chose to make leaves that look like blossoms.

This card features the second sentiment included in the set, which is a nice sized "With Sympathy" stamp.

For the background, I used the stencils included in the Elegant Notes Stationery Kit; blue to mimic the sky and green at the bottom to mimic grass.

This will be a perfect CAS sympathy card for mailing!

I went for a rustic look for my next card using just the leaves on the corners again, but this time stamped in green! I love all of the versatility I was able to achieve with this stamp set!


The flowers are from the new Into the Blooms: Pressed Flowers Die and the wood slices are from the Into the Blooms: Wild Wood. I cut the middle portion from Fine Linen cardstock and the outer portion from white and then colored it with Walnut Stain distress oxide ink.

This is the third sentiment included in the set; I love that they each have a coordinating die! It really makes the design options easier! 
Everything will be available for purchase tomorrow! Thanks for fluttering by!


Thursday, January 8, 2026

Seasonal Sympathy {and breaking all my rules}


It's never fun to need sympathy cards and I wish this one in particular wasn't needed, but here we are! A dear friend lost her mom a few weeks ago and is now awaiting the passing of her sweet dad! None of the cards I had in my stash seemed fitting for this time of year so I decided to make something new, a little more fitting of the season. Also, I'm breaking a few of my "rules" for sympathy cards, so come along as I dive into the creation of this card.

To begin, I created the background by cutting a 4 by 5 1/4 inch piece of Powder Green cardstock and embossed it using a cable knit embossing folder from Gemini Junior. I'm having a hard time locating it, so maybe it is discontinued. I added some Walnut Stain Distress Oxide Spray for depth and interest and set it aside to dry.
Next, I die cut all of the foliage, berries, and pinecones using some assorted sets. The brown leaves, the broad, thick leaf and pistachio colored leaves are all from the Into the Blooms: Anemones Die. The brown leaves are colored with Creamy Caramel ink from SU!, the broad leaf is colored with Stormy Sea (PTI) and Handsome Hunter ink from SU!, and the pistachio colored leaves are colored with Mint Julep (PTI) and Handsome Hunter (SU!). The large leaf cluster is from the Into the Blooms: Christmas Sprigs Die and is colored with Stormy Sea and Handsome Hunter.

I used the Into the Blooms: Pine Die for the pinecones. They are colored with Chocolate Chip ink (SU!) and then the berries are from the Into the Blooms: Bold Berries Die. I colored them with Antique Linen Distress Oxide ink with a touch of brown (whatever was left on a sponge dauber). I spritzed everything with a combination of Frayed Burlap Distress Spritz, Walnut Stain Distress Oxide Spray (linked earlier) and Antique Linen Distress Oxide Spray.

I set all of the foliage and things aside to let them dry. I die cut the middle size included in the new Love to Layer: Polished Points Die from Vintage Cream cardstock and stamped the sentiment. It is my go-to sympathy sentiment and is from the Vintage Garden Stamp Set. I stamped it with Walnut Stain Distress Oxide ink and added some ink splatters with the same ink. I used a sticky note to cover up the main portion of the sentiment and then just splattered it everywhere else.
I felt the sentiment needed something extra, so I rummaged through my mini sentiment stamp sets hoping to find an accent that was fitting. I made some modifications to the original saying; it said Sending Prayers For A, so I just used a sticky note to cover up the unnecessary bits and then heat embossed it in gold. The sentiment is from the Just Sentiments: Get Well Mini  Stamp Set
I added the sentiment panel to the background using foam squares and off-set it near the bottom right. I knew I was going to need more room on the left side for the foliage, berries, and pinecones. 
I arranged them using foam squares and liquid glue until I was satisfied with the arrangement. I added some Rock Candy Glitter and Shimmer Spray-Sparkle. Now, if you've been around awhile, you will know that I generally don't add glitter to my sympathy cards. I decided to add it to this card to give it the snowy look I was going for. So, here I am breaking my rules! ha ha! I also usually don't like to add sequins, but I did add a trio of sparkling clear sequins around the sentiment.
I think they just work on this seasonal, winter design! I adhered the entire background to an A2 top-folding Vintage Cream card base using liquid glue. I did stamp an inside greeting and added a few extra berries and leaves to the inside, but I forgot to take a pictures. I am definitely trying to be more prepared and stamp the inside of my cards as I make them and not wait until I NEED them. This really came back to bite me during Christmas....I didn't even get around to stamping on the inside of many of them and I felt bad. 
Thanks for fluttering by!


Friday, August 15, 2025

The Greetery {Wisteria Sympathy}


Hello and welcome! I’m happy to be here today sharing a pair of sympathy cards; I mentioned last month I needed to make welcome to the neighborhood cards, but somehow, I’m ALWAYS needing sympathy cards. The others got pushed to the back-burner and here I am with this floral pair! Now, this design could work well for almost any sentiment, so if you’d like to make somethings similar, just swap out the sentiments to suit your needs!

To begin, I used the beautiful BotaniCuts Wisteria Die and cut everything twice from white cardstock. I wasn’t actually planning on making two cards at this point, but rather cutting enough pieces to be able to arrange them as I wanted. I used finger sponge daubers and distress oxide inks to color all of the pieces. I used the placement guide included in the wisteria die to get them adhered correctly using liquid glue.

I used the Jumbo Curiosity: Butterfly Die and Stencil and cut 4 butterflies; I like options and this allowed me to try out a few different combinations. I only ended up using 3 of the 4 so now I have an extra for another project; maybe those welcome cards! (wink!) I gave them a spritz of shimmer spray as well as the wisteria flowers. I used a fine tip journaling pen to add some of the black details to the butterfly wings.

I kept one background white with a bit of tumbled glass distress oxide ink blending in the center and then worked my way out for a soft feel. The second background was created using the Seed Catalog Background Stamp and speckled egg distress oxide ink. I rounded the corners on both panels for a soft look.

I used liquid glue to attach the greenery portion on both backgrounds. I attached the wisteria pieces using small foam squares. The butterflies are attached with liquid glue only to the butterfly thorax and abdomen portions so I could bend the wings for realism.

For the sentiments, I die cut the pieces using the Comfort and Joy Die and then stamped the images using the Comfort and Joy Stamp Set. I have used this particular sentiment set in the past for a series of sympathy cards; I love that it transcends beyond Christmas and holiday projects! I used foam squares to attach them to the backgrounds. For the white background, I was able to stamp the ‘sending’ image directly on the panel and then placed the rest of the sentiment underneath.

I attached each of the background panels to top-folding A2 card bases using liquid glue. I DID round the corners of the bases before attaching, though. A trio of sparkling clear sequins finishes off the pair! I will probably add an inside greeting before they get filed away. I have decided it’s better to take that step BEFORE you need the card, because sympathy cards are rarely predicted! Thanks for fluttering by!

Thursday, July 24, 2025

With Sympathy

Hello and welcome! I hope your week has been amazing so far! I'm feeling confused as to how it is already Thursday, but here we are! ha ha! Back in May, when I made THESE cards, I mentioned I would use those for mailing and then if I was going to deliver a basket or something, I would make a card with more dimension and bulk. Well, here we are needing more sympathy cards. Well, technically only one, but since I was making one, it made just as much sense to make two!
For the background, I cut two A2 panels from Sea Glass Cardstock (this is the closest match I have found to Aqua Mist) and then used the beautiful Mandala Blooms 3D Embossing Folder. One one panel, I added Teal ink from SU! over the top of the raised portions for additional depth. I left the other one alone for two different looks.

I die cut all of the pieces for the flowers and leaves twice using the Into the Blooms: Anemone Die and then colored them with dye ink and blender brushes. I cut the centers from gold, because I just can't seem to stop with that, BUT, I have an idea for another card and the centers WON'T be gold! ha ha! The green leaves and stems are colored with Simply Chartreuse and Ripe Avocado ink, the bluish leaves are colored with Aqua Mist and Teal SU! ink, and the flowers are Lilac Grace and Plum SU! ink.

I glued the pieces for the flowers together using liquid glue and foam squares. The larger sentiment is from the Vintage Garden Stamp Set and is heat embossed in gold powder on a strip of vellum. I wrapped it around the center of the embossed panel and secured it to the back using tape. I arranged the flowers and leaves until I was happy with the arrangement. 

Fort this card, I arranged the flowers and then wrapped the sentiment strip around the top. This particular sentiment is from Feathered Friends 4 Mini Stamp Set.

 Both sentiments used for today's cards are my go-to for sympathy cards. I added pearls to the sprig piece and gems to the flower centers. Each panel is added to a top-folding A2 card base with the inside stamped with a greeting from the Inside Greetings: With Sympathy Stamp Set
Thanks for fluttering by!


Thursday, May 1, 2025

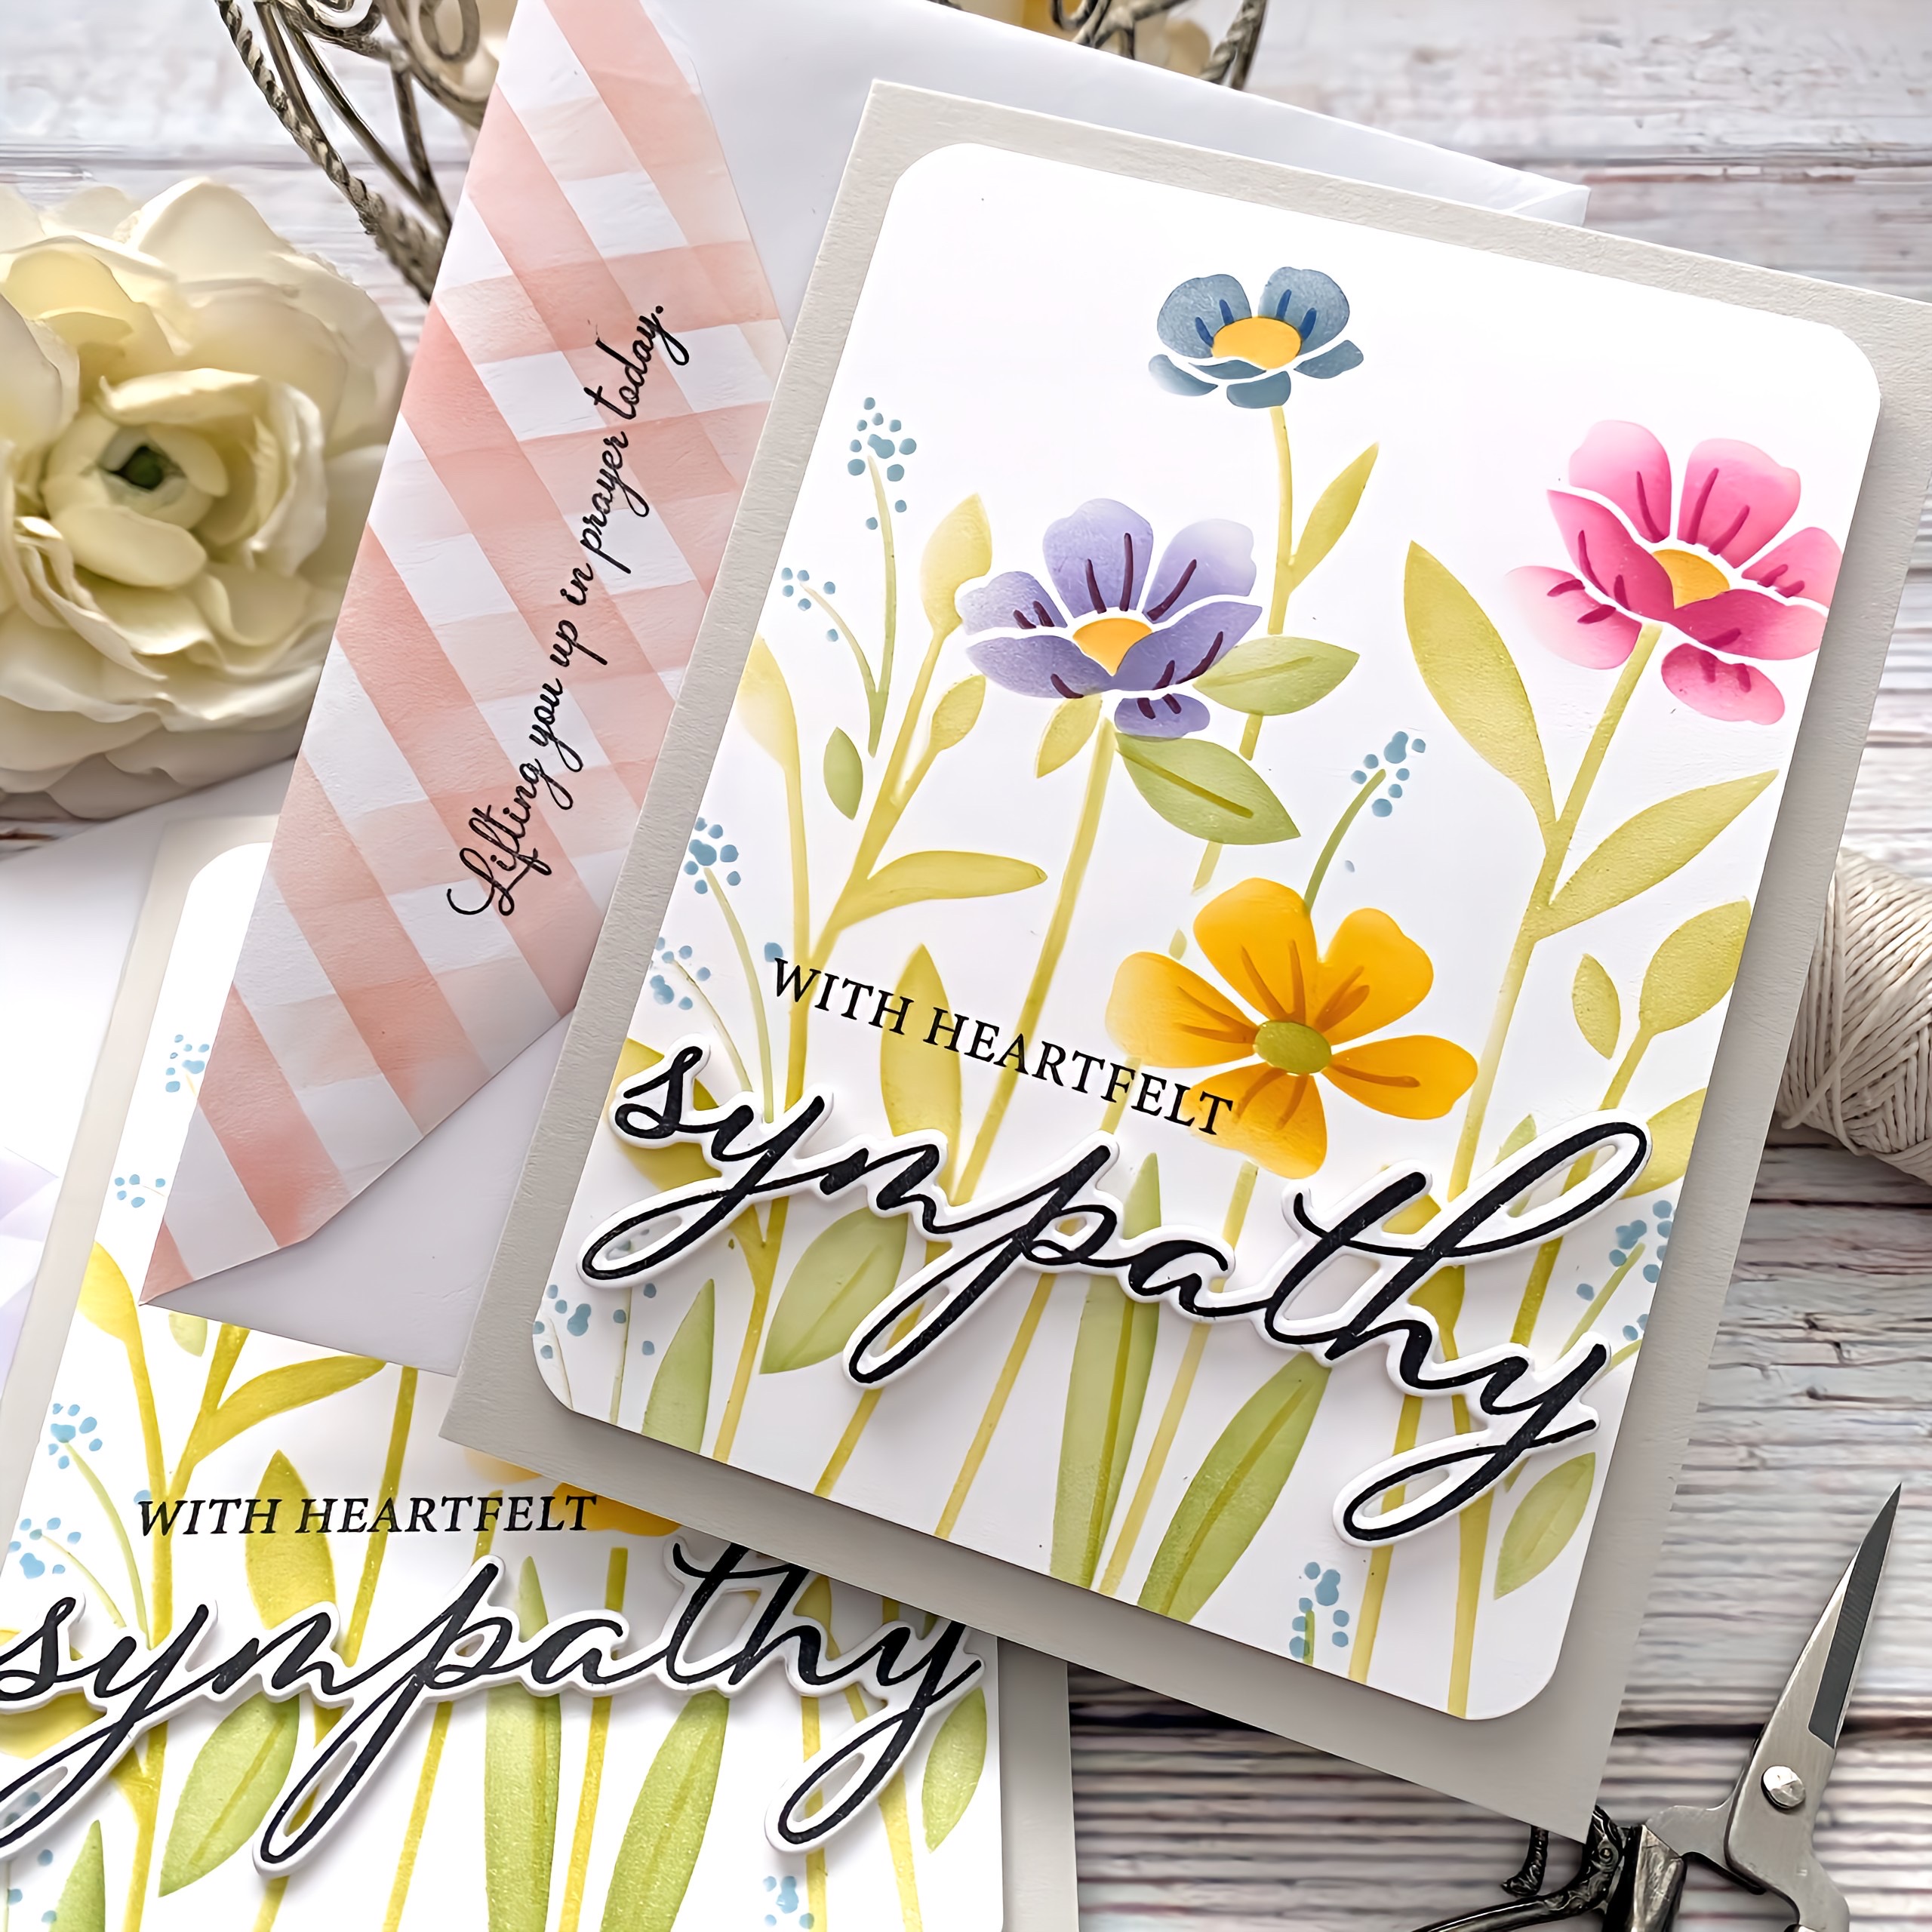
With Heartfelt Sympathy


Hello and welcome! Over the last month or so, I have been in need of quite a few sympathy cards, unfortunately. I like having a variety on hand because they are always needed unexpectedly and I like to send condolences quickly. 

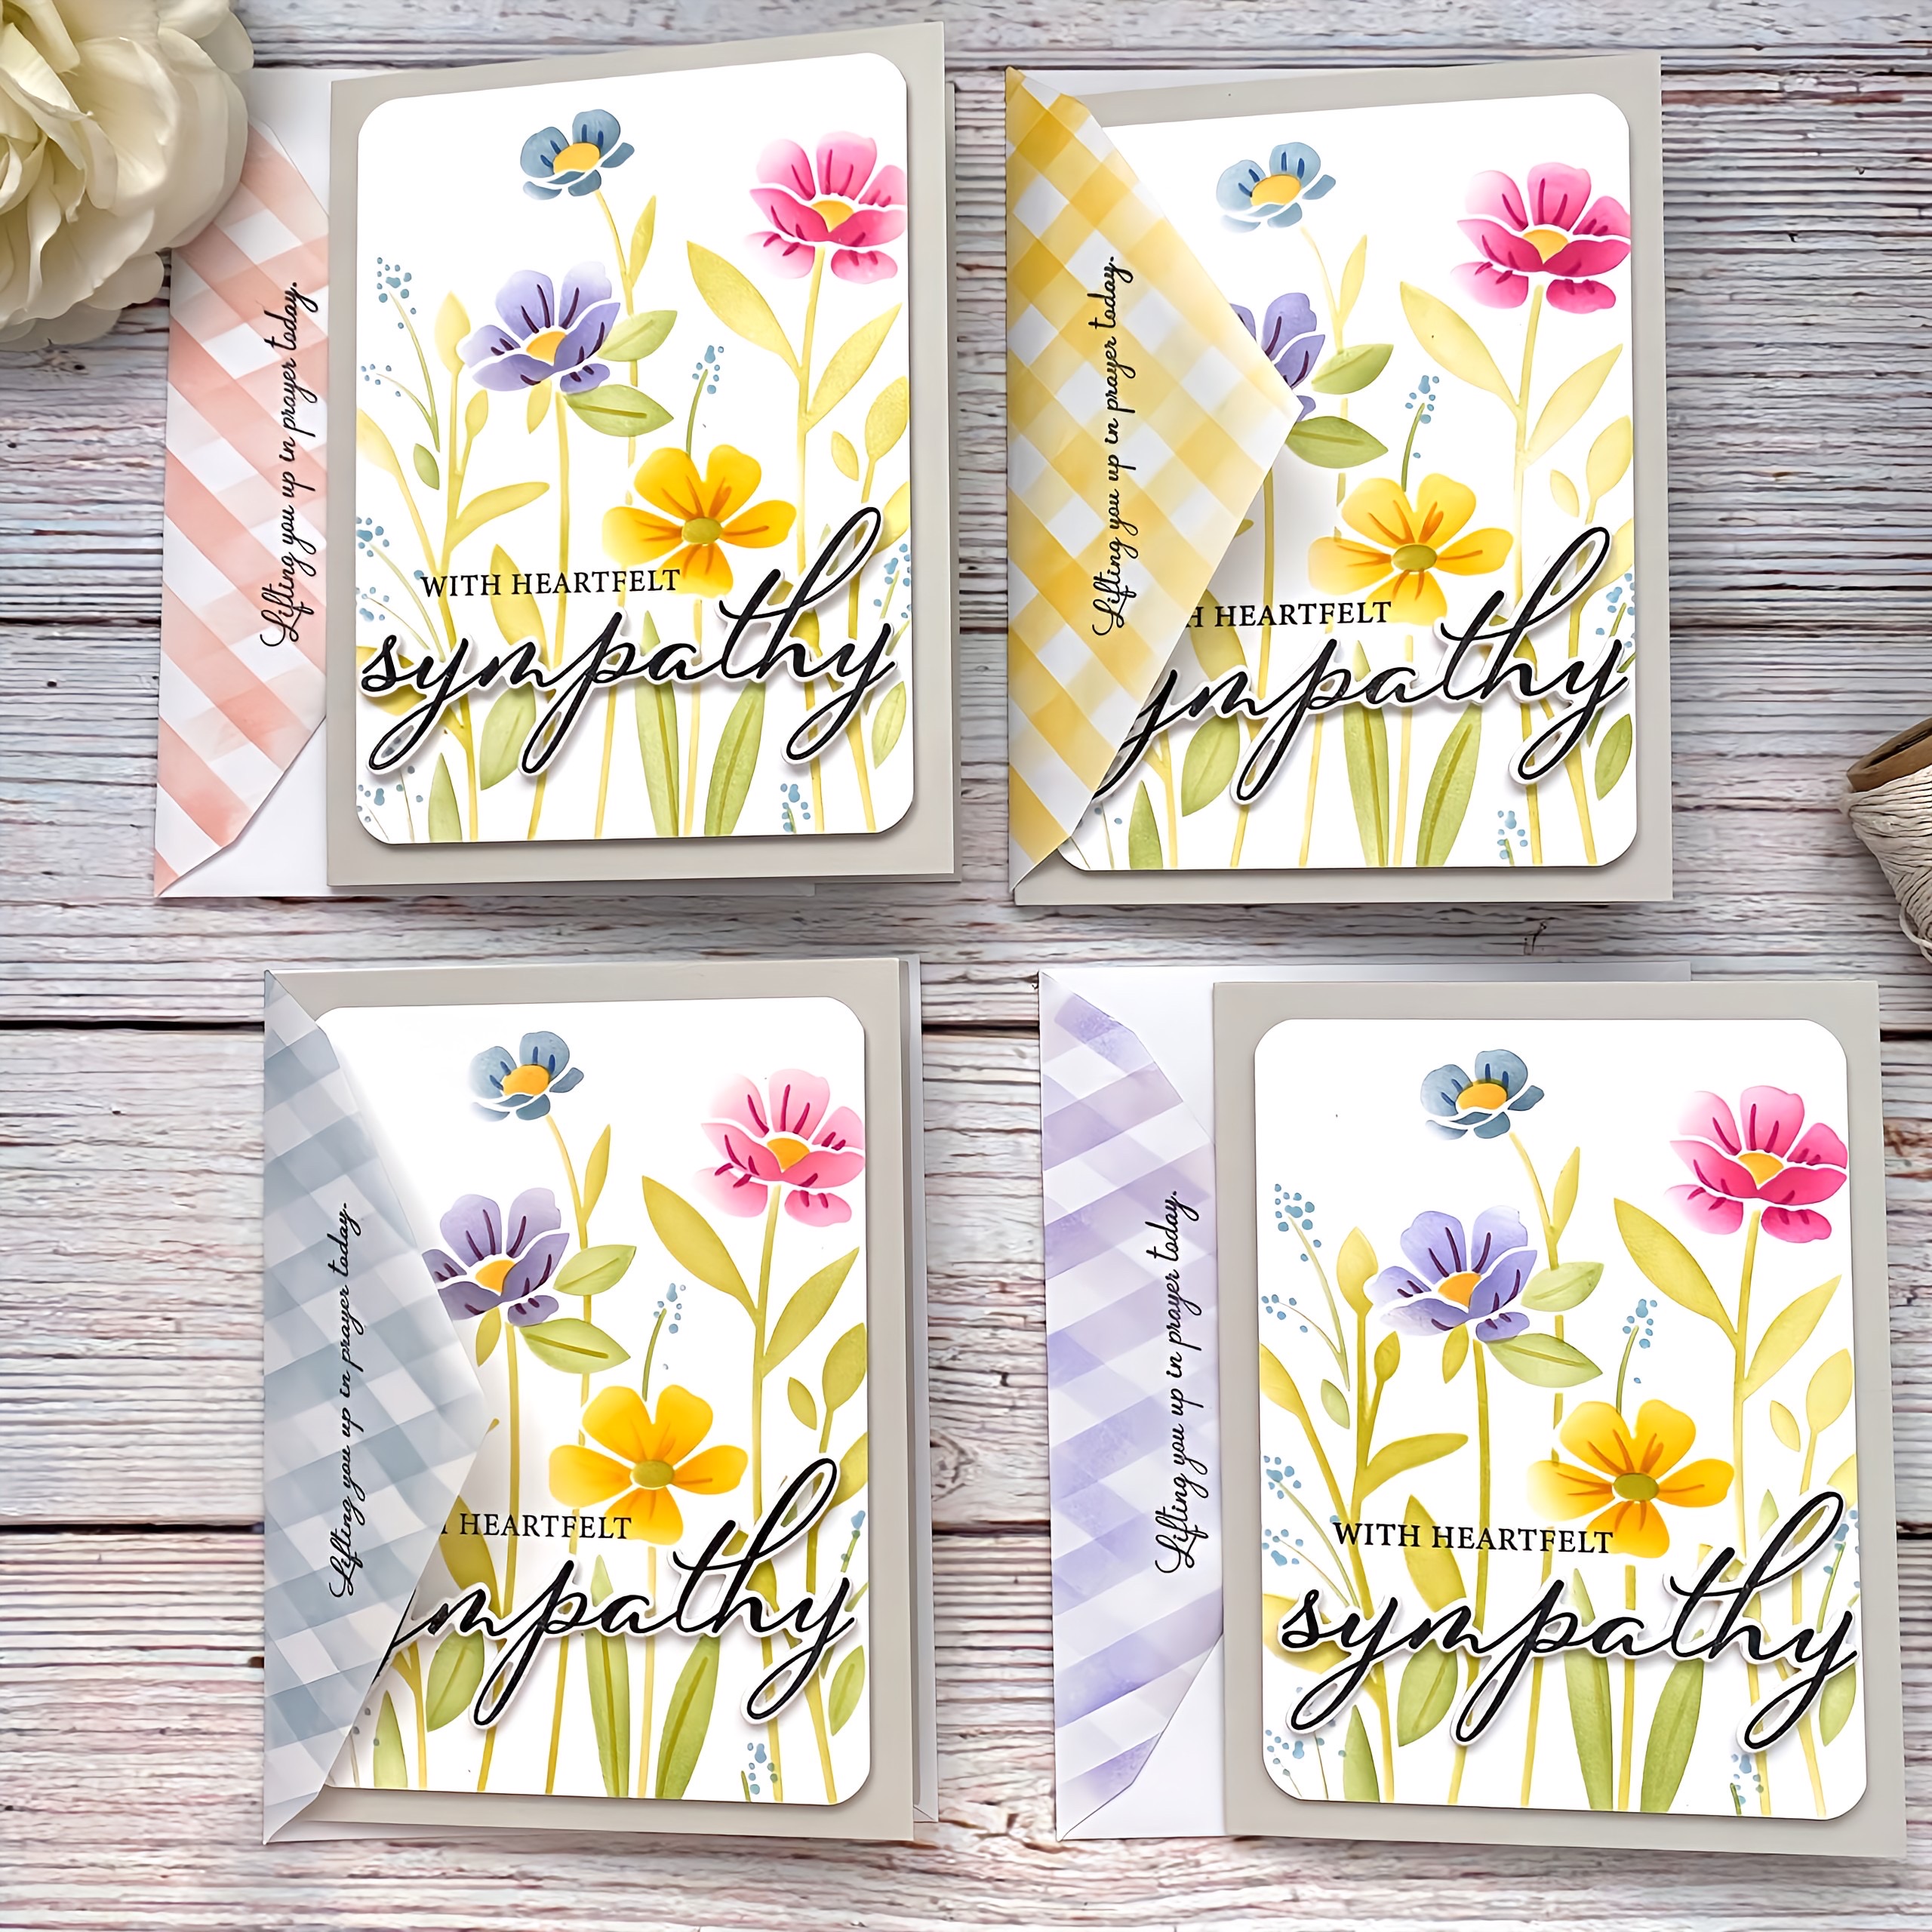
I've mentioned before I like having sympathy cards that can be mailed and others that can accompany a sympathy basket. These 4 are mailable and I have plans to work on some with more layers.

To begin the set, I used the Wild Blooms Stencil Collection on 4 white A2 panels. This was a comedy of errors, but in the end it all worked out! The stencils aren't numbered and it has been awhile since I used the collection AND I didn't realize I was missing two of the steps! ha ha! I did find the missing two, so I was able to get them finished, but it's best do them in order! 
I had originally planned to make 4 different panels with all of the flowers on each card being the same color, but knew that would mean I would need to clean the flower stencil between each color! I decided it made more sense to make each panel the same and just use 4 different colors on each one! ha ha! I really like the results and I'm happy I didn't do all the same color!

Once I was done with all of the stenciling, I cut each panel to measure 5 inches by 3 3/4 inches.  I rounded the corners with a punch and then stamped the "with heartfelt" portion of the sentiment directly onto the panel using black ink. The sentiment used on the front is from the Perfect Pairs: Commodities Stamp Set. I die cut the sympathy portion 8 times from white cardstock using the Perfect Pairs: Commodities Die. I stamped 4 using black ink and then glued another one underneath so each word is double thick for stability. 

I used little pieces of foam squares to pop up the sentiment underneath the "with heartfelt" portion. 

I scored and cut 4 card bases from Soft Stone cardstock and then attached the stenciled panels using foam squares. It's hard for me not to use any dimension, but between this and the sentiment, these will still be easily mailed with regular postage.

It's no secret that I love a coordinating envelope, so I used the Show Your Stripes Stencil Collection to add the gingham design to the flaps of the envelopes. I also added the "Lifting you up in prayer today." sentiment, which is from the Praying for You Sentiments Stamp Set, in black ink on each of the four envelope flaps.


I forgot to photograph the inside of each card, but I cut 4 white panels measuring 4 by 5 1/4 inches and then stamped one of the sentiments from the Inside Greetings: With Sympathy on each panel. I used a tape runner to attach them to the inside. My daughter has been needing to use some of the sympathy cards and she likes if there is a sentiment on the inside. I like it too, so I was glad to have these all stamped and ready to go. Oftentimes I am in a rush when I am making cards and I don't take the time to stamp an inside greeting, but I'm always glad when I do! 
Thanks for fluttering by!