Tuesday, October 24, 2023

The Greetery {Christmas Sampler Gift Tags}


Hello and welcome! I'm thrilled to be here today sharing some tags to gussy up your holiday packages using some of the latest products from the Recollective Holiday Collection! One of my favorite things about wrapping Christmas gifts is adding the finishing touches: the ribbons and tags! I created a trio of tags using each of the sentiments included in the Christmas Sampler Stamp Set.

I made quick work of the stenciling portion and just created them assembly line style using the Christmas Sampler Stencils. Once that was done, I used the previously released Aida Cloth Texture Plate to give it that authentic “stitched” look! I just love how it takes the sampler to the next level of cuteness!

I used the Hoopla Round Inserts die to cut the stenciled samplers into circles and then used the Hoopla Round die to make each of the three embroidery hoop frames and the cute little “hanger” on the top. That part is hard to see because of the Big Beautiful Bows, but they are there and they add just the right thing to attach the striped baker’s twine!

I added a different color bow to each of the three tags; these bows are made using the Big Beautiful Bow Die. This might be one of my absolute favorites from the new release….I just love how realistic they end up looking! I did take some creative liberties with the “tails” of the ribbon to suit the needs of my project. I used three different arrangements for each of the three tags so you can see a few options.

I tucked some BotaniCuts: Juniper sprigs here and there for a touch of greenery to really pull in the holiday spirit! You could add some glitter or snowy accents, depending on the feel you are going for. I simply colored mine with Distress Oxide inks and left them glitter-free.

For the inside of the tags, I used the leftover circles from making the hoops and used them to my advantage. I stamped a few of the sentiments included in the Wrapped in Love Sentiment Additions Stamp Setto finish off the inside. I simply glued the circles to the inside of the tag for a finished look. Thanks for fluttering by!


Monday, October 23, 2023

Papertrey Ink October Release Countdown Day 4

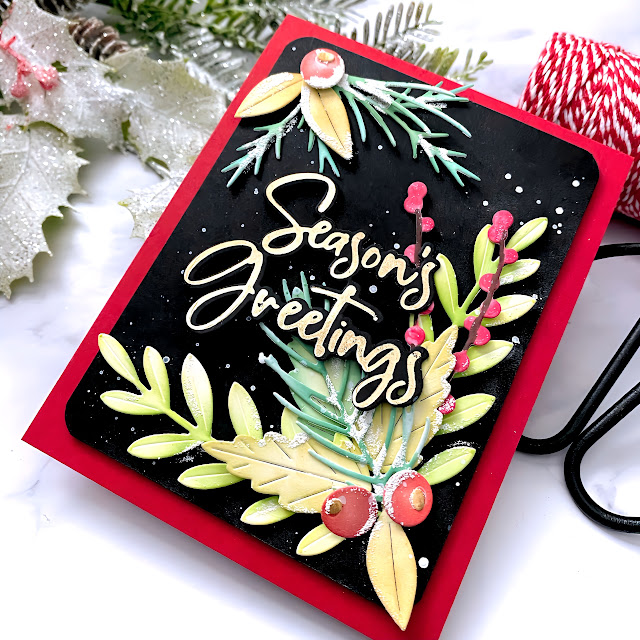
Well friends, it's the 4th and final day of the Papertrey Ink October release countdown! I have two remaining projects to share with you today and then everything will be available for purchase beginning at 10 pm ET on Tuesday night! My first card for today uses the fabulous new Season's Greetings Hot Foil. I decided to make something bold to really enhance the sentiment.

I don't think it's any secret how much I love the Into the Blooms series, and it's probably even more obvious how much I enjoy the Into the Blooms: Christmas Sprigs die collection! I've been having so much fun inking them and using them on so many of my Christmas cards this year.

I added some white paint splatter and white puff embossing powder for a snowy look!

Last, but not least, is the latest addition to the Psalm Reflections family. While this isn't particularly a Christmas sentiment, it talks about joy and that's good enough for me! ha ha!

In the corners you will see the new Psalm Reflections: October die....I absolutely love the detail that it adds, especially with this tone-on-tone look!

I was itching to ink up some of the new Holly to add here and there around the sentiment.

I generous sprinkling of glitter really gives this card that holiday sparkle!

This concludes my projects for today AND for the October countdown! Everything will be available in the shop beginning at 1o pm ET TOMORROW! Thanks for fluttering by!


Sunday, October 22, 2023

Papertrey Ink October Release Countdown Day 3

I'm back for day 3 of the Papertrey Ink October release coundown!  I have two cards to share with you today; up first is a card using the new Ornament Opulence stamp/die set. I really like the size of these ornaments, the different designs, and the accessories that come with it.

I used this set a little bit differently than it is intended. I die cut the ornament shapes from solid cardstock and the gold toppers rather than die cutting everything from white and stamping. 

I chose Pale Peony, Autumn Rose, and Pinefeather cardstock for the three ornaments. I added Autumn Rose ink around the perimeter on the Pale Peony ornament, Scarlet Jewel ink around the Autumn Rose ornament, and True Black around the Pinefeather ornament. I stamped the designs on each of the 3 ornaments with Stampabilities metallic gold ink. I chose this ink in particular because I felt like it would match the champagne foiling in the background better than gold embossing.

The sentiment is from the new Very Merry Christmas Sentiments and I stamped it using the same metallic gold ink. I used the coordinating die set to cut it out. I added a few sprigs from the Into the Blooms: Christmas Sprigs die collection. The "strings" for the ornaments are simply drawn on using a T square ruler and a metallic gold pen.

My second card for today uses the new Peace on Earth Hot Foil Plate paired with the new Starry Delights die collection and the Mega Merry Christmas die.

It's been a hot minute since I've created an ink blended background using Distress Oxide inks so it was fun to set the stage for this peaceful scene. I ended up having to make two panels because the foiling didn't work out on the first panel! EEk! I suggest doing a trial run on a scrap paper before foiling a blended panel. I ended up using a high heat and 25 seconds to get this to foil like this.

I added some glitter stars using foam squares and then added the Merry Christmas sentiment with liquid glue. I die cut it three times and then stacked them together securing them with liquid glue for a nice, sturdy piece. I covered the Merry Christmas portion with a post it note and then added Shimmer Spray over the top. In hindsight, I should have just spritzed it BEFORE I added the sentiment! ha ha! Join me again for the 4th and final day of the countdown! Thanks for fluttering by!


Saturday, October 21, 2023

Papertrey Ink October Release Countdown Day 2

Welcome to day 2 of the Papertrey Ink October release countdown! I have two projects to share with you today using some fun new products! Up first is a classic card using the new Candy Cane Classics die set paired with the new Into the Blooms: Holly dies!

The big "Season's Greetings" sentiment is from the new Christmas Your Way stamp set that was featured yesterday! It's such a fun set and I LOVE these big sentiments!

The Holly dies come with berries, too, but for this clean card, I just chose to use the greenery.

The candy canes come in three sizes AND an option for both directions....thank you! 

I chose a classic red and white striped candy cane, but the possibilities are endless!

I decided to go for something that coordinates with the first card, but this one is more playful! It features the new Christmas in Frames stamp/die set.  I deviated from the original intended purpose of the set so I could show its versatility.

You can see I added the berries to the holly for this card.

The double layered bow is from the Candy Cane Classics die set....I simply glued two together for a bigger impact.

Thanks for fluttering by!


Friday, October 20, 2023

Papertrey Ink October Release Countdown Day 1

Welcome to day one of the Papertrey Ink October release countdown! Things are oh, so very merry and I hope you enjoy these fabulous new products as much as I do! I have quite a bit to share with you today, so get cozy and let's dive into the projects, shall we? Up first is probably my most favorite stamp/die sets of the entire release and it's called Skating Into the Holidays! I have been wanting an ice-skate set like this for quite some time, so you can see why I'm so excited! I love the look of the skates and the ease of use with this set! I've paired it with the previously released Into the Blooms: Christmas Sprigs dies for a country Christmas feeling!

I wanted to mimic the look of skates hanging from a weathered door or a vintage sled! I was watching the Winona Ryder version of Little Women on Sunday and this card gives me those homespun vibes! I hate when Amy falls through the ice, but I love how Jo and Amy mend their quarrel after that! 
To begin this card, I die cut the skates, bow, laces, and brass "hanger" using the Skating Into the Holidays die set and then stamped them out. One tip I found to be helpful....stamp the skates from the bottom to the top for perfect placement. When I was stamping the blade portion of the skate I kept saying "toe pick".....does anyone else know what show I am referring to? Ha ha! That is another one of my favorite shows! Leave a comment with the title if you know what I am referencing! LOL!

I wanted my skates to be white, but not just stark white, so I stamped off the boot portion once using Soft Stone ink and then full strength for the detail portion! There are two bow options for the skates, but I'm particularly smitten with this big, plaid bow! I show the other option on another project so you can decided which is your favorite!

I die cut all of the pieces for the greenery using the Into the Blooms: Christmas Sprigs die and then colored them using finger daubers and assorted Distress Oxide inks. The background was created by stamping the Weathered Wood Background stamp onto a panel of Soft Stone cardstock using Weathered Wood Distress Oxide ink. I am finding that if I apply the ink to my background stamps with a brayer, I get really nice results with even coverage! I stamped the sentiment in black, which is from the new Christmas Your Way stamp set, underneath the weathered wood portion using black ink. I arranged the skates and greenery until I was happy with the arrangement. I added white puff embossing powder and glitter to really give this card some authentic snowy glisten!

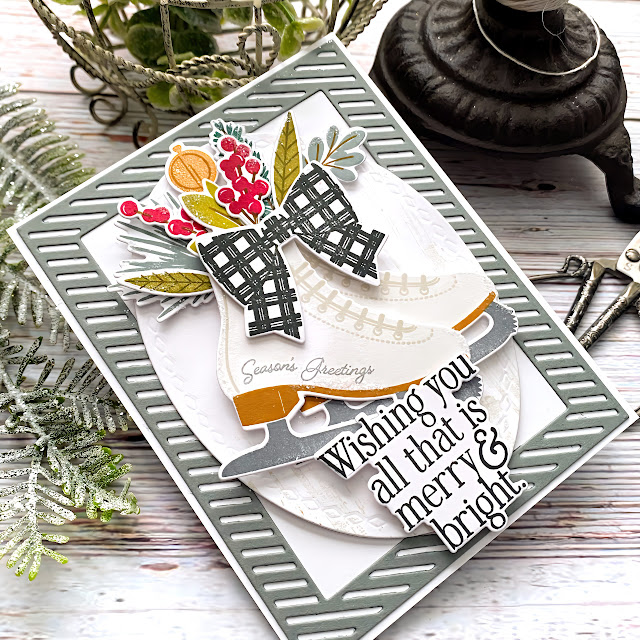
My second card uses the skates again, but this time I chose Fine Linen ink for the skates using the same technique as I did on the first card. I chose a big, bold black and white bow for these skates.....I just love how it looks! The Skating Into the Holidays stamp set comes with greenery and berries to tuck up inside the skates. I'm also in love with the two sentiments that you can stamp along the bottom edge of the boot...I chose Season's Greetings for this card, but on my next card I chose Happy Holidays!

This card also features the fabulous new Border Bling: Candy Cane Frames 2....I will be showcasing the other style on two more projects today. This particular sentiment is from the new Very Merry Christmas Sentiments that will be showcased in a few days, but I couldn't resist using it on this card! It comes with a coordinating die set, which I absolutely LOVE...it just makes it easier to add a sentiment in an otherwise impossible location!

I added some glitter to the skates and the foliage for sparkle and shine!

I die cut the larges oval from the Love to Layer: Ovals and then lightly stamped the Weathered Wood Background on it using Fine Linen ink.

I layered everything onto a top-folding A2 white cardbase using liquid glue and foam squares. 

My third card using this set is more bold and I tried making some black skates this time.  As I mentioned earlier, I was watching Little Women and while their skates aren't this style, I still wanted to try something darker than white skates. 

This card features the Border Bling: Candy Cane Frames 1....more traditionally "candy cane" than the other. Also, I forgot to note: both styles come with three different sizes so you have lots of options!

I chose the "Believe" sentiment from the Christmas Your Way stamp set and tucked a few more Christmas Sprigs along the bottom!

My final project for today completely switches gears, but I LOVE how it turned out! This card features the new Fancy Snowflake Frame die and yet another sentiment from the Christmas Your Way stamp set. I pulled in some older favorites to bring this snowy design to life!

You can see the Border Bling: Candy Cane Frames 1 die in the background, but this time for a tone-on-tone look...lots of Rapberry Fizz layers on this one!

I added some Into the Blooms: Poinsettia Die to the center of the snowflake and the JOY to you and yours sentiment.

I had so much fun working on all of these cards for today! Join me again tomorrow for day 2 of the countdown...more things to fall in love with! Thanks for fluttering by!


Friday, October 6, 2023

The Greetery {Recollective Holiday Collection} Release Day

I'm thrilled to be here today because that means the waiting is OVER! ha ha! It's finally release day for the Recollective Holiday Collection from The Greetery! I know many of you have been chomping at the bit to get your hands on this beautiful new release! I'm sharing a bonus card with you today using a few favorites; Big Beautiful Bow, BotaniCuts Juniper, and the Plaid Tidings suite of products!

As you can see, I went full plaid with the stencils this time, AND I added some Nuvo Crystal Glaze that I was yearning for on my countdown card. I just love those dimensional, popped up, shiny letters!

I assembled my bow before I completely figured out my layout; in hindsight, I would have left the tails off until it was all put together and then had them framing the sentiment by coming off the sides of the bow, rather than trailing down. Oh well...live and learn...and make another card, right? LOL!
I used the Windowpane plaid background for a tone-on-tone look so I wouldn’t overwhelm the plaid letters. I recently bought a mini brayer, and I am finding that I am getting great results when I apply  ink to the background with the brayer.. I used to use one quite a bit back in my early days of stamping, but I definitely got out of the habit. I am really loving how evenly it applies the ink to the background so you can get a perfect image the first time you stamp. I find it particularly beneficial when I am using the windowpane plaid background because you want the lines to be straight and not to be wonkily stamped. Also, I have to admit that the door on my regular sized MISTI is not altogether sturdy right now. Two of the hinges on the top and the bottom are broken and so it has a tendency of not lining up each time I press down. When I use these large rubber background stamps, I remove the black mat, and then lay the background face up in the bed of the Misti. Once that is done, I line my paper up on top of the rubber and use washi tape to get it to stick to the lid. From there, I ink up the background, and then press the lid down as many times as I need until I get a good impression. Because my door is broken, it is proving difficult to get a nice impression if I have to stamp more than once! Yay for the brayer!!!! it is a Tim Holtz brand, and it is just the perfect size!

I added some of the holly that is included in the Plaid Tidings stamp/die set and the Juniper branches here and there for some holiday greenery. I had so much fun creating this card! Thanks for fluttering by!
P.S. the entire Recollective Holiday Collection will be available for purchase beginning at 10 am ET TODAY!