Showing posts with label inlaid die cutting. Show all posts

Saturday, May 23, 2026

Papertrey Ink May Release Countdown Day 2

Welcome back for day 2 of the Papertrey Ink May release countdown! I have some fun, summery cards to share with you today using products you're sure to fall in love with! My first card for today uses the new Build-a-Bear Die set and I've paired it with the new Land That I Love Sentiments that were showcased yesterday.

I don't know if I've ever mentioned it before, but all of my boys have the same initials with RL being the first and last. Of course, the famous American designer Ralph Lauren also boasts these initials on many of his designs, so my kids have worn quite a bit of Ralph Lauren during their growing up years, including the Ralph Lauren Bear or Polo Bear, whichever you prefer!

I decided to head in that direction for this card, but the bear ended up being a girl bear in the end because the bow is just too cute! ha ha!

To begin, I cut all of the main pieces for the bear from Fine Linen cardstock and then added some Vintage Photo distress ink around the edges with a blender brush. I also darkened the foot pads and ears to completely change the color using the same ink. The sweater is cut from Dark Indigo cardstock and then the flag is cut from white, Pure Poppy, and Enchanted Evening. I popped it up using foam squares for a bit of dimension.

Rather than cutting the whites of the eyes with the included dies, I simply added white with a white paint pen. The stars and bows are also included in the die set and I cut them from Pure Poppy to bring in a bit more red! The background was created by cutting an A2 panel of Bitty Big: Blueberry Sky Color Collection pattern paper. I glued it to a top-folding A2 card base using liquid glue and then layered the Reflections: John 1 Die frame over the top.
My second card for today uses the new Quilt-It: Baby Die. There is also a coordinating stamp set to stamp the patterns on the quilt pieces, but I opted to use pattern paper for my card today. I found some old papers from My Mind's Eye that are the right scale and look "quilt-y". I cut them using the Quilt-It: Baby Die and then adhered them to a white star base from the same die set. I let that dry and got to work on the background.

I love this Reflections: John 1 Die and I felt it would be perfect to frame the quilt star. I used the same pattern papers as the quilt pieces to place behind the frame. I used foam squares to pop the frame and then glued the other pieces in place.

I took my color cues for the flowers from the pattern paper. I cut the flowers and leaves using the Into the Blooms: Wild Wood Die from white cardstock and then colored them with Pure Poppy, Harvest Gold, Ocean Tides, Spring Moss, Simply Chartreuse, and Ripe Avocado ink. I added them around the frame using liquid glue and foam squares.

I had originally started this card to be for a baby boy, but I felt it really needed some flowers, so I switched gears and added the summer sentiment using the new This is Big Sentiments: Welcome Stamp/Die set. I really love how this card turned out, even though I desperately need baby boy cards! ha ha! Thanks for fluttering by!


Saturday, April 25, 2026

Papertrey Ink April Release Countdown Day 2

Welcome back for day 2 of the Papertrey Ink April Release Countdown! There are some fun things for dads being featured today along with a beautiful new stencil! My first card for today uses the new Dad Die, Build-a-Briefcase Die, and some older favorites to pull this design together!

To begin this card, I got to work on the briefcase; it reminded me of my childhood playing with Barbies and this would have been so cute as an accessory! ha ha! I cut the main case from Honey Nut cardstock with Honey Nut ink blended on the edges. I cut the straps from Dark Chocolate and the hardware from gold cardstock! I assembled the briefcase using foam squares and liquid glue.

Up next, I got to to work on the Dad sentiments; this was achieved by using BOTH dies included in the set. There is a solid word die that I used as the shadow, cut from Dark Chocolate. Then I picked some fun colors of cardstock and used the second die included in the set to create the stripes. You could cut it from white and then just color all of the pieces as you choose. I cut another solid word from Ocean Tides and then glued the stripes using liquid glue.

I wanted to play with the briefcase theme and pull in some office supply detailing. The paper clip at the top is cut from gold and is from the Just Notes Die along with the torn notepad piece that says "for my". That sentiment along with the embossed sentiment at the bottom are both from the Just Sentiments: Father's Day Mini Stamp Set.

For the background, I used the largest die included in the Love to Layer: Deckled Edge Die and cut a piece of Vintage Cream cardstock. I added some Dark Chocolate ink around the edges along with some ink splatter. I cut the middle-sized frame using the Border Bling: Skinny Embossed Frame from Vintage Cream also and then glued it to the deckled panel using liquid glue.
Once that was done, I added the briefcase and Dad sentiment using foam squares. I placed it at an angle on an A2-sized panel of Olive Twist cardstock and then glued it to a top-folding A2 card base.

My next card is a quick bonus card that I made using the new All About Dad stamp set paired with the new Brushstrokes Stencil Collection. I love the bold sentiments included in the set; they would be perfect to use for mass-producing cards!

My final card for today showcases the sentiment set that was featured yesterday: This is Big Sentiments: Strength along with some leftover flowers and foliage from that card. I paired them with the beautiful new Birch Grove Stencil Collection.

The mat behind the sentiment is from the new Reflections die set being released, but it won't be featured until tomorrow!

Most of the detailing at the bottom of the stenciled panel got covered up, but I did add some additional foliage using the Stems and Blooms Stencil Collection

I used the bold Strength stamp yesterday, but wanted to show you the other option included in the set.

Thanks for fluttering by!
P.S. Don't forget to stop by tomorrow for day 3 of the countdown!


Monday, January 5, 2026

Baby It's Cold Outside

Hello and welcome! I'm sharing a fun wintertime card using a variety of products! I fell in love with this sweet Snuggle Snowman and immediately purchased the die! It arrived when I was busy with other projects and deadlines, but I made some time to use it. I got it out of the package and was ready to get crafty, but got called away for other motherly duties. ha ha! Anyway, I ended up setting it aside and then inadvertently threw it away. I was so sad, but I bought another one and it arrived the other day. I couldn't wait to spend some time creating this card. I saved a snippet of wrapping paper from Christmas to use as my inspiration, but I didn't want it to necessarily be Christmas-themed.

I also bought the beautiful Eyelet Layer Frames, but thank heavens I didn't throw them away! ha ha! To begin this card, I die cut the largest frame included in the set using Seafoam cardstock. I set it aside to do the embossed layer. I pulled out an older embossing folder that I've had for a few years called Pine Bouquet from SSS, but it looks like it's retired. I cut the panel down so it would fit inside the frame. I added some Seafoam Ink over the top using a blender brush to add some dimension.

I attached it to the lace frame piece using foam squares and then added it to a top-folding A2 card base. I die cut all of the pieces for the snowman and got to work assembling it. I took all of my color cues from the wrapping paper, which was fun, because I don't think I would have come up with the hat combination on my own. I glued a red pom-pom from my stash to the top for some added whimsy.

I die cut the eyes and nose twice; once so they could be placed back inside the holes, and again to go over the top for some added dimension. I wanted to add Glossy Accents to those pieces and it's always easier when they are raised a bit. Everything for the snowman himself was cut from white and then I just added some black marker to the eyes and Canyon Clay ink to the carrot nose.

The scarf is cut from Pure Poppy with some Scarlet Jewel blending for depth and contrast. I glued it to the body using foam squares and added the hat with liquid glue. I did add some ink splatter to the body as well for that snowy look. Once the eyes were dry, I added a dot of white gel pen to each one.

The wrapping paper had the snowman holding a bunch of greenery, ,so I got to work creating some. I used the Into the Blooms: Swag Die and cut the pieces from white cardstock. I didn't cut anything that was too holiday or Christmas-y, like holly. I colored the pieces with Stormy Sea ink and then Garden Green and Handsome Hunter from SU! I gave them all a spritz or two of Hickory Smoke Distress Spritz.

While those were drying, I attached the snowman to the embossed panel using foam squares. I tucked the greenery around him using liquid glue and foam squares. The snowflakes are cut from the Build-a-Hat die and the smallest one is from the Bring Home the Holidays Die. I added some blue pearls to the center of each snowflake.

I just love this sentiment and thought it would be perfect for this card. It is from the Just Sentiments: Winter Wonderland Stamp Set and is heat embossed in white on a strip of Pure Poppy cardstock. I added it using strips of foam tape. The finishing touch is some Rock Candy Glitter which I made sure to add to the top of the pom pom for a realistic snowy look! I had so much fun creating this card and I'm so glad this cute snowman is finally here to stay! ha ha! Thanks for fluttering by!


Monday, October 28, 2024

Papertrey Ink October Release Countdown Day 4

I can't believe we've made it to the final day of the Papertrey Ink October release countdown! My first card for today uses the new Stained Glass Dies. 

There are three different styles of window, but I chose to use on of them twice for this card. To begin, I added blues and greens using watercolors on a panel of watercolor paper.

While that was drying, I die cut both windows from Antique Gold cardstock. I glued them to a 4 by 5 1/4 inch panel of watercolor paper. I die cut the window again from the watercolor panel and then inlaid the pieces using liquid glue and a gem picker.

I stamped the sentiment, which is from the Reflections: October stamp set onto a pieced of acetate using Jet Black StazOn ink. I strategically added liquid glue to the back of some of the more bold letters and glued it over the top of the windows.

I added the star and the manger, which are from the Reflections: October die set.

I finished it off with some foliage from the Into the Blooms: Mushrooms die set.

My final card for today, and for the release uses the new Border Bling die. I cut it from Stormy Sea cardstock and then glued the sheet music paper to the opening and then added it to a Vintage Cream top-folding A2 card base.

I had fun making the pinecones using the Into the Blooms: Pine die and added them to the corners.

The angel is die cut using the Angelic Sentiments die and added to the middle using foam squares.

The sentiment is heat embossed in gold onto scarlet Jewel cardstock and layered over the top of the angel using foam squares.

Thanks for fluttering by!


Monday, July 18, 2022

Papertrey Ink July Release Countdown Day 2

Welcome to day 2 of the Papertrey Ink July release countdown! I'm sharing two cards, so my post is a little bit shorter than yesterday! ha ha! Up first is a card using the new Elegant Edges: Wispy Tree die; TBH....my card is giving me Teletubbie vibes, but I didn't realize it until I was editing photos! LOL! Or maybe a Hobbit hole? Maybe Teletubbies live in Hobbit Holes? LOL!

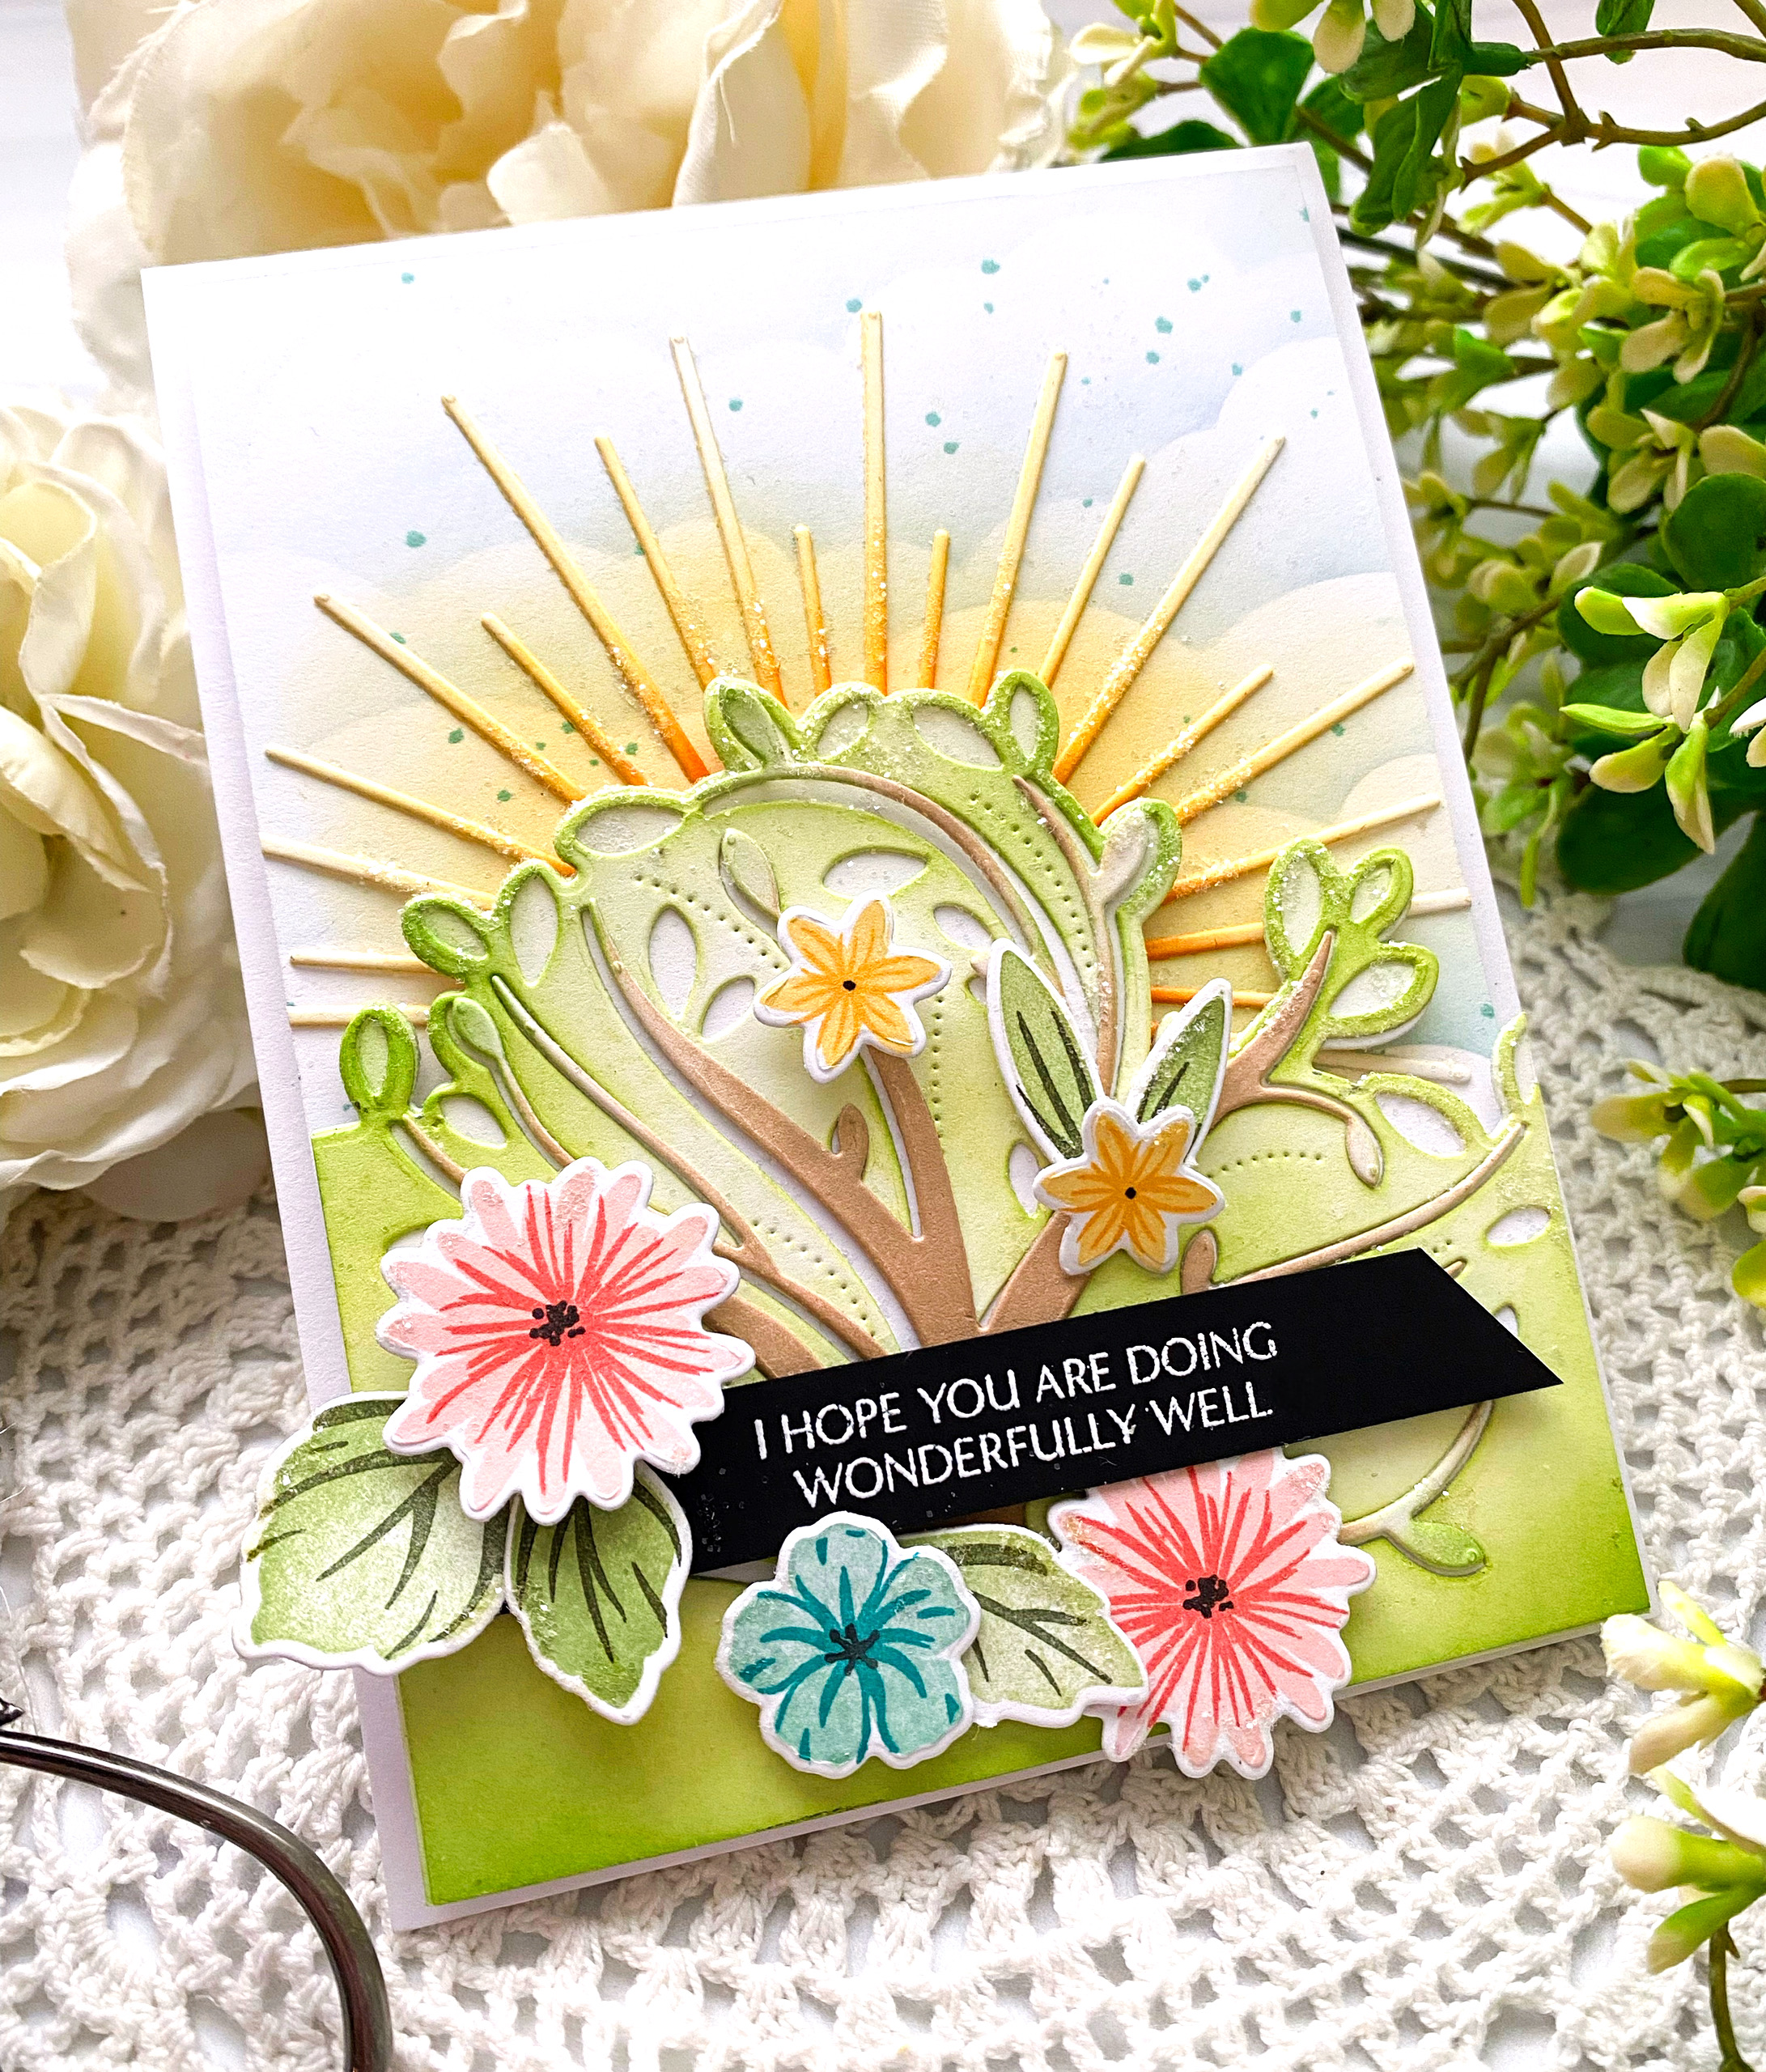
The Elegant Edges: Wispy Tree die is quite versatile; just like the others in the series. You can die cut the the tree from a solid piece, you can die cut the tree from a solid piece and then use the additional edge die, like I did on this card, OR you can just use the pieces that fall from the die. I actually chose to do some inlaid diecutting by adding in the largest portion of the tree once it was die cut. I added some ink and then glued it back into the negative space.

I thought it would be super cute to have the sun peeking up from the back of the tree so I die cut the On The Border: Sunburst Border Die and tucked it behind the tree panel. I used a cloud stencil for the background with some ink splatter and then layered everything up onto that. The sentiment is from the new Just Sentiments: You're on my Mind and is heat embossed in white. I added a few flowers and leaves from Posies and Sprigs stamp set for some added color and charm.

My  next card uses the new Cover Plate: Wispy Tree die; this will be such a fun one for autumn and Halloween cards! I've paired it with the new Eucalyptus Elegance stamp set; this one will be so fun to tuck in flower arrangements (I'm thinking Effortless Beauties)

My daughter said there is just too much green on this card, but that's the vibe I was going for; natural, green, earthy, simple.

This is another sentiment from the Just Sentiments: You're on my Mind and is stamped in black onto a strip of Weathervane cardstock.

I mentioned yesterday that I began this release with 4 sheets of white cardstock so I chose to use Rustic White cardstock for all of the die cutting and the background is watercolor paper with some ink blending and water spritzing. Join me tomorrow for day 3 of the release; it will be very colorful! Thanks for fluttering by!


Monday, May 23, 2022

Papertrey Ink May Release Countdown Day 4

It's the 4th and final day of the Papertrey Ink May release countdown! I have two more patriotic cards to share with you today; they both use the fabulous new USA dies and of course I HAD to use more of the fabulous sentiments from the Celebrate Freedom stamp set. I want to put a bug in someone's ear and ask to get some everyday sentiments with these same beautiful font combinations!

Both of today's cards also feature the fun new Wood Plank Background! I know I am going to have so much fun using this is so many different ways! Thank heavens it was showcased on the last day, otherwise I fear it would have somehow made its way to ALL of the cards for this release! ha ha! I wanted a rustic Americana look, so I added a lot of ink blending around the edges of EVERYTHING to give it that aged look.

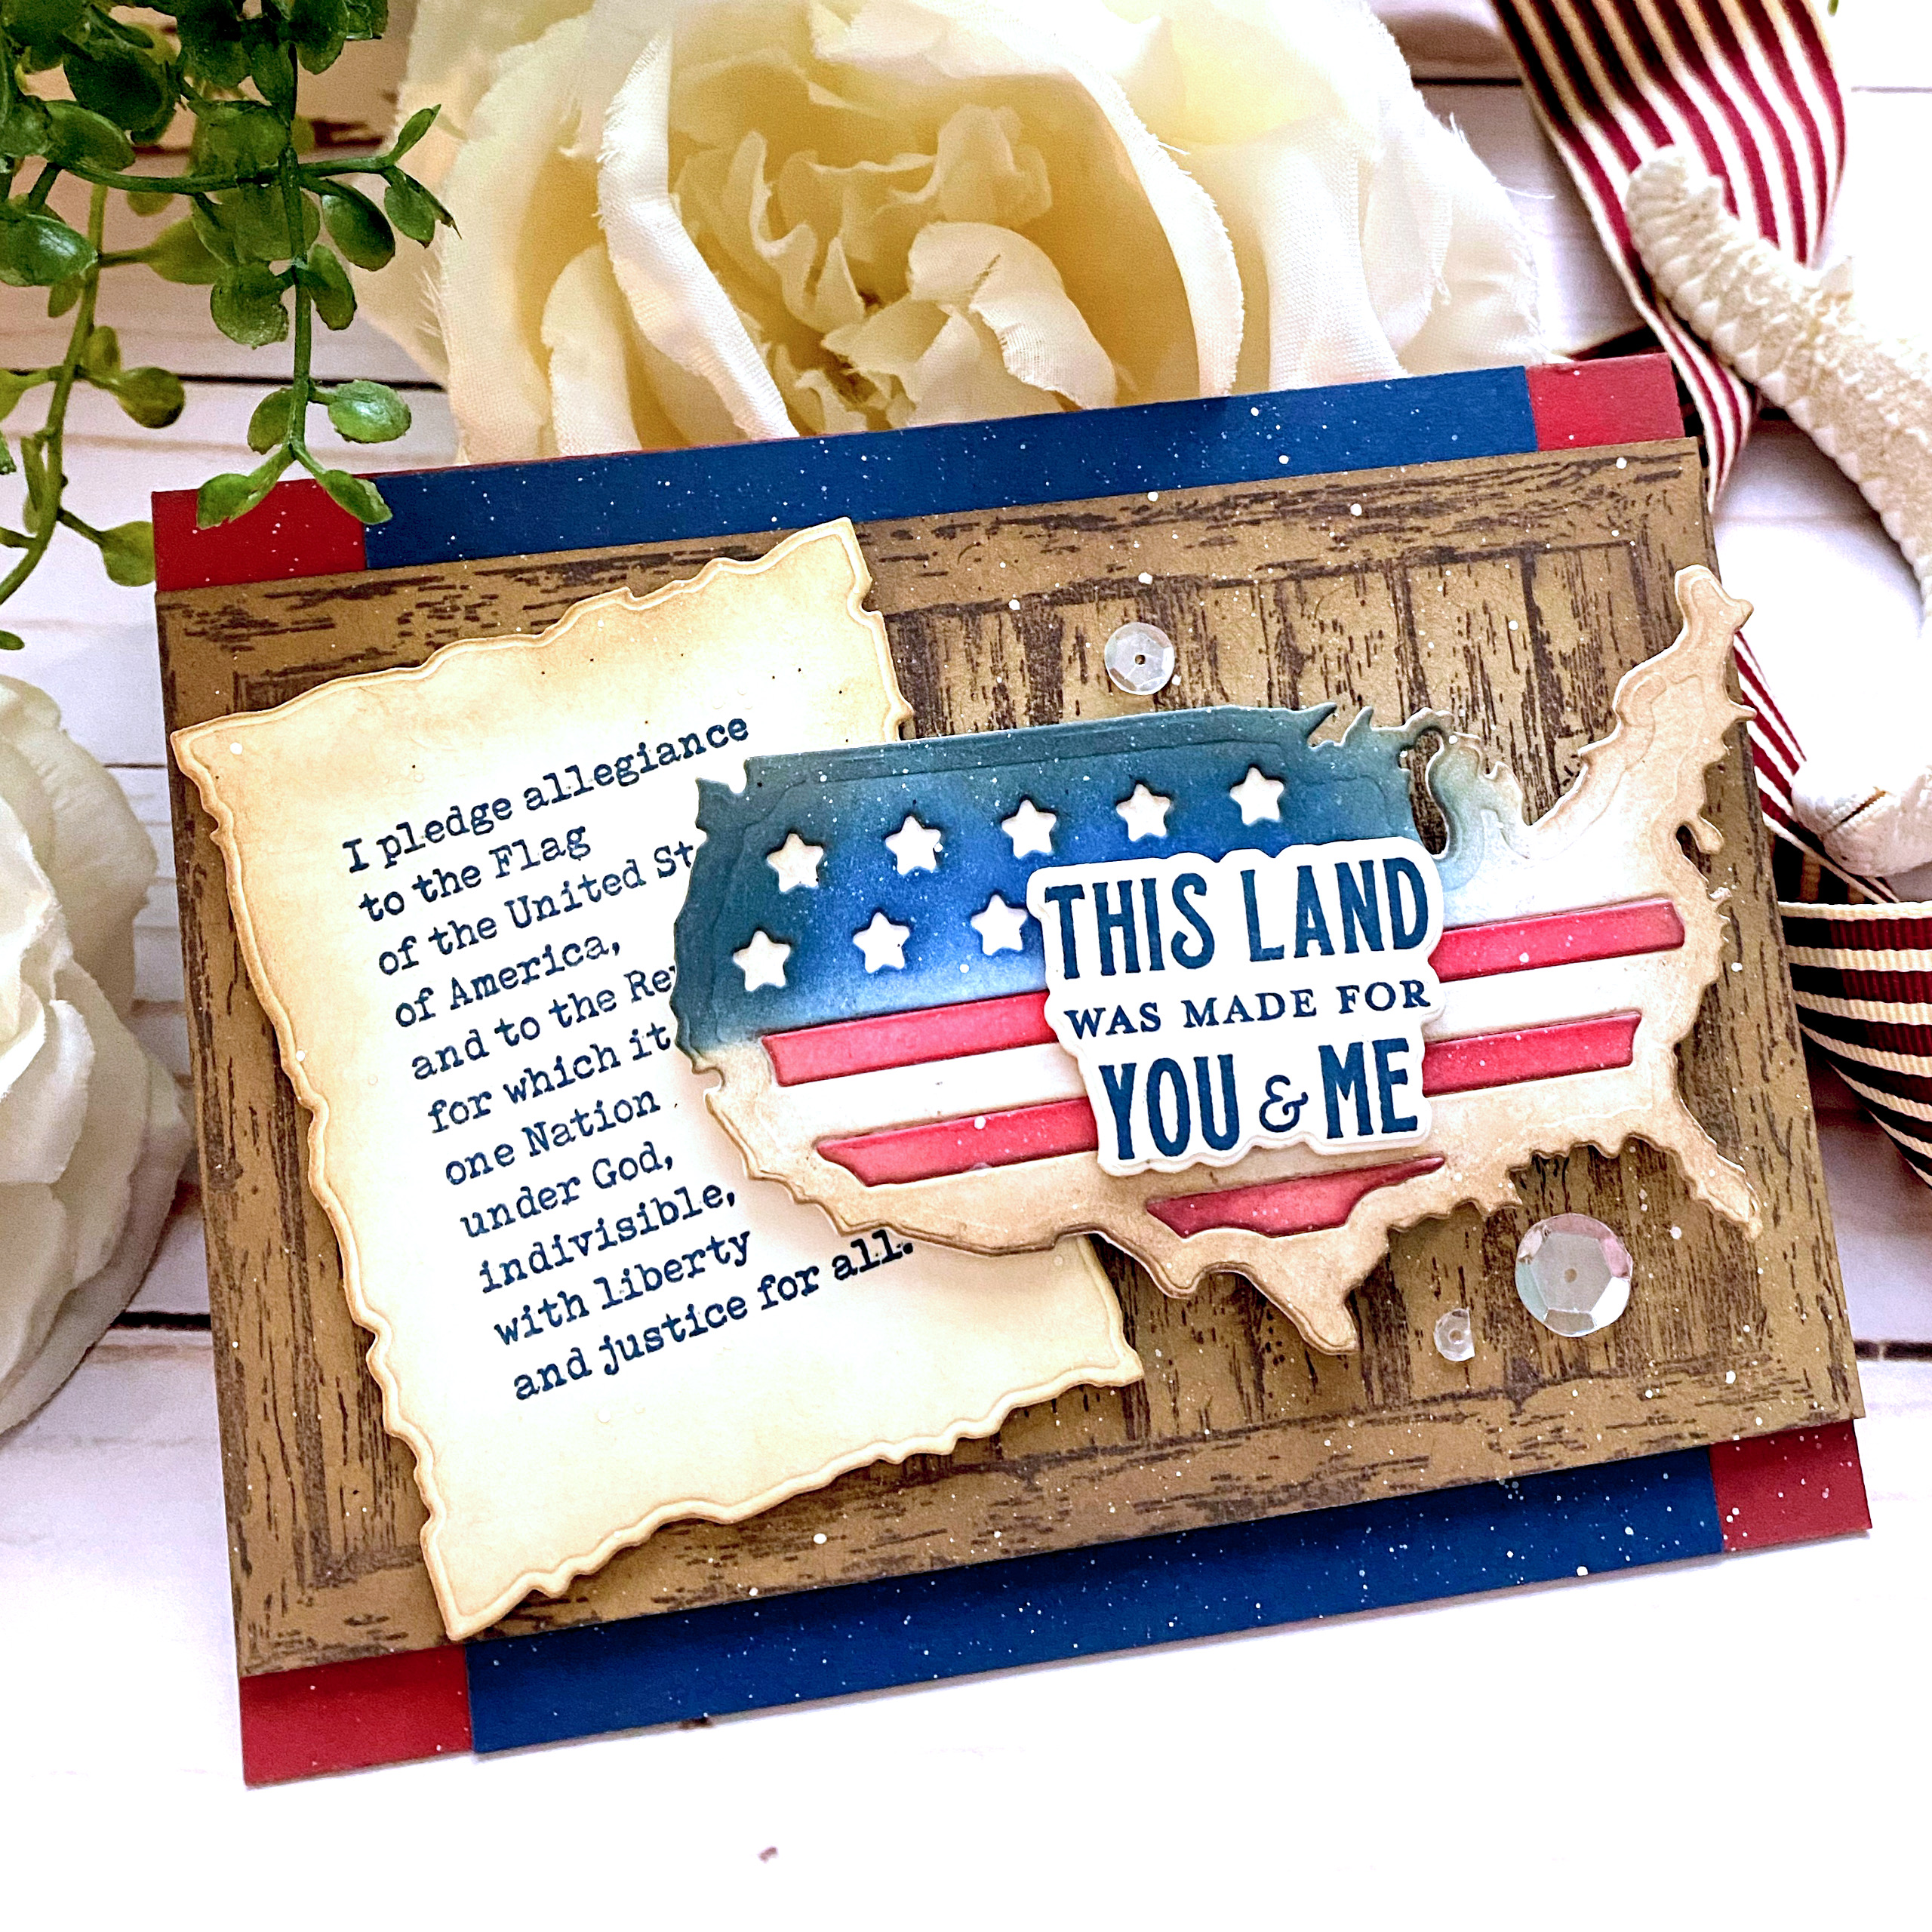
I was especially pleased to see how nicely the pledge of allegiance sentiment looks on the Love to Layer: Torn edges die cut! Once again, the ease of the die cut sentiment made this design possible!

The USA die comes wired together, but I cut them apart so that I could layer the detailed portion over the top of the solid portion so I could do some inlaid die cutting. I die cut everything from white, colored the red stripes and glued them back in place. I sponged the blue ink at the top and then added the brown around the edges to give it some age.

My second card for today is almost exactly like the first, but this one is more bright and airy, which I love! By changing up the color of the Wood Plank background, it really changed the overall feel. This card features the new Feathered Friends 23 mini stamp set an die. 

I wanted to use a flower on this card, so I used one from the Into the Blooms stamp set and colored it with Distress Oxide ink.

I gave this one a bit of a shabby look as well, but didn't use such a heavy hand. 

I have a few people in the neighborhood that I will be delivering 4th of July goodies to, so these will be perfect to tuck with their packages! Thanks for fluttering by!