Friday, May 18, 2018

SugarPea Designs {Sweet 2 Repeat} Blog Hop


Hello friends! Thanks for stopping by today! I'm always excited for the  SugarPea Designs Sweet 2 Repeat Blog Hop! It's the best excuse to play with all of the new goodies that I just can't resist! My "thinking of you/sympathy stash is completely depleted and I DESPERATELY needed one. These little bunnies were calling my name and I had recently sent out THIS card so I wanted to create something similar, yet different. Before I get into all of the details, don't forget to stop by all of the other designer's blogs for more inspiration!
Amy Kolling
Amy Rohl
Amy Tsuruta

Lea Lawson
 
Kelly Lunceford
 
Kerin Sylvester
 
Natalia Zubkova
Raluca Vezeteu
Stéphanie Beauchemin 
Vera Yates

Melissa Andrew
Mindy Eggen

To begin, I die cut the yellow piece using the Eyelet Coverplate and layered it over an A2 card base. I just love the sweet detail that it adds to a sweet card like this. The bunnies are stamped and die cut using the 24 Carrot Friend stamp set and coordinating 24 Carrot Friend SugarCuts. I colored them with Copic markers.

I also added a hint of wink of stella to the images and some crystal glaze inside the ears and noses. I just love adding simple little additions like that, especially to a simple card design, for some added detail.


 I die cut a white heart using the Postage Stamp SugarCut and then embossed the "sending" sentiment in gold powder. The "Lots of Love" portion is stamped in grey ink and both of these coordinating sentiments are from the Sending Sentiments stamp set, which I can tell will get a lot of use! I added a few sequins to finish it off! Thanks for fluttering by!

Thursday, May 17, 2018

Precious Remembrance Shop/Imagine Crafts Blog Hop Day 2-School Days and Totally

I'm back for Day 2 of the Precious Remembrance Shop and Imagine Crafts Blog Hop! I have been having SO much fun putting together  many fun projects for my boys' teacher's end-of-the-year gifts. Of course, there will be prizes, so let me fill you in on all of the details! 
Giveaway Details:

- Hop Along and leave us some comments on each blog. 
- Show us some love!:) Like & Follow both companies on Facebook & Instagram 
- Giveaway is open until May 19,2018. Winners will be chosen randomly. 
- Have fun & Goodluck!
Here are the links for the Precious Remembrance Shop's Facebook Page and Instagram.
Here are the links for the Imagine Crafts Facebook Page and Instagram

1 Winner : $30 Gift Certificate from Imagine Crafts 

HERE IS THE BLOG HOP LINEUP! MAKE SURE TO STOP BY EACH BLOG FOR LOTS OF GREAT IDEAS AND INSPIRATION!!!


Precious Remembrance Shop 
Kelly Lunceford (you are here)

I'm using both the School Days stamp set and the Totally stamp set for these sweet little 3 by 3 cards! I wanted to keep the cards colorful, without too much fuss! The paint swoosh image is stamped repeatedly  using a rainbow of Memento Dew Drops! Such a simple technique, but I love the results! I spritzed it with some Silver Shimmer Spray for some shine! The "abc 123" image is from the "school days" stamp set that I used on yesterday's projects as well. I stamped in Memento Tuxedo Black ink and then colored it using copic markers.


The "me/you/us" sentiment is stamped in black as well. It is from the "Totally" stamp set. I thought it complemented the "abc 123" image nicely. These cards will be perfect to tuck inside the basket of gifts with some sweet salutations written inside.


For my second project, I created some gift card holders.  I was hoping to give the teachers gift cards to their favorite restaurants during Teacher Appreciation Week, but I ran out of time! Now I can get those bought and put into these cute little holders!


I stamped and embossed the school bus image and then used some dew drops (linked above) to do some watercoloring with an aquapainter. I Love the dreamy look it gives the school bus. I used Dandelion Yellow, Nautical Blue, Lady Bug, and Tuxedo Black dew drops. I also added some Glaz On to the windows and headlights.
You can see the details a little better here! I can't wait to give all of these to the teachers! And the best part? I'm ready and done EARLY! LOL! Thanks so much for joining me...don't forget to stop by the other blogs and thanks for fluttering by!


Wednesday, May 16, 2018

Precious Remembrance Shop/Imagine Crafts Blog Hop Day 1-School Days


Hello Friends! Welcome to Day 1 of the Precious Remembrance Shop and Imagine Crafts collaboration Blog Hop! I have been having SO much fun putting together  many fun projects for my boys' teacher's end-of-the-year gifts. I will be sharing projects today AND tomorrow, so stay tuned! Of course, there will be prizes, so let me fill you in on all of the details! 
Giveaway Details:

- Hop Along and leave us some comments on each blog. 
- Show us some love!:) Like & Follow both companies on Facebook & Instagram 
- Giveaway is open until May 19,2018. Winners will be chosen randomly. 
- Have fun & Goodluck!
Here are the links for the Precious Remembrance Shop's Facebook Page and Instagram.
Here are the links for the Imagine Crafts Facebook Page and Instagram

1 Winner : $30 Gift Certificate from Imagine Crafts 

HERE IS THE BLOG HOP LINEUP! MAKE SURE TO STOP BY EACH BLOG FOR LOTS OF GREAT IDEAS AND INSPIRATION!!!


Precious Remembrance Shop 
Kelly Lunceford (you are here)


For my first project, I created some tags to tie up their basket of goodies. I had so much fun on THIS project, I decided to use the same paper pad and some of the same details! I love how they turned out! I've mentioned before that my First Grader has two teachers and my Second Grader has his regular teacher and his SPED teacher, so I made 4 of each project. 


For these tags, I used the delightful School Days Stamp Set, which I love! It is a perfect set for both teachers and students! There are so many great sentiments and details!


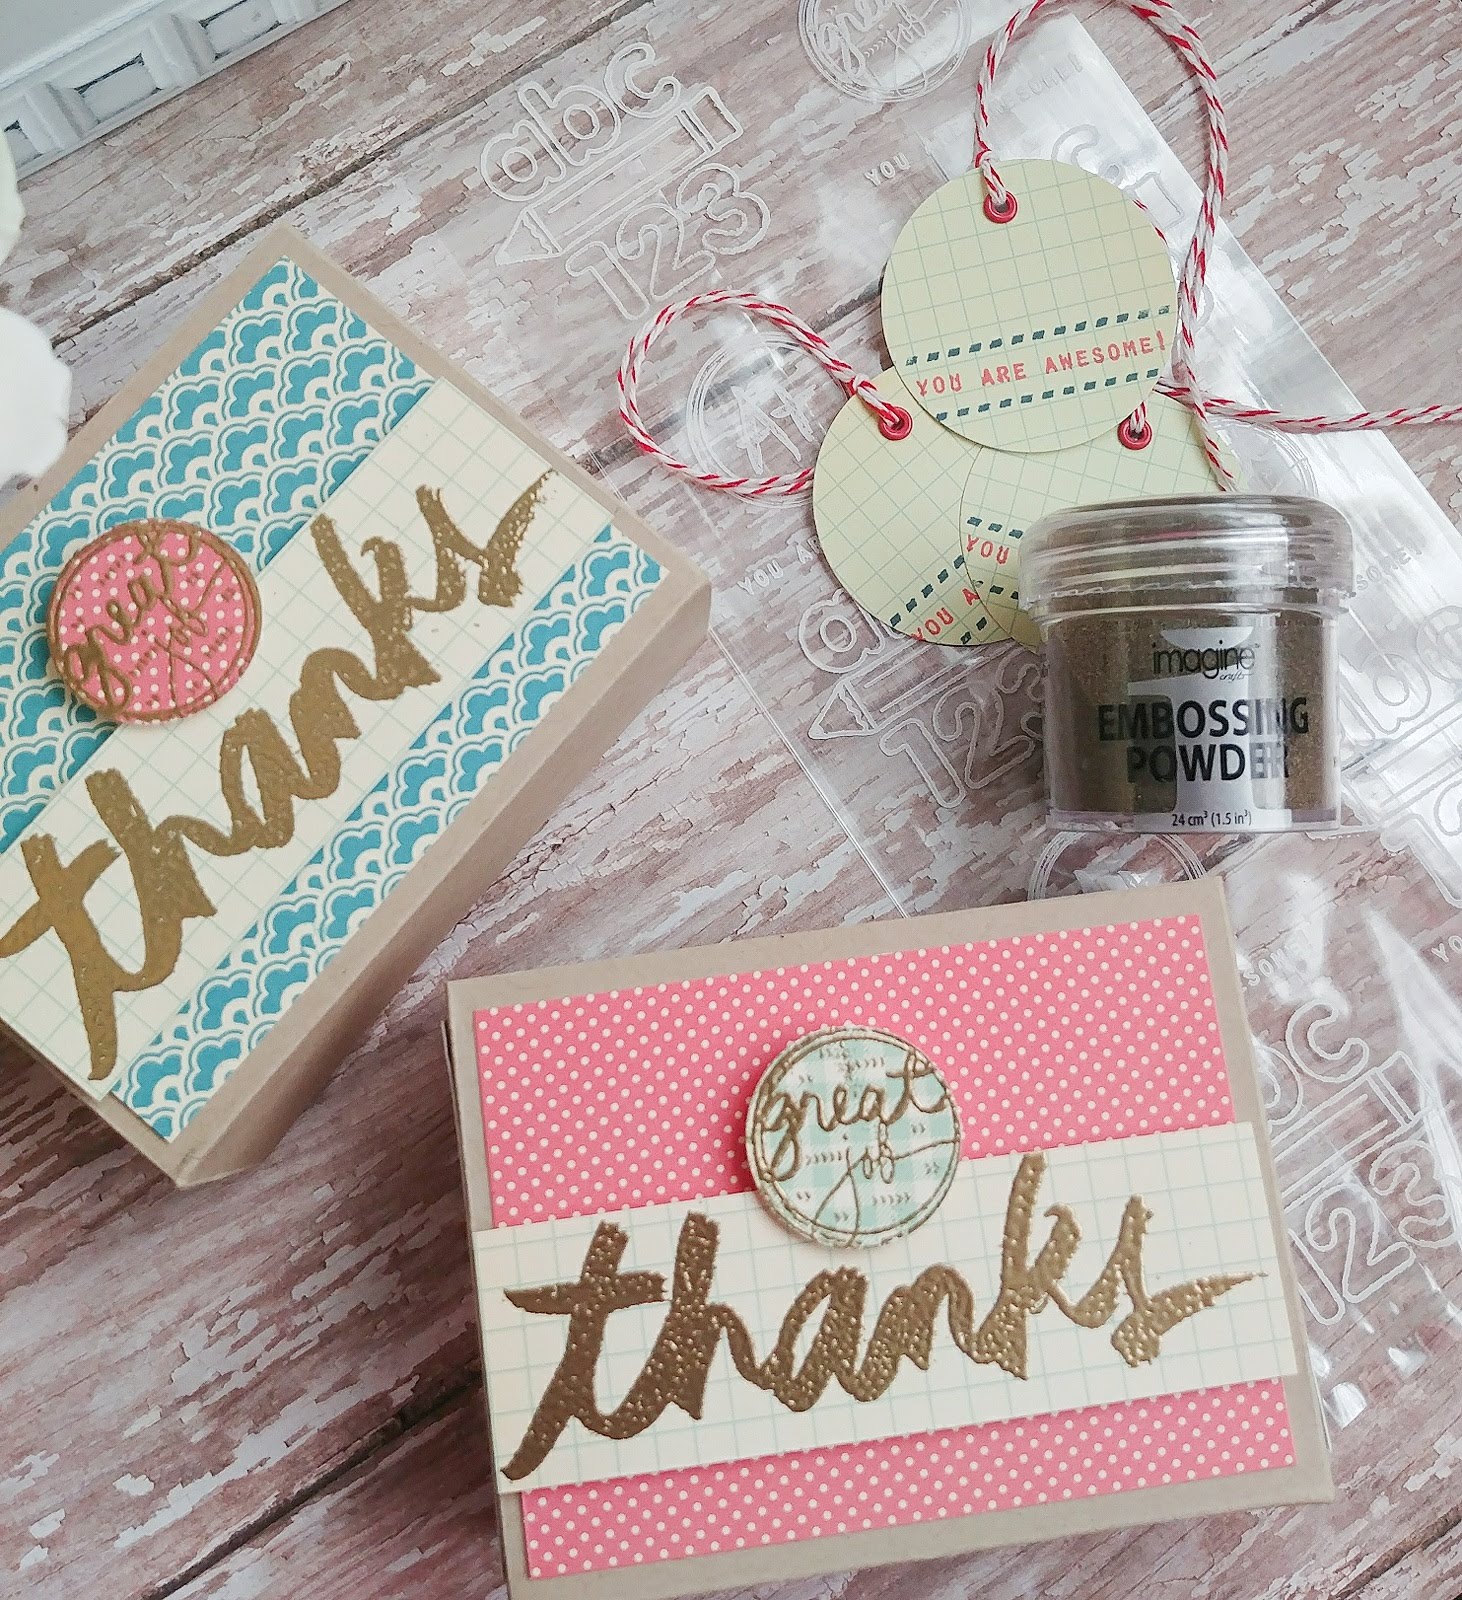
To begin, I stamped  the "abc 123" image using Versamark ink and then heat embossed it using Gold embossing powder. I've mentioned a few times that I have been needing to find a new gold powder that I like, and friends, this is IT! It is perfect! Once that was done, I die cut the image using a circle die and then colored the images using copic markers. I added some clear Glaz On over the top of the images for some detail and shine!  I stamped the "You are awesome" and the dotted line image using Nautical Memento Dew Drop and Lady Bug Memento Dew Drop

The "A+" image is embossed in gold as well and punched out using a 1 inch circle punch. I created a paper pinwheel using pattern paper and added a Seaside Blue Button to the center of each for some added detail and color. I love how these sweet little tags turned out! I know they will really bring some charm to the entire ensemble! 

My second project that I am sharing today is a set of handmade boxes, stamped cellophane bags, and coordinating tags.  The boxes and stamped cellophane bags will hold some homemade caramels. I made some last week for Teacher Appreciation Week, but these particular teachers didn't get any. I don't want to cheat them, so they will get some, too! I used Cotton White StazOn ink to create custom made/matching cellophane bags to really make the project cohesive. It didn't take much time at all to quickly stamp a few of the images from the School Days Stamp set onto the bags.


The tags are very simple, but keep the cohesive feel of the project.  I will certainly share some additional photos when I get the caramels made and the boxes all put together! As much as I would have liked to have it ready for you to see now, we don't get out for a few more weeks and I want them to be fresh! LOL!

I gold embossed the "great job" and "thanks" sentiments onto some coordinating paper. I love the shine it gives these projects! I hope you enjoyed these projects! Don't forget to join me again tomorrow for some additional projects that I am excited to share! Thanks for fluttering by!


Stock your Stash-Birthday Greetings

I'm super excited to be participating in my first "Stock Your Stash" challenge for Reverse Confetti! It is the new challenge that replaced the SFYTT challenge. You can read about it HERE and get your own card linked up in the gallery! I can't wait to see what you make! The purpose of this challenge is to get your stash filled up with all of the cards you like to send! This month's theme is "Birthday"!


The funny part about my card is that it won't even make it into my stash...I made it specifically for my son's teacher's birthday coming up in a few days! LOL! I used an unexpected combination, I feel, but it goes perfectly with some Bath and Body Works goodies that I got for her! I always love using the gift as inspiration! It also makes for a very cohesive looking presentation as well!

To begin, I stamped and heat embossed two of the floral images from the Tall Blooms stamp set. After they were heat set, I colored them using some Copic markers in soft colors. I really like how the Copic coloring looks paired with the gold embossing. You can see another card from the recent release using this same technique and a very similar feel HERE

I die cut the Diamond Stripe Confetti Cut out of Sand cardstock. This rivals Kraft cardstock and I might just be falling in love with it more and more each time I use it! I heat embossed the floral image onto the center square portion of the die cut using one of the amazing images from the Pattern Blocks stamp set. I knew right away that Tall Blooms and Pattern Blocks would be a match made in heaven! I die cut the center square portion twice since embossing warps the paper. It gave me a place to adhered the embossed piece nice and flat. I popped it up using foam squares for some added dimension.

I planned on making a 4 1/2 inch square card, but decided to keep that extra portion hanging down to heat emboss the sentiment. I also added a few self-adhesive gems for some additional detail and shine. I hope you get a chance to play this month and thanks for fluttering by!

Monday, May 14, 2018

Merry Monday #290 {Peace, Love, and Joy}

Welcome to a brand new week and a new Merry Monday Christmas Challenge! No matter how busy life gets, I absolutely love the time I get to spend working on my cards for Merry  Monday! It will be even more fun when I get to bring them all out in December to give them to family and friends!
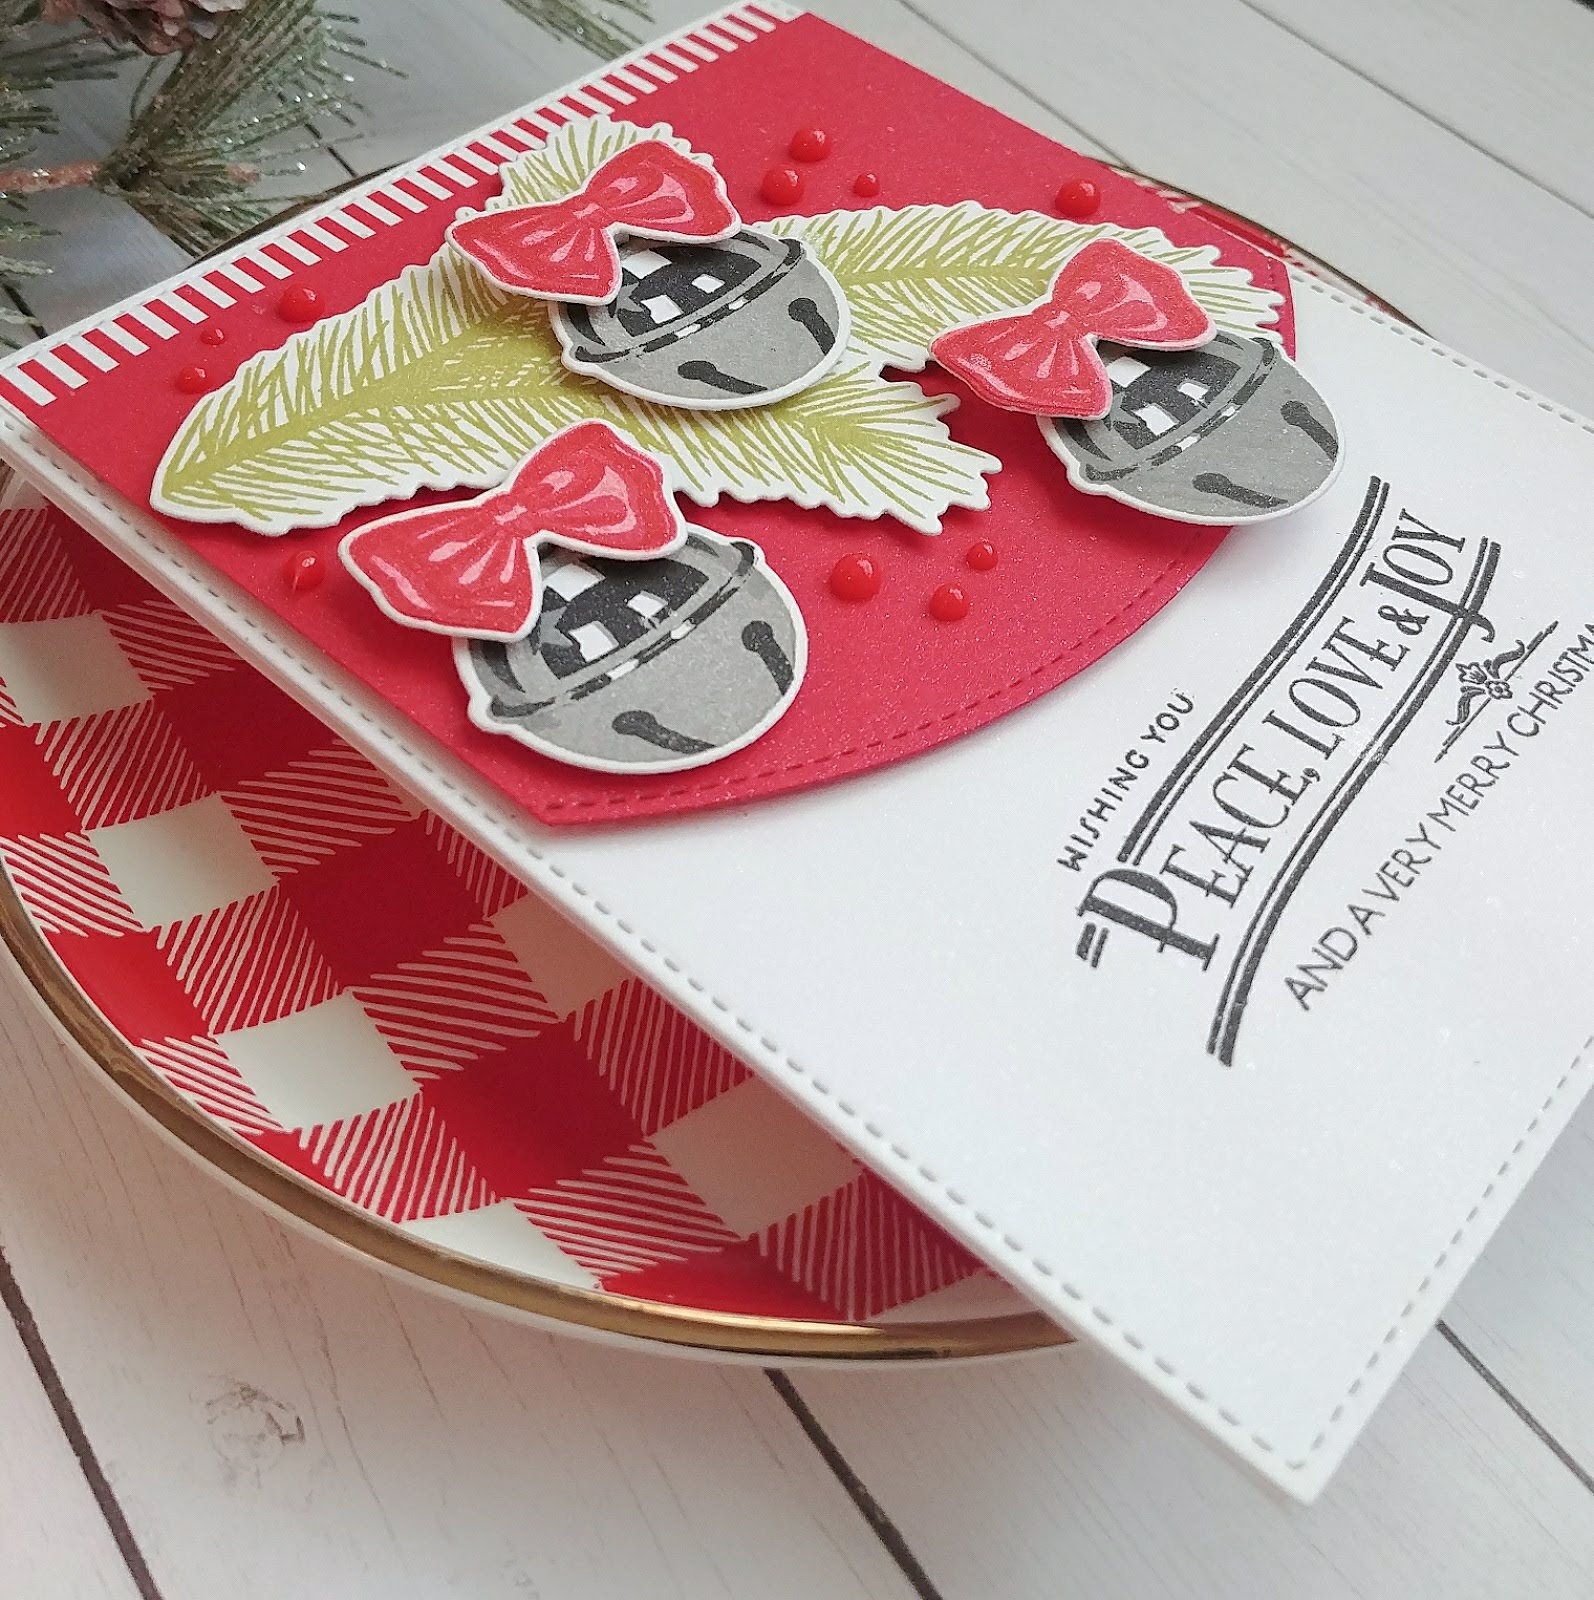
This week JoAnn has asked us to add bells to our cards! Confession: I was SO HAPPY to see that bells were required for the challenge! I ordered the Holiday Style stamp set and it came a few weeks ago! I was so excited to use them on a challenge, but guess what? It was the "no stamping" challenge! LOL! I used them on  THIS project, though, but I still couldn't wait to use them again! 

To begin, I die cut a panel of white and a panel of red using the Card Front Element Builders SugarCuts. I really liked the detail on the challenge photo, so I thought it would be fun to include that onto today's design. I stamped the white bottom portion using the Happiest of Holidays stamp set using black ink. I really like this particular sentiment because it was long and horizontal and I knew it wouldn't take up too much room that I was planning for the bells. 

The bells are stamped using Going Gray, Smokey Shadow and Black inks to create this realistic looking bell. I am seriously in love with them. I didn't use my MISTI when I made the project I linked above, but decided to for the bells today. The bows were stamped off once using Pure Poppy, then at full strength and then the last piece was stamped using Rose Red SU! ink. 


All of the images, including the branch are die cut using the coordinating Holiday Style Dies. I can't wait to use the Christmas ball ornament images included in this set as well! I added a strip of red and white striped pattern paper from the Spots and Stripes Pattern Paper pad from SugarPea Designs. I added some red Nuvo drops here and there for some added detail. A good spritzing of Shimmer spray finishes this design off! Thanks for fluttering by!

Friday, May 11, 2018

For my Teacher!


Well, Teacher Appreciation Week has come to a close and I wanted to share a few of the projects I sent to school for my boys' Teachers. I was so happy to use some of the recently released Papertrey Ink goodies for this first project! I used it on my Traveler's journal post that you can see HERE, but it was fun to use on actual Teacher gifts this time! These ideas would also be perfect for end-of-year gifts! 

To begin, I die cut the apples using the Big Apple Die out of Pure Poppy cardstock. The stem and leaves were also die cut, with the included pieces, using Kraft cardstock and the Simply Chartreuse Bitty Big pattern paper

The gift card portion is just a piece of Kraft Bitty Big pattern paper folded in half. I measured the gift cards and then made the insert the appropriate size. I really liked the idea of showcasing a sentiment rather than the busyness of a gift card. The sentiment is heat embossed in gold using the Great Teachers Stamp set.  I already know this is definitely going to be a go-to set!

The little apple and the pencil are also from the School Days stamp set.  I used the coordinating School Days die cuts, which I love! I forgot to photograph them without the gift card portion, but I stamped another sentiment underneath.

This next project is something quick and easy and uses some of my favorite Reverse Confetti images. When this sweet little Honey Bear stamp set was released, I never used the honey or bee images. When I spied this chapstick I knew that it would make a great teacher gift and I would be able to use these sweet images.


I made 6 of these and my brown markers were running out of ink, so my coloring is not very detailed. I colored them using Copic and Prismacolor markers and then die cut them using the Honey Bear Confetti Cuts

I mounted them onto a Stitched line tag that has some blue ink blended onto it and stamped with the "for my teacher" sentiment. I thought this was a simple gift, but the teachers mentioned to me how much they loved it!

My next project is VERY simple, but again, I made 6 of everything so I needed to maximize time. I heat embossed the sentiment from the Great Teachers Stamp set onto a Tag Sale 5 tag. The apple is from the School Days stamp set, linked above. I also glued a red button for some added detail.

This last project was whipped up this afternoon. I made my famous caramels and put them in some bakery boxes. The tag is stamped quickly using theTeach and Inspire stamp set, which is one of my all-time favorite stamp sets.  I hope you enjoyed these projects and found them inspiring! It's not too late to get working on some end of year gifts if you missed out on Teacher Appreciation Week! Thanks for fluttering by!

Thursday, May 10, 2018

I'm here for you!

I participated in the Layton's Legacy Blog Hop and NICU fundraiser/card drive on May 8th. I wanted to share the card I made for it. You can see the rest of the cards as well as more information on the SugarPea Designs Blog. It is something my fellow teamie, Lea Lawson has put together and is in honor of her angel baby, Layton. You can read more about that on her blog: Lea Lawson Creates


To begin, I colored two of these adorable raccoons from the Indian Summer stamp set using Copic markers. I added some Wink of Stella over the top and then die cut them with the coordinating Indian Summer Sugar Cuts. I thought they would look adorable with the Lantern SugarCut. I cut it twice and glued it together for a more stable piece. The inside portion I die cut out of white paper and then did some ink blending using Fine Linen Distress Oxide ink. It is spritzed with water and some Shimmer Spray.

I used the Diagonal Stripes Coverplate which is colored with Distress Ink as well. It didn't oxidize as much as I wanted, but I still like how it turned out. The "I'm here for you" sentiment is from the Heartfelt Sympathy stamp set. I love that there are so many sentiments included that aren't just for sympathy cards. I added a few sequins to finish it off! Thanks for fluttering by!