Hello and welcome!
My boys' school postponed Teacher Appreciation Week, so I've been busy getting the teachers' gifts put together for each themed day of the week. My sweet son Rowan has been in Special Ed since 2nd grade and I always like to make sure to thank his teacher(s) in that class as well as his regular class. These two strawberry cards will be headed to them with a strawberry themed gift.
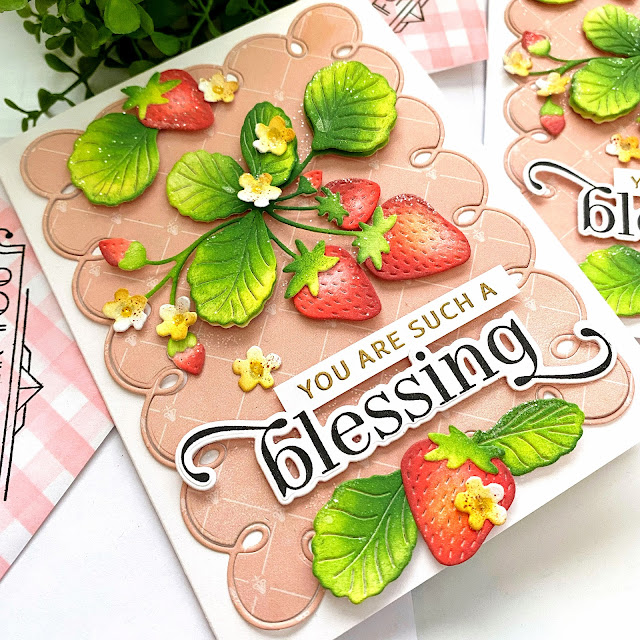
To begin these two cards, I used the BotaniCuts Strawberries Die to cut all of the pieces I needed for the cards. I used Distress Oxide inks and finger daubers to color the different pieces. This is always my favorite part; maybe because it feels like finger painting in a way! ha ha! I glued the berries to the stems/tops using liquid glue and allowed them to dry.
While they were drying, I die cut the background panel from pattern paper using the Frosted Frames Die. I adhered the center portion and the swirly portion to an A2 white card base using liquid glue. I set both bases aside to dry and got to work on the sentiment. If you've been stopping by regularly, you might be seeing a pattern with my sentiment choices! ha ha! I REALLY love this particular sentiment and felt it would be perfect for these cards; it is from the Blessed Blooms Stamp Set.
I stamped the blessing portion in black and then heat embossed the "you are such a" portion using gold powder. I haven't done any gold embossing lately and I always love how it looks. I layered the largest berry bunch onto the card front using foam squares and then positioned the sentiment below using additional foam squares.
I added a few more berries at the top and bottom with leaves tucked here and there. I decided to jazz up the strawberry blossoms more than I usually do; I added yellow ink around part of the perimeter and then a darker shade of yellow on the very edge. I added some ink splatter using my Color Spritzing Tool and a marker. From there, I used the end of my stylus on a foam mat to press the middle of the flower inward to create more dimension. If you've ever seen someone make paste flowers for a cake, that is the same technique that I used.
I really like how they turned out; I usually only add a small dot of colored pencil to the middle and I feel like they don't have the same impact as the beautiful berries. With these additional steps, they feel like they fit in a little bit more! ha ha! I can't seem to stop with the gingham envelope flaps stamped with a sentiment, so I took a little bit of extra time to do that. You can read how I did that in THIS post if you're interested. I also added some glitter here and there for some sugary sparkle and shine! Thanks for fluttering by!
P.S. I will be gearing up for a busy next few weeks with lots of fun new goodies coming your way, so stay tuned!


4 comments:
BEAUTIFUL WORK, Kelly! I LOVE the colors you chose! Together, they have a strawberry short cake feel to them! ;) I'm SURE the teachers will LOVE what you've put together for them! I like to not only shape my flowers with a stylus, but those strawberries too, & mount them with foam tape! They just POP OFF the page then! (P.S. I have a stamp with the same pattern, as your background paper!;) ) ABSOLUTELY BEAUTIFUL!!! ;)<3
You’re such a sweetheart Kelly, so thoughtful and caring. Your son’s teachers ( or all your teachers in general) will fall head over heels for your beautiful cards. You put so much work into them and it shows. I love the Frosted frames cut with PP, I have to keep that in mind. Thx for sharing and I look forward to all your special cards and treats coming up. 😎💕
What a great idea! I’ll have to try that! I’ll bet they’re amazing! Thank you so much!
Thank you so much! You’re so sweet!
Post a Comment