Tuesday, May 26, 2020

Secret Agent {I spy with my little eye}

Happy Tuesday, friends! Thanks for joining me yesterday for my Keeping Christmas post! I always love when the 25th rolls around! I hope you all had a nice Memorial Day honoring those who have died in the service of their country {USA}and those loved ones who we cherish and honor as well! I'm back today sharing some fun birthday cards using the clever and whimsical Secret Agent stamp set! This is such a fun set and I love the assorted sentiments that make this perfect for different occasions and kids of all ages!

One of these cards will be going to a 7 year old which makes the "agent number #007" so much fun at the bottom! I made two even though I only NEEDED one...I knew this would be a "MISTI intensive" project {ha ha} so I decided to just make 2. You know what I always say...if I'm going to make one, I may as well make 2! I've mentioned it before, but for those of you that don't know, I'm in charge of the kids at church and teach them music. Since we haven't been to church for a few months, I've been sending thinking of you cards and dropping off a religious gift and a birthday card at their doors. I bought some doorknob bags which are perfect to tuck the gift and the card inside and hang on their doorknob and go. 
To begin these two designs, I cut two pieces of Rustic Cream cardstock measuring 5 1/2 inches by 8 1/2. Once that was done, I used the Edgers #5 die collection to die cut the different edges to make the card look  like a file folder. Once that was done, I scored it in half and folded it using a bone folder, which once the edges are cut is around 3 3/4 inches. I stamped the "Top Secret" image on the file tab using Pure Poppy ink and then stamped the "Confidential, Top Secret" circle image over the top in black as well as the front.
I stamped the rest of the images that are directly on the card front using black and red ink and my MISTI for alignment.  I die cut the secret agent twice for each card using the Secret Agent die collection and them stamped the images. He is just a series of two stamps; the pants and head portion and then the second step is his jacket. It really keeps the retro feeling of the stamp set by just using the two colors!

Next comes the fun part! I die cut the magnifying glass three times for each card. I stamped one using my MISTI and then just used the other pieces for stability. I made a sandwich making sure to put the Pure Poppy transparency sheet between the layers. There is a circle die cut that cuts this to the right size so that it sandwiches nicely. I just used liquid glue to adhere the layers. I like using liquid glue for these types of projects because it gives me some "wiggle" time to make sure all of the edges are lined up properly.

I attached the magnifying glass using a half circle of Velcro so that the recipient can take it off to use it to decipher the inside message as well.  I was showing my 6 year old how it all worked and he was enamored with the idea! Then my 8 year old came around a while later and I showed it to him. I asked if an 8 year old would like something like this and he replied no. I said that was good to know so that I could make sure only 7 and younger would receive a card like this. He then said that maybe he did like it a bit...then he said, "fine, I really like it"! LOL!  I guess 8 year olds are a go as well! I like that the stamp set comes with the "boy" and "girl" sentiment so that you can make it for either one. 

For the front of the card, I used Tropical Teal ink ink to stamp the hidden message, but found that it was too obvious. I then tried it with Weathervane ink for the inside and that was the winner. I found that I could stamp it lightly, but the colored transparency sheet made it stand out nicely when it is held over the image. 
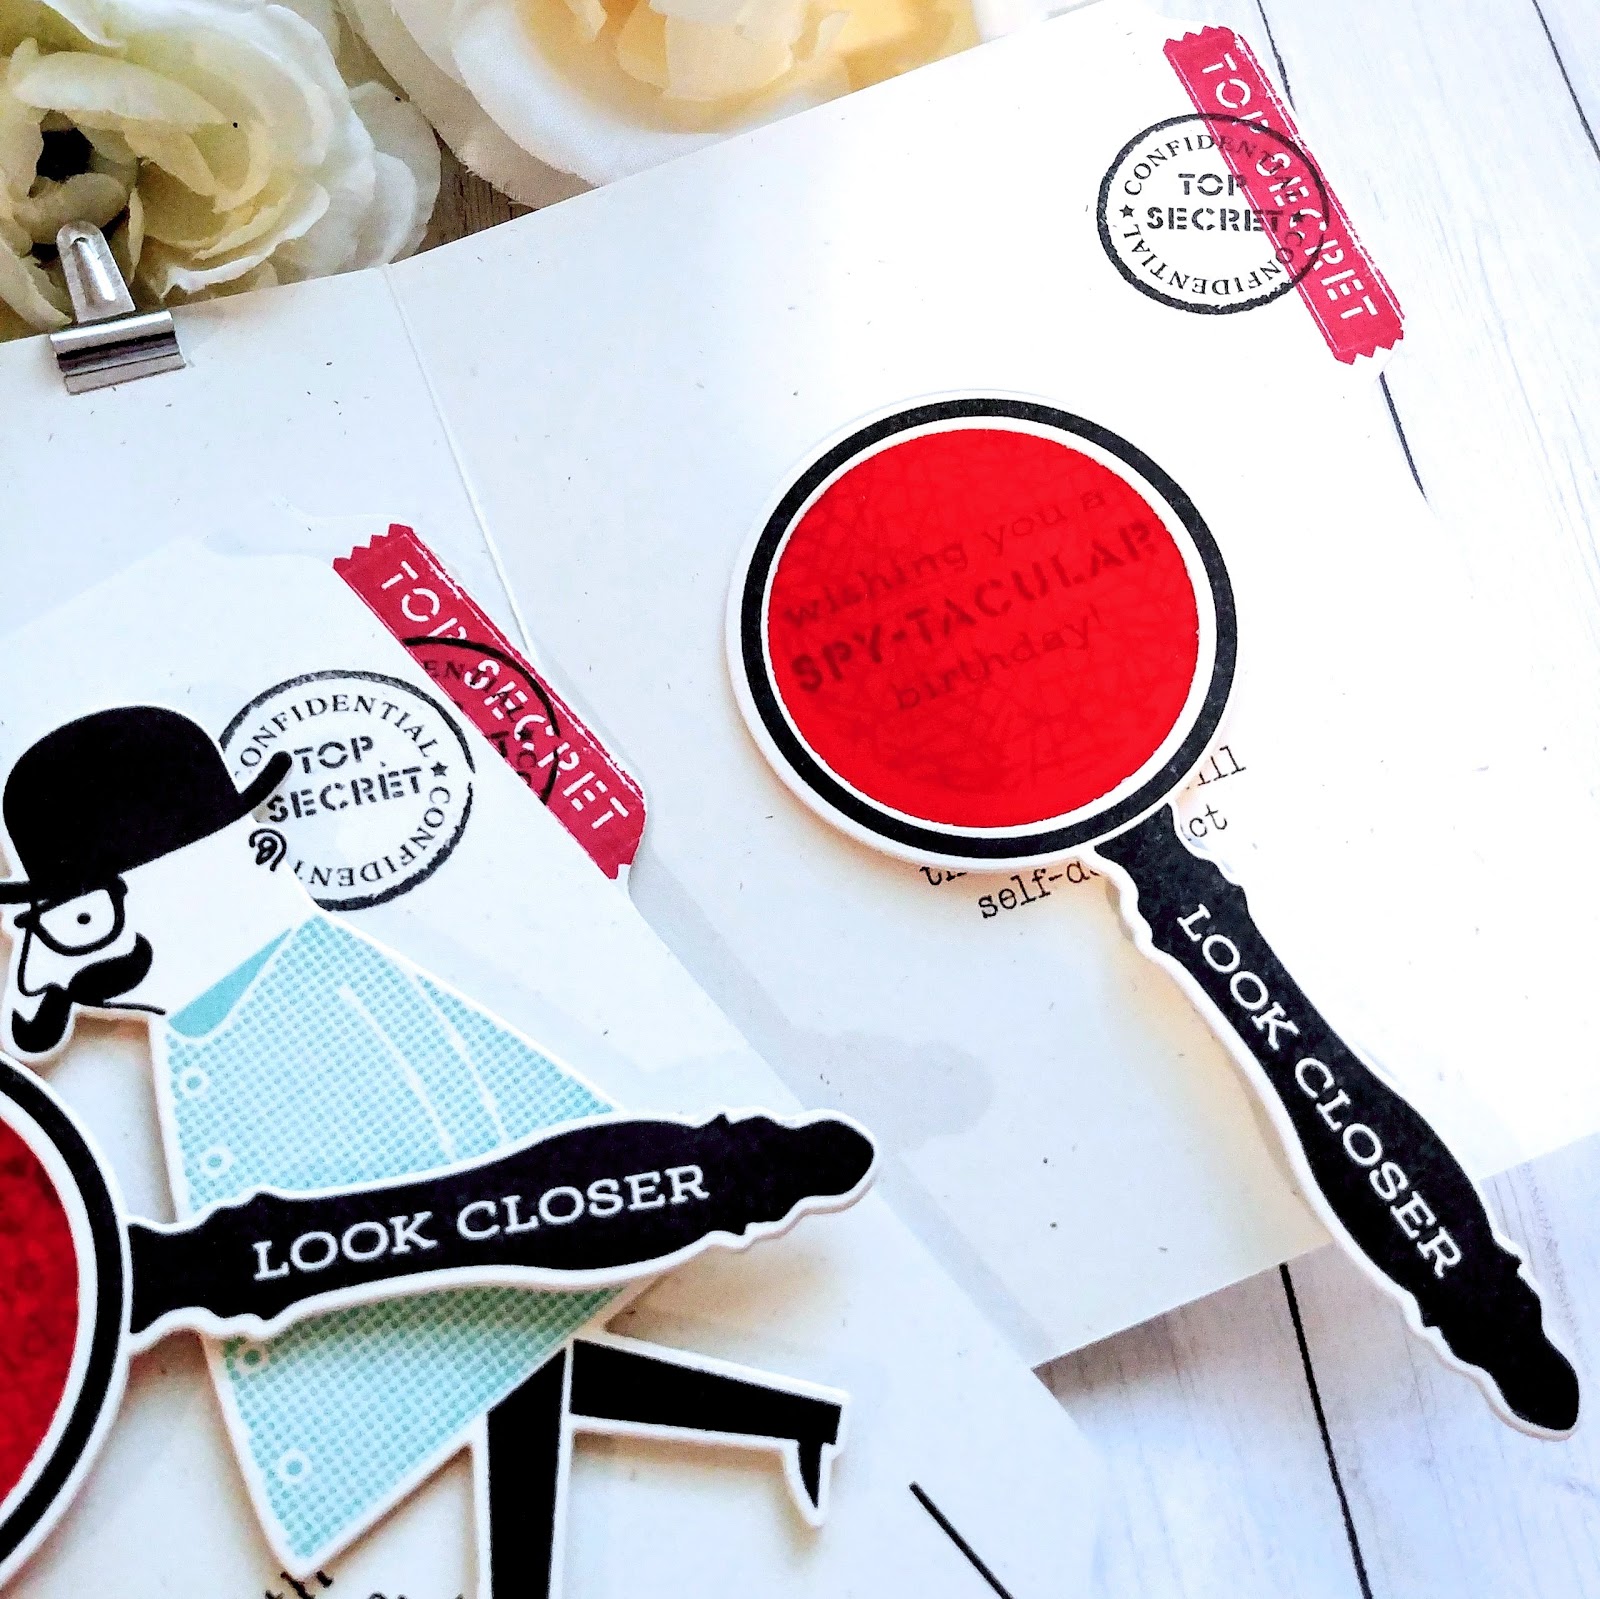
I put the magnifying glass over the top so you can see it better in this photo. You could add as many scrambled messages as you want on the inside of the card, especially on the left hand side. I think I'll try adding more on the next batch that I make!


I added a little silver clip to the top. It isn't holding anything in place, but more for aesthetics. You could definitely rearrange some of the design elements so that it could have a purpose. It was a last minute decision and I felt if I added any more words or image the card would look too busy!
These were so much fun to put together and I can't wait to make a girl version as well! I have a lot of birthdays coming up so it is a definite possibility! Join me tomorrow for the first day of reveals for the new release from The Greetery! Thanks for fluttering by!


Monday, May 25, 2020

Keeping Christmas {Sending Christmas Cheer}

It's the MOST wonderful time of the month! Welcome to this month's Keeping Christmas Blog Hop! I had so much fun on today's projects and I hope you enjoy them, too! They are similar in feel to most of the projects I've been making this year; a little bit vintage, paired with a few trendy patterns to keep things fresh! I FINALLY asked my sister what the name of the paper pad is that I've been using for the majority of my projects this year. It is called "North Pole News" and it is made by Craft smart. I believe it is from Michael's. She gave it to me last year, so I don't know if it is still available, but I wanted to let you know for those of you have asked about it. Don't forget to head to the other designers' blogs to see what Christmas inspiration they have for you!
Kelly Lunceford (Creator)

As you can see, I have two separate projects that I'm sharing for today's post. I made three mitten pouches, and 4 gift card/treat envelopes. I keep telling myself that I don't NEED to make anymore gift card holders, but they're always so fun. These would also make fabulous tags and you could easily slip some holiday treats down inside, something like Ghirardelli squares. All you would need to do is to punch a hole and add some twine or ribbon.

Up first are the mittens! I usually make mittens like this every year, but I normally use felt. I decided that I could try creating them out of pattern paper since the stitching makes them strong. I die cut three of the mittens out of pattern paper using the Shape Up Series: Mitten die. I die cut three out of Rustic Cream cardstock since you can't use two of the same side, so it would be a waste of pattern paper. I would end up by having the pattern on the inside, so I opted for a sturdy cardstock. I stitched them together using my sewing machine and white thread. 

The trickiest part is sewing around the thumb portion, but I just put my machine in the needle down position and go slow and steady. I set these aside and got to work on the the embellishments. I die cut the largest snowflake from the Snowfall Style 2 die twice for each mitten for a total of 6. I used Weathervane cardstock and then added the chunky silver glitter to the tips using a 2 way glue pen. I set those aside to dry and then got to work on the rest of the design details.

The "Sending Christmas Cheer" and "Peace and Joy to you & yours this holiday season" sentiments are both from the Holiday Photo Finishers stamp set. I heat embossed the cirlce image using silver powder and then punched it out using a circle punch. The wrist portion is scored at the beginning and end of the sentiment and then secured in the back using ScorTape. It gave it an arced shape so that it will be easy to fill the pouch up and not impede the wrist portion. It's a little whimsical, but I really like how it ended up.

The red patterned portion was created by die cutting the label shape using the Mat Stack 1 die and then stamping it using images from theMat Stack 1 Collection stamp set. I used another one of the images on my projects from last month that you can see HERE. I really like how the red pops and the stripes look like a candy cane or ribbon candy! All of these components are layered together using foam squares. The holly sprigs are embellishments that can be found each year at Hobby Lobby and I attached them using a hot glue gun for security.
Next up are the gift card/treat holders. I die cut these out of pattern paper using the Seed Packet Die and then I glued them together using a tape runner adhesive and ScorTape. The flap is secured by a half circle of velcro on each flap. This will allow it to stay closed nicely, but easily opened for the recipient.

I attached a cute plastic red bow embellishment that I have used on some other projects this year that you can see HERE. I'm crossing my fingers that these are available again this year because I REALLY like them! My sister got them for me so I will have to ask her where they came from....I'm guessing Hobby Lobby, but it could be Michael's, too!

I used the smaller snowflake from the Snowfall Style 2 die collection to die cut the silver and champagne colored glitter snowflakes. I toyed around with mixing the two colors for one snowflake, but they made my eyes go buggy so I opted to keep the same color together.

This sentiment is also from the H0liday Photo Finishers stamp set and I fussy cut around the edges since it doesn't have a companion die. The rustic cardstock makes it a little bit more difficult to get a crisp impression, but I like the vintage look it gives the project.

I've been loving the idea of Christmas, but now that my grass is so green and the leaves are on the trees, I'm happy that Spring/Summer is here for me to enjoy! ha ha! I guess that is why I love this series so much because it gives me an excuse to dive into the feelings of Christmas all year long. I bought a new Bing Crosby album for my phone so I could listen while I was working, much to the chagrin of my children! I've had years where I didn't listen to any Christmas music while I created during the year because I wanted to "save the magic" for the holiday season, and I've had years where I listened to it each month. I think this is definitely going to be a "listening" year! LOL! Thanks for fluttering by!

Friday, May 22, 2020

The Greetery's TGIF {Just a Note}

Hello friends! Welcome to this week's T.G.I.F. {The Greetery Inspiration Friday}. I'm over on The Greetery Blog but thought I'd share my projects here as well! I've created 3 projects today using quite a few different sets, using bits and pieces from each one! I even added a bonus tag that was created using some leftover dies and images!  I usually just put them back in with the stamp or die set when I am cleaning up, but for today I decided to put them to good use and make a coordinating tag! I've been doing a lot of porch deliveries these last few months and tags are perfect to have on hand to dress up a little drop-off surprise!


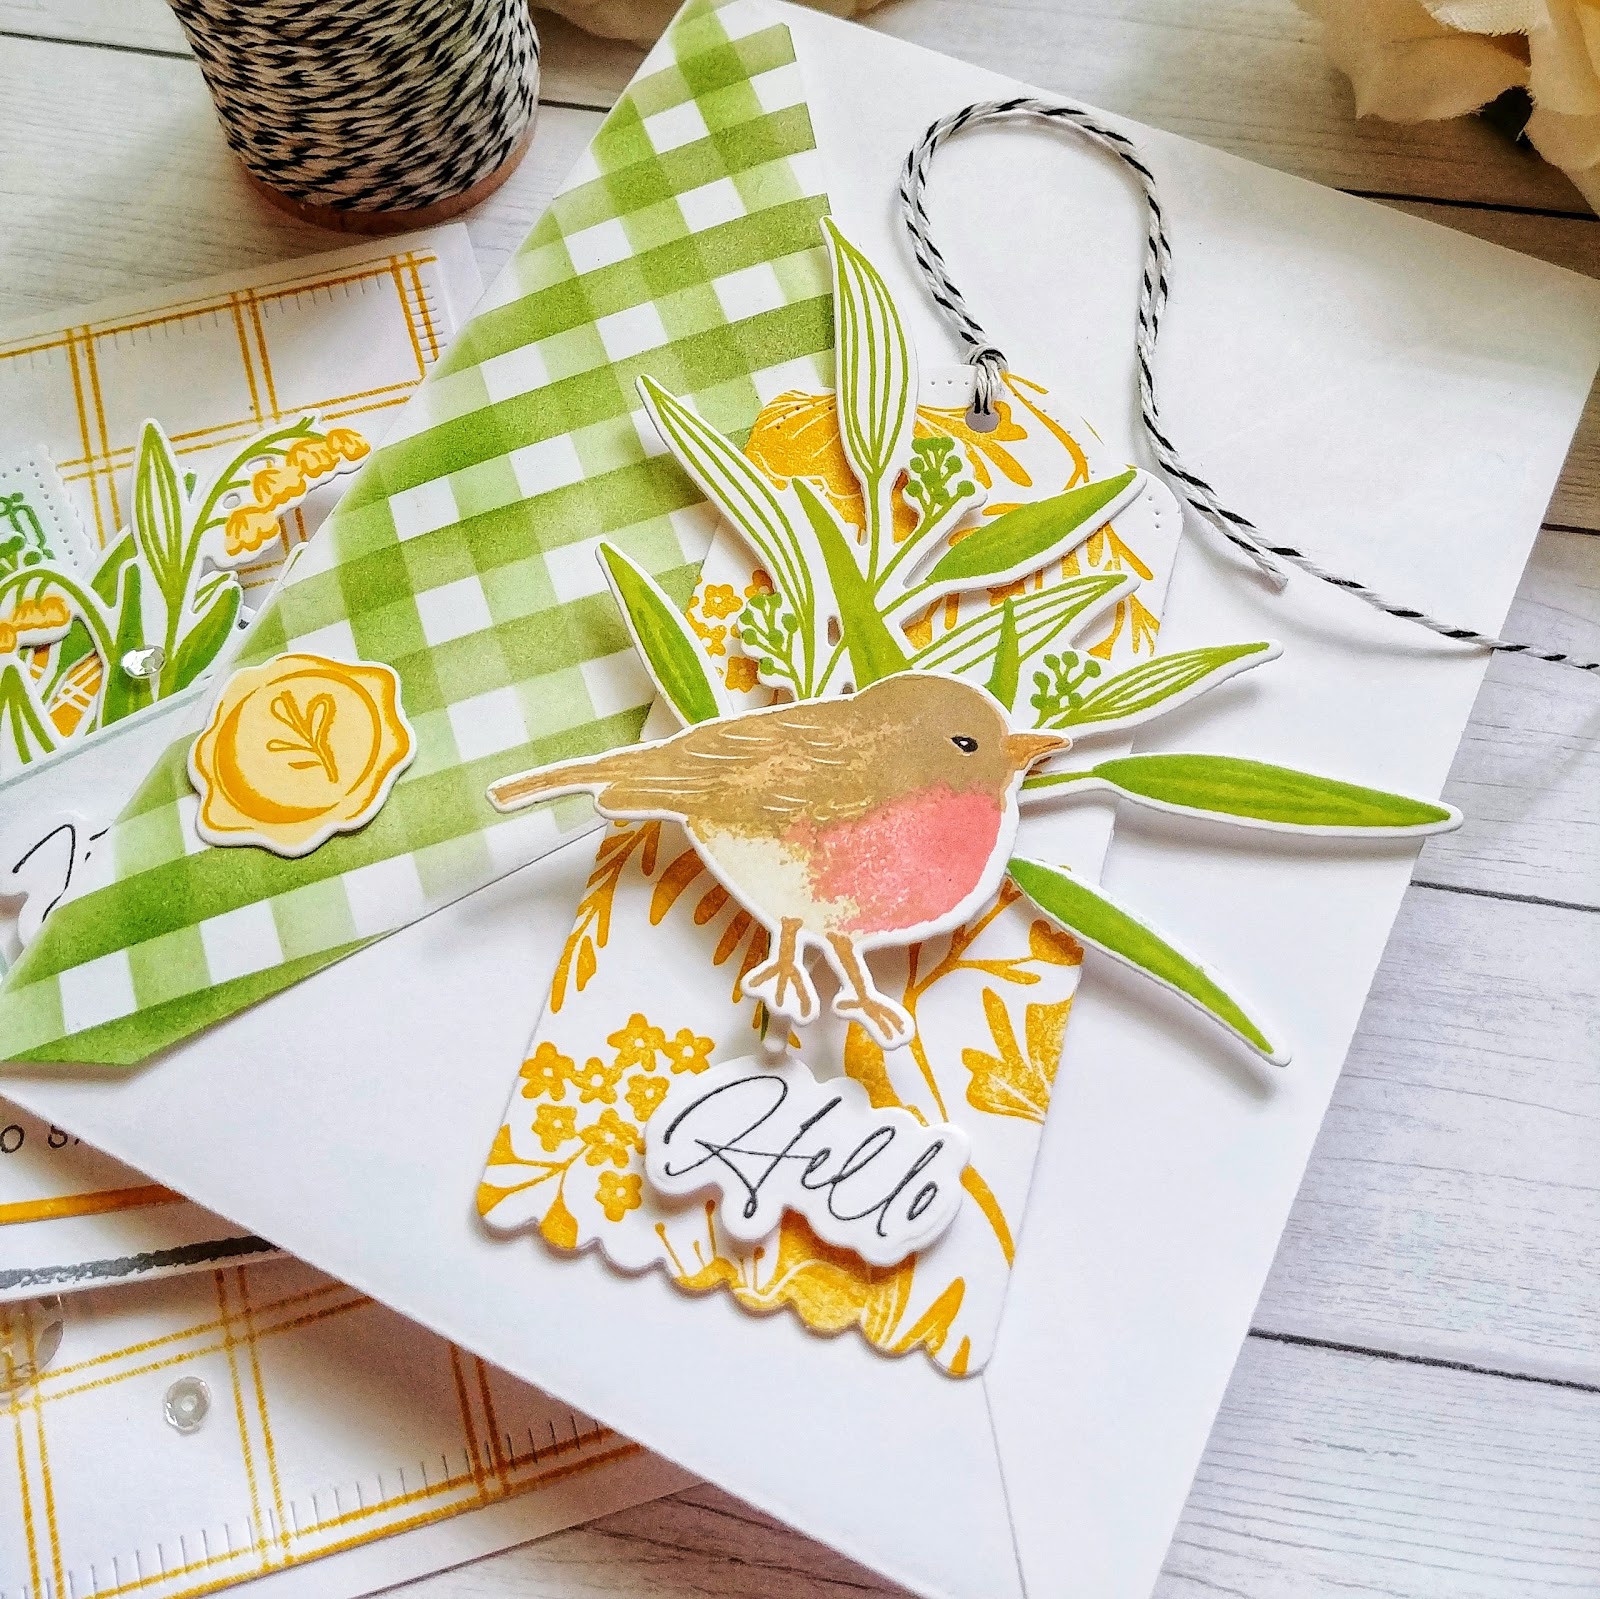
The cards are similar in layout as far as the focal image, but I had some fun with the two backgrounds. The first card uses the new Fresh Floral Background Stamp that has been die cut using the Halfsies Oval Die. The portion that was left over is what I used for the tag by diecutting it with theSpeed Tagging Die. I simply placed the stamped background underneath the specific tag shape that I wanted to use. I'm sharing the tag a little later in the post. The second background uses the wonderful Windowpane Plaid Background Stamp stamped simply in yellow and then die cut using the Crimped Frame Die

Each card has stamped flowers and foliage from the Signed and Sealed With a Kiss. They are tucked inside an envelope that is from the Signed and Sealed stamp set with a mini note card from the same set. The "Just a Note" and "to say Hello" and "to say I care" sentiments are also from the Signed and Sealed set. The yellow label and the stamped panel behind the envelopes are both from the With Love at Christmas stamp set. I love when a stamp set stretches beyond it's intended season for added versatility. 

I really like stamping multiples of most things when I am creating for a few reasons: I never know exactly where the design will take me so I like having options on hand, it is beneficial for me time-wise since I set everything up in my MISTI (if I'm stamping one, I may as well stamp 2 or more), and I enjoy making multiples of cards to send to friends and family. 
When stamping with multi step stamps, I find it to be most beneficial to die cut the shape first and then place the die back in the negative space all set up in my MISTI. That way I can make sure the edges are aligned nicely. If there isn't more than one step, I'll usually just stamp the image and then die cut it afterwards, making sure to line it up accurately around the stamped image and then secure it with washi tape. 
I spent one Sunday afternoon creating all kinds of different colored birds from the Robin and Wren Stamp Setand tucked them away to use on future projects. I had three left, which just happened to work perfectly for these three projects! They are just the right touch to add to these nature inspired cards!
Of course I couldn't resist creating some coordinating envelopes using the Flappable Stencil! They are so easy to whip up and are perfect complements to the cards! Thanks for joining me today and I hope you're all taking this unique opportunity to mail out your special creations to brighten the lives of others!

Monday, May 18, 2020

Stitched Sunshine!

I took advantage of a lazy Sunday afternoon to make a few cards; one for an upcoming birthday and one to say thanks! The Stitched Sentiments stamp set was my starting point and then all of the other "stitched" details fell in to place! These were so fun to work on, using bits and pieces from this and that to create these cards to pop in the mail!

This is the perfect sentiment for a birthday in May and with all of the beautiful flowers beginning to bloom, the Stitching Garden stamp set was a natural choice! It complements the other stitched details so nicely.  To begin, I used the In Stitches Die Collection to die cut the banner and the embroidery hoop. I heat embossed the metal portion at the top to give it a more realistic look. Once that was done, I stamped the hoop portion using Classic Kraft ink for a light wood feel.
I used the Cross Stitched Mini Stamp set using Soft Stone ink on the center portion of the hoop. Once that was done, I stamped the "You" and "May" sentiments using Raspberry Fizz ink with the heart stamped in Aqua Mist ink. I set these pieces aside to work on the flowers.
I actually made three cards in total; one like this one shown here and 2 of the "You" design. I stamped enough flowers and leaves from the Stitching Garden Stamp Set for each card and then used the Stitching Garden die set to die cut each of the stamped images.

Each of the embroidery hoops is mounted onto one of the images from the Stitch In Time Borders that is stamped in Raspberry Fizz. On the card that I didn't photograph, I stamped it in Aqua Mist ink for a different look. I ended up by liking the Raspberry Fizz much better for balance!
I cut a 4 by 5 1/4 inch piece of white cardstock and stamped the vine image, which is from the Stitched Sentiments Stamp Set, using my mini MISTI. It worked out perfectly to just rotate the paper to get the second impression. I used one of the little flowers included in the set to add the yellow, aqua, and blush flowers.

I added the pierced detail around the edge once I was done stamping using the Nesting Basics: Pierced Rectangles. After that was done, I was able to add the embroidery hoop layered onto the stitched border to the white panel using additional foam squares. I had fun adding the flowers and tucking things here and there!

The Stitched Sentiments stamp set comes with a banner image, but I opted to just do some simple sponging around the edges to give it some definition. I stamped the "make the world a better place" portion of the sentiment using black ink. I added it to the hoop using foam squares. The entire focal panel is added to a top folding Raspberry Fizz card base! A few sparkling clear sequins and a spritz or two of Shimmer Spray finish off these designs! I had a lot of fun putting these together; a perfect way to spend the afternoon! Thanks for fluttering by!


Saturday, May 16, 2020

Home is where the heart is!

Happy Saturday, friends! I'm just popping in with a fun little "welcome to the neighborhood" ensemble I've been working on this week!  A new family moved in a few weeks ago and I have been meaning to put something "COVID-19" appropriate together to drop off at their house! As much as I wanted to do some baking, I opted for a handmade card, a little house filled with Werther's soft caramels, two packages of microwaveable popcorn, and 5 Redbox codes, and a hand sewn key wristlet for their new house key!

I pulled out all of the "old school" stops for this ensemble; felt, ribbon, buttons, dies, stamp set, etc. LOL! It really feels like a blast from the past, but there are some stamps and supplies that I will never part with, because I need them for times like this! How about you? Do you keep old stamp sets, and older supplies? You all know I'm a crafty hoarder so the answer is yes for me! I have gotten rid of a lot of older SU! sets, but don't ask me how many I STILL have! LOL! 

Of course I had to make a little house to include in the welcome basket! These houses are so cute and are always well received! To begin, I die cut the Tiny Town Basic Die out of Happy Spots pattern paper and all of the shutters and window frames from white cardstock. I also die cut the Tiny Town: Scallop Shingles and little handle for the top out of white as well. Once that was done, I got to work assembling the house. 

The finishing touch is a tag tied up with ribbon and twine. I even went super old school with an eyelet! ha ha! The tag is die cut using the Charming Tags 1 die, which is back in stock, out of white cardstock and then I stamped the stems and flowers from the Love Lives Here stamp set, which has been retired. The house is die cut and then stamped using my mini MISTI and popped up with foam squares. I'm loving the Banner Builder Basics die lately and use it ALL the time! They are the perfect addition to each of today's projects!

The banner is die cut from Sweet Blush cardstock and then I bent the sentiment to fit the arc of the banner! One of my favorite things to do with these houses is to add a small battery operated tea light, but I decided since it was going to an entire family, they'd probably rather have it full of caramels! ha ha!

The card uses the same tag as the house, but with a few additions, including the new Nifty Plaid background stamp. I love it so much and have used it quite bit during the release! 

The tag with the house and flowers is the medium size tag, so I die cut the largest one out of the same Happy Spots paper as the house. I layered them together using foam squares for dimension. I also included a larger banner with a different sentiment. The Nifty Plaid background is stamped onto a panel of white cardstock that has been die cut using the Love to Layer Notched die. I added the entire panel to a top folding Berry Sorbet card base.

I wasn't planning on putting this card in an envelope so I didn't worry too much about how long the tails were on the banner. If you are mailing your card, you might want to keep the banner a little bit smaller so that it can fit in an envelope better.

I bought 5 Redbox codes for BluRays and printed them out onto cardstock and then die cut it using the smallest of the notched die and tucked it inside of this custom made Essential Pillow Box Die. It is die cut from the Happy Spots pattern paper and then tied up with ribbon.

 I added a banner as you can see, to keep the entire project cohesive. I die cut some felt flowers and glued them together using Tombow Mono Multi glue. The oval is die cut using the Limitless Layers: 2 1/4 inch oval die and then stamped with the Nifty Plaid background stamp. I gussied it up with the butterfly, banner, and felt flower.

You can see everything in the basket ready to go! I wrapped up the popcorn in the same pattern paper for aesthetics and presentation. This will be easy to just pop on the porch. I wrote a nice greeting inside the card and we can't wait to actually meet them properly! Thanks for fluttering by!


Thursday, May 14, 2020

Ink to Paper May Release Countdown Day 4 {To an Amazing Dad}

Welcome to the 4th and final day of the Ink to Paper May release countdown! Everything will be available for purchase at 10 pm EST on May 15th! We're continuing the Father's Day festivities with a bunch of fun new stamps and dies!

I've been sharing peeks of the new Nifty Plaid all week, but it is officially being showcased today! I had so much fun using the new In Stitches: Back Pocket die the other day, I decided to use it again to create a fun gift card holder for Father's Day. I actually made two, but didn't like the second one as well, but I did include a photo of both of them together at the bottom of the post!

This project consists of the pocket and then a small "card" of sorts to slip the gift card into. I like having things like this really secure, but it also adds some extra detailing and a way to use even more of the fabulous sentiments!

I die cut the two different sizes of pockets, stamped the Nifty Plaid background on the smaller pocket and then added the silver rivets using foam squares. The two pockets are secured together using a double thickness of foam squares to allow the gift card folder to slide easily inside. Make sure you move the foam squares as far as you can to the edge to ensure that the gift card will actually fit! Ask me how I know! LOL! I realized that I wanted to add a tag like the "hero" one here on my pocket card the other day, so I made sure to remedy that on this gift card! The Dad sentiment and this Hero sentiment are both from the new Just Sentiments: Father's Day.

Once the pocket was all put together, I die cut the new To Die For Sentiments: Father's Day twice out of Kraft cardstock and glued them together with liquid glue. I added some Cocoa Bean ink around the edges of the die cut sentiment to add some definition. Once that was done, I used small portion of foam squares to add it to the pocket. 

You can see the second pocket here. It is just too busy looking for me, which goes to show how important our color choices are. LOL! It's just not balanced right, but I do plan on gifting it this year because most of the time, dads just don't care! ha ha!

Next up is a CAS card and gift bag ensemble using the new Border Bling: Diamonds paired with the Just Sentiments: Father's Day. One thing that I do like about store bought Father's Day cards is the simple designs that you can find. That was the direction I was headed in with this duo!

It's so easy to gussy up one of the fabulous Kraft Coffee Bags with a tag like I did here! These bags have a wax coating on the inside which is perfect for handmade treats so they don't soil the bag. There's nothing worse than unsightly grease marks seeping through handmade packaging! LOL!

I die cut two of everything; one for the card, one for the bag. I used the largest tag from the Charming Tags 1 die and die cut it out of Ocean Tides cardstock. I stamped it with the Nifty Plaid background {surprise, surprise} and then added the silver gromet from the In Stitches: Back Pocket Die to the top using foam squares.

The diamond portion is from the Border Bling: Diamonds and is die cut using Ripe Avocado cardstock. I used the Just Sentiments: Father's Day to add the "For my amazing Dad". I used my mini MISTI for the placement.

As I mentioned earlier, I made two tags, so it was a breeze just to add it to the dry embossed panel. My brain kept wanting to add "just a little something" but I resisted to keep it CAS, like I was aiming for! LOL!

This will be perfect for Father's Day gift giving! Treats are always involved, so this bag will be the perfect thing! My FIL is in a care facility so we haven't been able to see him since all of the craziness began! Who knows what Father's Day will bring, but we will remain hopeful! Thanks for fluttering by!