Wednesday, May 27, 2020

The Greetery Confetti Collection Release Day 1

Hello and welcome! What a thrill to be celebrating The Greetery's 1 year birthday! Boy, does Betsy have a celebration for you! There is so much to love with this Confetti Collection release! I was thrilled a little over a year ago when Betsy asked me to help her launch her new company called The Greetery and I'm even more thrilled to be here today celebrating the one year anniversary! I think it is safe to say that The Greetery has blessed so many of our lives with all of the amazing products that help us to create projects to bless the lives of others! "Where Making and Giving Meet" is the tag line for The Greetery and it is just perfect! From the tag line to the logo, and all of the amazing products in between, The Greetery is a company to love and Betsy is a creative genius to be cherished! Thank you, Betsy, for all you do for the papercrafting community! 
The festivities begin at The Greetery's Blog and then a hop filled with inspiration at every stop! The team will be showcasing many projects using the new products and some AMAZING guests have joined the hop as well! 
Before I link the other designers, there will be a GIVEAWAY of TWO $50 gift cards that are picked from the comments on the designers' blogs, so make sure to leave a little love at each stop of the hop! Winners will be announced on Friday at 7 am on The Greetery Blog and the new release will be live in The Greetery Shop on Friday May 29th at 10 AM EDT!
Kelly Lunceford (you are here)
Guests:


I have SO much to share with you today! I had so much fun creating and creating with each of the sets being showcased today! First up is the new Balloon Bouquet stamp and coordinating dies paired with the new Twisted Crepe die and the Big Balloons die! I have a slight obsession with balloon stamps and dies, so these were definitely up my alley! This is such a fabulous collection of stamps and dies!

I set the scene with the previously released Silver Lining Die and the Crimped Frame Die with some ink blending! I often get asked which inks I use and the answer for every project made for this release is Pinkfresh Studio Ink. They are beautiful inks that give stunning results. Once the ink blending was done, I added the sentiment in the lower left corner which is from the Sentiment Suite: Love stamp set to accent the large "Happy Birthday" sentiment stamped on the balloon! The Balloon Bouquet stamp set has multiple sentiments to make this a very versatile set.

I stamped the large balloon using the multi step stamps and then die cut it using the Big Balloon die collection, including the smaller balloons. I also stamped the stand alone bloom that is attached to the pink balloon. The balloons are added to the cloud background using varying levels of foam squares to give it a more realistic look. I added some glitter to select edges of the pink and small blue balloon for added sparkle.

I added some Crepe paper streamers to the top using the Twisted Crepe dies! Each section is colored using ink blending. This particular die collection comes with one particular die that cuts individual sections of the crepe paper streamer so that you can give it the two toned look like I have done here. I just simply added some darker ink to a piece of white cardstock and then ran it through my die cutting machine using that particular die and then glued them in place using liquid glue.

I tied the bottom of the large balloon with a simple bow of metallic cord for some added whimsy and sparkle! A few sparkling clear sequins finish off this birthday design! Up next is a baby card using the same supplies but with the addition of the new Ticker Tape background stamp! I heat embossed it in silver for a subtle look with lots of shine!

I've been needing an update to my baby collection and this is just the ticket! Balloons are so trendy now and they are used in such creative ways! I just wish these beautiful paper balloons were available at my party store! LOL!

The Balloon Bouquet stamp set comes with a five set stamp to get the look of the balloon that I used here. Step one is the solid balloon image with the outline for the leaves and flowers. Steps 2-5 are the leaf and flower images to make these balloons come alive. The die collection has a die for the small and large floral cluster so you can really give these balloons some dimension. I didn't add the extra die cut to the large balloon, but I'm guessing some of the designers did so you can see it throughout the hop! I can't wait to play with these balloons some more!

The green and smaller purple balloon both have glitter around the edges like I did on the first card. I also added some crepe paper at the top securing it to the edges with liquid glue.
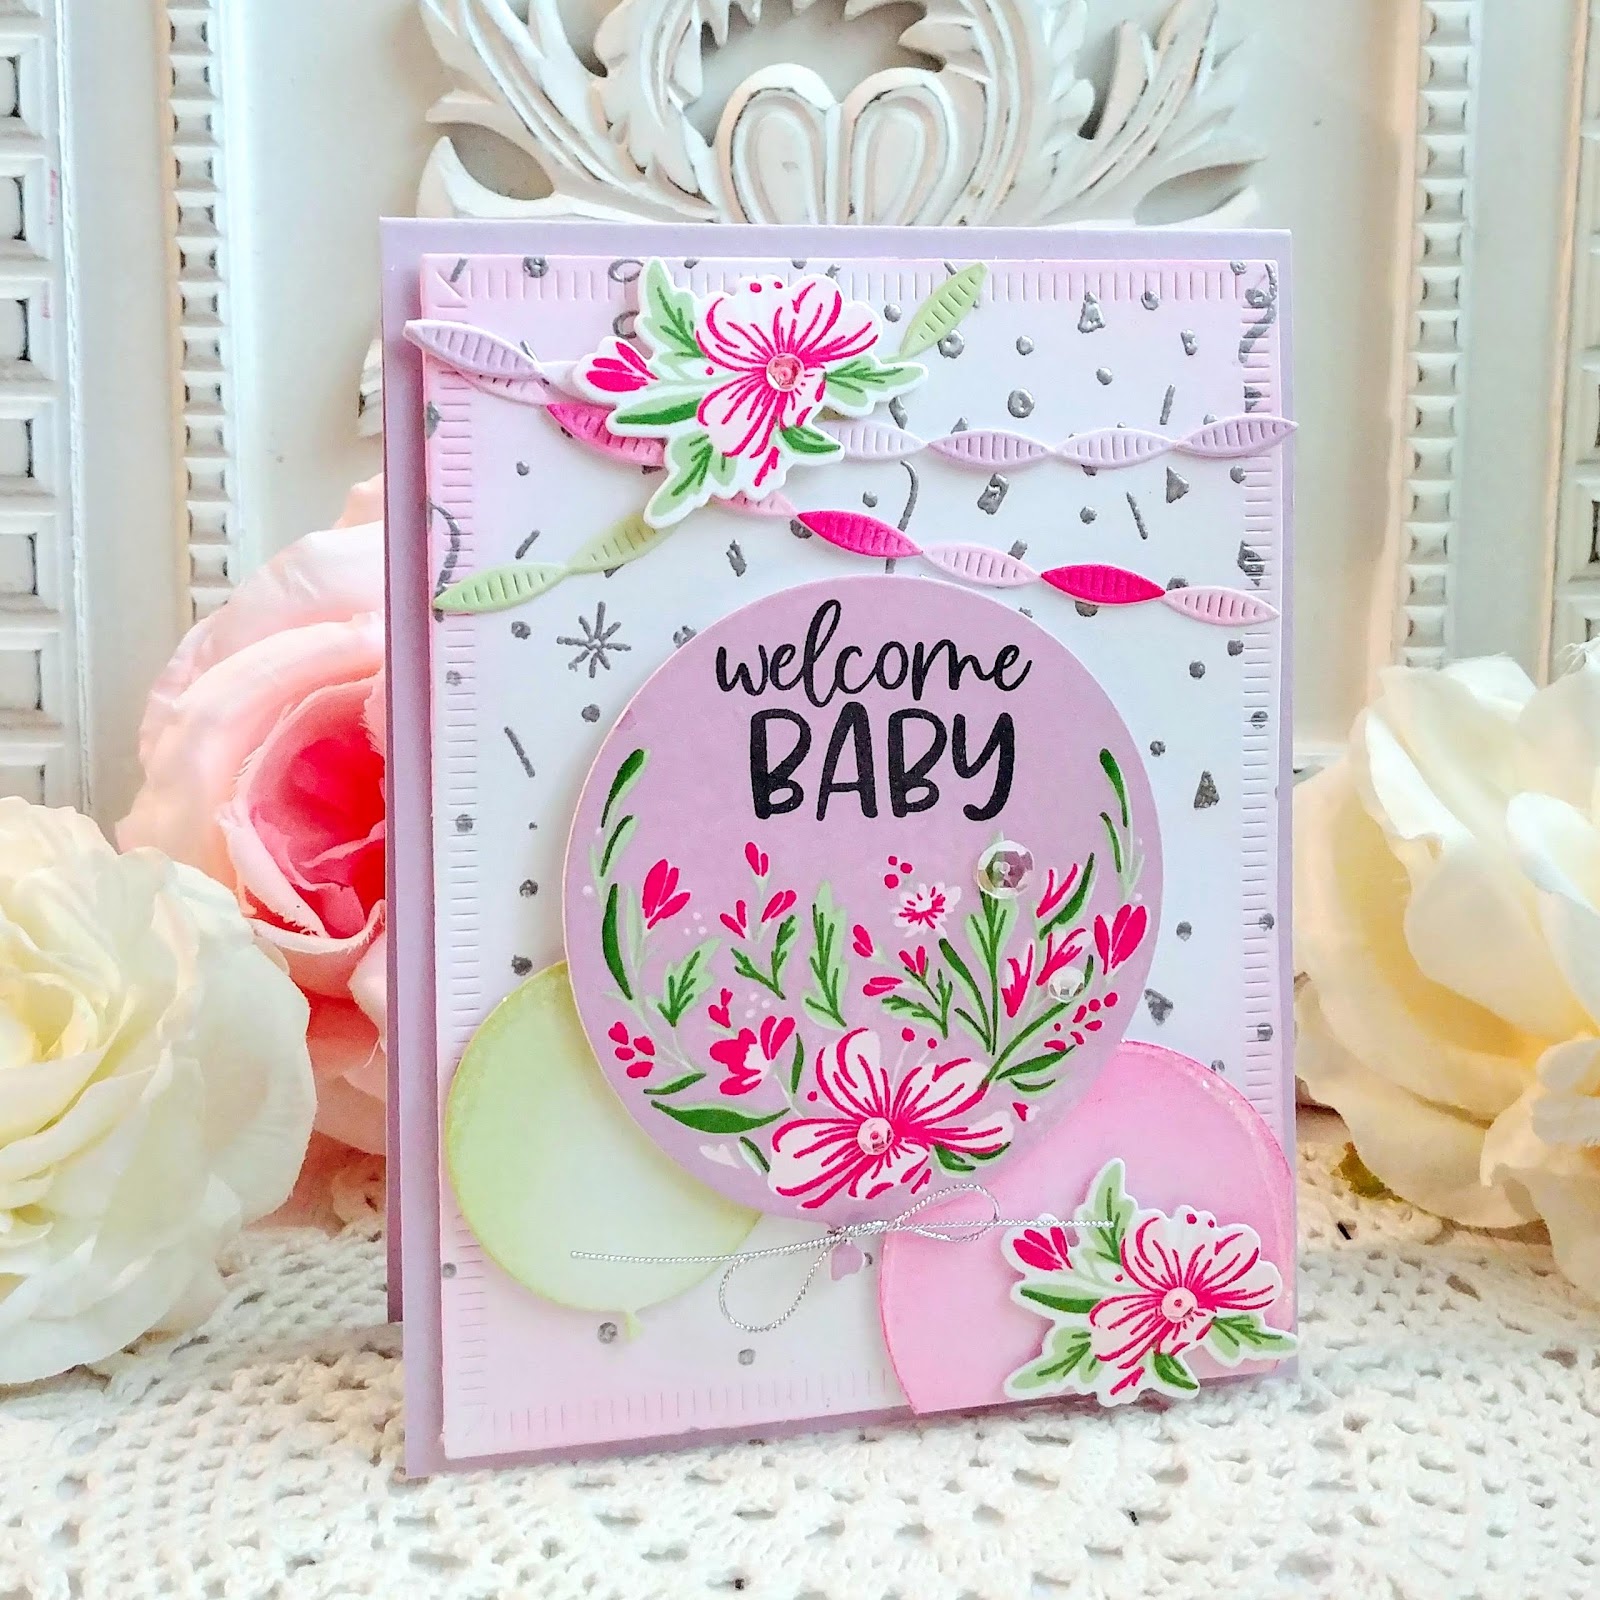
I added a few of the smaller floral clusters to the top and bottom for added interest. The entire focal panel is layered onto a panel of Soft Lilac cardstock using foam squares. A trio of sparkling clear sequins finish off this baby card!
My next three cards use a fun new stamp and die set called "Think Happy"! This is a fun small set that allows you to create floral and rainbow cards using some of the funnest sentiments! I couldn't resist using the traditional rainbow for each of these next designs!
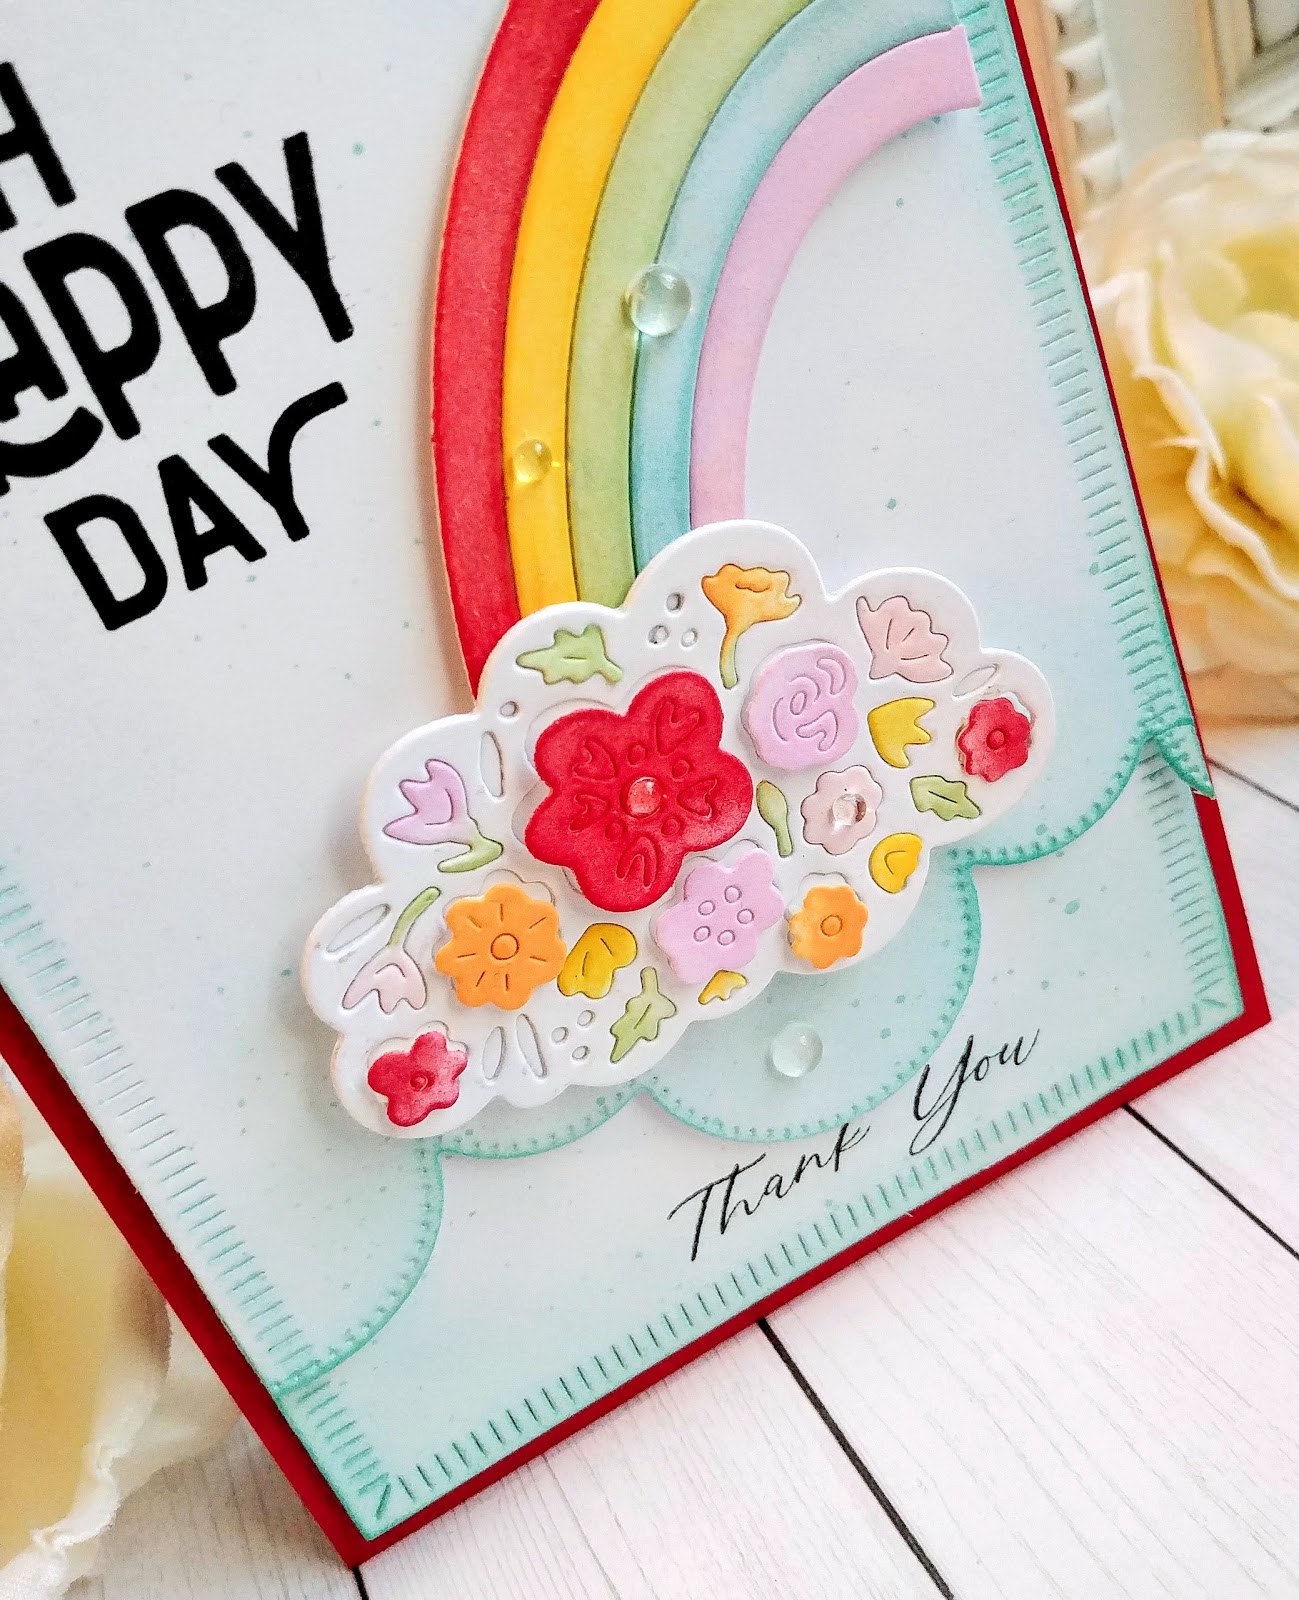
This entire card consists of ink blending on white cardstock to get each of the colored pieces. I love the variations in color that I can get by just doing some ink blending! To begin, I die cut two rainbow pieces. I used one as a guide to lay the colored pieces on top of. This particular die keeps the strips connected at the top and bottom, but I cut them apart to the do the inkblending on the second diecut. I layered them back onto the first die cut using liquid glue.

I also die cut two clouds; once without using any shims of any kind in my die cutting machine so the pieces wouldn't pop out. The second time, I made sure to use a shim so each of the pieces could be removed easily. I glued the two clouds together using liquid glue and then added in the ink blended flowers using both foam squares and liquid glue. I used foam squares to give this rainbow and clouds extra dimension. I stamped the "Oh Happy Day" sentiment in black as well as the Thank You sentiment which is from the Sentiment Suite: Thank You stamp set.

For my second card using this set, I thought it would be fun to add some of the fabulous images from the previously released Top Down Day Stamp Set. I stamped the bug in red and added some of the flowers from the same set and let the rainbow shoot behind her! I thought it worked nicely with the "Think Happy" sentiment!

I made sure to use my MISTI when stamping the sentiment to make sure I got a nice, saturated image. I also added some sparkling clear sequins to this design, but added some dew drops to the previous design. The clouds and rainbows seemed to be begging for some precipitation! LOL!

My third and final card is the simplest of the three and was the first one I created. I have a tendency of getting more and more ideas as I go along, so one card is just usually not enough! LOL!

I also wanted to use each of the sentiment combinations because they are just so much fun! My card stash was beginning to dwindle because of all the cards I've been sending, so these will be a welcome addition!
My final series of projects use the new Birthday Blooms stamp set. I got carried away and made 5 cards because I love all of the sentiments so much. I didn't actually end up by using all of them, but I did stamp the "Make a Wish" sentiment on the inside of each of these cards.
When I create floral cards, I always layer and stack the flowers and leaves, but this set is made to be used in more of a "pattern" type layout so that was fun for me.


To begin these designs, I die cut all of the images from white cardstock and then used my mini MISTI to stamp all of the larger sentiments first. I die cut two of each one, but in the end only used some of them. I realized that I was using more flowers than sentiments so I was running out! LOL!

Once I had the larger sentiments stamped, I got to work on the leaves and flowers. I went for a bright and cheery primary color combination that would appeal to many people and they are just perfect for summer!

I die cut the medium size of the Crimped Frames for each of the five designs. I stamped the coordinating smaller sentiment for each of the larger sentiments I chose to use. Once that was done, I got to work arranging the flowers.

I used foam squares on each of the leaves and flowers to give them dimension. I also added some sparkling clear sequins here and there on each of the panels.

After that was done, I created some colorful backgrounds using both the Windowpane Plaid background stamp and the Fresh Floral Background stamp. I simply used the same colors for the backgrounds as I did for the blooms.

In the end, I like the ones with the floral background better, but I still like the plaid ones, too!

The floral background cards are layered up onto white card bases using foam squares for even more dimension.l

I'm thrilled to have so many fun designs to add to my stash! Don't forget to leave a comment to be eligible to win one of the $50 gift cards! Join me again tomorrow for day 2 of the full reveals! You won't want to miss it! Everything is so cute! Thanks for fluttering by!


Tuesday, May 26, 2020

Secret Agent {I spy with my little eye}

Happy Tuesday, friends! Thanks for joining me yesterday for my Keeping Christmas post! I always love when the 25th rolls around! I hope you all had a nice Memorial Day honoring those who have died in the service of their country {USA}and those loved ones who we cherish and honor as well! I'm back today sharing some fun birthday cards using the clever and whimsical Secret Agent stamp set! This is such a fun set and I love the assorted sentiments that make this perfect for different occasions and kids of all ages!

One of these cards will be going to a 7 year old which makes the "agent number #007" so much fun at the bottom! I made two even though I only NEEDED one...I knew this would be a "MISTI intensive" project {ha ha} so I decided to just make 2. You know what I always say...if I'm going to make one, I may as well make 2! I've mentioned it before, but for those of you that don't know, I'm in charge of the kids at church and teach them music. Since we haven't been to church for a few months, I've been sending thinking of you cards and dropping off a religious gift and a birthday card at their doors. I bought some doorknob bags which are perfect to tuck the gift and the card inside and hang on their doorknob and go. 
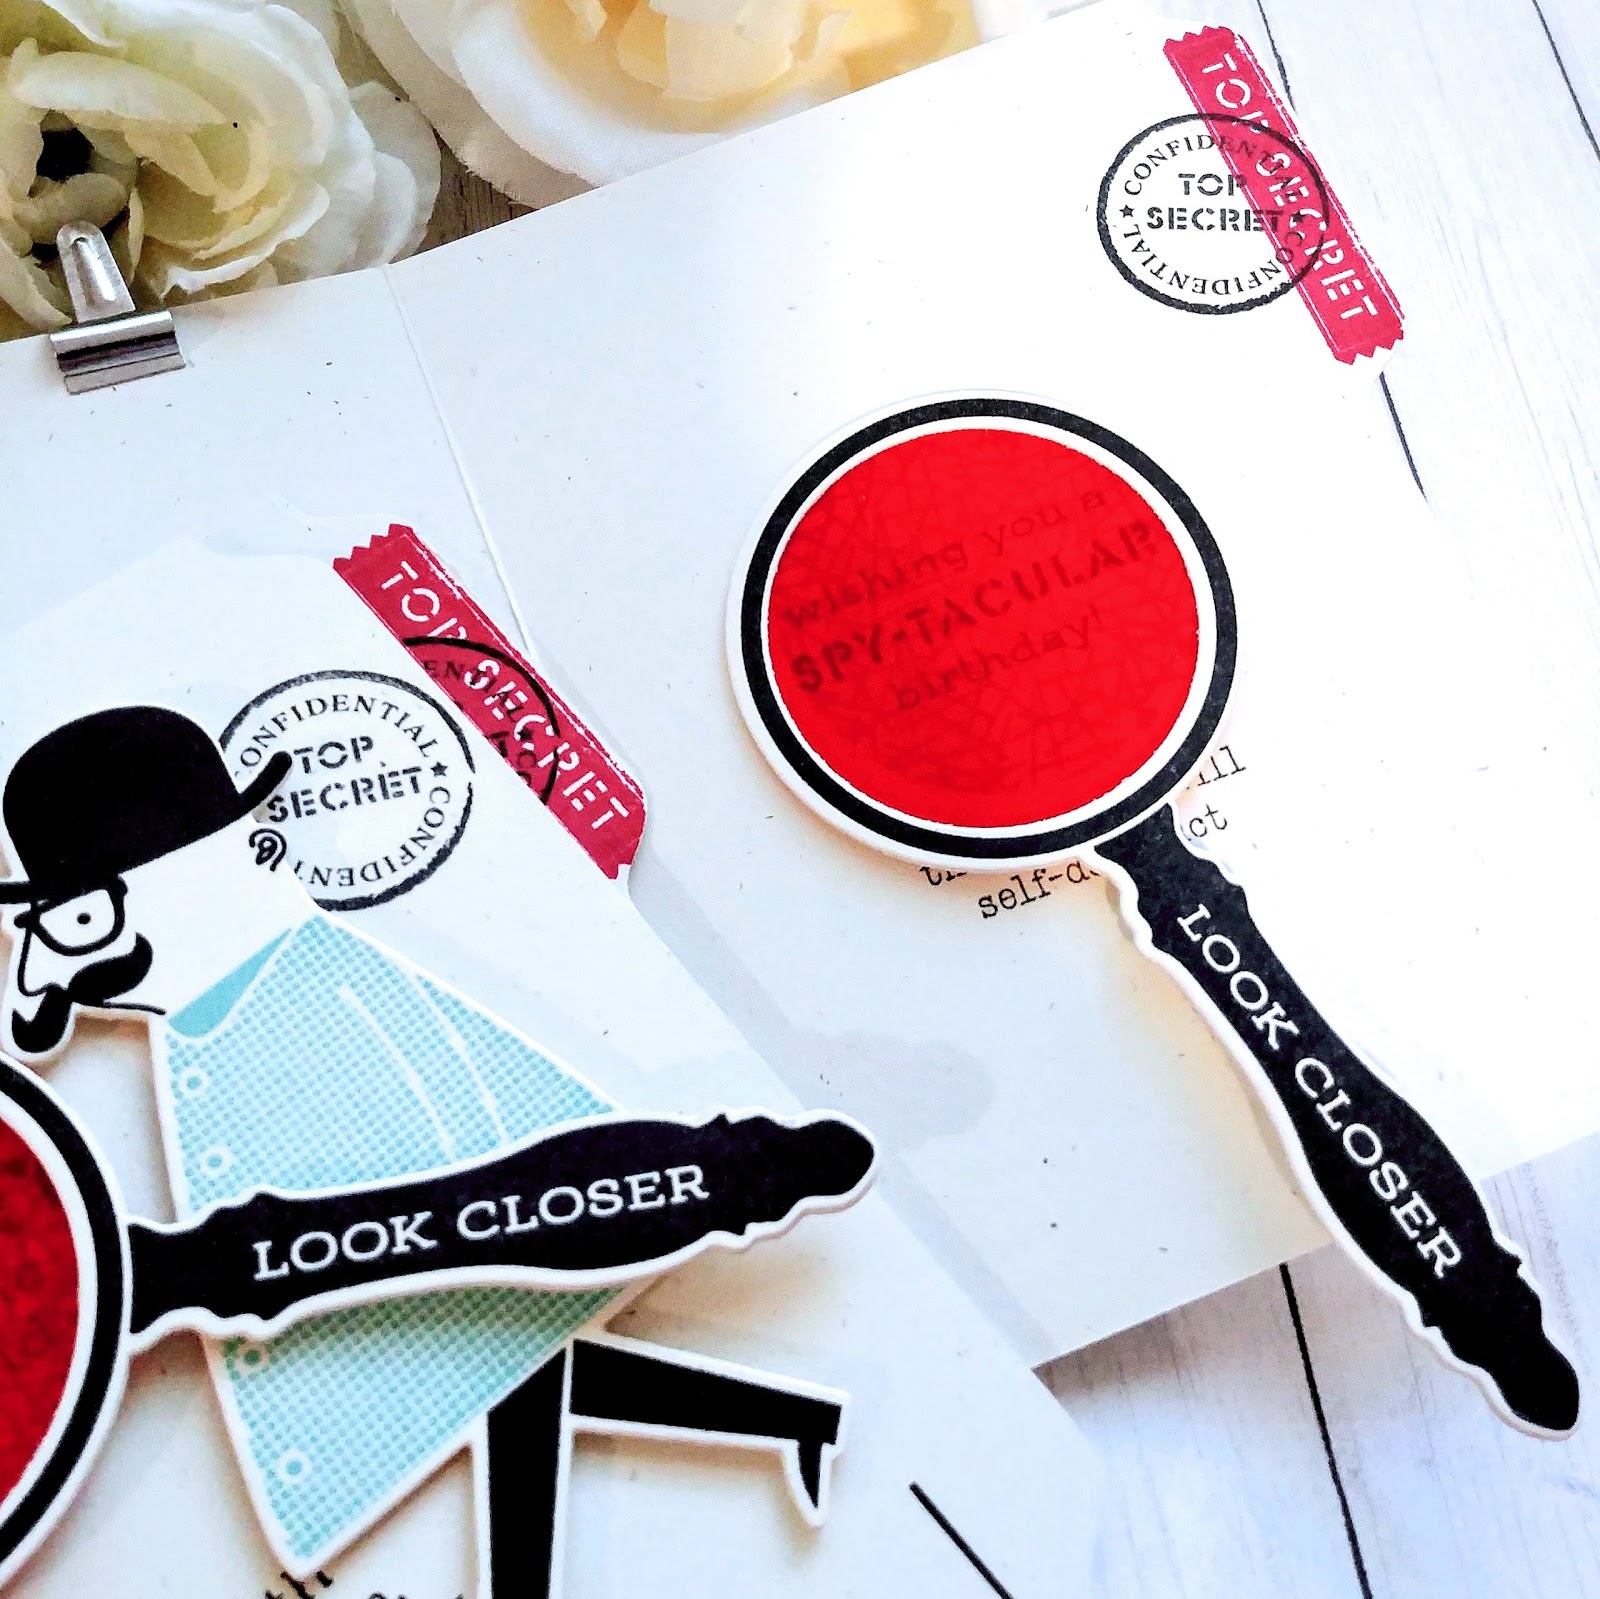
To begin these two designs, I cut two pieces of Rustic Cream cardstock measuring 5 1/2 inches by 8 1/2. Once that was done, I used the Edgers #5 die collection to die cut the different edges to make the card look  like a file folder. Once that was done, I scored it in half and folded it using a bone folder, which once the edges are cut is around 3 3/4 inches. I stamped the "Top Secret" image on the file tab using Pure Poppy ink and then stamped the "Confidential, Top Secret" circle image over the top in black as well as the front.
I stamped the rest of the images that are directly on the card front using black and red ink and my MISTI for alignment.  I die cut the secret agent twice for each card using the Secret Agent die collection and them stamped the images. He is just a series of two stamps; the pants and head portion and then the second step is his jacket. It really keeps the retro feeling of the stamp set by just using the two colors!

Next comes the fun part! I die cut the magnifying glass three times for each card. I stamped one using my MISTI and then just used the other pieces for stability. I made a sandwich making sure to put the Pure Poppy transparency sheet between the layers. There is a circle die cut that cuts this to the right size so that it sandwiches nicely. I just used liquid glue to adhere the layers. I like using liquid glue for these types of projects because it gives me some "wiggle" time to make sure all of the edges are lined up properly.

I attached the magnifying glass using a half circle of Velcro so that the recipient can take it off to use it to decipher the inside message as well.  I was showing my 6 year old how it all worked and he was enamored with the idea! Then my 8 year old came around a while later and I showed it to him. I asked if an 8 year old would like something like this and he replied no. I said that was good to know so that I could make sure only 7 and younger would receive a card like this. He then said that maybe he did like it a bit...then he said, "fine, I really like it"! LOL!  I guess 8 year olds are a go as well! I like that the stamp set comes with the "boy" and "girl" sentiment so that you can make it for either one. 

For the front of the card, I used Tropical Teal ink ink to stamp the hidden message, but found that it was too obvious. I then tried it with Weathervane ink for the inside and that was the winner. I found that I could stamp it lightly, but the colored transparency sheet made it stand out nicely when it is held over the image. 
I put the magnifying glass over the top so you can see it better in this photo. You could add as many scrambled messages as you want on the inside of the card, especially on the left hand side. I think I'll try adding more on the next batch that I make!


I added a little silver clip to the top. It isn't holding anything in place, but more for aesthetics. You could definitely rearrange some of the design elements so that it could have a purpose. It was a last minute decision and I felt if I added any more words or image the card would look too busy!
These were so much fun to put together and I can't wait to make a girl version as well! I have a lot of birthdays coming up so it is a definite possibility! Join me tomorrow for the first day of reveals for the new release from The Greetery! Thanks for fluttering by!


Monday, May 25, 2020

Keeping Christmas {Sending Christmas Cheer}

It's the MOST wonderful time of the month! Welcome to this month's Keeping Christmas Blog Hop! I had so much fun on today's projects and I hope you enjoy them, too! They are similar in feel to most of the projects I've been making this year; a little bit vintage, paired with a few trendy patterns to keep things fresh! I FINALLY asked my sister what the name of the paper pad is that I've been using for the majority of my projects this year. It is called "North Pole News" and it is made by Craft smart. I believe it is from Michael's. She gave it to me last year, so I don't know if it is still available, but I wanted to let you know for those of you have asked about it. Don't forget to head to the other designers' blogs to see what Christmas inspiration they have for you!
Kelly Lunceford (Creator)

As you can see, I have two separate projects that I'm sharing for today's post. I made three mitten pouches, and 4 gift card/treat envelopes. I keep telling myself that I don't NEED to make anymore gift card holders, but they're always so fun. These would also make fabulous tags and you could easily slip some holiday treats down inside, something like Ghirardelli squares. All you would need to do is to punch a hole and add some twine or ribbon.

Up first are the mittens! I usually make mittens like this every year, but I normally use felt. I decided that I could try creating them out of pattern paper since the stitching makes them strong. I die cut three of the mittens out of pattern paper using the Shape Up Series: Mitten die. I die cut three out of Rustic Cream cardstock since you can't use two of the same side, so it would be a waste of pattern paper. I would end up by having the pattern on the inside, so I opted for a sturdy cardstock. I stitched them together using my sewing machine and white thread. 

The trickiest part is sewing around the thumb portion, but I just put my machine in the needle down position and go slow and steady. I set these aside and got to work on the the embellishments. I die cut the largest snowflake from the Snowfall Style 2 die twice for each mitten for a total of 6. I used Weathervane cardstock and then added the chunky silver glitter to the tips using a 2 way glue pen. I set those aside to dry and then got to work on the rest of the design details.

The "Sending Christmas Cheer" and "Peace and Joy to you & yours this holiday season" sentiments are both from the Holiday Photo Finishers stamp set. I heat embossed the cirlce image using silver powder and then punched it out using a circle punch. The wrist portion is scored at the beginning and end of the sentiment and then secured in the back using ScorTape. It gave it an arced shape so that it will be easy to fill the pouch up and not impede the wrist portion. It's a little whimsical, but I really like how it ended up.

The red patterned portion was created by die cutting the label shape using the Mat Stack 1 die and then stamping it using images from theMat Stack 1 Collection stamp set. I used another one of the images on my projects from last month that you can see HERE. I really like how the red pops and the stripes look like a candy cane or ribbon candy! All of these components are layered together using foam squares. The holly sprigs are embellishments that can be found each year at Hobby Lobby and I attached them using a hot glue gun for security.
Next up are the gift card/treat holders. I die cut these out of pattern paper using the Seed Packet Die and then I glued them together using a tape runner adhesive and ScorTape. The flap is secured by a half circle of velcro on each flap. This will allow it to stay closed nicely, but easily opened for the recipient.

I attached a cute plastic red bow embellishment that I have used on some other projects this year that you can see HERE. I'm crossing my fingers that these are available again this year because I REALLY like them! My sister got them for me so I will have to ask her where they came from....I'm guessing Hobby Lobby, but it could be Michael's, too!

I used the smaller snowflake from the Snowfall Style 2 die collection to die cut the silver and champagne colored glitter snowflakes. I toyed around with mixing the two colors for one snowflake, but they made my eyes go buggy so I opted to keep the same color together.

This sentiment is also from the H0liday Photo Finishers stamp set and I fussy cut around the edges since it doesn't have a companion die. The rustic cardstock makes it a little bit more difficult to get a crisp impression, but I like the vintage look it gives the project.

I've been loving the idea of Christmas, but now that my grass is so green and the leaves are on the trees, I'm happy that Spring/Summer is here for me to enjoy! ha ha! I guess that is why I love this series so much because it gives me an excuse to dive into the feelings of Christmas all year long. I bought a new Bing Crosby album for my phone so I could listen while I was working, much to the chagrin of my children! I've had years where I didn't listen to any Christmas music while I created during the year because I wanted to "save the magic" for the holiday season, and I've had years where I listened to it each month. I think this is definitely going to be a "listening" year! LOL! Thanks for fluttering by!

Friday, May 22, 2020

The Greetery's TGIF {Just a Note}

Hello friends! Welcome to this week's T.G.I.F. {The Greetery Inspiration Friday}. I'm over on The Greetery Blog but thought I'd share my projects here as well! I've created 3 projects today using quite a few different sets, using bits and pieces from each one! I even added a bonus tag that was created using some leftover dies and images!  I usually just put them back in with the stamp or die set when I am cleaning up, but for today I decided to put them to good use and make a coordinating tag! I've been doing a lot of porch deliveries these last few months and tags are perfect to have on hand to dress up a little drop-off surprise!


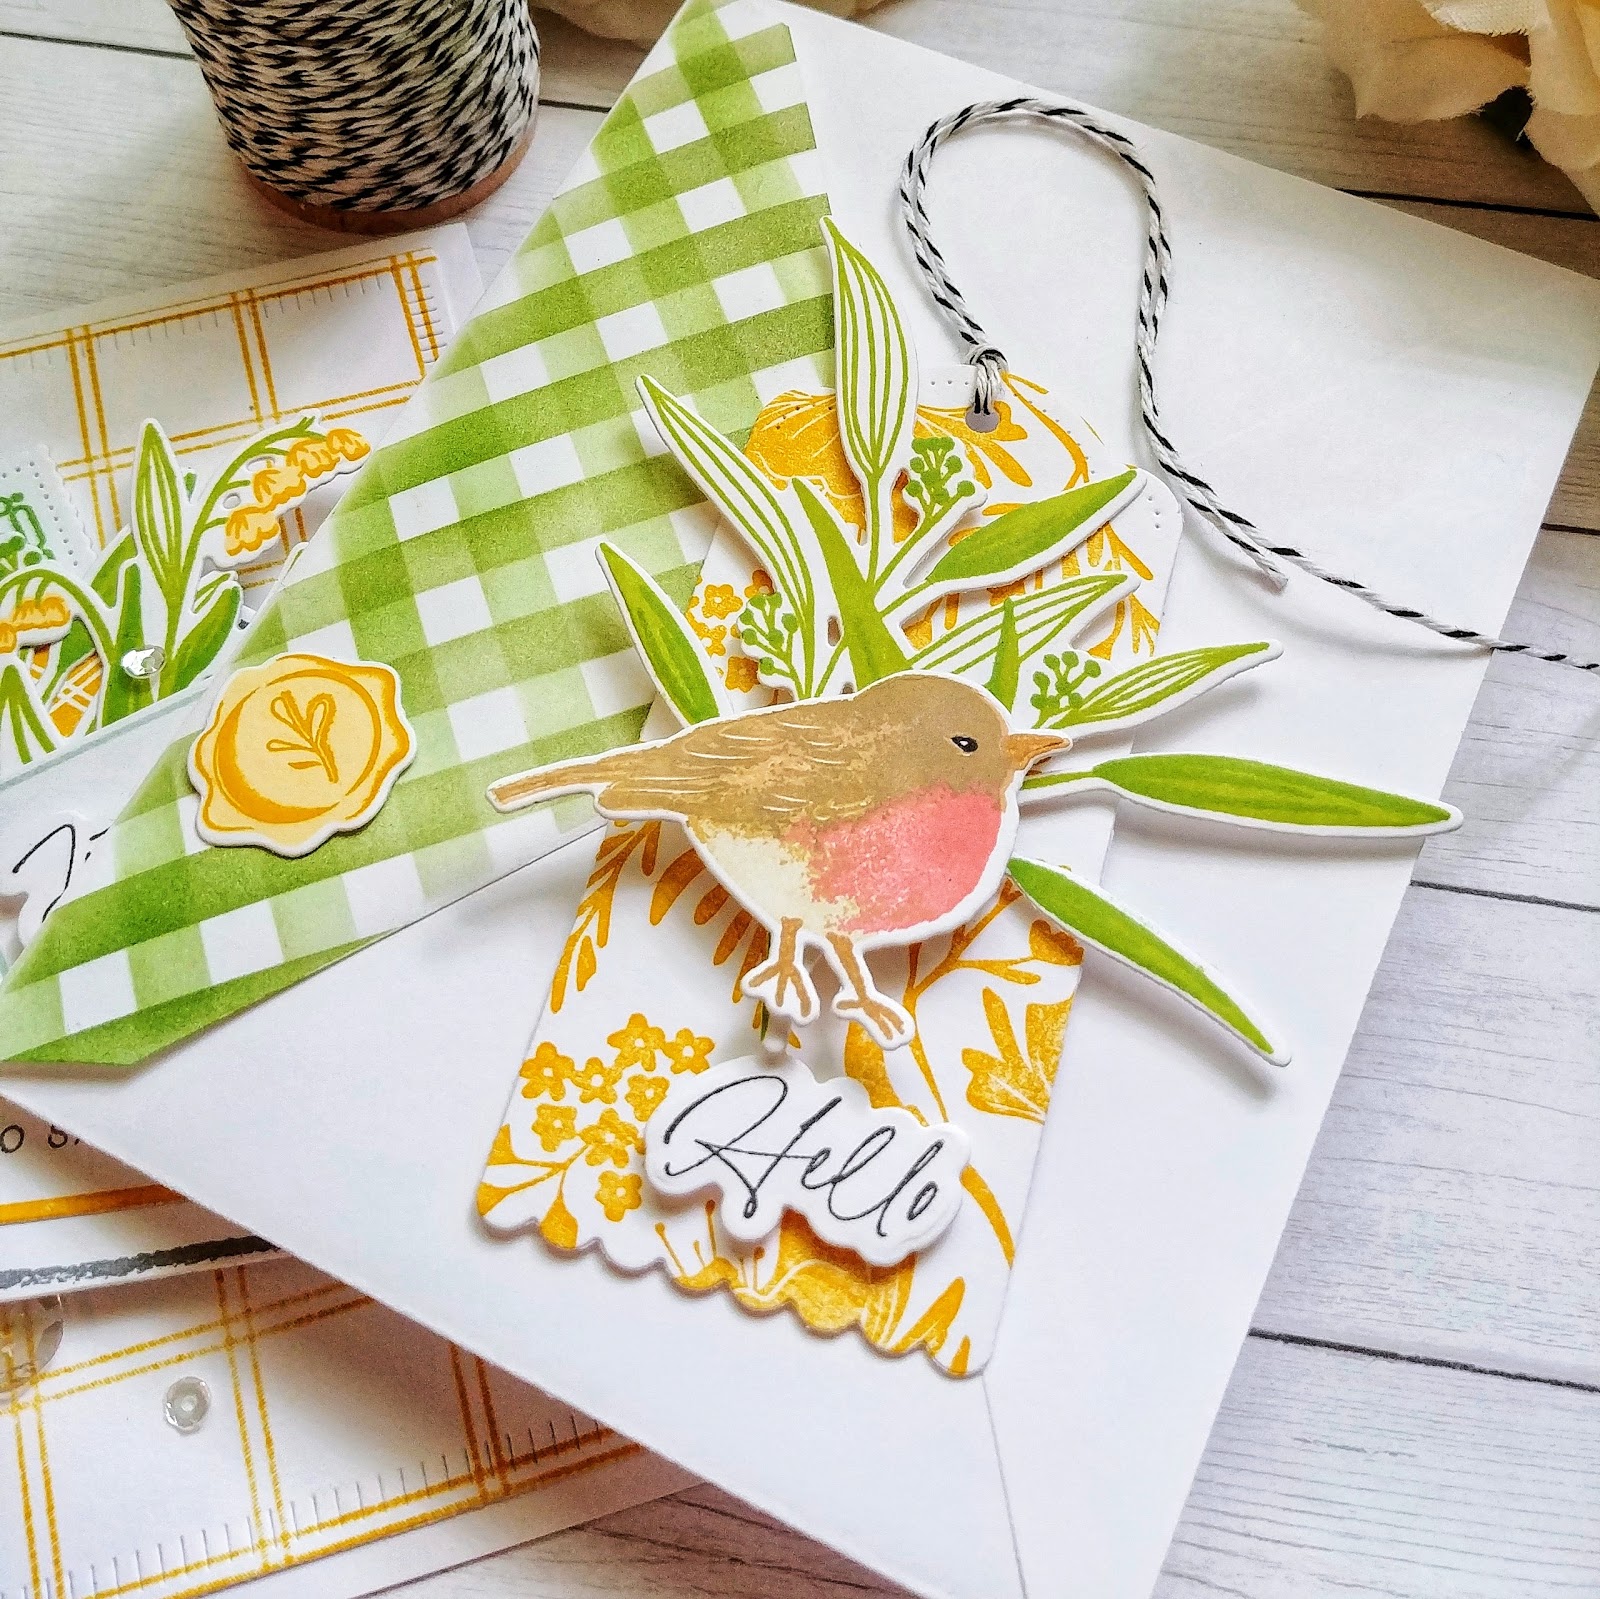
The cards are similar in layout as far as the focal image, but I had some fun with the two backgrounds. The first card uses the new Fresh Floral Background Stamp that has been die cut using the Halfsies Oval Die. The portion that was left over is what I used for the tag by diecutting it with theSpeed Tagging Die. I simply placed the stamped background underneath the specific tag shape that I wanted to use. I'm sharing the tag a little later in the post. The second background uses the wonderful Windowpane Plaid Background Stamp stamped simply in yellow and then die cut using the Crimped Frame Die. 

Each card has stamped flowers and foliage from the Signed and Sealed With a Kiss. They are tucked inside an envelope that is from the Signed and Sealed stamp set with a mini note card from the same set. The "Just a Note" and "to say Hello" and "to say I care" sentiments are also from the Signed and Sealed set. The yellow label and the stamped panel behind the envelopes are both from the With Love at Christmas stamp set. I love when a stamp set stretches beyond it's intended season for added versatility. 

I really like stamping multiples of most things when I am creating for a few reasons: I never know exactly where the design will take me so I like having options on hand, it is beneficial for me time-wise since I set everything up in my MISTI (if I'm stamping one, I may as well stamp 2 or more), and I enjoy making multiples of cards to send to friends and family. 
When stamping with multi step stamps, I find it to be most beneficial to die cut the shape first and then place the die back in the negative space all set up in my MISTI. That way I can make sure the edges are aligned nicely. If there isn't more than one step, I'll usually just stamp the image and then die cut it afterwards, making sure to line it up accurately around the stamped image and then secure it with washi tape. 
I spent one Sunday afternoon creating all kinds of different colored birds from the Robin and Wren Stamp Setand tucked them away to use on future projects. I had three left, which just happened to work perfectly for these three projects! They are just the right touch to add to these nature inspired cards!
Of course I couldn't resist creating some coordinating envelopes using the Flappable Stencil! They are so easy to whip up and are perfect complements to the cards! Thanks for joining me today and I hope you're all taking this unique opportunity to mail out your special creations to brighten the lives of others!