Tuesday, March 16, 2021

Ink to Paper March Release Countdown Day 1

Hello and welcome to day 1 of the Ink to Paper March release countdown! I have a lot to share today using quite a few of the new release products! To begin, I have three cards using a fun new floral set called Prominent Petals! I've also paired these flowers with the new Dainty Deliveries Frame die!

To begin this card, I die cut the Dainty Deliveries Frame out of Lemon Tart cardstock and then layered it onto a panel of the same cardstock using liquid glue. I added the largest Love to Layer: Scalloped Circle die cut in the center and then the medium doily die cut from the Delicate Doilies to use as an anchor for the different colored blooms and leaves!


The two sentiments are from the previously released Lush Bloom stamp set and they are stamped in black and then added to the center of the floral cluster using foam squares.

Each of the flowers has an outline image and then different "filler" stamps for the petals, thus the name "Prominent Petals"!

There's also some of these fun circle clusters for you to add either background details or detail directly to the flower. I will showcase how to use them in a background on my third card today!

My second card for today uses the Dainty Deliveries Frame in a different way. I turned it horizontally onto the vertical panel using liquid glue.

 I chose to create some poppy type flowers for this design using red and black inks for a dramatic look!

The "sent with love" sentiment is also from the Prominent Petals set and I stamped it directly to the white panel underneath the flowers.

I added some black paint splatter over the top of the main panel using a paint brush.

You could also stamp the outline image using something different than black ink for a softer look.

I used the Nesting Basics: Pierced Rectangles dies around the perimeter of the white panel to add even additional detail to this simple design!

The idea for my third card using the Prominent Petals was actually from the "assembled examples" graphic for the stamp set. I really liked the layout and that it showcased all of the different images together!
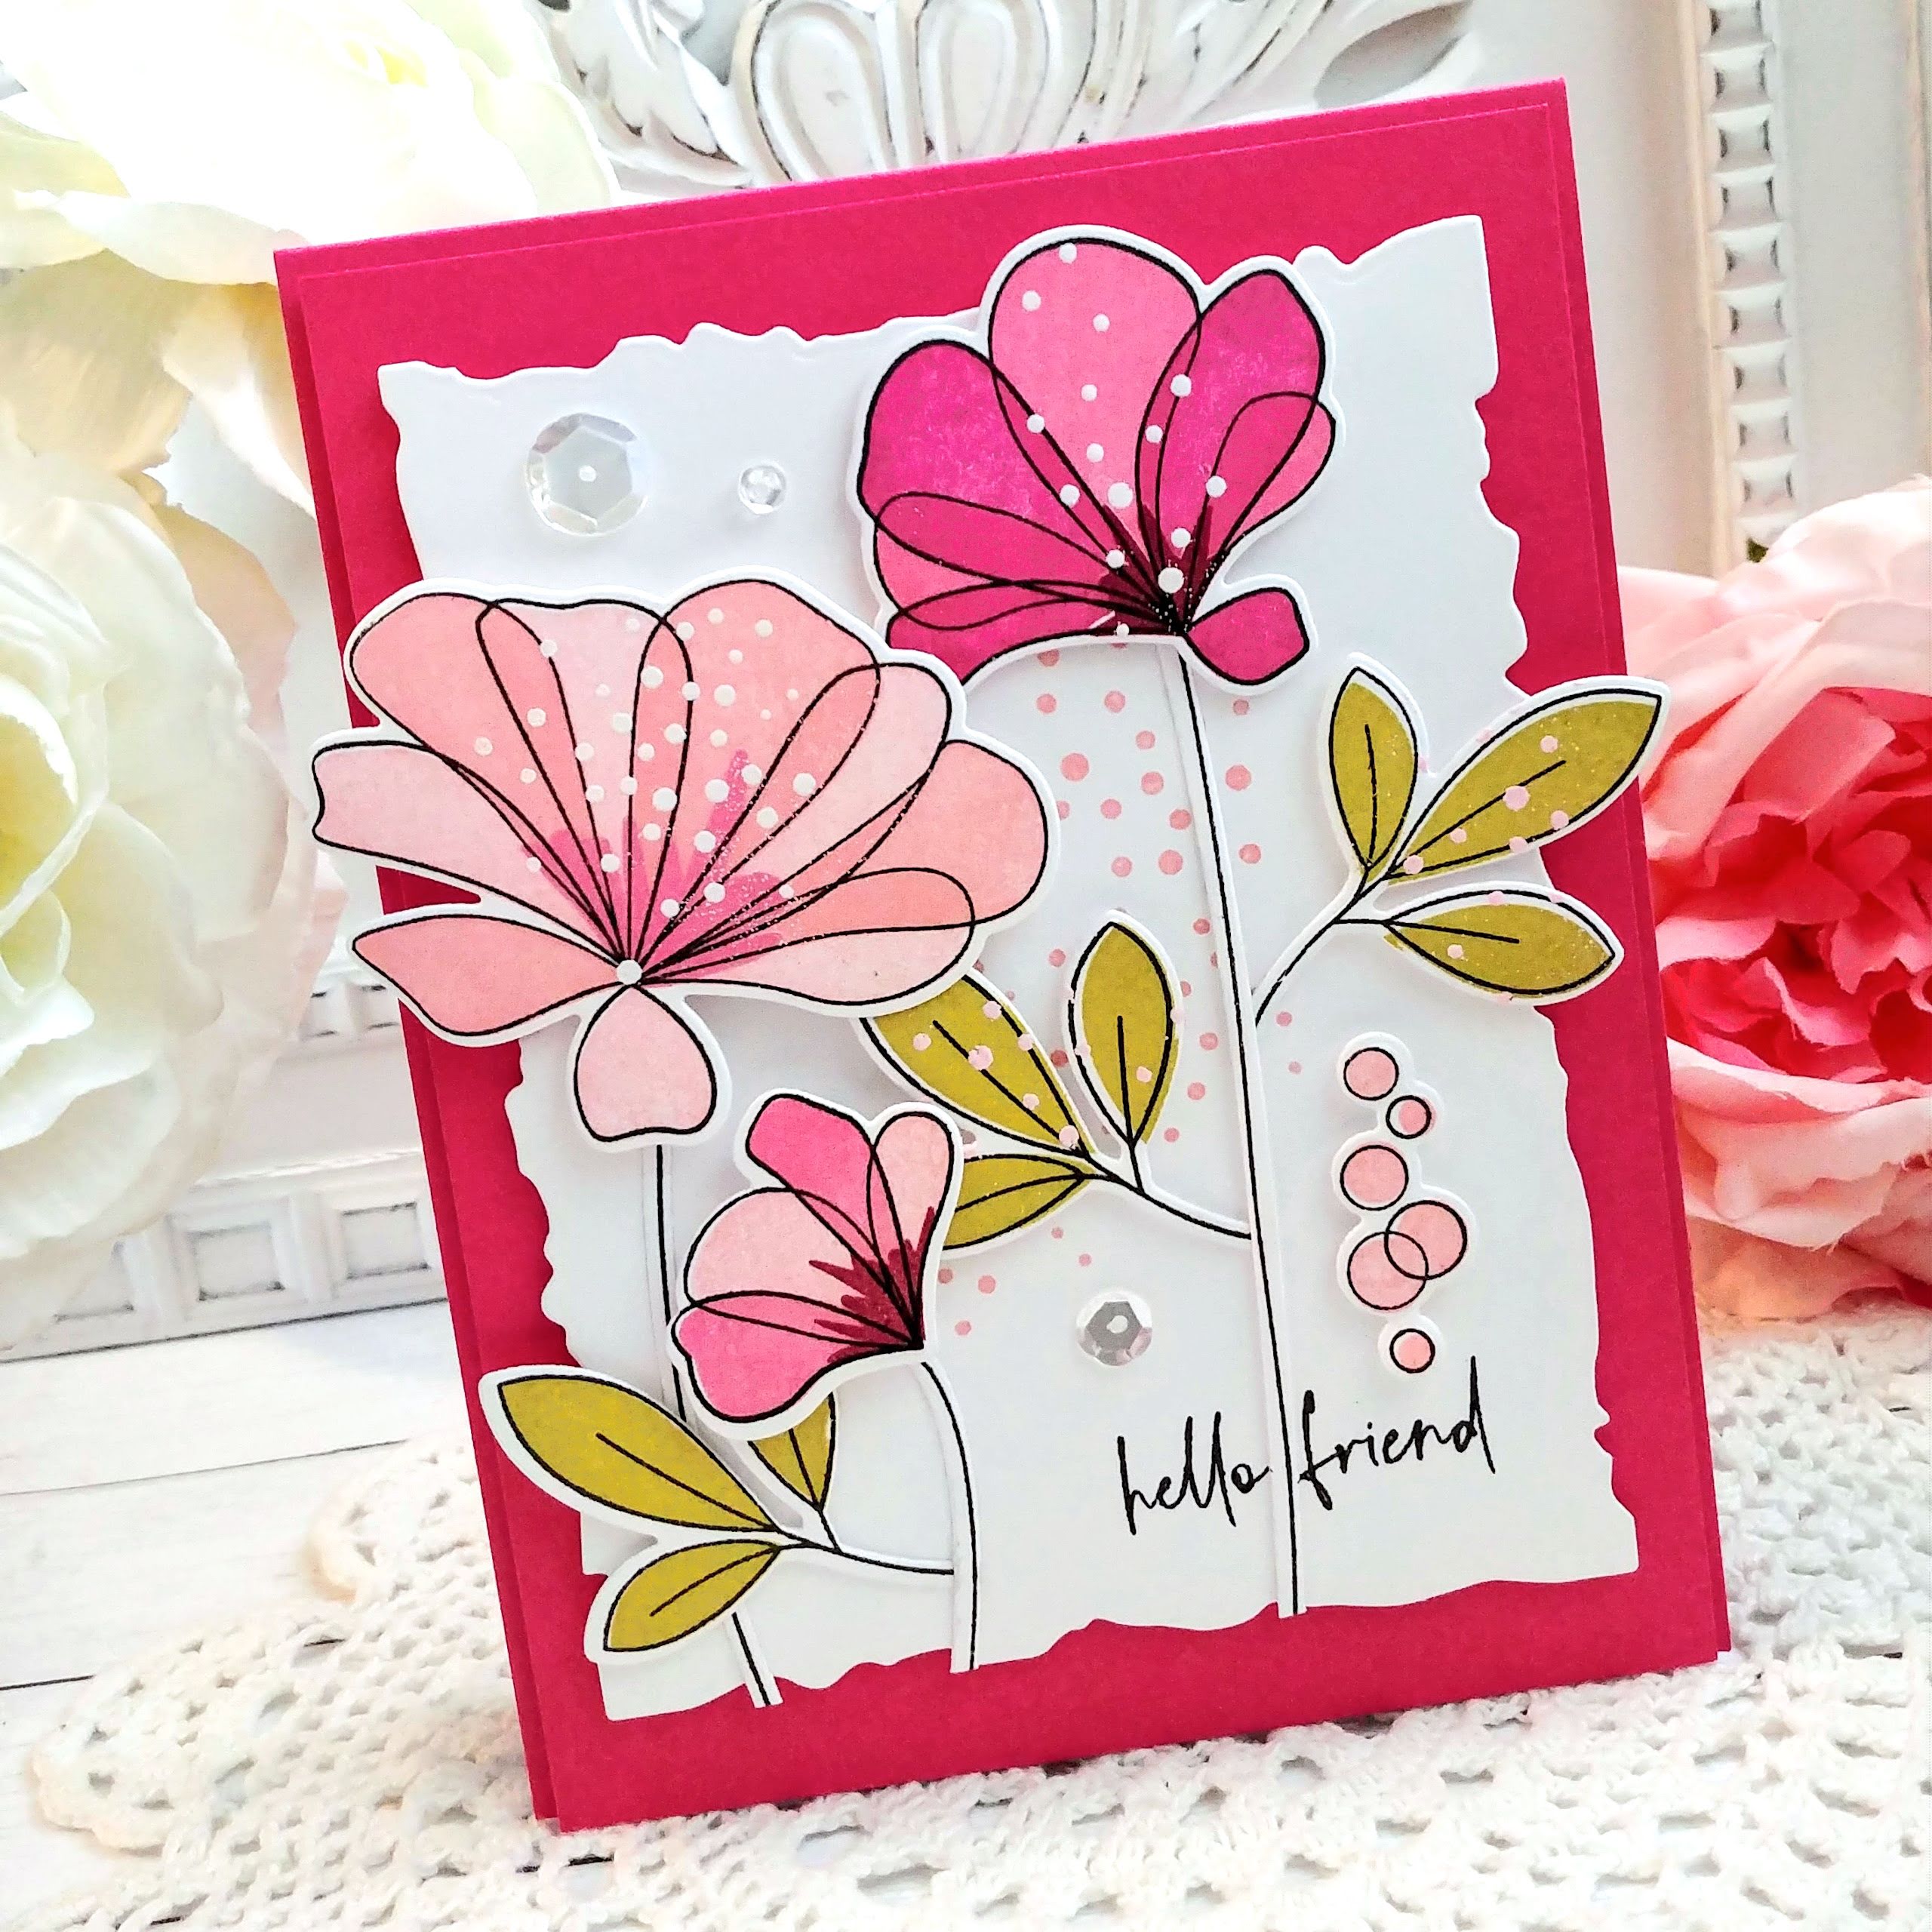
I used white and pink embossing powder on the flowers and leaves to give the speckled portions more drama. You can also see how I added the pink portion to the background.

The flowers are all layered onto a panel that was die cut using the new Love to Layer: Torn Edges dies.

It really helps add some visual detail to the edges to keep the design moving!

This "hello friend" sentiment is also from the Prominent Petals stamp set and is stamped strategically between the stem! ha ha!

My 4th and final card for today uses the new "Flying By" stamp set paired with the Dainty Deliveries Frame. I chose to do some emboss resist with the butterfly for a whimsical feeling!

I added the color using blender brushes and then spritzed some water over the top using a spray bottle. I set it aside to dry and got to work on the background.

I added the same colors of ink that I used on the butterfly around the edges of a white piece of cardstock. I then layered the Dainty Deliveries frame over the top using liquid glue and a frame that has some blended purple ink.

I added the butterfly die cut to another one of the Love to Layer: Torn Edges die cuts with foam squares. I added some Hawaiian Shores ink splatter to the card front using a paint brush!

The sentiments are from the "Flying By" stamp set and are added using foam squares.  A few sparkling clear sequins finish off this design! I might need to add some shimmer spray before it heads to its new home! ha ha! Join me tomorrow for day 2 of the release! Thanks for fluttering by!


Saturday, March 13, 2021

Pinkfresh Studio {You're All Kinds of Wonderful}


Hello friends! I'm over on the Pinkfresh Studio blog today and I'm excited to share with you my latest project! I initially sat down to create a trio of tags, but when I finished, I was inspired to create a coordinating card using the same products! (You can see the tags at the bottom of this post) I used the beautiful new Anemone Magic washi tape to embellish my design. I love the variety of colors in this particular tape making it easy to create different looking cards with the one tape. The tags I wrote about earlier were to accent some mini loaves of Blueberry Buttermilk Banana bread so I decided to pull out the blues and focus on that.

To begin, I cut a panel of white cardstock in half vertically to give me a long thin panel so I could adhere the washi tape. I mentioned on release day that this washi tape is VERY forgiving and easy to use so you can quickly fix any mistakes that are made as you apply it to your cardstock. I used the coordinating Anemone Magic die to die cut the images.


What I love about the dies is that they are all connected in one large piece so you can lay it over the washi panel and cut everything once! It's so fabulous! I kept thinking to myself that these tapes make it feel like I'm cheating! ha ha! They are just THAT easy to use and they are gorgeous!
I set the flower embellishments aside and got to work on the base layer! I die cut two of the Essentials: Classic Tags with Fillable Elements. I positioned them without adhering them down just to get an idea of where the placement of the sentiment should be. Once that was done, I heat embossed the sentiment, which is from the Friendship Blooms stamp set, onto the blue panel measuring 4 by 5 1/4 inches.


Once that was done, I adhered the bottom cut-out portion of the tags using foam squares. I used my paper cutter to trim off the top pieces. When I set out to create this card, I didn't know what part of the tags I would be using, so it felt silly cutting off the tag part! ha ha! As you can see, I DID end up by using one of the top pieces! I'll talk about that in a bit!

I was super inspired by Lea Lawson's card she made earlier using the Indigo Vines tape where she added the gold details with the Leafy Circle die, so that is what inspired that fun detail! I added the die cut Anemone embellishments using foam squares for a lot of dimension! As I mentioned earlier, I went ahead and added one of the tops of the tags and tucked it behind the panel with adhesive. This gave me the perfect opportunity to add a gold bow at the top of the tag portion for a little extra touch! 
As promised, here are the tags I created for the loaves of bread!


I used all three of the different tag shapes for variety.

This one ended up being my favorite and the inspiration for the card!

I added some gems to each of the tags for some sparkle! This was such a fun collection of projects to create! Thanks for fluttering by!


Thursday, March 11, 2021

Thanks For a Great Season, Coach!


Hello friends! This is another one of those "more for me" posts so I can document certain projects, etc! ha ha! My 3 youngest sons have been playing city ball with the recreation department and the season is winding to a close. That can only mean ONE thing; coach thank you gifts!

My husband is the coach for my 7 year old and has an assistant. My husband ALSO coaches my 11 year old and has the SAME assistant! LOL! I thought that was so funny! Anyway, my husband wanted to give the assistant a thank you gift so I got to work. I showed him the projects I made two years ago, but he said the colors were all wrong! I'll let you decide if they're "all wrong" or if they're exactly the same.LOL! You can see them HERE. He wanted the card to look like the current Utah Jazz "Dark Mode" jersey! You can take a peek at that HERE.

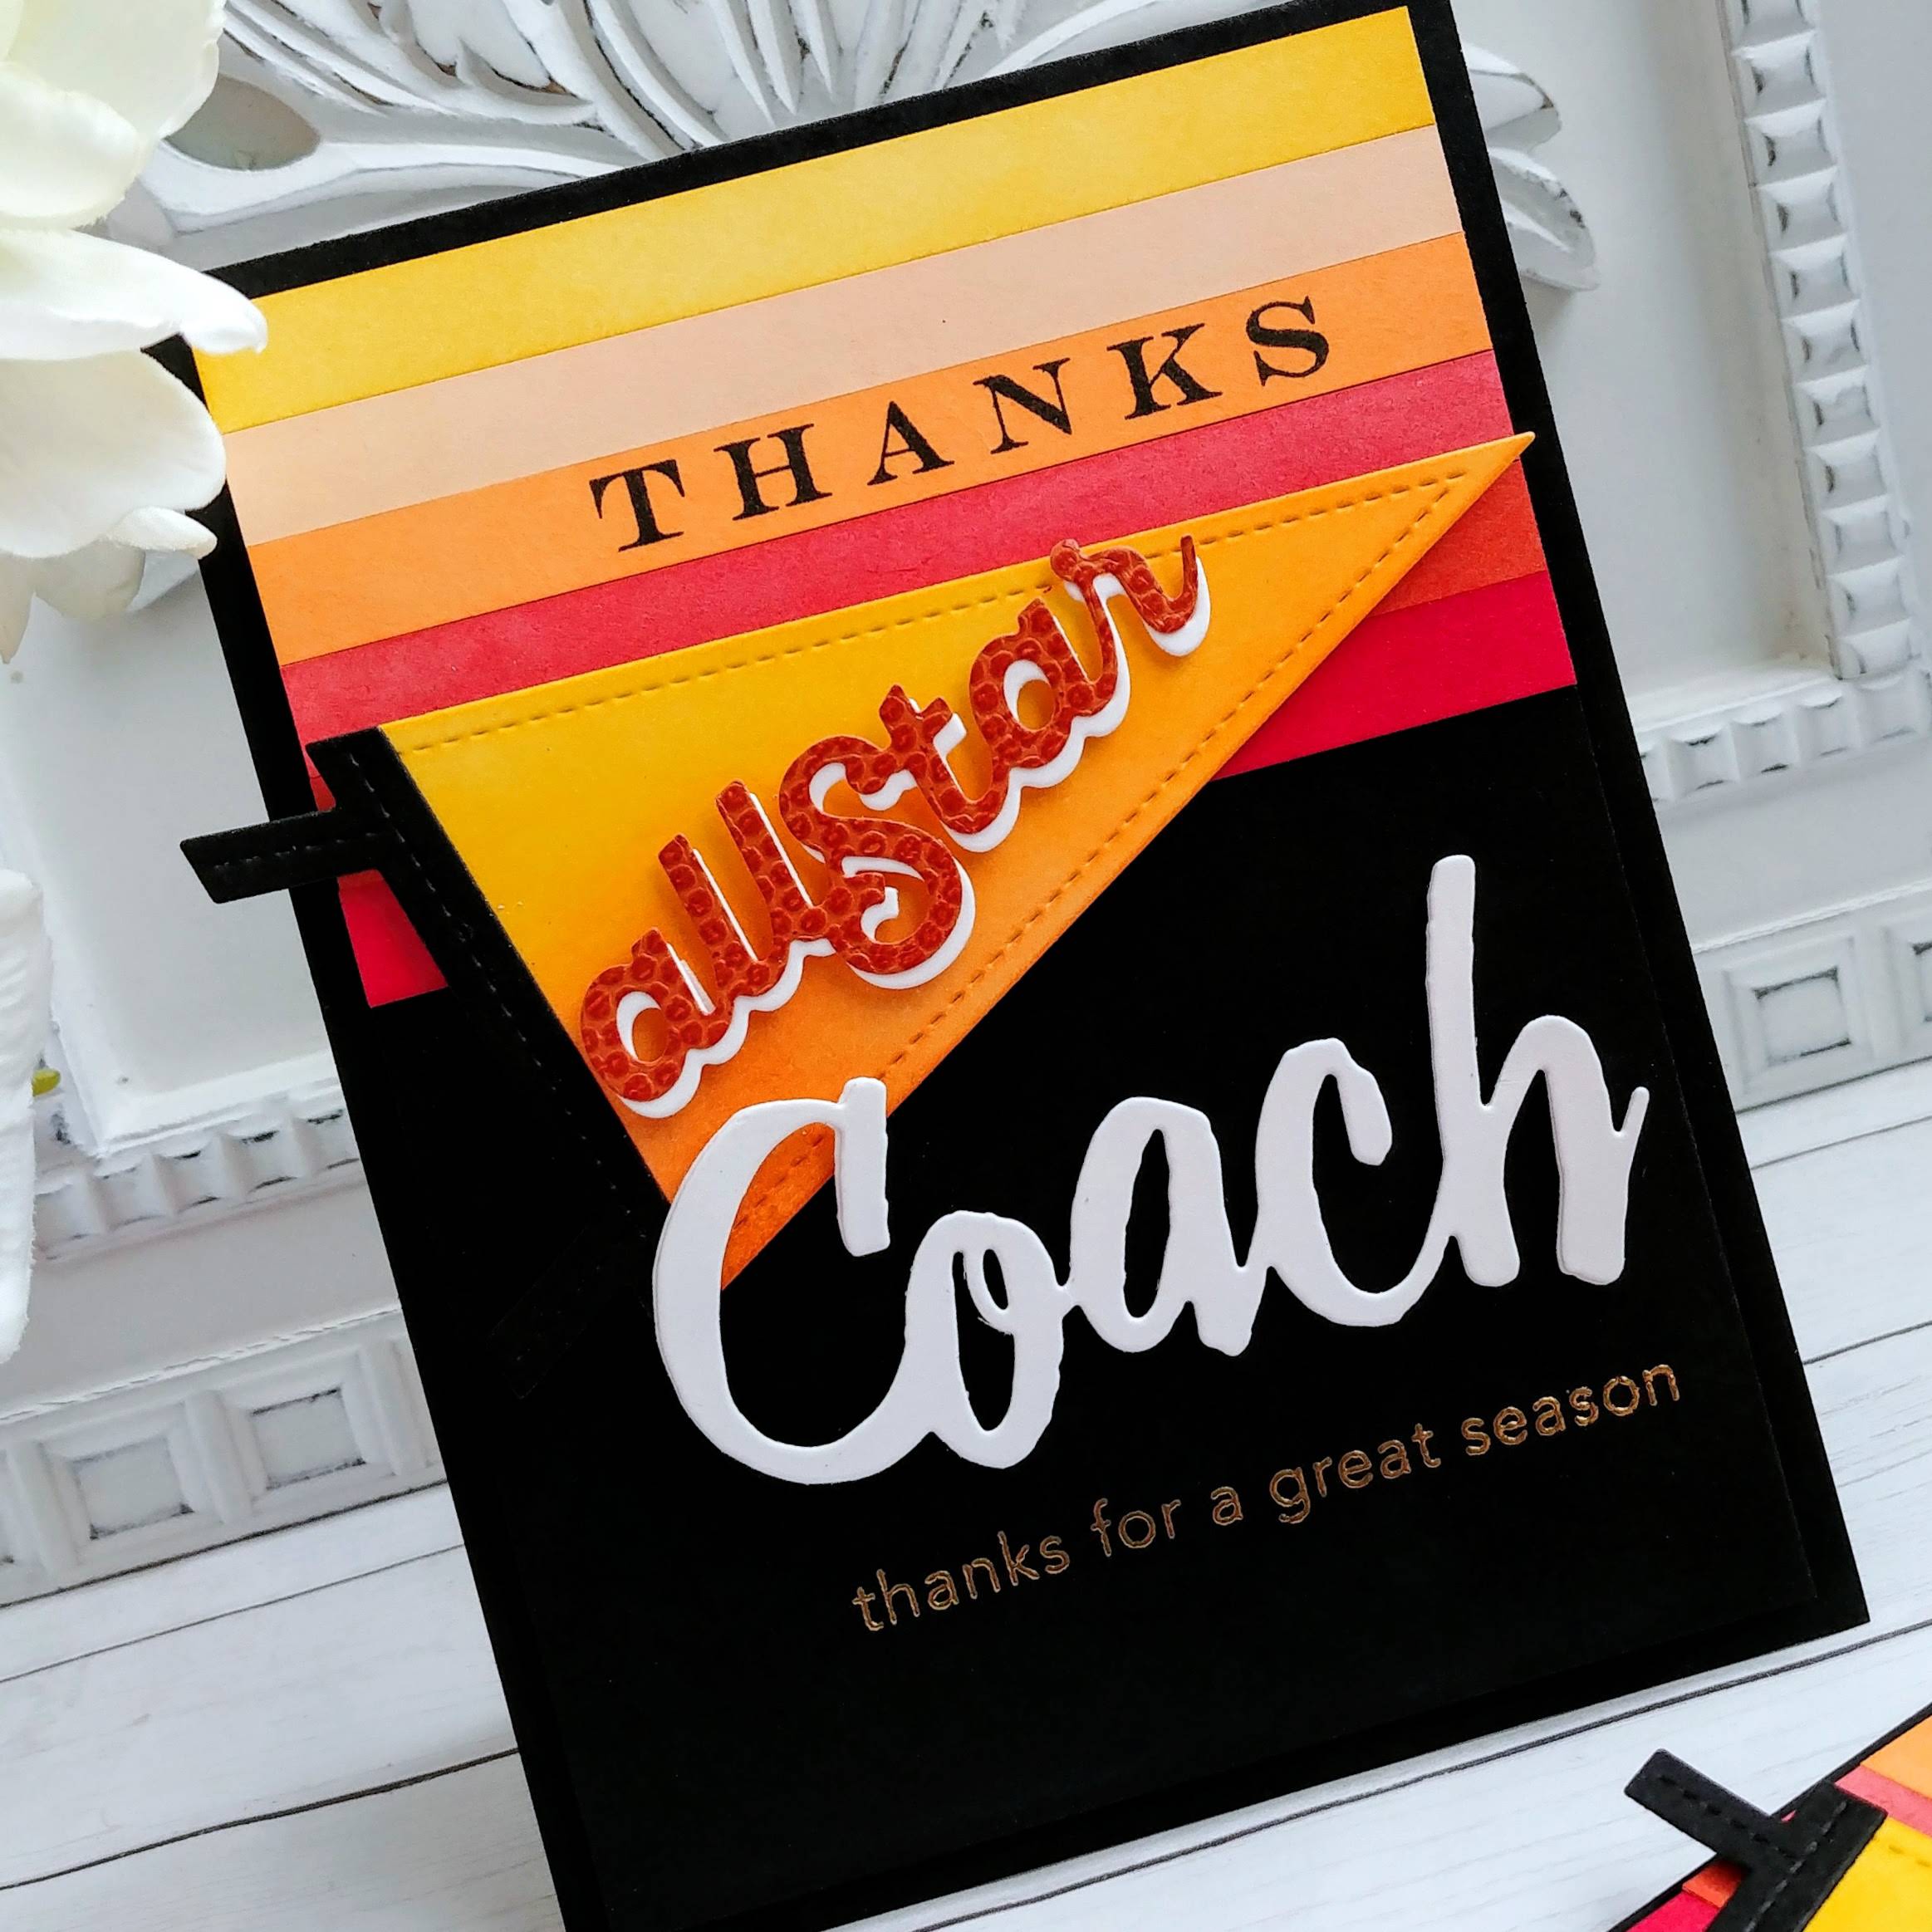
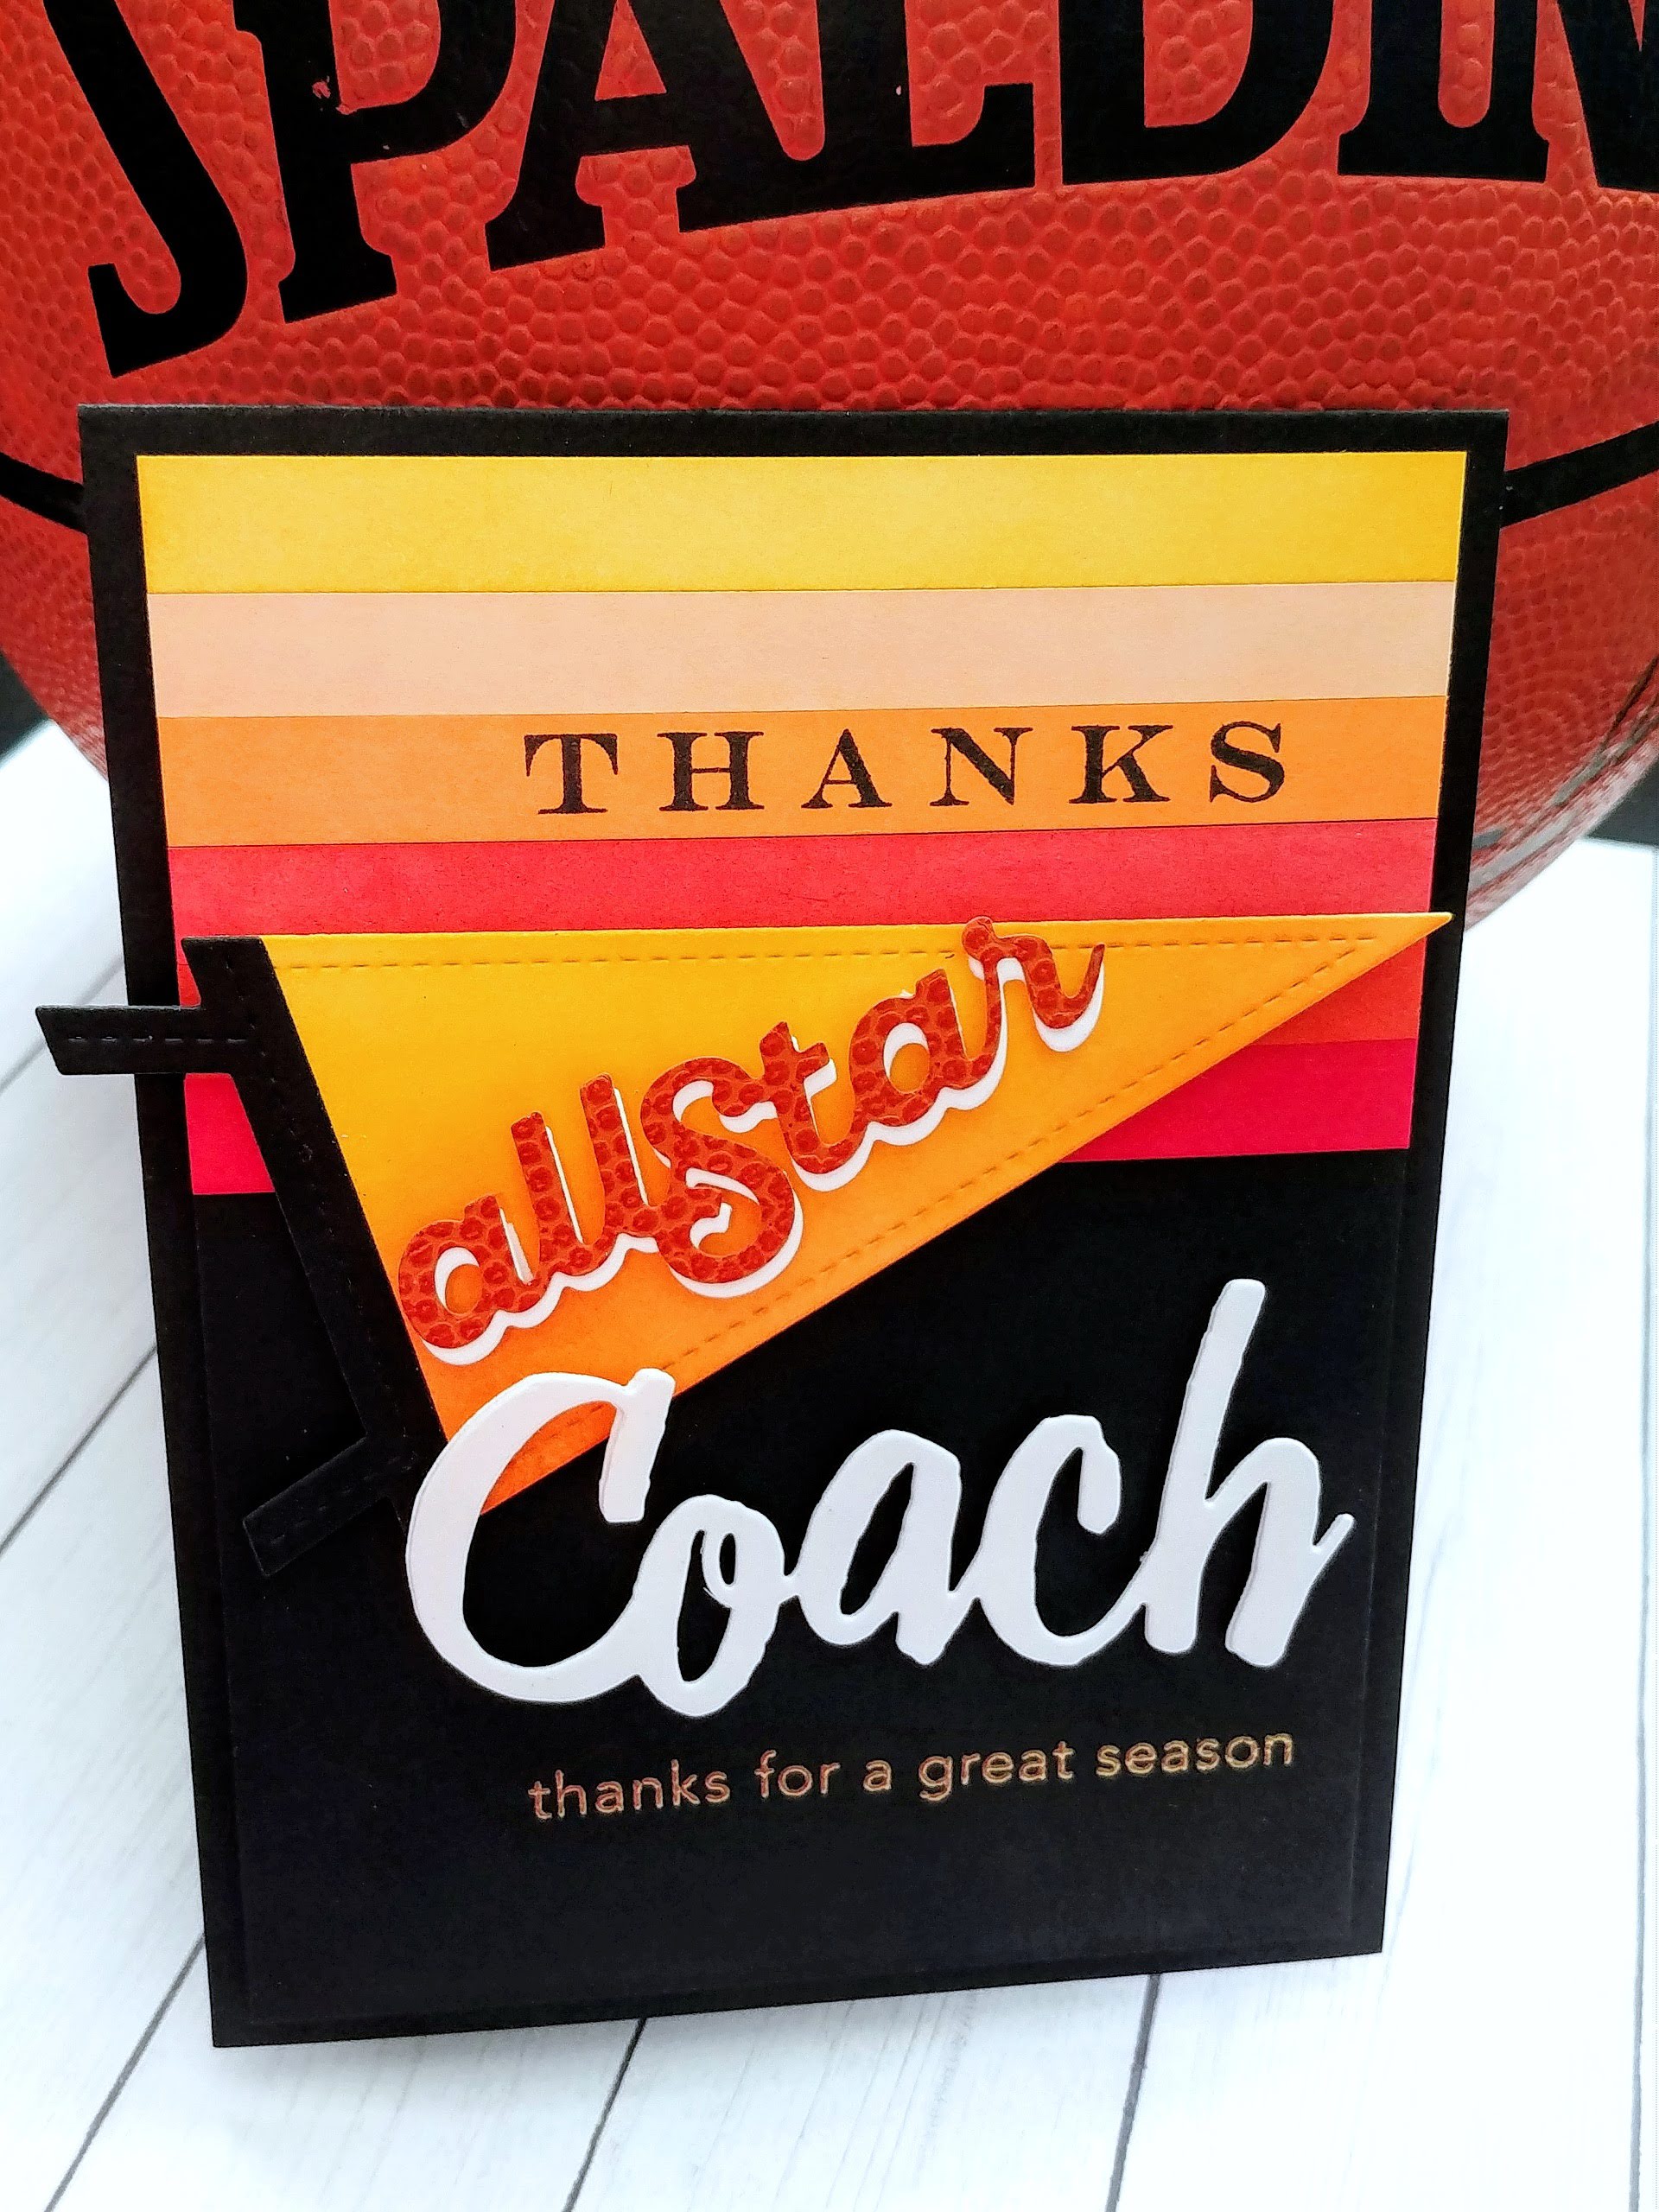
So, here you have it! The Utah Jazz Dark Mode Jersey inspired card! I made two because my 9 year old will be ending his season this week with a double header and we wanted to thank his coach as well!  To begin, I cut strips of white cardstock and then did a direct to paper inking to color the strips with the right colors. I simply swiped the juicy ink pad along the strips and applied the ink. Once that was done, I added them to a black panel measuring 4 by 5 1/4 inches using a tape runner.
I went ahead and stamped the "thanks" onto one of the strips using the retired "Thanks, Coach" stamp set. In hindsight, I would have stamped it directly across the middle of the strip, but I had mentally planned out the layout and didn't actually try it out first! Oh well! I used the Thanks, Coach die to die cut the "coach" word twice for each card. I glued them together using liquid glue.


The "all Star" portion of the card was created using the Pennant Flag dies. I love using specialty paper to tie in the theme of the card, so in this case I used basketball texture paper. I only have one small scrap left so it looks I'll be needing to buy some more before next year! ha ha! Especially since I'll be making this same card again but in "different" colors! LOL! Am I being snarky today, or what? (hangs head in shame)

I heat embossed the "thanks for a great season" sentiment directly onto the panel using gold powder. I layered this entire panel onto a top folding A2 card base using foam squares. I added a white panel on the inside using additional sentiments. These were fun to make and I think the coaches will like them! Thanks for fluttering by!


Wednesday, March 10, 2021

The Greetery Spring Fever Release Day {Happy Easter}

It's the best day of the month! It's release day for the Spring Fever collection at The Greetery! All of the new products will go on sale at 10 AM ET! I've made one more card using the beautiful new BotaniCuts Wildflower Mix paired with the super fun BotaniCuts Toadstool Garden. I was actually inspired by the mushrooms I was slicing during meal preparation! LOL! I thought it would be super fun to color some toadstools in Easter egg colors and then add in the flowers!


As you can see, I'm at it again with the Square Dance Stencil to create another fun springtime gingham background! I also die cut it with the Crimped Frame Die to give it some detail around the edges. 

I die cut all of the toadstools and all of the flowers out of white cardstock and then got to work coloring them with assorted Distress Oxide Ink pads. I used a combination of finger sponges and blender brushes depending on my  needs.

Once they were all colored and glued together, I got to work placing them on the gingham background using both foam squares and liquid glue. 

I couldn't resist adding some of the Terra Texture I used on my cards from the last release. I really like seeing the shock of green coming up from the grass and in the flower gardens as the grass begins growing and the bulbs start to grow! I thought it would be a fun spring-y touch!

I added some Nuvo drops to the centers of the flowers and some glitter here and there for some shine! The finishing touch is a sentiment from the new Empty Grave stamp set that is die cut using the new PreText dies! I added it to the top of the card using foam squares for some added dimension!! Thanks for fluttering by!


Tuesday, March 9, 2021

The Greetery Spring Fever Release Day 2

Welcome to day 2 of the Spring Fever release from The Greetery! Thanks for ALL of your sweet comments on yesterday's post! I'm sharing two projects with you today using products that I know you're going to love! This first project uses a few things from yesterday paired with a fabulous new collection of products called Print Shop Floral Frame! If you fell in love with the Print Shop Floral background last year, you're going to love this framed option!

I couldn't resist adding in another bow from the "Put a Bow On It" stamp/die that was showcased yesterday! I know I will be using this one quite a bit, or at least as much as my design will allow! I really just want to put it on everything! LOL! The sentiment is from the Bunny Hop stamp set that was showcased yesterday as well!

To begin, I used the Print Shop: Floral Frame stencil to get started. Next, you use the coordinating stamps to allow it to come to life! I chose bright, springtime colors again because I just love them1

I used the "guide" that comes with the frame die (for if you cut the frame apart) and used it as a stencil to mask so I could add the blue ink in the center of the frame along with some ink splatter.

I added a lot of glitter and sequins to give the frame and bow some sparkle and shine!

I layered the entire focal panel onto a top folding Hawaiian Shores A2 card base to make the colors pop!

I'm super thrilled that there are some fabulous new slimline options for your card making! I paired it with the new "Full of Grace" stamp set and the different stand-alone images that are included in the Print Shop: Floral Frame stamp set.

I did some loose watercoloring in the background as a backdrop for the sentiment and the flowers.

The black sentiments really pop off the yellow background framed with the flowers! Everything will be available for purchase tomorrow! Don't forget to stop by the other designers' blogs to see how they've used these gorgeous new products! Thanks for fluttering by!