Friday, May 20, 2022

Papertrey Ink May Release Countdown Day 1

It's day 1 of the Papertrey Ink May release countdown! Today is all about BABY; so many fun new stamps/dies/stencils to refresh your baby stash!  I love the ethereal feel of the new Little Ones stamp set paired with the Night Sky Background Stencils and the Border Bling: Skinny Star Frames.

I chose to heat emboss the "welcome" and "BABY" sentiments in gold for a luxe feel. I also die cut some of the tiny stars and the moon from specialty gold cardstock to add in even more metallic shine and to balance everything out.

There are three different sizes of frames included in the new star frame set. I chose to die cut the largest frame from Sweet Blush cardstock. I glued it over the top of a white A2 card base with Sweet Blush stenciling. The "you are a child of god" sentiment is stamped directly to the card base using black ink.

The entire card got a generous spritz or two of Shimmer Spray for some sparkle and shine.

Up next is a fun and versatile new stamp set called Adorable Outfits. The sky is the limit when it comes to all of the different combinations you could try using the different onesie stamps/dies. I chose to create a girl onesie using the sleeveless base image and adding the ruffled sleeves. 

The rose "applique" is also from the Adorable Outfits die collection and is easily assembled to create this cute embellishment.

I added some stenciling using the new Night Sky Background stencils to a Scallop Top Gift Bag. I also used the included star cut-out to reinforce the star theme. I think a onesie or a bib peeking out of the star will be so cute! 

There is also a collection of stencils that allows you to add patterns to the different onesies. I stamped the "hello cutie" sentiment, which is from the Adorable Outfits stamp set, onto one of the clouds from the Little One die collection.

I had a few gold stars left over from my first card so I added them here and there. the onesie has a bow of twine and a mini clothespin for added detail. I tied it up with a seam binding bow to finish it off! Thanks for fluttering by!


Monday, May 16, 2022

Pattern Play with Papertrey Ink


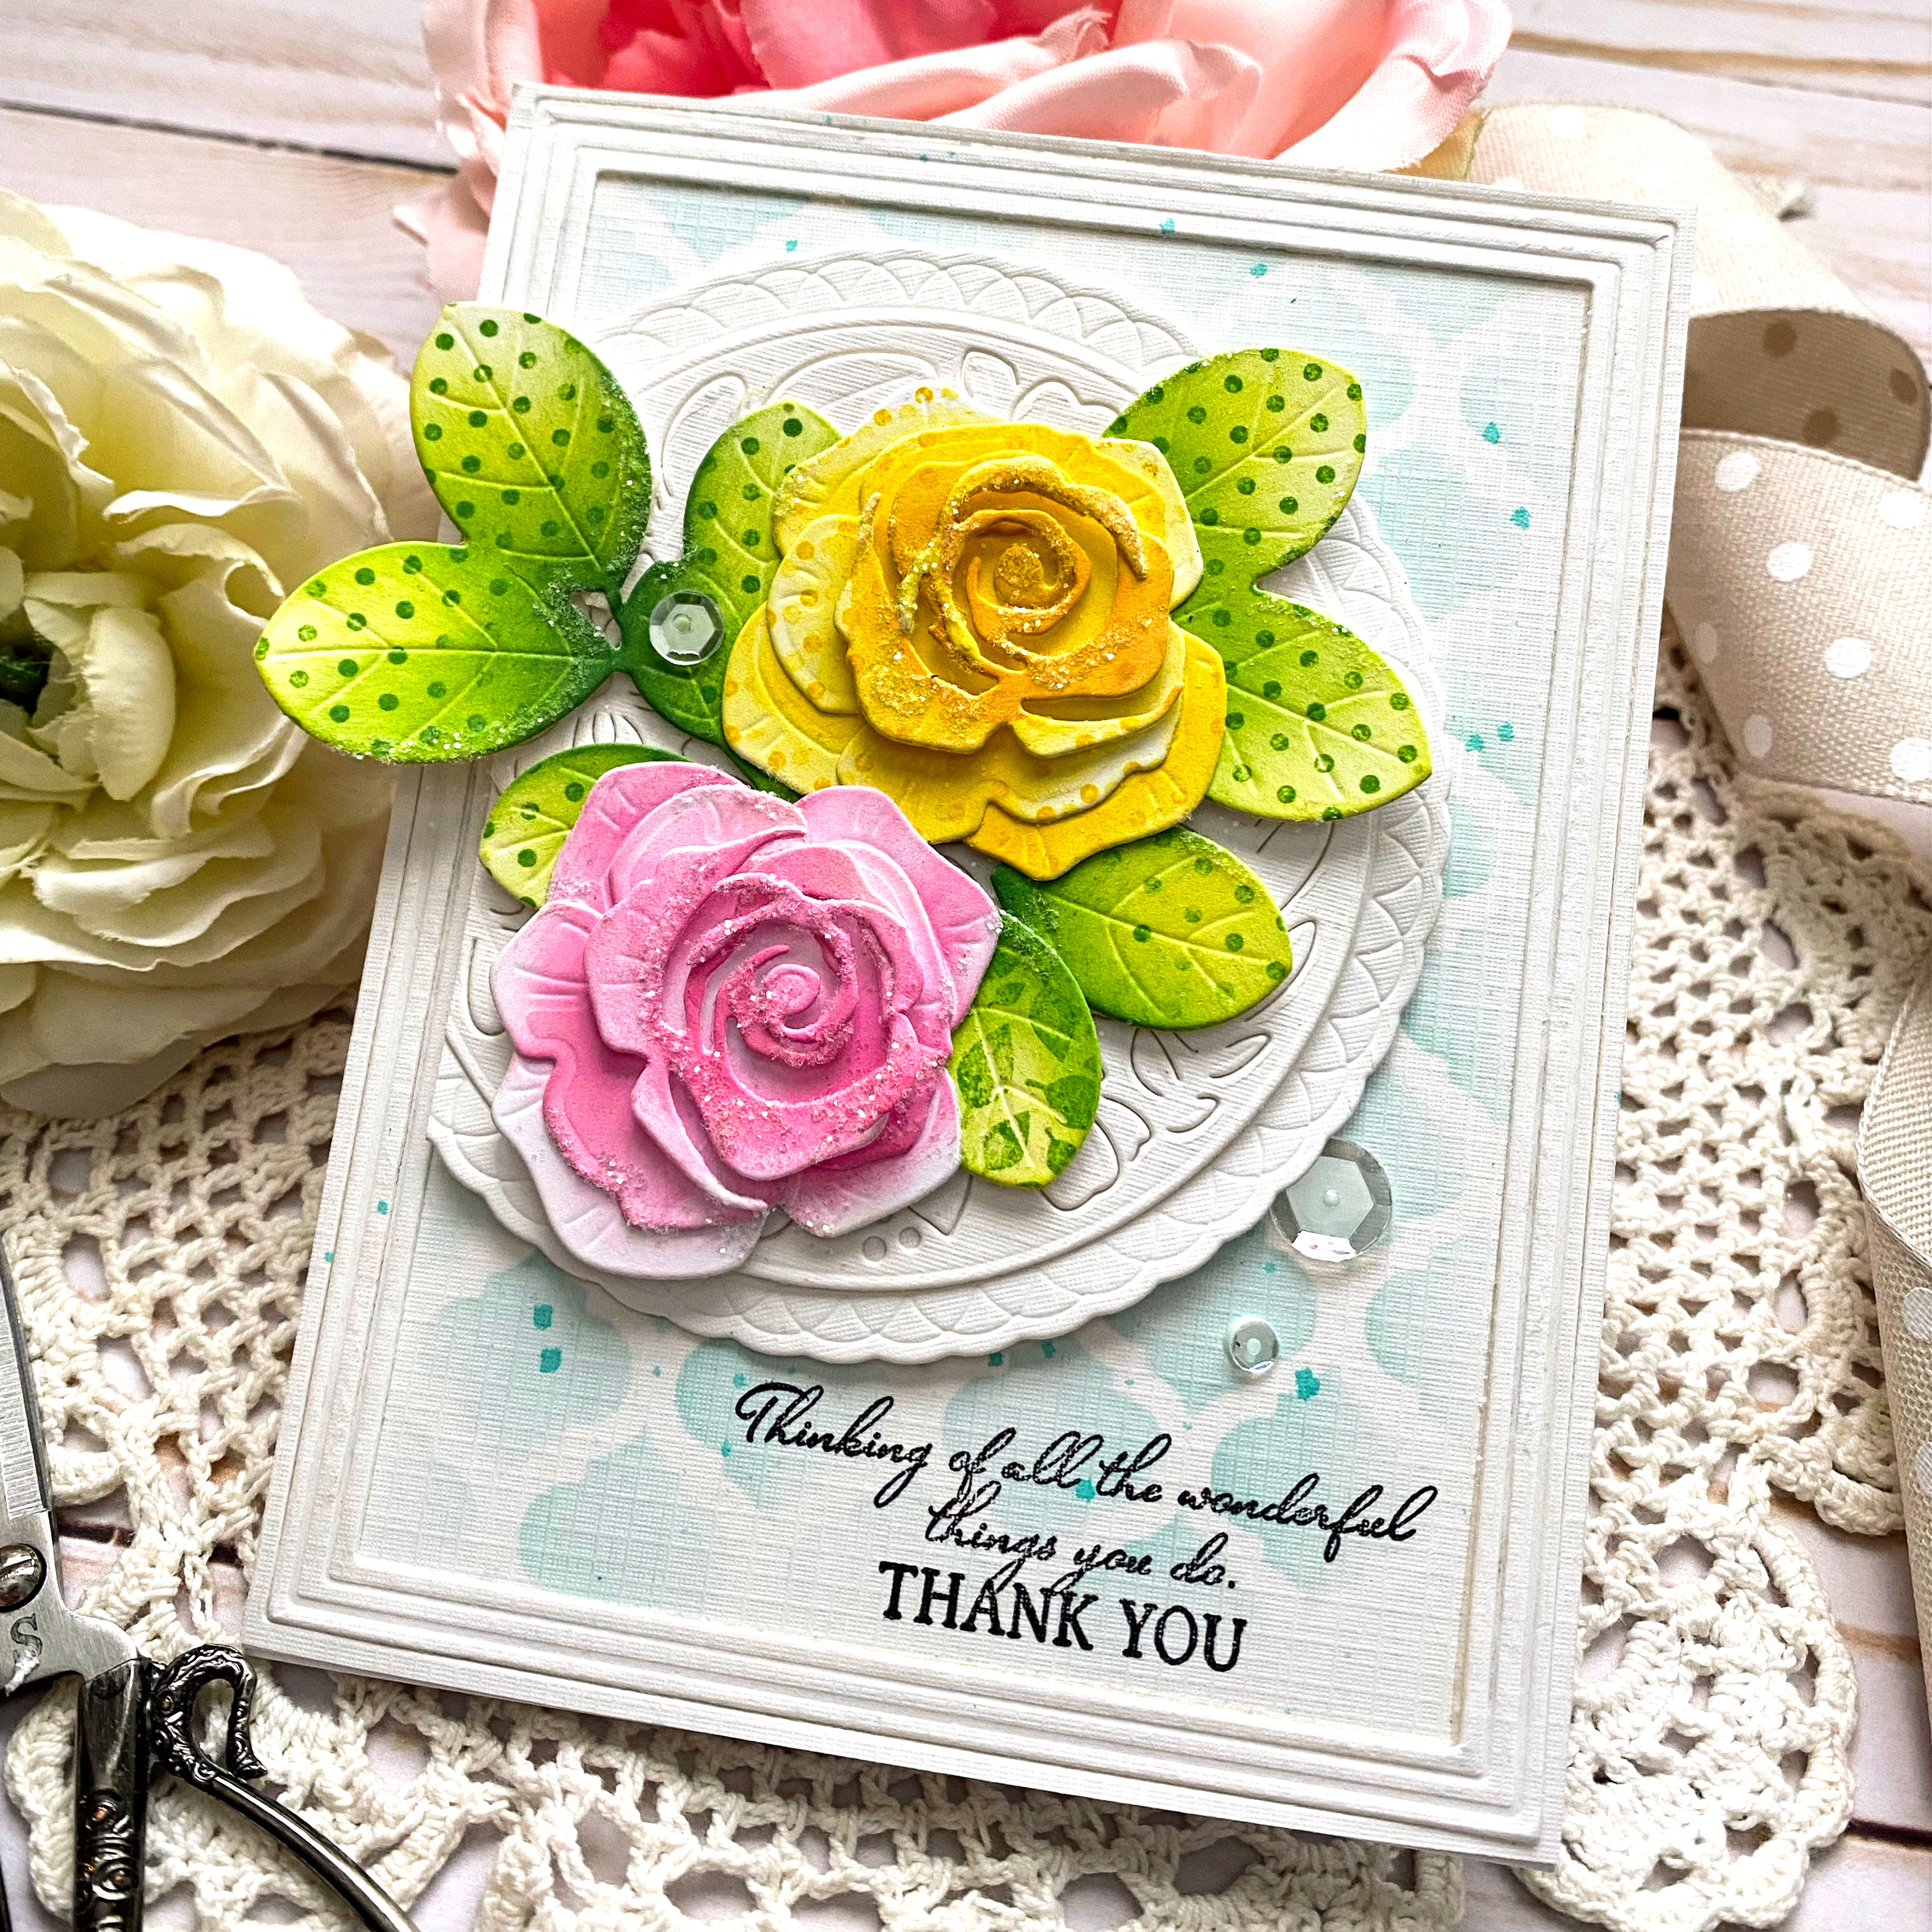
It's my turn to participate in this week's Papertrey Ink What Do I Do With This? feature! I’m thrilled to be sharing the day with Kelly S. as we share our designs using some amazing products in new ways! I love how Kelly used the Pattern Party stamp set  for her whimsical sun; that got me thinking of a few other ways to use these cute patterned stamps! I wanted to explore the possibility of adding pattern to solid images like I did on my leaves and roses for today’s card!

To begin, I die cut all of the leaves and flower pieces I would need to complete my card using the Into the Blooms: Roses dies (I actually die cut a bunch more that I’ll use on another card). I colored them using Distress Oxide inks and a finger dauber until I was happy with the look. I used a lighter hand than I normally do because I knew I would be adding the patterns over the top. Once each piece was colored with ink, I used my Mini MISTI to stamp the polka dots and leaf pattern onto the leaf clusters as well as the stand-alone leaf.

I did the same thing with the yellow rose and the polka dot stamp, but opted to keep the pink rose plain so it wouldn’t be too busy. I really like how these patterned leaves and flowers turned out! You could experiment with a few of the other patterns included in the Pattern Play stamp set for even more possibilities.

Once the leaves and flowers were assembled and ready to go, I got to work on the background. I wanted to incorporate a stencil like Kelly S. did, so I took an A2 panel of Fresh Snow Linen cardstock and added the Aqua Mist ink using the Stencil Basics: Quatrefoil Stencil I used a heavier hand in the middle of the panel and then let if fade toward the edges. I added the Border Bling: Skinny Embossed Frame using ScorTape and then splattered some Hawaiian Shores ink in the middle as well. The sentiment is stamped in black toward the bottom right corner.

I wanted to keep the card soft, but detailed, so I added the Love to Layer: Floral Fusion Die and Love to Layer: Scalloped Circles offset from the card base and layered the roses and leaves over the top. I added a sprinkling of glitter and a trio of sparkling clear sequins for some shine! I hope you’ll take a fresh look at some of your pattern stamps and think of some new ways to use them! Thanks for fluttering by!


Sunday, May 15, 2022

The Greetery {You Are Such a Blessing}

Hello and welcome! 
My boys' school postponed Teacher Appreciation Week, so I've been busy getting the teachers'  gifts put together for each themed day of the week. My sweet son Rowan has been in Special Ed since 2nd grade and I always like to make sure to thank his teacher(s) in that class as well as his regular class. These two strawberry cards will be headed to them  with a strawberry themed gift.

To begin these two cards, I used the BotaniCuts Strawberries Die to cut all of the pieces I needed for the cards. I used Distress Oxide inks and finger daubers to color the different pieces. This is always my favorite part; maybe because it feels like finger painting in a way! ha ha! I glued the berries to the stems/tops using liquid glue and allowed them to dry.

While they were drying, I die cut the background panel from pattern paper using the Frosted Frames Die. I adhered the center portion and the swirly portion to an A2 white card base using liquid glue. I set both bases aside to dry and got to work on the sentiment. If you've been stopping by regularly, you might be seeing a pattern with my sentiment choices! ha ha! I REALLY love this particular sentiment and felt it would be perfect for these cards; it is from the Blessed Blooms Stamp Set.

I stamped the blessing portion in black and then heat embossed the "you are such a" portion using gold powder. I haven't done any gold embossing lately and I always love how it looks. I layered the largest berry bunch onto the card front using foam squares and then positioned the sentiment below using additional foam squares.


I added a few more berries at the top and bottom with leaves tucked here and there. I decided to jazz up the strawberry blossoms more than I usually do; I added yellow ink around part of the perimeter and then a darker shade of yellow on the very edge. I added some ink splatter using my Color Spritzing Tool and a marker. From there, I used the end of my stylus on a foam mat to press the middle of the flower inward to create more dimension. If you've ever seen someone make paste flowers for a cake, that is the same technique that I used.

I really like how they turned out; I usually only add a small dot of colored pencil to the middle and I feel like they don't have the same impact as the beautiful berries. With these additional steps, they feel like they fit in a little bit more! ha ha! I can't seem to stop with the gingham envelope flaps stamped with a sentiment, so I took a little bit of extra time to do that. You can read how I did that in THIS post if you're interested. I also added some glitter here and there for some sugary sparkle and shine! Thanks for fluttering by!
P.S. I will be gearing up for a busy next few weeks with lots of fun new goodies coming your way, so stay tuned!


Friday, May 13, 2022

The Greetery {Wildflower Birthday}


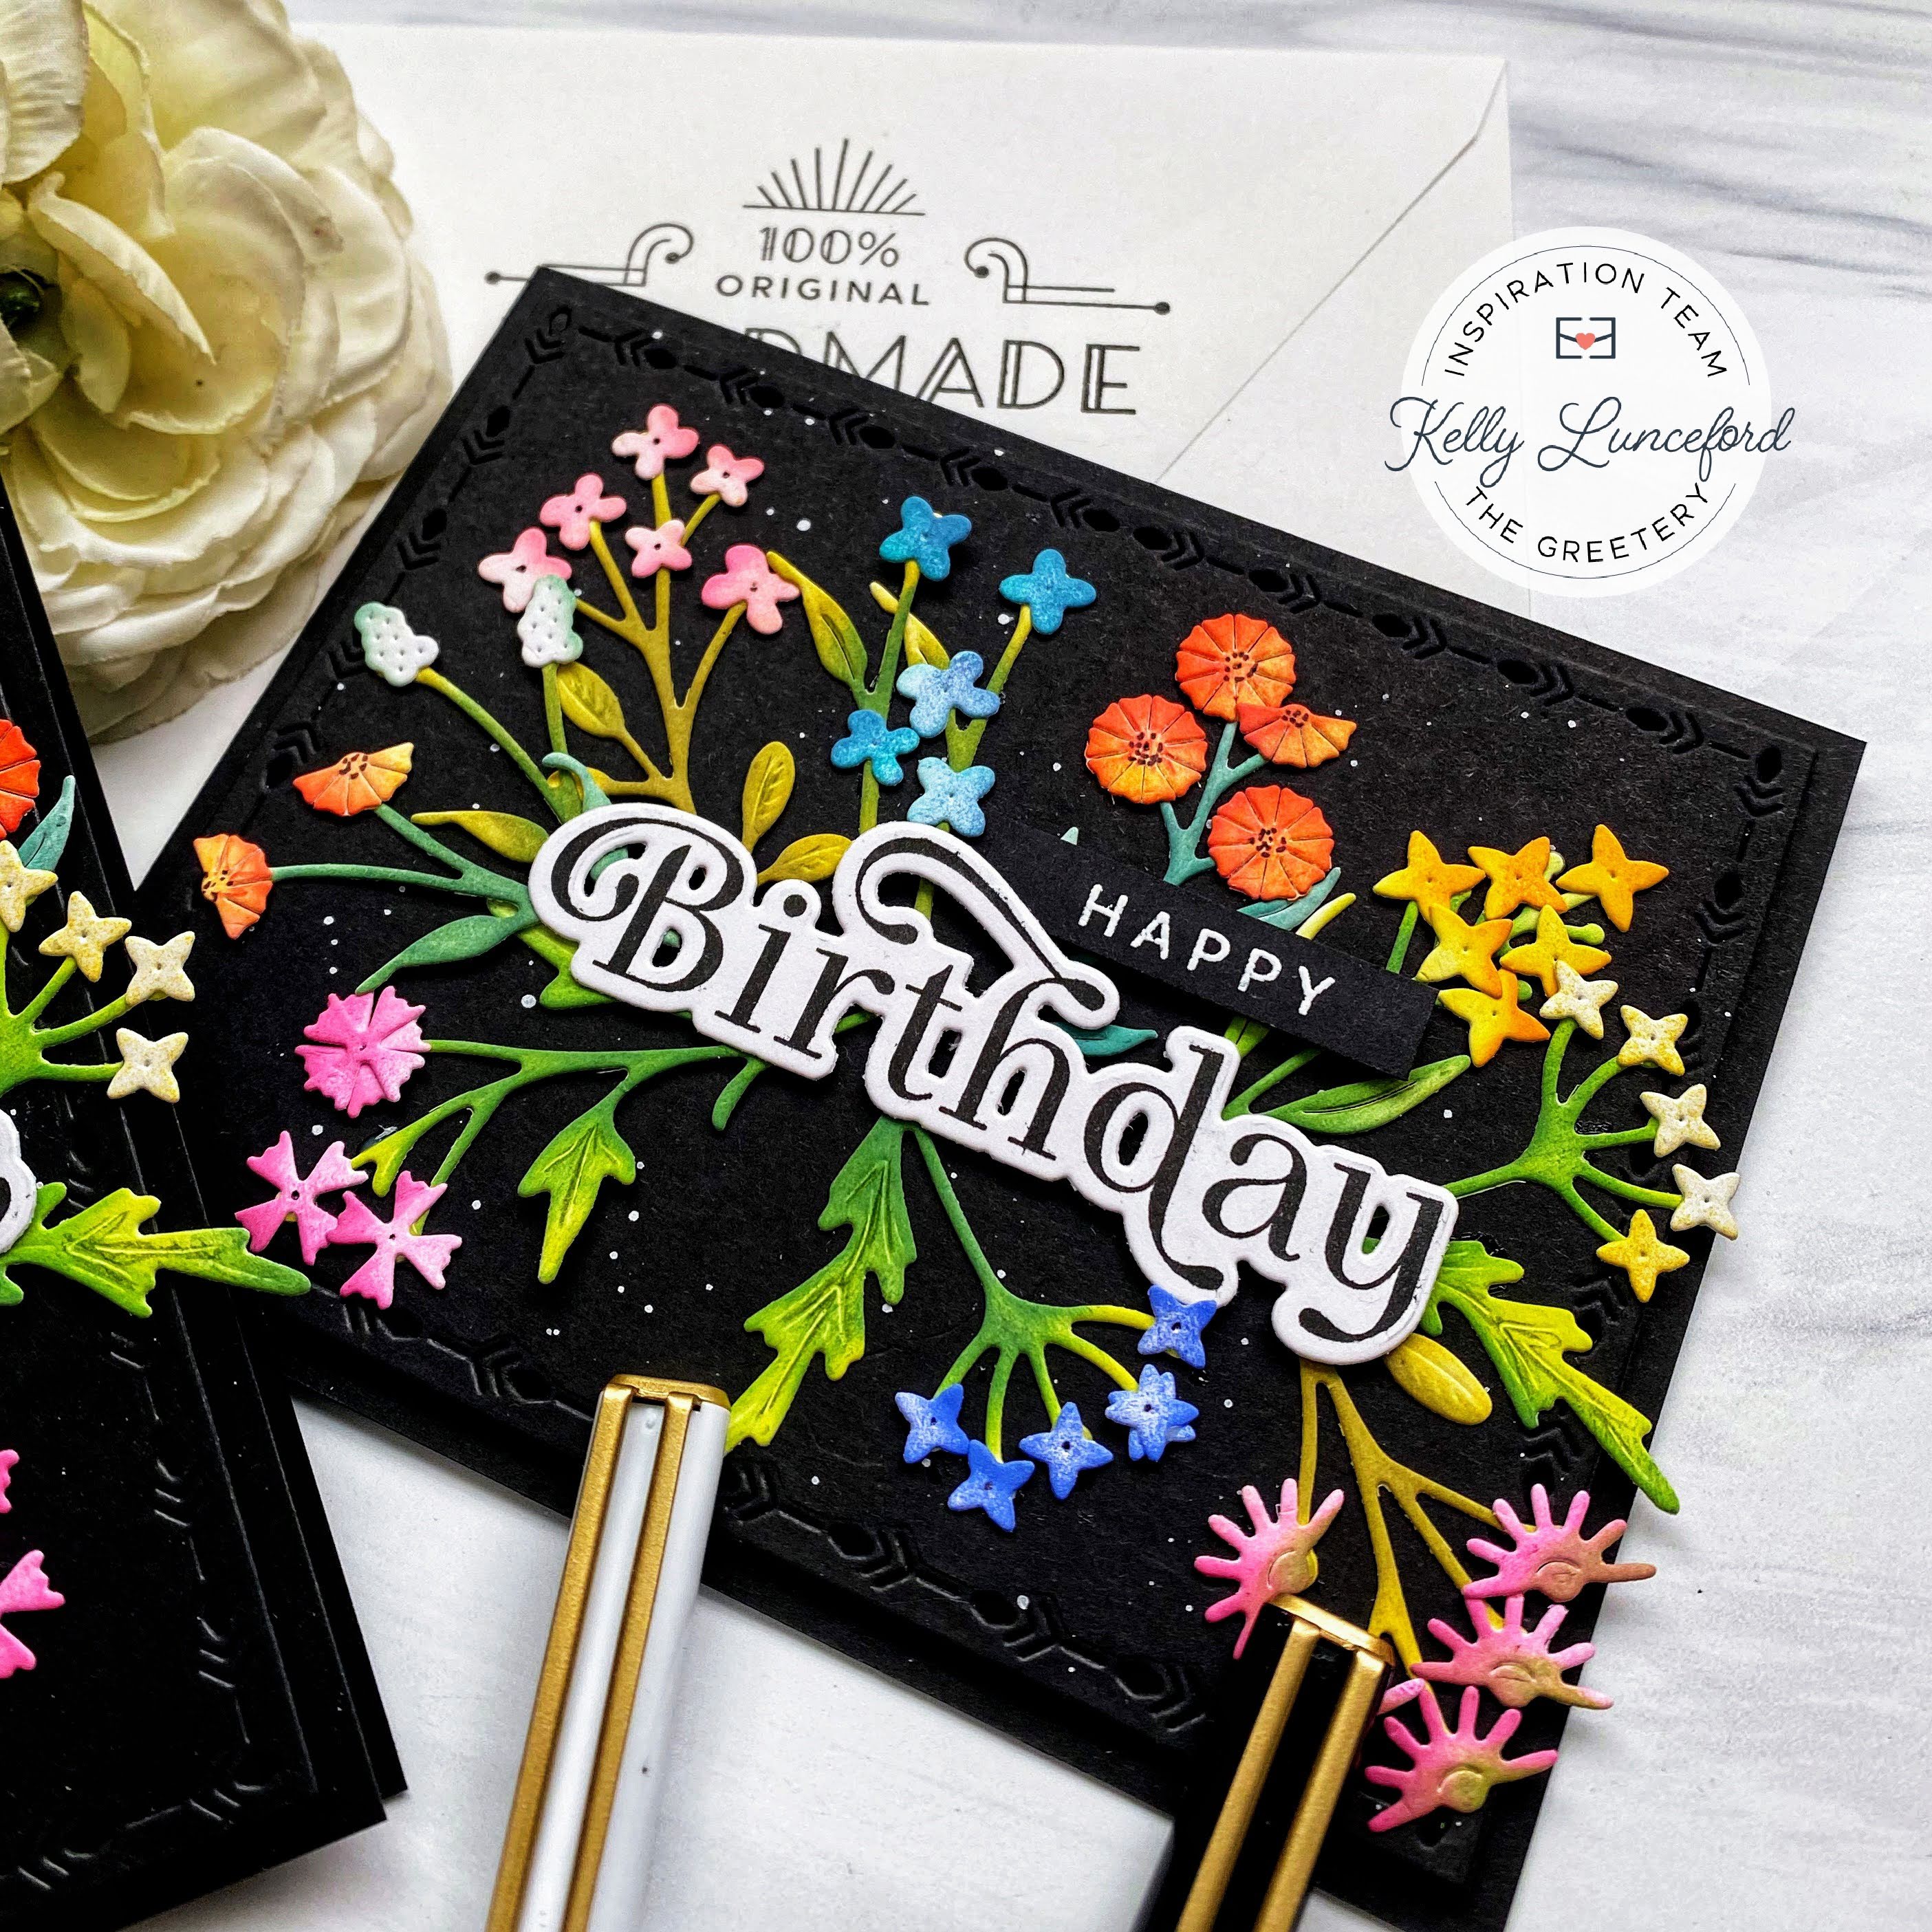
Hello friends! It's my turn for this week's TGIF {The Greetery Inspiration Friday} I’m so thrilled you’ve joined me today as I share a duo of bold wildflower birthday cards! I can’t decide which layout I like better: landscape or vertical, so I made one of each! The flower clusters are so much fun to create, so I just kept going and going, which turned out to be plenty for two cards.

To begin, I die cut all of the flowers and stems twice using the BotaniCuts Wildflower Mix dies. I also had a few stems and flowers left over from a previous project so I added those in as well. I colored all of the stems and flowers using finger daubers and Distress Oxide inks. I chose to give each type of stem a unique combination of inks to really give some variation and depth to the stems and leaves. I chose traditional colors for the flowers and then glued them to the stems using liquid glue. I was having such a fabulous time as each new sprig was added to the pile.

For the background, I simply die cut the largest frame in the Nordic Frames collection using black cardstock. I added some white paint splatter, allowed it to dry, and then added it to the black card base using foam squares for dimension. Once that was done, I got to work on the sentiments.

I die cut the outline for both the “Celebrate” and “Birthday” words and then stamped them using the Birthday Blooms stamp set in black ink. The companion sentiments, which are also from the Birthday Blooms stamp set, are heat embossed in white onto strips of black cardstock. I added the main sentiment piece to the front of each card using foam squares. I glued the different wildflower clusters here and there until I was happy with each arrangement. I added the companion sentiment to the card using additional foam squares.

Once I finished, I realized that I hadn’t added any pen or colored pencil details to the leaves and flowers. I used a black pen to add centers to some of the flowers and then a few colored pencils for the leaves and additional flowers. I opted not to add any glitter or sequins, which is surprising for me! Ha ha! There is a method to my madness, however; I didn’t want any stray glitter specks to fall onto the black cardstock and make the cards look too busy. I felt it would compete with the ink splatter, so I resisted. If you can’t live without a little sparkle, you could always use a Wink of Stella glitter pen or something similar to add glitter where you’d like. Thanks for fluttering by!

P.S. I realized I didn't talk about the envelopes....I decorated the flaps using the Handmade Labels stamp set for an extra bit of detail!

Sunday, May 8, 2022

Reverse Confetti May Release Blog Hop

Hello and welcome, friends! Today is the Reverse Confetti 9th Birthday release blog hop! I'm sharing two projects with you for the hop using some of the cutest new products in honor of the celebration!


My boys' school is celebrating Teacher Appreciation Week later than the nationally scheduled time, but that doesn't mean I haven't already been working hard on getting gifts and things put together for them! I found the cutest bundle of lotions and potions at Bath and Body Works featuring butterflies and purple and blue tones with the sentiment "I appreciate you everyday". I knew it would be the perfect gift to send for the teachers!

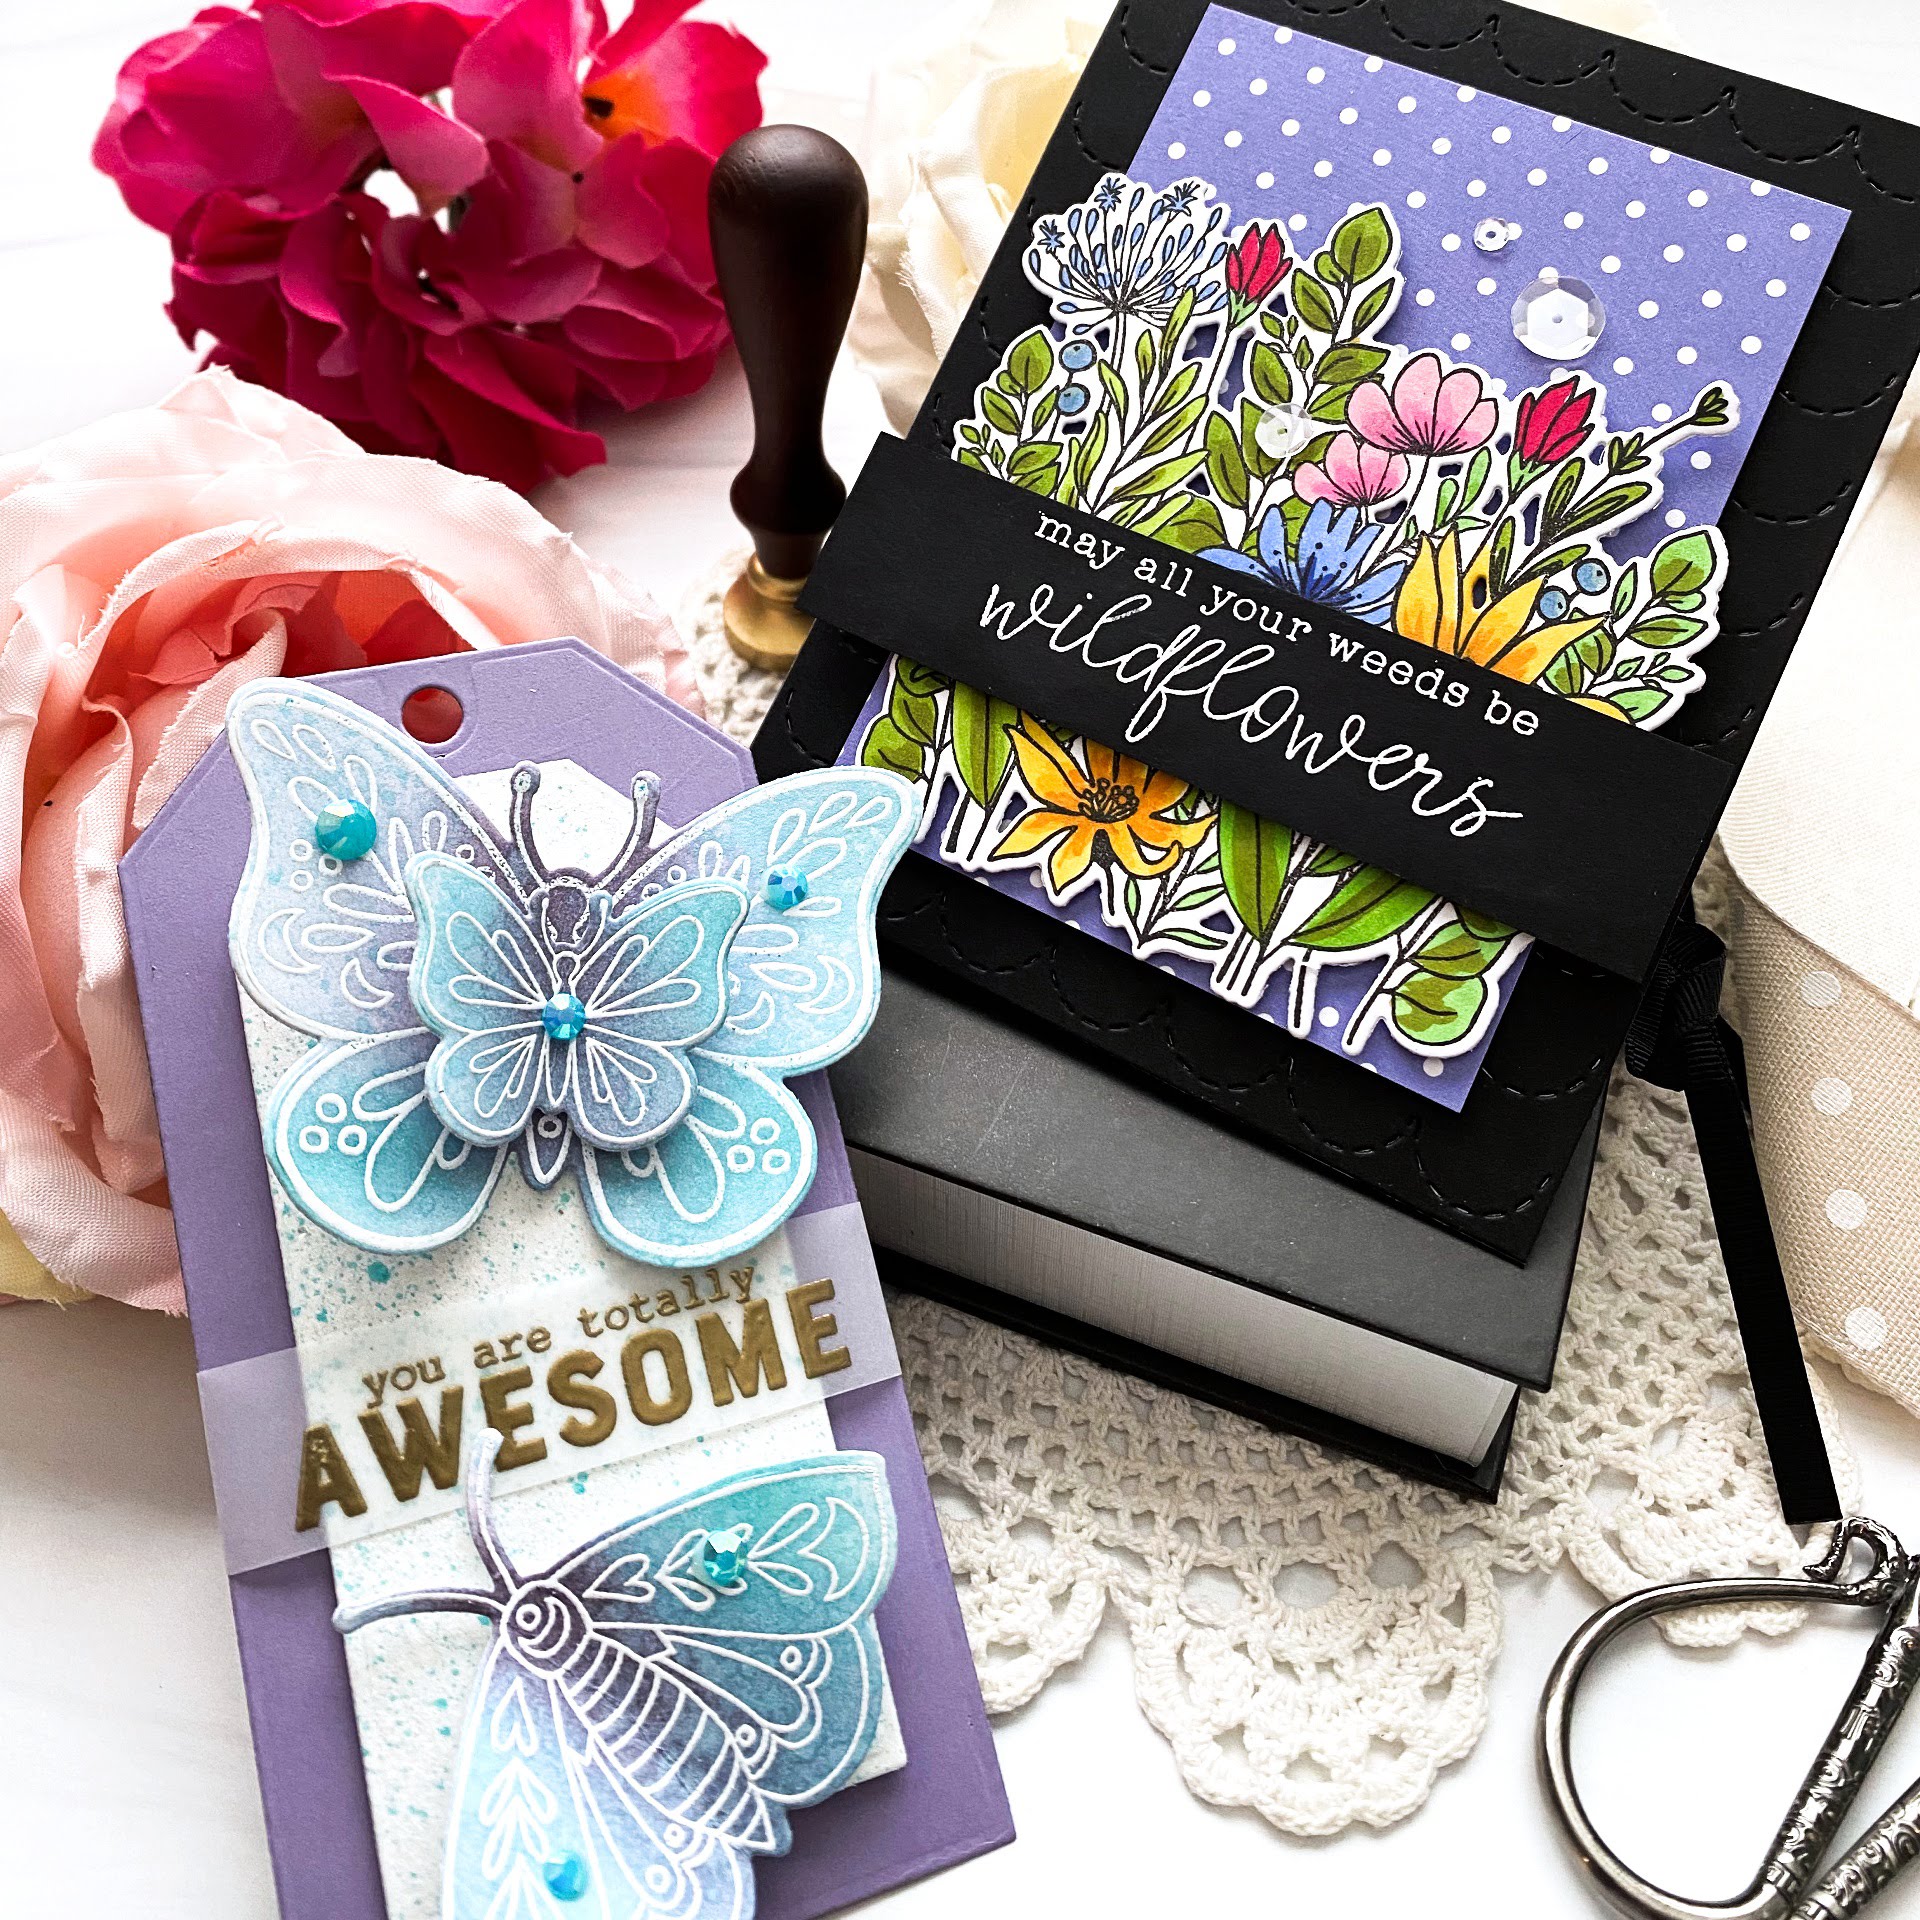
I created a trio of tags using the new A Beautiful Day stamp/die set to coordinate with the gifts! Since I was using 3 each of every butterfly image in the set, I decided to use the emboss/resist technique for a soft look, and to make great use of my time! I chose to use the same colors that the box featured, of course!


I used the new tag die collection to create the layered tag. The base layer is cut using the largest die and then the next layer is die cut using the second tag die included in the set. I die cut this layer from watercolor paper and then spritzed it with Salvaged Patina Distress Spray for some added detail. The sentiment, which is an older set, coordinated so nicely with the bold font on the box. I couldn't resist using it for these tags, but the included sentiments are very lovely, too! My choice was purely based on coordination! ha ha! I heat embossed the "you are totally awesome sentiment, which is from the Best Sentiments stamp set, onto strips of vellum. I secured them to the back in a very tidy manner opting for a thin piece of ScorTape. I also added a few gems here and there for added detail and shine.

My second project for today uses the new Wildflowers stamp/die set! I know I say it every new release blog hop, but I rarely do any coloring these days, so it's always fun to get my markers out to color!

I'm especially loving this cute sentiment, which is one of three included in the Wildflowers set. I heat embossed it in white for a bold contrast! The background was cut using the same cardstock and the Stitched Scallops Cover Panel to give the background some subtle detail.


I die cut the flower panel using the Wildflowers die set and then layered it onto a piece of Darling Dots paper. I added a few sparkling clear sequins for some sparkle and shine! Thanks for fluttering by!
Don't forget to hop along to the other designers' blogs to see what magic they've created!


Reverse Confetti

Michelle Short

Cheryl Espie

Kelly Lunceford

Audrey Tokach

Joy Baldwin

Amy Rohl

Jennifer McGuire

Maria Russell

Becky Roberts

Kavya

Andrea Shell

Lisa Henke

Cheiron Brandon

Anita Madden

Heather Ruwe

Amy Kolling

Jenny Colacicco

Lien Leysen

April Antonio

Dana Kirby

Susan Wymer

Jeanne Jachna

Rachel Alvarado

Tricia Barber

Brandi Mahon

Amy Tsuruta

Richard Breaks

Jeff Lindberg

Colleen Beamish

Ricky Burton - Romero

Joe Sysavath

Monday, April 25, 2022

Papertrey Ink Flash Sale {Happy Mother's Day}

Mother's Day is right around the corner so I chose some beautiful stamps for the Papertrey Ink Flash Sale this week to get you started on your Mother's Day projects! I love the big, bold sentiments included in the Mother & Father Stamp Set so I chose to heat emboss one of my favorites for contrast on this floral design!

The overall look and feel of this card was inspired by a printable I saw on Pinterest featuring a spring design! I love it when I can recreate the look and feel of a printable, but get my fingers inky and use my favorite supplies! I absolutely LOVE the flowers and leaves from the Wreath Box Sentiments Stamp set and knew they would be the perfect choice to accent the sentiment.

I let pattern paper do all of the work for the background; it's a 3 3/4 inch by 5 inch panel of Bitty Big: Harvest Gold pattern paper attached to a top folding A2 card base.

Once I heat embossed the sentiment, I die cut it using the Nesting Basics: Ovals and the Nesting Basics: Pierced Ovals. I added flowers and leaves here and there using foam squares for dimension.
I decided to jazz up the inside by using another one of the included sentiments in the Mother and Father stamp set and die cut it with the same oval dies. I had one lone flower to add to the bottom of the sentiment! Thanks for fluttering by!


Sunday, April 24, 2022

Papertrey Ink April Release Day 1

Hello and welcome to day 1 of the Papertrey Ink April release countdown! FYI: This is a quick post as I am sitting April out, but I am sharing a trio of bookmarks that I made using a few of the new products! I was always a bookmark fanatic as a child and loved getting new ones any chance I got; now I simply grab an old receipt or piece of junk mail! ha ha! The new Bookmark dies will allow me to create any type of bookmark I can imagine!

For the three bookmarks, I die cut a sturdy base using white cardstock and then die cut another bookmark using the Bitty Big: Blueberry Sky, Spring Moss, and Pale Peony pattern papers. I used ScorTape and a bit of liquid glue at the top to secure the two layers together.

I used the new Go-To Gift Card Holder: Book and Book Scrolls to decorate each of the three bookmarks. The book mark die set comes with an apple, star, and heart shape with a hole at the top so you can add them to the top of the bookmark, or use them at the end of the string like I have here.

Teacher Appreciation week is coming up quickly, so I thought it would be fun to make a bookmark for each of my little boys' teachers.


I barely scratched the surface of the beautiful possibilities of the new Book Scrolls stamp set. These are so pretty and will be perfect to accent all sorts of cards and projects!


I used DMC floss to loop around the top of the bookmark and then tied the apple piece with a knot. The apple stamp is from the new Go-To Gift Card Holder: Book stamp set. There are so many fun options with this new suite of products! I can't wait until I have some time to put them to good use! Thanks for fluttering by!
P.S. Bonus points for guessing which book this is! ha ha! If you know it, you know it! :)