I hope you all didn't think that I dropped off the face of the earth! I took some time to celebrate a few birthdays, special family occasions, and just some down time. I'm back today with this month's SugarPea Designs Mix it Up Challenge! You can check out the details of the challenge on the SugarPea Designs Blog!


I wasn't quite ready to embrace the fall theme of this month's challenge, soI decided to create a card using the colors, but in a more summery way. I really like the black background in the inspiration photo, so I decided to get a little creative with the background on my card.
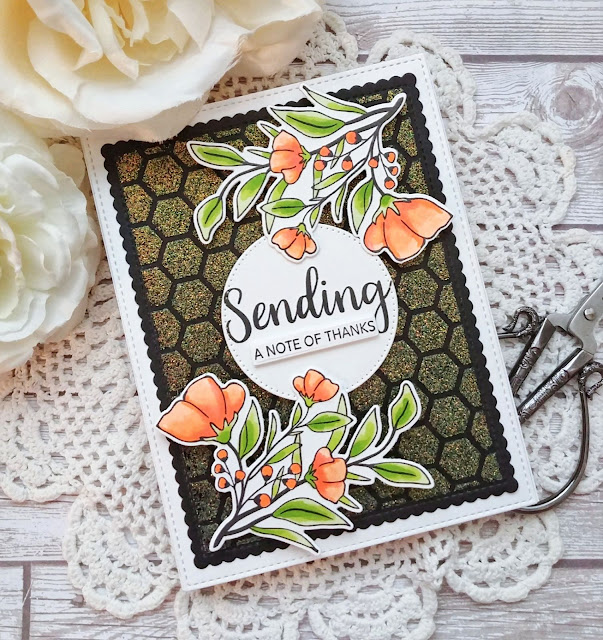
This card really looks different with the light hitting it and without the light. I will share a photo at the bottom of this post where it doesn't have any light picking up the colors from the glimmer paste. To begin, I die cut the black scallop piece using the Card Front Element Builder SugarCuts and then cut a second piece out of blackcardstock that fit just inside the stitched lines of the scallop piece. This is the panel that I added the glimmer paste onto. I used some Pixie Spray and adhered the Honeycomb Stencil and then added a nice even coat of Moonstone Glimmer Paste. I set it aside to dry and washed my stencil and knife.
While that was drying, I stamped the floral clusters that are from the new Meadow Motifs stamp set in black and then colored them using copic markers. I used the colors from the inspiration photo to create some warm, sunny flowers. I used the coordinating Meadow Motifs SugarCuts to die cut the flowers.I also die cut the circle from the Card Front Element Builder II and stamped the sentiment which is from the Sending Sentiments stamp set onto the circle. I also stamped the "a note of thanks" sentiment and then die cut it using the new Sentiment Strips SugarCuts. I popped it up using foam squares underneath the "sending" portion.
Once the stenciled panel was dry, I adhered it to the black scallop piece. It is adhered to a white panel that was die cut using the Card Front Element Builder as well. I used foam squares to adhere the sentiment circle in the middle of the card. The flowers are added using foam squares as well for dimension.
You can see how different the card looks without the sun catching the sparkles in the glimmer paste. I had a lot of fun working on today's card! I hope you get a chance to join us this month! I hope to see your card in the gallery! Thanks for fluttering by!


4 comments:
Welcome back Kelly...you've been missed! Your card today is just BEAUTIFUL!! Loving your background and how sparkly it is...it's a perfect backdrop for those gorgeous blooms! Lovely, lovely card!! :0)
Yes, I was concerned about you. I must admit to being a worrier! Oh, my your backgrounds are stunning... love all that sparkle. I'm so happy to see that all is well with you and look forward to your continued beautiful creations.
Thank you so much! You're always so sweet! Thanks for stopping by!
Oh, you're so sweet! I'm sorry to have worried you! Thank you for your sweet comment and for stopping by!
Post a Comment